When and how to harvest vines for weaving. Basket weaving is a pleasant leisure and an exciting hobby
Vine is the oldest material for weaving various devices: dishes, furniture and decorations. Recently, weaving from a vine as a form of creativity is returning its popularity - environmentally friendly materials and natural motives in decorating home interiors are again becoming fashionable.
Types of products
Vine is a flexible pliable material from which it is convenient to weave a variety of household items. Most often, craftsmen use willow rods and vines - they are the most flexible and strong enough not to break in the working process.
Among the wicker wickerwork you can find the following:
- furniture - armchairs, tables, shelves, large baskets for things;
- dishes - baskets, trays, breadbaskets, vases;

- decorative elements - floor vases, figurines, boxes, Christmas tree decorations.

Baskets, tables and chairs from the vine are made more often than other objects due to the simplicity of their design. In some cases, their creation is similar to weaving using the macrame technique: the same technique of alternating knots and free parts of threads.

Toys from the vine began to be created in antiquity. But now this creativity has revived thanks to the growing love for ecological materials.
Types of creativity
Many novice craftsmen may confuse this concept with the techniques of weaving products from a vine. Weaving differs not only in the way it is created, but also in the appearance and tightness of the rods. In addition, weaving from a vine of the same type can combine different techniques.
Solid weave
The classic type of creating products from a vine. With continuous weaving, there are no decorations on the objects in the form of openwork holes and patterns.

This type is used to create baskets, armchairs and tables - due to the tight fit of the rod, the product can withstand a lot of weight.
Openwork weaving
This type is characterized by many openwork and twisted elements in the product. These can be slits, waves, and loops.

Most often, souvenir baskets, crackers and vases of this type are weaved.
Twisted weaving
This kind of weaving has been forgotten for a while. And only in recent years it has received a second wind. With its help, they create miniature products like Christmas tree decorations and figurines, armrests for furniture.

The peculiarity of this type of weaving from a vine is that the rods are not intertwined, but twisted together. In this case, the product is given a certain shape.
Spiral weaving
High requirements are imposed on products from this type of weaving, therefore, mainly professionals are accepted for its implementation. Rings of rods are taken as a basis, which are braided through one with a special tape.
In this case, the vine should be especially flexible and not leave creases. Therefore, instead of willow vines, spruce or pine roots are often used to start spiral weaving. In addition, the diameter of the beginning and end of the rod should be almost the same in order for the ring to be uniform.
The braiding tape is cut from the upper glossy layer of the willow vine. It should be thin and elastic, but very strong.
There is also a figured type of weaving from a vine, which is based on the combination in one work of several types of this creativity at once. As a result, the work of the master is not geometrically correct, but with corrugated edges in the form of waves.
Weaving techniques
Weaving from a vine is carried out according to 1 simple principle - initially the master builds the frame of the product with long strong rods in the form of a fence. After that, thinner flexible twigs are taken, which braid the base in a certain order, forming a pattern.
Currently, there are many different techniques for weaving wicker products. In addition, a different method is applied to each part of the product - be it the bottom, sides or the edge.
But the techniques presented below are considered basic and the easiest to perform. Therefore, beginners are advised to initially start mastering them, and then move on to more complex ones.
Simple weaving
The easiest weaving technique. In addition, it is versatile - it can be used to weave any kind of product.

For a simple method, start braiding the frame rods with one vine through one: 1 rod in the front, 1 in the back. At the next row, change the braiding order - now the first rogue is braided at the back, and the second at the front, so that the rows form an interesting diagonal sequence.

To speed up the process and diversify the pattern, you can weave 2, 3 or more rows in the first order, and also 2 or 3 rows in the second to increase the width of the resulting pattern.
Weaving in inclined rows
This technique is also called the layer-by-layer method of creating vines. In this case, the same number of intertwining vines is taken as there are twigs in the frame.
The first twig bends around the first vine in the frame from the front, the second - from the back, and is brought out to the outside of the product. Repeat this with each vine, gradually weaving the layers of your work.

This method is better for circular weaving - making baskets, baskets, large round shopping baskets.
For a variety of patterns on the product, you can also take 2 and 3 rods for one action.
Rope weaving
An interesting method of weaving from a vine, which is often used to separate 1 layer of patterns from another. It is possible to weave a rope from 2 or 3 rods. The pattern looks like a small twisted rope.

For weaving from a vine in two rods, go around 1 vine of the frame with 1 working rod from the back and bring it out. Repeat the action each time with the upper rod that was just used, pressing the lower one.

Weaving in 3 vines is based on a slightly different method - you need to bend around not one, but two pegs of the frame, and not from the back, but from the outside. After that, the vine bends around the third riser from the inside and is brought out. The 3-rod weave can also be used for circular braiding.
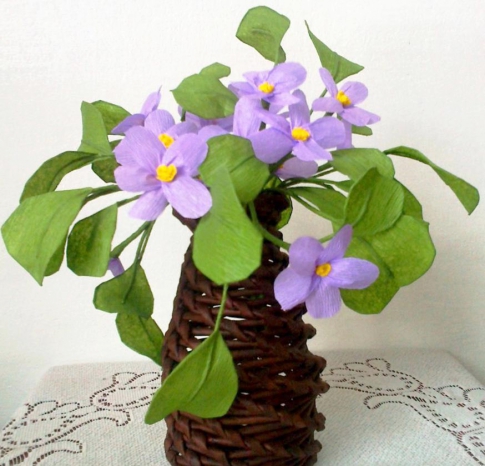
Willow vine wreath: master class
If you have never tried your hand at creating complex twisted products from a vine, but really want to learn this type of needlework, start with the simplest thing - weaving willow wreaths for interior decoration.
This master class does not require special knowledge in the field of weaving. At the same time, it will help you learn how to properly handle willow twigs in your work.
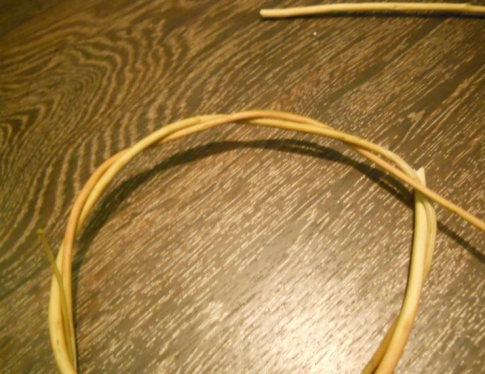
Collect willow twigs 30-60 centimeters long and peel them off the top glossy layer. Forty elements are enough for you to create 2-3 wreaths. After that, soak the vine in water for about 4 hours to make it more flexible. At this stage, the preparatory stage is over - you can start working.
- Weave a ring from the first twig. To do this, start wrapping the thin end of the rod around the thick part of it.

- Take the second piece and braid it around the first.
- Hide and secure the thin tip between the crevices of the wreath.
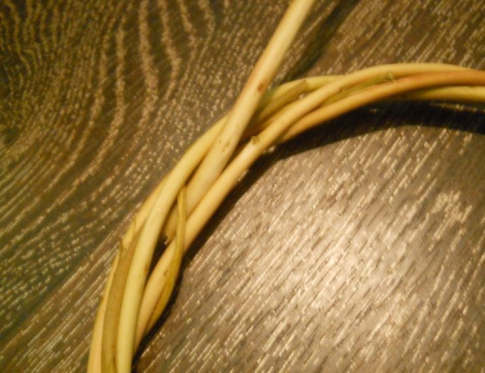
- Using the same technology, start wrapping the rods around the already formed base.

Leave the finished wreaths to dry in a warm, dry place for about 3-5 days. After that, they can be used as a ready-made decorative element or as a base in a more complex master class. Such blanks are often used to create wreaths for Halloween or New Years.
This rather ancient type of creativity does not lose its attractiveness today. You can weave not only baskets from the vine, but also various trays, boxes, decorative items for interior decoration and even. One has only to get carried away with this process, and you will not be able to stop. And your reward will be beautiful handmade products.
Harvesting vines for weaving baskets
Naturally, it all starts with. The vine is usually cut during the period of sap movement (early spring or autumn) and in winter. Vines cut during this period are of good quality. In addition, you need to ensure that it is from fully matured wood.
Processing the vine involves boiling it in boiling water for 20 minutes. Moreover, you need to fill it not with cold, but with boiling water.
To make sure of the good quality of the vine, you can conduct a simple experiment: bend the cut branch in the thickest place by 180 degrees - if at the same time it does not burst, you can safely use it in weaving. Otherwise, discard this rod - it will constantly break.
Weaving an oval basket from a vine
Weaving baskets from a vine always begins with weaving its bottom. The oval basket is no exception. Therefore, we prepare for it 3 rods of 25 cm, 5 rods of 13 cm and 1 short rod 6 cm long.

In principle, other lengths of twigs can be used to create a larger or smaller basket. You just need to adhere to this size ratio. The number of rods should always be odd, and in our case their number is 9. Split 3 long rods in the middle, push the middle rod through the splits and braid them with a thin twig crosswise.

After that, at a distance of 3-4 cm from each other, we stretch and braid all the other rods, and attach the short rod to one of the sides of the cross. As a result, we have a crosspiece with 17 ends.

Now we need to braid this crosspiece. As a result, we will get an oval bottom, the size of which is still 25x15 cm. It needs to be leveled by cutting off the protruding ribs. And to complete the bottom, we add additional ribs.
We use thick rods with a diameter of about 5 mm as lateral ribs - they serve as a frame for the future basket. There must be an odd number of these ribs. For example, as in our case, there may be 33 of them. Make sure that the distance between the edges is exactly the same. The finished bottom is 40 cm long and 30 cm wide.

We braid the edge of the bottom with a pigtail, bend the ribs. We collect the tips of the side ribs into a bundle over the center of the bottom. Inside them, at a height of 15 cm, insert a spacer ring, which should be slightly larger than the bottom. In our case, a ring is used 50 cm in length and 32 in width. We fix the ring with wire from two opposite sides.
We continue weaving, which now goes up the side ribs. We bring the ends of the rods to the outside of the basket - later we will carefully cut them off.

As soon as we reach the spacer ring, remove it and continue weaving to the desired height. After that, we make the braiding of the upper edge, starting from any edge.

Weaving handles for a basket from a vine
When braiding the top edge, leave two long rods parallel to each other. They will serve us as additional strengthening of the handles.

We make a handle, insert it into the side holes where our left ribs come out. We braid the handle with thin long rods, inserting 5-6 rods from one edge. We wrap them along the entire length of the handle a couple of times. We do everything in the same way on the other side.
 |
 |
 |
 |
 |
 |
To make the handle tight, we drag it along the entire length with twine. It can be removed when the basket is dry and well formed. We braid the protruding ends of the rods on both sides.
In Russia, basket weaving was quite common. Almost every peasant could weave a good basket if necessary. Well, the basket makers were woven for every taste: small and large, round and rectangular, oval and conical, with simple and complex weaving, with and without lids. It was difficult to manage without baskets on the farm. They carried linen to the river; took on the road, going on a long journey; they were used for harvesting; they went mushrooming with them.
In modern everyday life, baskets also find various uses, and it's hard to imagine a real mushroom picker without it. And willow is best suited for mushrooms. The willow branches from which the basket is woven contain a large amount of tannins. Thanks to them, the mushrooms do not deteriorate for a long time, and the air passing through the rods as through a filter is cleared of harmful microorganisms. In addition, willow twigs absorb excess moisture and, thanks to their thermal insulation properties, protect the mushrooms from overheating.
First of all, you need to prepare good quality raw materials. More than 170 species of willows grow in the wild in our country. The rods of many of them, after appropriate processing, are quite suitable for weaving. Willow wood is renowned for its flexibility and high ductility. Only some types of willows, such as brittle willow, are not suitable for weaving due to their fragility. Of the wild willows, young shoots of three-stalked willow, basket willow and willow are most often harvested for weaving.
The three-stalked willow, popularly called white-thawed, white-tailed, or simply a vine, is a small shrub that grows along the banks of rivers, lakes and other bodies of water in almost all regions of our country. Leaves are oblong, long and shiny. The bark is greenish yellow on the outside and lemon yellow on the inside.
Basket willow, also called broom and white willow, is a shrub or small tree. Annual young branches are yellow or olive brown. The leaves are long, lanceolate-linear, smooth above, and silky-tomentose below, whitish. The eye vein running along the linden tree is yellow and sometimes slightly brownish.
On roads, on the banks of rivers and ponds, or not far from dwellings, you can often find a large spreading tree, sometimes reaching thirty meters in height. This is a white willow, or willow. The branches of the willow are green-yellow, the bark is covered with silky hairs that resemble a whitish bloom. You, probably, more than once had to observe how in a matter of seconds, as soon as a gusty wind blows, the crown of a willow turns from green to silver-white.

In the old days, peasants harvested willow in the so-called vertexless method. At a willow tree growing near the house, they cut down the top, which was used for firewood and various handicrafts. By autumn, the part of the trunk remaining on the root was densely overgrown with young shoots suitable for weaving. Most of the twigs were cut, and by the next fall new ones grew in their place. Approximately the same is done in modern basket production, planting willows of cultivated species in special areas - rod-shaped, purple and others.
For weaving, rods are usually used at the age of one to two years. For small graceful weaving, annual shoots are taken, which in some species of willows are thin and long like a cord; for weaving large things, as well as for making the frame of baskets - two years. Willow rods, intended for weaving, should be long, thin, flexible, viscous, straight-grained and split well along the fibers. It is necessary to harvest only those rods, the surface of which, after removing the bark from them, looks clean and glossy.
For baskets, try to harvest rods with a length of at least 60-70 cm with a diameter at the butt (at the cut point) of 5-10 mm. Typically, willow shoots on the same bush have approximately the same physical and mechanical properties. Therefore, before you cut twigs from a bush, first check the quality of one of them. If a willow branch has a too large core on the cut, and even with a brownish-reddish tint, do not take the twigs from such a bush - they are usually brittle. For our purposes, we need branches that have a small, barely discernible core in the cut. And, of course, you need to choose fairly straight shoots, without growths and knots.
You can harvest vines for weaving baskets almost all year round.
But most often basket-makers harvest it in spring or autumn. In spring twigs, the bark is removed easily, without pretreatment. But if the rods are cut at other times of the year, then in order to remove the bark, they need to be soaked or evaporated. In summer and autumn, the rods are soaked in the running water of a river or stream; it is possible in a barrel or a trough, but in this case it is necessary to change the water every day. The harvested vine is tied into a bundle, a load is placed inside - stones and immersed in water. To prevent the rods from being carried away by the current, they are tied with a rope to a peg driven into the bank. The rods are soaked for one to two weeks.
They can be steamed instead of soaking. Then the processing time will be reduced from one to two weeks to one or two hours. Put the rods in a tank or trough, fill with water and put on fire. Bring water to a boil and boil for one to two hours. Then take out the rods, wait until they cool down, and remove the bark with a pinch punch (fig. 5).

There are many designs of jaws, but the simplest of them is a metal slingshot driven into a massive bench, table or log. The jaw can be made from two metal rods. Drive sharpened rods of the same length into the wooden base at the same time. Wrap them with thick wire from the bottom, laying the turn to the turn, to a height of 5-7 cm. Dissolve the free upper ends - you get a slingshot.
To remove the bark from the rod, insert it with the thickened butt part into the pinch and, pressing the rod against the pinch with your left hand, pull it towards you with your right hand. If only one side of the bark has been removed, pass the cane through the pinch again. Sort the peeled rods by thickness. If you did not manage to prepare thin rods, then split the thicker ones into strips - halves and quarters. Remember that wood that is too damp does not split well, so dry it at room temperature.
Etch or paint some of the rods intended for artistic weaving. A grayish-brown color is obtained if the rods are dipped in a solution of ferrous sulfate for a while; brown color - in a solution of potassium permanganate or in a decoction of alder bark.
If you want vibrant colors, use regular aniline fabric dyes or colored inks. A bucket of hot water requires about four bags of aniline dyes. Add a few tablespoons of acetic acid to the colorful solution. So that the rods are well painted over, soak them in the dye for three hours. Then rinse with clean water and dry at room temperature. Soak the twigs in cold water just before braiding.
In order to weave the basket itself, you must first of all master the various types of weaving and ways of closing the bead.
The most common is simple weaving. In some cases, to speed up the process, it is performed in two or three rows at once (Fig. 1). Although simple weaving is quite quick and easy, its strength is not high.

A kind of simple weaving is weaving in inclined rows (Fig. 2). By alternating rows of colored twigs, you can achieve great decorative expressiveness.

Weaving with "string" (Fig. 3) is used in cases when in some areas of the basket they want to get special strength. For example, in flower girls, intersecting or parallel rods are intertwined with a "string".

Weaving "in a checkerboard" (Fig. 4) is used mainly for decorative purposes. The rods of two contrasting colors are alternately laid as in the usual simple weaving, only not through one rod-riser, but through two.

The beauty and strength of the basket largely depends on the correct termination of the side.
The simplest and fastest way is through one riser rod. The first rod is wound up behind the second, the second after the third and so on until the last one (Fig. 6).

The board is also closed with two rods, only through two riser rods (Fig. 7)

or with one rod - through two riser rods (Fig. 8). Using these methods, the ends of the rods must be taken out into the basket, and the remaining ones must be carefully trimmed with a knife.

Sealing the side with a "pigtail" takes more time, but gives the basket a special beauty and expressiveness. To weave the pigtail, the board is first sealed in a simple way through one rod. In this case, all the rods are tied with threads of three together and intertwined as it is done when weaving a regular braid. When braiding a pigtail around the bead, the used rods are trimmed, closing their ends under the pigtail, sequentially including more and more groups of rods in the weaving (Fig. 9).

Do-it-yourself baskets from the vine began to weave a long time ago. This material was used in the manufacture of fences and cradles for babies. They even made dishes from the vine. Nowadays vine baskets owe their popularity to mushroom pickers. They are the ones who use such products more than other people. A good solution is to weave a separate option for picnics or household items. There are many design ideas - from the simplest to the most stylish and fashionable. At the same time, it is easy to make this item yourself.
Choosing the right material
The first thing to do is to pick up the material. It must be of high quality. The service life of the product depends on this indicator. Usually the vine is cut at the very beginning of spring or autumn. It is believed that at this time it has great strength.
A quality vine branch is defined as follows: in the thickest place, it is bent all the way. It should not burst or crack. Material that meets these parameters is suitable for weaving. An important nuance is that each branch must mature.

The vine needs to be processed, because recently cut wood will not be able to keep the shape of the basket. There are two schemes for preparing branches: soaking and leveling. In the first case, the rods are treated under running water or placed in a container and the liquid is changed every day. The water must completely cover the wood. So that it does not float up, it should be pressed down with a load. You need to carry out a similar procedure within two weeks.

The second method is faster and will take three hours. The rods must be folded into a large container and filled with boiling water. The mixture is boiled for about two hours. Cool the vine and start separating the bark from the twigs. The peculiarity of the second method is that the branches of the vine will acquire brightness and shine. They are also easy to clean and wash.
Making a list of tools
Before weaving a basket from a vine with your own hands, you need to prepare the following tools:
- awl;
- side cutters;
- weight - it will hold the vine in a certain position;
- pliers - they are used to bend the rods.
The fixtures should be prepared in advance. This approach will speed up the creation of the cart.
Work algorithm
How to weave vine baskets? First, you need to divide the work into several stages, they will help you quickly understand the algorithm of actions and master the technique:
1. Weaving the bottom begins with the need to take 8 twigs. In half of them, a hole is made. Each of them is 3 centimeters. The second half of the branches is threaded into these cuts. As a result, a cross is formed.
 Making a cross for the bottom
2. The next step is to wrap around the base. You need to take two branches and circle them around the four branches. This is how two circles should be woven. Upon completion of this action, they begin to wrap around each of the rods. Two more rows are created. Elements must be evenly spaced. As a result of weaving, a circle is obtained.
3. Another rod is added. It is placed in the extreme row, bent. It is worth noting that the previous warp is cut off (due to lack of length). In the same way, all the rods are replaced and two rows are woven. The vine should bend around the cane from the inside and outside. This principle is maintained until the bottom is completed. There are 16 main rods. At the end of weaving, you need to add another one. It is placed between the rest of the branches in the last circle.
 Making the foundation
4. Having weaved the base of the intended size, you need to start creating the walls. Choose medium-sized rods. They are attached to the bottom of the basket - into the weaving itself. The bases of the walls are bent to a right angle, and the tops are tied. The folded ends are inserted into the bottom of the basket and wrapped around them. You should take three twigs. With their thin side, they are inserted into the holes next to the main rods - one per rack.
5. It is necessary to weave a "braid" and repeat the pattern of the base. It should resemble a diamond in shape, and it goes around each vertical rod. In this technique, 2-3 rows are performed. Doing so will create the base of the form.
 We make a frame for the walls
6. It's time to start weaving a common "canvas". In this case, the method of setting the vine in one rack and removing it in front of another is used. When the desired height of the basket has been reached, the vertical branches are cut and their ends are hidden in weaving.
 Weave the walls
The vine basket is ready. It remains only to make a pen. First, you should measure the length for the handle and choose a thick branch. It is bent and shaped to fit the basket. The ends of the rod are sharpened and inserted into the walls of the product. 6 thinner rods should be placed next to the handle. They go around the main branch, which allows you to firmly fix it in the weave. To prevent small branches from moving, they are fixed with adhesive tape. The "tails" of the twigs should be hidden in the walls of the basket.
 Making a pen
 To start using the basket to its fullest, you need to let it dry. It will take several days. This simple method is used by most novice masters. In the future, it is recommended to develop your weaving skill and create more complex designs. Not only baskets are in demand, but also furniture, decorative elements from a vine.
Weaving instructions (2 videos)
Options for ready-made baskets (38 photos)


This article is published to replace my old guide; to see the old version see here www.bushcraft.ridgeonnet.com/basic_basket_old_version.htm
I'll start with an introduction to simple terminology ...
When you look at the bottom of the basket, the sturdy, straight rods radiating out from the center are called "Spokes". After they are folded up to form the walls, I call them "Racks." (These straight lines that create the profile of the bar are usually called the "Box")
All sections of willow vines that bend between the needles / stanchions are called "Weavers" (traditionally called "Weft").
My knowledge and experience of basket weaving is based on self-study. I have not taken any specialized courses, so the instructions below describe my own methods. The technician may use a technique that is slightly different from my method of making this type of product. Not being an expert, I still want to present my knowledge of basket weaving in this article.

I collect willow rods for baskets in the countryside. Not all types of willow are suitable for making baskets; some of them produce material that is too brittle, which cracks when bent strongly during the fabrication of the edges of the basket. When I look for a suitable willow tree, I just bend the branch 90 degrees or more, and if it cracks, then it means that it does not fit into the basket ... and I have to look for other options. Often the best option is willow with red, purple and orange bark. I do not know any names of willow species, I just know which is better and which is worse from what I see.
If you do not have the opportunity to collect willow yourself, you can buy ready-made twigs. Musgrove 's Willow (http://www.musgrovewillows.co.uk/) is an excellent firm with around 700 rods available for around £ 20 including postage.
If the collected rods are damp, they must be dried. Baskets made from freshly cut, juice-filled twigs lose their shape after a while and become loose. When the willow is dried, its bark shrinks slightly.
Before you start weaving, the rods must be soaked in order to make them more flexible. If the willow branches have retained the bark, then soaking can take about 1 week. Many recommend wrapping the sticks in a damp cloth and leaving them to “ripen” overnight.
You don't need a lot of tools to make a simple basket like the one in the photo. It is enough to have a pocket knife, secateurs and possibly an awl. I used to make baskets using only a knife, but pruners are easier to work with! 
Cut 8 twigs from the thick shoot. Cut them approximately the length from your elbow to your fingertips. 
In the center of four of these branches, split a few centimeters in length. 
Insert whole rods into the cleft to form a cross. This is called "Slath".
(alternate between thick and thin ends to line them up) 


Carefully select the thinnest and longest shoots from the collected branches, this will allow you to make a good weaving from the very beginning. Take two rods and insert their thin ends into the slot of the slot as shown here ... 


First, we will use a weaving technique called "Twining". This is a very easy weaving method and is good for stitching knitting needles and stakes firmly. The technique consists in holding two knitting rods and twisting them alternately one after the other so that they change places. Each bend always goes in the same direction. After each bend, the next knitting needle (or knitting needles as in this case) is placed between the two knitting rods and then the next bend begins ... so they are held in place. Look at the photo ... it really is that simple!
Braid four knitting needles around. Make two rows. 


When you've finished braiding two rows around each row of four knitting needles, start braiding each knitting needle separately. Bend each knitting needle outward to braid them alternately. Arrange the spokes evenly so that after finishing one row of weave, we get evenly spaced spokes, like the spokes of a bicycle wheel. Make a couple more rows of weaving using this method. 


At some point, you will approach the end of the rods used for knitting, and you need to build them up. It is better not to add two new rods at the same time. Look at the photo, in this example I am replacing the "B" rod with a new rod marked "A". I took rod A, sharpened its end, then slipped it between the rods of the last two rows, then bent it following the weaving order of the old knit. Now I can cut the old rod B and continue weaving the basket.
When replacing one rod with another, keep the thick end thick and the thin end thin. 
The replacement of the second old rod must be carried out a little further in a circle from the replacement of the first one. 
After you have weaved a couple of rows around the knitting needles, we stop using the twisted weaving method and continue to weave in a simple way, which is a simple twist around the inside and outside of the knitting needle. You continue to weave this way until the base expands to the desired diameter. However, in order to correctly perform such a simple type of weaving, we need an odd number of knitting needles. We have 16 knitting needles, so one more should be added. Just place it between the bars of the last pair of rows. It can sometimes be difficult to push in a new knitting needle, so use an awl to widen the hole (if you don't have an awl, you can use a thick metal nail). 

Cut off one of the stitches and continue to weave in the usual way from the inside and outside around the knitting needles. 
To add a new knitting rod, place a new one next to the old knitting rod and continue weaving. 
Continue braiding until you have braided the bottom of the desired diameter. In my case, the bottom was made with a diameter of 8 inches. 

The bottom can take a concave shape ... this is good, because this will stabilize the basket. You can tighten the bend by constantly pushing down on the knitting needles while weaving. 
It's time to form the walls of the basket. For this step, use medium thick willow shoots, one for each needle. Sharpen the thick end at each of them. 

Now you need to place a new willow shoot in the weave along each knitting needle. If you look closely at the willow shoot, you will notice that the thick end is slightly curved; position each shoot with the concave side facing down. 

Cut off the ends of the old twigs at the level of the knitting edge. 

Now take one of your new uprights and fold it down to the left under the two adjacent rods, then rotate it up as shown in the first two photos below. Now take the next twig from the left and bend it as well. Continue to weave the basket in the same way. It is quite difficult to keep the stands in place, but try to do everything as best you can.
At this stage, the posts can simply be bent upwards, but it is better to bend them as described above, because this makes it possible to make an edge that gives the basket more stability. 


The last two rods of the posts will not have the next posts in order to bend them; so they just need to be screwed around the first posts. When you twist the last two rods, everything will be tightly connected.
Tie the uprights together at the top ends so that they do not fall out of place. 


Now you can start weaving the sides of the basket. You can simply start basic weaving right after the uprights are folded up, but for the purposes of this tutorial, we will start with a weaving technique called three rod wale. This type of weave produces a nice edge before starting the main weave; and also helps to firmly hold the upright rods in position.
To weave "three rods", place three new rods along the three adjacent uprights. Take the far left rod and bend it to the right in front of two adjacent posts, then behind the third; and then go back forward. Now take the next rod and repeat the action; then the next, etc ... 


When you have finished braiding the second row with three rods, you can untie the top ends of the strut rods. 

We can now start to weave with the basic method that forms the supporting sides of the basket.
We will be using a type of weave called "French Randing". This type of weave is very popular; with its help, you can make even walls and weave much faster at a good pace.
First of all, you need to add one rod to each rack around the circumference of the basket. Choose good, long and thin rods of equal length. Add twigs one by one so that the direction of the tips of the growth of the shoots is directed towards the left hand. Place the butt end behind the post rod, then pass it in front of the next post to the left, then behind the third post, then slide it forward. The knitting rod will hold in place by itself. Now add the next rod, place the butt behind the next upright on the right; weave over the end of the previous rod in the same way. Continue adding twigs until you have braided the entire basket.
Now let's start weaving ... start with any knit twig, just braid it to the left using the same method you used before: forward, backward, then forward again. Then take the next knitting rod on the right and do the same ... that's all, just keep weaving around the basket. 


When you return in a circle to the place where you started to weave, you will see that two rods of knitting, instead of one, are behind two rods of racks. You may be wondering which rod to start with ... Start with the rod that is at the bottom, then everything will return to order. The photo shows that the number 1 knit rod should be braided earlier than the number 2.
This row of knitting is now complete and you can continue by grabbing the knitting rod and braiding it in the same way as before. 
Continue braiding using the French welt method until all the rods are braided to the ends. Cut off individual excess ends of the twigs. 

Lock the Rant next to three rods ... 

You can build the basket to whatever height you need with the same French welt. One layer of welt will be sufficient for this type of basket. All we need to do now is bend the rods down and weave them into the edge. There are many different options for the edges, which are made by weaving the rods of the uprights in front and behind in different combinations. I think you can develop your own design yourself ...
For this exact model ... take one of the stanchions and bend it down to the right. Place them behind the next two posts; in front of the third and fourth racks; then behind the fifth rack; then go back forward. Now take the next stand on the right and repeat in the same order. 

The last pair of uprights will not be vertical enough to braid them. However, repeat the same weave, tucking the ends in and out of the edges to achieve the same pattern.
Finally, trim the long ends flush with the edges of the basket. 


If you don't need a handle, then the basket is complete! Great job! 
If you need to add a pen, keep reading ...
To form the main part of the handle, you will need a thick, flexible shoot of a willow or other suitable tree. I used dogwood. Bend it and mark how long you need the handle, then cut it off. Sharpen the ends and push them down between the crochet twigs on opposite sides. 


Now take 4 or 5 long, medium thick willow shoots and insert them into the weave near the end of the handle. 
Wrap these shoots around the handle several times until you reach the other side. Thread the ends under the weave edge of the basket. 


Repeat the last step from the other end to fill the voids in the weave. 
Grasp the ends of the rods and pull them so that the braid fits snugly against the handle. Then stick a thin willow rod into the netting next to it. 

Bend a new willow rod and start wrapping it around the ends of the braid to secure the ends in place. After a few turns, hide the end as shown in the illustration. 


Trim the ends at the end. 
Cart is complete! In the center is a basket made entirely of blackberry sprouts. To see how to prepare blackberry shoots for baskets, check out my old article on baskets.
If you've made it to the end, great! 
Excerpt from the old version of the article
Blackberries are an excellent material for many reasons: they dry quickly, are very flexible, beautifully colored, strong, have long shoots, and are almost uniform in thickness throughout. I also worked a lot with blackberry shoots without even soaking them before braiding, thus saving a lot of time.
If you are using willow or blackberry, then you need to dry it. You can tell that it has dried out by its weight loss and shriveled bark. There are several specific types of willow that are suitable for weaving and are best harvested in winter, if possible in winter, when the amount of sap is less and there are no leaves on the branches.
You may ask how to remove the thorns from the blackberries and make the branches comfortable to weave ... when I first picked the blackberries I destroyed a pair of good leather gloves. I have found that it is best to wear leather gloves while keeping a piece of tarp or sturdy material on top. Holding the branch by the growing end, slide your hand (protected by skin or cloth) down the stem, then cut it off at the base. This will be a rough cut to remove all the thorns and leaves, but the stem will still be rough. Set aside the blackberry shoots to dry completely, and then push them through the sandpaper in your hands, this will make the branches smooth and allow you to work with them without problems. The construction of the baskets is the same regardless of the material you use. Choose your shoots thoughtfully. Don't pick blackberries that are too thick or too short to work and look for long shoots.

