Adhesive cork flooring: types and technology of installation. How to lay a cork board yourself Cork floor what to lay on
Are you looking for interesting solutions for apartment renovation? What is your option to install a cork floor? Not sure what it is, what is the benefit for you and how to do it? Everything is very simple. Let's consider what a cork floor is and how to lay it correctly.
The material for the production of cork linen is the bark of cork oak. Bark is removed from trees 25-30 years old, but it is not used in construction. Then, within 6-9 years, the bark is restored, it is removed again (if the technology is followed, the tree is not damaged). And this material is already being used for the manufacture of various products.
By technology, cork can be divided into types:
- veneer - the most expensive type of cork;
- agglomerate - the cheapest option (made by pressing crumb at high temperature with the addition of various resins);
- combined - both pieces of veneer and chips are used for manufacturing.
Finished panels can be treated with various compounds that affect the properties of the cork and give it greater strength and moisture resistance.
Pros and cons of the material
Benefits of cork floors:

- excellent heat and sound insulation;
- cork - the material is elastic and resilient, does not creak, does not slip, it is pleasant to walk on it;
- the cork is not subject to decay and is fireproof;
- the material is hypoallergenic, does not attract dust and does not accumulate static electricity;
- cork floors are able to withstand high pressure, including pressure points.
Flaws:
- like any natural material, the cost of cork panels is higher than the usual laminate or parquet board;
- the base for the cork must be perfectly flat;
- if there are cats or dogs in the house, then claw marks may remain on the cork;
- over time, the protective layer is erased and tracks remain in places of heavy traffic.
Back to the table of contents
Types and variants of cork flooring
- Floating type (you can find the name cork parquet). It is produced in the form of panels with locks and is a cork layer glued to the MDF panel.
- The adhesive type is produced in the form of square or rectangular tiles. Sizes may vary. A protective layer can be applied on top.
- The process plug is sold in rolls or plates and is used as a backing.
For the final finish, the first 2 types are widely used, it all depends on your choice. It should be borne in mind that if you plan to lay the cork cover in the bathroom or toilet, then you need to give preference to the adhesive type. This is due to the fact that it is treated with a special compound that prevents the floor from swelling.

Floating cork is best used indoors with a low level of humidity: in the bedroom, nursery or hallway.
To lay a cork floor with your own hands, you will need:
- Pencil.
- Roulette.
- Square for precise right-angle cutting of panels.
- Long ruler.
- Chopping cord.
- Construction knife. It can be used to easily cut adhesive-type cork panels.
- Spatula or roller for applying adhesive to floors and cork boards.
- Electric drill. Useful if you need to drill holes, for example, for heating pipes.
- Fine-toothed hacksaw or jigsaw. These tools are useful for sawing floating panels.
- Rubber mallet for adjusting cork slabs in place.
Back to the table of contents
Cork flooring technology
Surface preparation
Before laying the cork flooring, the surface must be leveled, if necessary. It must be dry, clean and primed.
You do not have to remove the old floor covering, but lay the cork covering from above.
Glueing the cork floor:

- Before laying the 1st row of cork tiles, use a construction cord to mark the main line along which assembly will begin. This can be diagonal from opposite corners of the room, or laying in a straight line along the walls.
- Draw a line with a pencil using a ruler along the cut line.
- When working with glue, you must use a respirator, for example RPG-67. Cork tile adhesive is flammable and has a strong odor. After work, the room must be thoroughly ventilated.
- Apply the adhesive evenly to the substrate using a spatula or roller along the marked line.
- It is also necessary to apply glue to the panel and let it dry for 10-15 minutes.
- Then attach the panel to the base and tap the entire surface with a rubber mallet.
- In some places it will be necessary to adjust the cork panels. For this, marks are made with a pencil, with the help of a square or ruler, the markings are made and the excess part is cut off with a construction knife.
- After laying the tiles on the floor, it is necessary to cover it with 2-3 coats of varnish. For these purposes, a two-component polyurethane varnish is perfect.
- The glue dries within 24 hours. It is advisable not to walk on the laid panels during this time in order to avoid their displacement.
Cork flooring has become widespread relatively recently. Nevertheless, the popularity of cork flooring is growing: manufacturers are developing and offering full-fledged relatively inexpensive substitutes for solid natural cork veneer, and laying a cork floor with your own hands is available to a person with initial home repair skills.
However, cork floors are not available everywhere. Therefore, before purchasing material and getting to work, you should understand what a cork floor is, and, especially, what are its advantages and disadvantages. Otherwise, expensive material and painstaking work can go down the drain.
Types of cork floors
- The most expensive is solid cork veneer, or Cork board(cut of cork oak bark), coated with wear-resistant varnish. Don't confuse it with school corkboards. Absolutely environmentally friendly material, combines both the best advantages and the most serious disadvantages of cork. It can be produced in large (up to 6 sq. M.) Layers with a thickness of 4-6 mm and in rolls; also - in the form of a tile. Often, the seamy side, not the front side, is protected with vinyl film, which makes it easier to stick and lay on a concrete floor.
- MDF panels with cork... Average material in the price category. It is also often called a cork board, although in fact it is a cork laminate: the base is made of MDF, then a layer of cork chips treated also using MDF technology (dry hot pressing), and on top is a layer of cork veneer 2-4 mm, protected by varnish and / or vinyl. In terms of useful qualities, it is practically equivalent to solid veneer, but not so picky about the quality of the underlying surface.
- Cork laminate Available in standard laminate sizes and thicknesses.
- Pressed cork chips. It is used to make inexpensive cork tiles... On sale, it is easily recognizable by its fine-grained texture, similar to the cork from an inexpensive wine. The color of the solid cork is complex figures of irregular shape in a yellow-brown scale. However, cork tiles provide a finish that is not inferior in quality to that of solid veneer. For a budget cork floor - the best option.
The main dimensions of cork tiles are 30x30, 60x60 and 60x90 cm. On sale, under the guise and at the price of tiles, you can find scraps and waste of solid veneer. They are small, but if there is a desire, time and artistic taste, you can collect such coverage from them that sophisticated connoisseurs will gasp.
What is good and what is bad about a cork floor
The cork floor has excellent spring properties, not slippery even with a protective coating. It plays well with the load, including the regular alternating one. Provides excellent sound and heat insulation. Absolutely environmentally friendly and harmless: in the entire centuries-old history of using cork, no signs of its effect on health have been noted.
However, there are also significant disadvantages of cork floors. In addition to the high price - fragility and sufficient complexity of laying on glue. It is better not to tackle the glued cork floor without skillful hands and an accurate eye.
Further, there is a high coefficient of thermal expansion even for wood. In addition, the cork swells strongly if the water contains dissolved organic matter. As a result, the cork absorbs well and firmly retains the smell and color of the impurity. Perhaps you have an old wine cork lying around somewhere - try to return it to its cylindrical shape, remove the color and smell from the part that was in the bottle.

As a consequence of the above, the cork floor is short-lived in any premises in a variable temperature regime: from thermal deformations, the cork will soon begin to crumble. Therefore, the answer to the question of whether it is possible to lay a cork floor in the kitchen, balcony and in the hallway: only cork laminate with a protective coating, and even then it is not very desirable.
As for the toilet and bathroom, there is a definite "no" to the cork floor. Even if you and your guests use the services absolutely carefully during the most riotous fun, anyway, from fluctuations in temperature and humidity in the cork coating, microcracks will soon form, along which moisture will pass, and then delamination, most often in hidden places: under the baseboard or under the bathroom where water vapor stagnates.
The cork has no antiseptic properties; she is biologically neutral material. Therefore, if you find and open such a "pimple", under it you will find a disgusting kind of mucus, from the contents of which, under a microscope, a microbiologist who is not indifferent to his work immediately faints.
Where cork floors are good
However, there are types of spaces where cork flooring is highly recommended and others where they are perfectly acceptable:
- Children's. Any cork floor can be laid here; if funds are available, it is better from solid veneer. First, the child will always be warm. Secondly, the plopping tomboy will not hurt himself. Thirdly, walking with bare feet on a traffic jam gives a somewhat irrational, but beneficial effect on the psyche and development of the mind, a sense of a living connection with nature.
- The bedroom is for the same reasons as in the nursery.
- Study. In addition to all the same, the cork dampens sounds well, without creating at the same time deadening silence.
- Living room. It is better to use cork laminate here, as in any other frequently visited premises. Cork flooring, even with perfect maintenance, does not differ in durability.
How cork floors are laid
Laying the cork flooring on the floor can be done not in two, as they often write, but in three different ways:
- Cork laminate, with some extra precautions regarding tooling and laying technique, see below.
- The same cork laminate and solid veneer can be laid loosely without fixing - this is a floating cork floor.
- Any kind of cork floor can also be installed with glue.
The technologies for laying a floating cork floor and an adhesive floor are fundamentally different. But the requirements for the preparation of the premises are the same. The tool is also used in a special way.
It is necessary to lay a cork floor in the warm season so that the temperature difference during delivery from the seller's warehouse to the room does not exceed 5-7 degrees. It is also desirable that the humidity in the room under the floor be no more than 60%; moisture content of 75% is no longer acceptable when laying.

Tools, accessories and additional materials
To install a cork floor, you first need a rubber wood hammer (mallet). Then - a hand-held circular saw or jigsaw with a circle or a "clean cut" file, very fine-toothed. Any hand saw will crumble the cork around the edge. For an adhesive floor, you will need a rolling roller - similar to a painter's, but metal, heavy, and small, 20-30 cm, but an accurate level.
Cork floating floor planks will need to be tweaked and leveled. For this, the spacer wedges will need to be made from his own scraps - the wooden ones will crush the cork. Also, the rule for fitting is a piece of cork board, which is abutted against the fitted one and adjusted by lightly tapping with a rubber mallet. You cannot use a hook clamp to tighten the cork laminate.
Additional materials will require a special plinth for the cork floor, which is attached to the wall. It is impossible to make a cork floor in doorways, so special sills will also be required. For an adhesive floor - special glue and also a special spatula for its application: wide, fine-toothed.
A small but important fixture for laying a glued cork floor is a can of canned vegetables or coffee with a quickly but tightly closing lid. In it you will need to keep a rag moistened with solvent - many small scraps. Use a rag to wipe off glue drips. Outside a tightly closed container, it will dry quickly, and abundantly moistened will ruin the coating.
Room preparation
Any cork floor must be laid on a level, smooth and dry surface. A leveled concrete screed is not enough - it is rough. The traffic jam when walking on it, or rolling the chair "plays". In this case, concrete works like an abrasive; the cork is soft and wipes quickly even on the adhesive layer.
Particularly "dislikes" a cork floor of a damp underlying surface. The point here is not only and not so much that the adhesive connection will be fragile, but in the swelling of the cork. Because of this, somewhere, a "bump" is formed, described in the section on the bathroom, and with the same content. Therefore, the base must be leveled and dried before laying the cork floor.
A concrete floor should be checked for moisture before laying. For this, a room or part of it, but not less than 2 square meters, is covered with plastic film for a day, an approximately rectangular piece, not a strip. If, after a day, moisture has not settled on the underside of the film, you can proceed to the final leveling. If not, you still need to dry it. Numerous complaints that, they say, a solid floor at 60-80 euros per square in a week began to stain and swell, are explained precisely by a too wet base.
Note: moisture can pass from the neighbors below. Therefore, immediately inspect carefully the "bare" floor, and seal all the cracks; especially - at the heating risers.
Leveling the floor
The base floor under the cork is leveled with a liquid leveler. A dry leveler (a laminated composite of soft material between two layers of plastic foil) is not suitable: the cork is harder and brittle. From a stiletto heel or chair leg, a cork floor on such a basis can crack.
(More on wet screed for leveling the floor)
Even the cheapest cork floor is not a cheap pleasure, and its reliability and durability are highly dependent on the base. Therefore, we can recommend before the cork, the cheapest, even substandard:
- The mechanical properties of marmoleum are the same as those of cork; the failure of the top from a concentrated load will not happen.
- Marmoleum will "flow" under the underside of the unevenness of the base, and its upper surface will remain even.
- Marmoleum possesses bactericidal properties: suddenly a harmful "pimple" forms under the cork, marmoleum will not allow harmful microflora to develop in it.
If linoleum, laminate or already laid on the floor, then it is better not to touch them, but lay the cork on top.

Floating floor
A floating cork floor can be inlaid, from a single piece of veneer or large pieces of it, and from a cork laminate. The first two options are the prerogative of a team of at least two well-worked professionals. Independent attempts of this kind end in the breakdown of an expensive coating: the price of cork veneer rises rapidly with an increase in the size of a piece.
Floating cork flooring is done as follows:
- The room is measured out, material is purchased. Upon delivery, it is unpacked and kept for a day for acclimatization - equalization of temperature and humidity.
- In the meantime, the base floor is covered with a plastic film with an overlap of 20-30 cm and with an overlap of 10-15 cm on the walls. The joints of the pieces of film are glued together with adhesive tape.
- Planks of an incomplete row in width are cut to size from the side of the tongue of the tongue; the groove must not be touched. When laying with a half-joint offset, half of the outer boards are sawn in half lengthwise.
- Laminate boards are laid from the far corner in transverse rows with a shift of the seams by a third or half of the board length, like a regular laminate: the comb of the next board is inserted into the groove of the previous one, holding it at an angle, lightly pressed and lowered. Pull up to the place with a rule and a rubber mallet. It is necessary to maintain an indent of 20-30 mm from the walls. It is maintained, and the board, which is extreme in front of the wall, is tightened with spacer wedges.
- The excess film is cut off.
- The "cork" plinth is attached to the wall with mounting glue. It should not lie on the floor, but hang over it by 1-2 mm. For this, it is convenient to use matches or toothpicks. True, what to do with the garbage, which will inevitably cram into the gap before the cork swells, the manufacturers of cork floors do not say.
- The floor is ready, you can walk on it right away.
Video instructions for laying cork
Glued cork floor
How good an adhesive cork floor will be depends a lot on the adhesive. Manufacturers of coatings recommend each of their own, but adhesives without a volatile aggressive solvent - "Kaskoflex" and the like, should be recognized as the best. They are non-toxic and take the longest time to dry (5-10 minutes); this is enough to fit the tile or board. But such adhesives are expensive, so the question is often asked: Is it possible to lay a cork floor on PVA?
It is impossible to lay a cork floor on liquid PVA: this glue is water-based, which is contraindicated for cork. You can let the PVA dry until it tackles with pressure (15-25 minutes) so that all the water from it evaporates. But then each tile will have to be put in place right away: it will not be possible to move it; she will immediately grab tightly. And you can apply liquid PVA only on one surface - the base floor, and this is a violation of the gluing technology. And the humidity of the air will rise during operation. So, alas, it is impossible to recommend laying a cork floor on cheap PVA.
An adhesive cork floor is laid like this:
- We work from the center of the room in a spiral. Swirling to the right or left - whichever is more convenient for you. For right-handers it is more convenient to "unwind" clockwise.
- Apply glue to the base with a spatula in an even layer, lay the tiles, tighten by hand or by rule.
- We roll it in with a roller.
- With a level two times, along the diagonals, we check the horizontality. If the next tile is lifted up somewhere, we tap it with a rubber mallet.
- The glue that comes out at any stage of the work is instantly erased with a rag moistened with solvent. We throw away the used flap: if it is mistakenly used again, it will only smear the drip of glue, and you cannot remove the dried glue from the cork.
- Leave the same gap around the perimeter as for the floating floor.
- At the end of the work, we wait a day, sew up the gap with a plinth - the floor is ready.
Video: the process of laying cork on glue
HDF cork laminate
The cheapest material for cork flooring is HDF (high density fiberboard), covered with pressed cork chips. But behind the "smart" foreign abbreviation is the well-known fiberboard, which is not matched in properties with the cork and with the "chemical" impregnation. Therefore, we can recommend HDF cork for flooring only in one case: if you want to cheaply tell your friends that you have a cork floor.
Summary
Cork flooring can be very good and useful, or very bad and harmful. It depends on whether it is laid out in a suitable room for him. And only its decorative qualities depend on the price category of the material and the method of installation.
Cork is an excellent floor covering if you need a “quiet”, pleasant to the touch, warm floor. The installation of cork is very different depending on the type of material chosen. The castle cork floor is easy to install, the glue one requires certain knowledge. But both with that and with the other you can cope independently.
Laying non-adhesive cork is not an easy task. It is complicated by the fact that the material is natural and there are drawbacks on the surface of some tiles during production. There are also differences in the size of the tiles (the discrepancy is up to 1 mm) and thickness. Therefore, for self-installation, it is better to choose either the lock option - it fits like a regular laminate. You can also put a cork bag, which is put on the glue. But it is better to take it with a chamfer - it will be easier. In the presence of a chamfer during installation, the different thickness of the tiles is not visible (the difference can be substantial) and it is easier to work with the joints. But when buying, you need to take material with a large margin - about 10%: the offset should be strictly the same, and this is an additional material consumption.
In any case, you should carefully read the installation instructions - there are a lot of nuances that have a significant impact on the result.
Base
Laying cork requires careful preparation of the substrate. A concrete slab or screed leveled with a self-leveling mixture is suitable as a base for an adhesive cork floor. They are also called. Compositions Vetonit 3000 or Osnovit T-45 have shown themselves well, but the like can be used.
Under the adhesive cork flooring, manufacturers recommend achieving a perfectly flat base without any drops at all, under the lock on the floor there can be drops of up to 2 mm by 2 meters (checked with a ruler, level or rule). In practice, it turns out that the glue cork (cork parquet) normally fits even on not quite even substrates. It is only important that the grooves / humps are very smooth, without steps, cracks, cavities, etc.
Laying the cork cover is possible only after the screed is completely dry. Permissible humidity - no more than 5%. If there is no moisture meter, take a piece of polyethylene with an area of about 1 square meter, glue it to the base with tape. It is necessary to glue tightly. Leave for a day, then tear off. If there is no condensation on the film, the floor has the required moisture content, a cork can be glued to it.
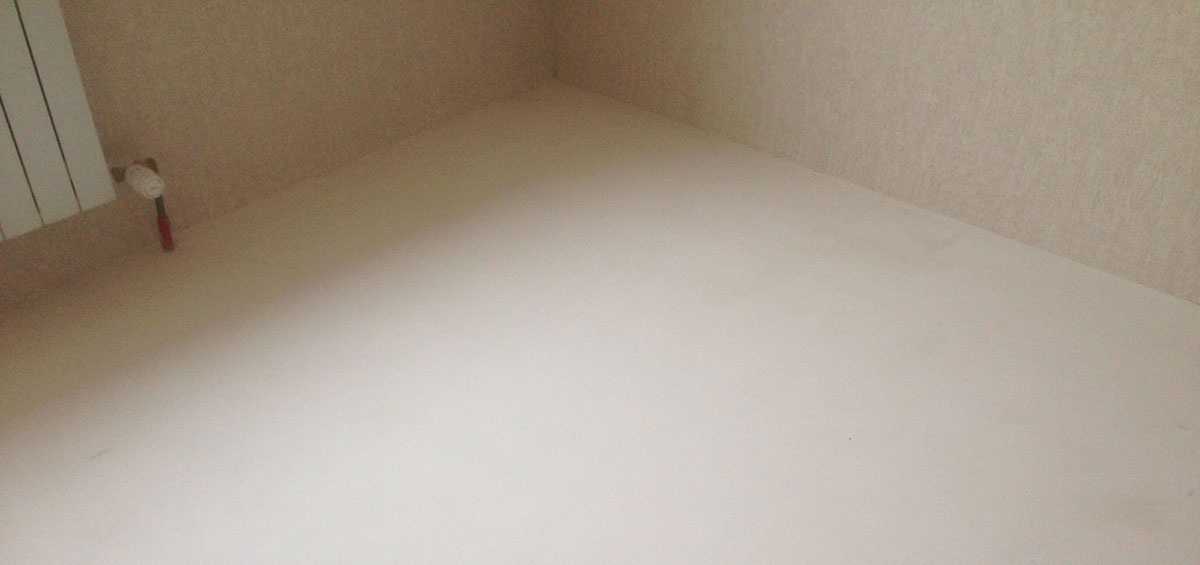
Cork can be laid on such a base - it is even, dry, clean
Before laying, the base is thoroughly cleaned - first with a broom, then with a vacuum cleaner. There should be no debris or dust on the surface.
Wooden floors are leveled with "dry screed" - moisture resistant plywood, fiberboard, gypsum fiber board. Sheets are laid "in a run-up" - so that the seams do not coincide. When laying, gaps of 3-4 mm are left between the sheets, the sheets are attached to the subfloor using self-tapping screws. Their caps must be sunk into the material (if necessary, pre-drill holes).
Seams and holes are sealed with putty. It is better to take an acrylic putty - it is more elastic than gypsum, glue "lays down" on it without any problems. After drying, sand the putty so that the entire surface is even. The base is cleaned of dust, it can be primed - to reduce the consumption of glue.
Tools
Glueing the cork flooring requires a number of tools. The set is not very large and does not require large material costs. Difficulties can arise only with a notched trowel - it must be with a very fine tooth, and these are rare.

If it was not possible to find a spatula with a fine tooth, you can make it from an ordinary one using a file. The correct cutting depth is obtained when you pass the corner of the file along the edge two or three times. It won't take long.
Laying method
There are different styling schemes, including patterns. But they need to be calculated, and this requires certain knowledge and time. The first self-laying of the cork flooring is desirable using the simplest offset schemes. It looks good and is perfect for building experience.
If your floor adhesive is not chamfered, you can use the haphazard method. Usually at the end of the row, the plank is not whole. The rest of it goes to the beginning of the next row. The same procedure continues further, with the only restriction that the "gap" of the seams should be more than 15 cm. If it turns out less, lay this piece through the row or a little later. As a result, there is no displacement pattern (well, almost), and the joints are almost invisible.
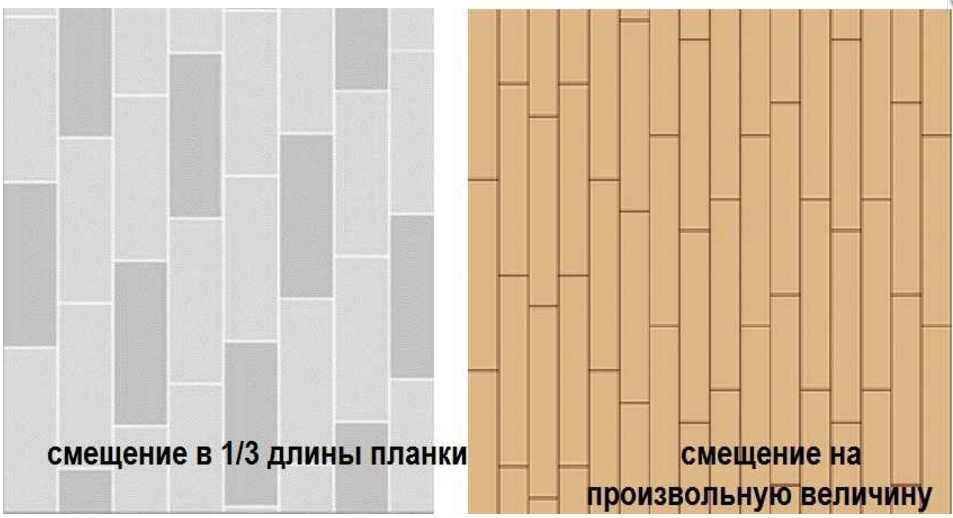
If the cork floor was bought with a bevel, then the offset should be clear - the boundaries of the tiles are clearly visible, therefore there should be order. In this case, an offset of 1/3 or 1/2 of the strip length is applied. The consumption with this method of laying cork is higher and this should be taken into account when purchasing.
Preparation of adhesive cork floor tiles
The tiles are unpacked (all packs) and left for a day at room temperature. During this time, the tile will take on "working" dimensions and subsequently no gaps will appear. By the way, there are requirements for "weather conditions": humidity 40-70%, temperature from + 18 ° C to + 30 ° C.
While the tiles are acclimatized, they must be sorted. This material is made from natural raw materials and defects are common. When sorting, you will need masking tape (paper) to mark the found defects so as not to search for them again. We sort the tiles into three categories:
- without defects;
- with small defects (dents, slightly knocked edges and corners);
- with significant deviations (potholes, foreign inclusions, delamination of the decorative layer).
Next to each "marriage" we glue pieces of paper tape - it will be easier to find. There may be a lot of defective tiles, but this is not a big deal - there will be a place for them. We glue those tiles on which there are minor deviations near the walls. There is usually no direct light and these flaws are not visible. Severely defective tiles are placed last in the row. We choose such that the defect is under the skirting board, and the remaining piece, already without flaws, goes to the beginning of the next row.

There is one more defect that is difficult to see in a separate tile, but it is very clearly visible in the installation. It happens that the decorative layer along the edge is sanded so that the substrate appears. We look at all the "good" bars for this drawback. We put them in the first or last row along the wall so that the chamfered edge is also under the skirting board.
There are also tiles of different thicknesses, so everything must be checked on this basis. We take a reference piece (you can cut it off from the defective strip), put it on one side and on the other, run your finger, checking if the thickness is the same. We put aside the thinner ones. We will lay them closer to the wall, where the differences are not so visible. For thicker ones, sand the edges. To do this, glue a strip of medium-grained sandpaper to the standard with the grain down, grind off the excess from the seamy side. The cork rests on the floor, the sandpaper cuts off the excess. As soon as the thickness is equal, we stop. After this preparation, laying the cork on the glue will be easier.
Markup
It is best to start laying the cork floor in the middle of the room. We find the center, through this point we draw lines perpendicular to the walls (at an angle of 90 °). In this case, we will lay the tiles along the walls. If you want to lay the cork cover diagonally, draw the lines at 45 ° in relation to the walls. It is easier to beat them off with a paint cord (a regular cord smeared in blue).

Usually, the long side of the cork strip is placed along the long wall, but this is not necessary. Having decided how you will lay out the cork tiles, you need to check whether the last plank will be wider than 5 cm. To do this, "dry" tightly one to the other, lay the tiles in a row on the floor - from wall to wall. The gaps at the walls should be more than 5 cm. If not, move the tiles so that the rule is fulfilled. It is necessary to check on the "narrow" - transverse side. Then you can lay the cork flooring, but the process itself is more complicated for cork parquet, and we will talk about it further.
Cork styling adhesive
This is a very important point. When laying cork on glue, manufacturers usually recommend a specific brand. It is advisable to listen to their opinion, but it is quite possible to use a replacement similar in quality.
A solvent-based neoprene contact adhesive is used to lay the cork. It "smells" very much, so it is advisable to work in a well-ventilated area, but it is still better to have a gas mask. Without means of protection, there may be a severe headache, vomiting, and hallucinations may occur.

One more point. The glue and its vapors are highly flammable. Therefore, there is no smoking and even the close presence of fire. Just one spark (short circuit, for example) leads to ignition. Even dried glue burns, and fresh glue burns like this over the entire surface. Therefore, handle it very carefully.
On the back side of the cork tile, the glue is applied with a velor roller, it rolls out well in an even layer. It is poured onto the floor, then spread over the surface with a fine-toothed spatula. After application, the glue should dry for 30-40 minutes (more precisely, see the instructions on the can), and the pot life of the glue should be several hours, so there is time for gluing and eliminating defects. But it will not be possible to tear off the laid and "knocked" tiles completely, therefore, when laying the cork covering, we try on well and only then begin to press it.

When coating the tiles, it is important to try not to stain the front side - all stains appear under the varnish. If, nevertheless, there are stains, we remove them immediately after gluing with white spirit or another solvent for your brand of glue.
To make the work move faster, find a flat sheet (cardboard, fiberboard, hardboard, any other material) that fits 5-10 tiles. Lay the tiles seamy side up, close to each other, joining wide parts. You will get a track. We coat all the tiles at a time and leave to dry.
Subsequently, in order for the work to go faster, it is better to have two boards on which the glue dries and to coat two areas with glue on the floor. Each time to wait 30-40 minutes - it will take a lot of time for laying, and so, while the first is laid, the second is almost ready. We clean the freed board from glue, put the next batch, coat, etc.
How to cut cork
Cutting the cork is simple - with a sharp blade along a metal ruler. If the tile is thick (there are 4 mm and 6 mm), approximately 1/3 of the thickness is cut in one pass. If the cut is hidden by the floor with a plinth, raise the bar, bend it along the cut line, it breaks. If necessary, you can help yourself with a knife.

Sometimes the cutting line has to be joined. Then you have to cut it off with a knife. You will have to carry out 2-3 times, and in order for the cut to be smooth, it is necessary that the ruler does not move. To do this, several pieces of double-sided tape are glued to the seamy side of the ruler. So that the scotch tape is not too sticky, it is "powdered" - with dust, building mixture, flour, etc.
Installation process
Next, the actual laying of the cork covering on the floor begins. We lay the first row along the drawn line. It is very important to lay it flat, without distortions and deviations. All joints must be absolutely even, therefore, in the first two rows from the stack "without scrap" select tiles with exactly the same dimensions. They can be laid out on an unstained part of the floor, checking for the same size and thickness.
We spread the selected tiles with glue, wait for the allotted time. Getting started with the installation. We spread with one edge strictly along the line. With the first, everything is simple: they put it down, pressed it down with their hands, tapped it with a mallet.
The next one should be put so that it goes 1-1.5 mm with its edge on the laid tile. So the joint will turn out to be tight and the cracks are not even subsequently formed. To do this, we try on it, holding it in weight, making sure that it does not stick. When you are convinced that the edge comes to the desired distance, you can lower the far end, set the long side of the bar exactly along the line, set the second end butt-to-end. A wave forms near the joint. It will straighten out due to the elasticity of the tile, but the adhesive cork floor will more resemble a continuous coating and there will be no gaps between the tiles.

We glue the laid strip from the far end, first smoothing it with your hand, then tapping it with a mallet. We put the “wave” last. It is nailed with a mallet towards the joint. It turns out a very tight seam. All other tiles are laid according to the same principle. They should be a little "cramped". Due to the resulting wave, we tighten the seam, in subsequent rows, due to elasticity, we also correct the discrepancies in the sizes of the planks.
When laying the second and subsequent rows, the longitudinal joint is also compacted by creating "tightness", but not in such a volume. Tightly, with a slight bend, we put the bar to the edge of the laid one, then we lower the opposite edge (the joint on the short side is all the same - with the wave). We carefully tap each tile along the entire plane with a mallet, paying special attention to the joints.
We cut the tiles at the walls so that a gap of 5 mm remains. This distance compensates for the thermal expansion of the floor covering and does not swell when the temperature rises.
Difficult places
Cork installation is rarely straightforward. It is usually difficult to bypass pipes. Try to have a tile joint on them. If not, we cut the cork in this place. but not straight, but obliquely, and so that the upper front part lies on the lower one.
In any case, first we make a template from thick paper or cardboard. We lay the cork floor so that less than one tile remains before the pipes, wait a while for the glue to dry even better, otherwise the paper or cardboard will simply stick and cannot be torn off without damage. In general, we are waiting for about an hour or a little more. Now the template will not stick "tightly". Cut out a piece of paper (cardboard) to the size of the tile, then cut out what you should get out of it. We apply cork to the sheet, circle it and cut it out, then glue it in place. It takes a long time, but it will turn out beautifully and without flaws. If something goes wrong, the imperfections can be repaired with parquet sealant before varnishing.
After laying, the entire cork floor is supposed to be rolled with a pressure roller according to the technology. This is an ordinary roller, but its weight is 50 kg and it tightly presses the coating to the glue. Since not everyone has such a device, you can try to replace it - you yourself gently trample over the entire surface. The weight is not less, so there should be an effect.
Cork skirting board
The penultimate stage of cork laying is the installation of cork skirting boards. It is "tightly" glued to the floor covering, then it is still filled with varnish. The cork parquet laid in this way is absolutely airtight - a kind of trough is formed on the floor, the burs of which are the plinth. Therefore, we pay special attention to fitting - the joints must be tight.
The fitting process is not much different from the installation of a plinth made of ordinary materials: the corners are cut with a carpenter's miter box (how to do it correctly, read the article about the ceiling plinth, but the floor plinth is cut as well). The tailored cork skirting board is glued to the floor surface, but not to the wall. He only leans against the wall.

Beveled cork floor - so you don't have to worry about the joints
According to the choice of length, the approach is as follows - we cut off a little longer than necessary, so that the joints are without gaps. After everything has been cut, folded to dry, checked the docking (flaws can be modified with sandpaper), you can glue the cork skirting board. We glue a strip along the width of the plinth on the floor, on the underside of the plinth itself, wait for the right time, glue it in place, pressing it well with our hands.
Now the floor is almost ready. The laying of the cork coating on the glue is finished, the final stage remains - varnishing. We leave the finished floor to dry for several days (usually 72 hours, but just look at the instructions for the glue) and for now we try not to walk on it - so as not to move or stain it. After the glue has set completely, varnishing can be started.
How to varnish
The varnish is applied in a few words with a velor roller. The number of rollers is based on the number of layers. Before varnishing, carefully inspect the cork floor for defects. They will definitely be - you laid tiles with flaws, in addition, in the process of work, new ones may appear: somewhere an edge has jammed, somewhere a dent has formed, etc. After the first varnishing, all these flaws are covered with parquet sealant. The first layer consumes a lot of varnish, but the film does not form on the surface, but all the flaws "climb" out. We eliminate them. Please note, if the tile is already with a protective varnish coating (there are some), use the sealant immediately.
We take a parquet sealant of a suitable color. Sometimes you have to mix several different colors to get the desired shade. We use it to close up grooves, chips, etc. We wipe off the surplus immediately.

After applying the first coat of varnish, be prepared for the fact that all flaws will become more visible and the surface will be rough. We close up all the flaws, after the sealant has dried, smooth out the roughness along the entire surface of the floor with medium-grain sandpaper. We remove the resulting dust with a vacuum cleaner, wipe it with a damp cloth. After drying, cover with a second layer of varnish. We pour it without sparing it, we fill in all the irregularities (chamfers, if they are there too). Sometimes this is enough (the floor is smooth), sometimes a third layer is required. If you need the next layer, again remove the roughness with a sandpaper with a slightly finer grain, remove dust, wipe, dry, varnish. So until the result satisfies you.
There is a separate article on varnishing at home. You can read it.
Laying the interlocking cork cover
No wonder this type of cork is called "cork laminate". Laying - one to one. Likewise, a backing is required, only it is better to use cork. The difference is that it is also recommended to lay a dense plastic wrap under it. It is better if it is seamless, but you can also spliced two canvases. This will require double-sided tape.

Two canvases are spread with an overlap of 10-15 cm. The knock is glued with two strips of double-sided tape. This ensures a sufficient degree of sealing. This layer cuts off the possibility of capillary suction of moisture in the event of a wet overlap.
A substrate is laid over the spread film, and a cork floor with locks is already laid on it. The whole process is similar to laying a laminate, and it is described.
Or in any other useful area, you will need to select and lay the floor covering. In addition to traditional ceramic tiles and moisture-resistant laminates, cork floors can also be used. What types of this flooring are there? Can cork be used for a balcony or loggia? How to install a cork floor?
If the balcony or loggia is not planned to be used as a separate room, but as a continuation of an existing room, then you can use the cork without restrictions. Any cork flooring options: laminate, tiles, MDF panels and cork boards can be used as flooring. The situation is completely different if the balcony, after insulation and finishing work, remains a separate isolated room. In this case, you will need to take into account several important nuances:
- High humidity... Although the cork itself copes well with moisture, the locks fail over time under its influence. In addition, even when the joints are sealed with a sealant, the locks will continue to allow moisture to pass through. Adhesive plates are devoid of this disadvantage.
- Plane requirements... In this respect, plates with a lock are in a more advantageous position. They easily hide small irregularities due to the underlay, so they are recommended for use in rooms where the floors have small deviations from the plane. In this respect, adhesive panels are more whimsical, therefore, before installing them, it is necessary to thoroughly level the base to "zero".
- Final result... To lay the adhesive material, certain skills are required, as well as accuracy. Making the joints invisible is quite problematic. Plates with locks are connected like a laminated board. Even not a specialist can handle their installation.
Important: If the balcony will be used as a separate room, it is better to choose a cork covering with an adhesive installation method. A material with a castle joint is suitable for an option in which a balcony (loggia) is used to expand the room.
Varieties of cork
Cork flooring is available in a wide range. Basically, all products are divided by the type of installation of the product, so most often you can find information about adhesive and locking cork... But the following solutions can also be distinguished separately:
- Cork laminate... Completely identical to the laminated board. Refers to locking materials. Its installation is easy and does not require any special skills.
- Cork tiles... One of the most popular adhesive types of this flooring. Laying a cork floor with your own hands in this case requires special construction skills and accuracy.
- MDF panels with cork layer... In this material, the cork is glued as the top facing layer. As a rule, such material also has a locking system of fixation.
- Cork board... It is made by gluing together several layers of material. Stows like a laminate. It is a type of floating floor covering. One of the most expensive materials.
Note: Some cork materials can be installed by yourself. It is better to entrust working with others to professionals.
Preliminary work
Although castor and adhesive flooring have different installation requirements, there is a common trait that sets each of these materials apart. This is the fear of dampness. Accidental moisture cannot harm this coating. But constant dampness leads to deformation and swelling of the cork. It is for this reason that at the preparatory stages it is necessary not only to level the floors, but also to give them waterproofing properties. How to do it?
- Concrete floors cleaned of debris. If the slab of the balcony or loggia is in perfect condition, then special solutions can be used to increase the waterproofing properties. Usually they use for this deep penetration soil... After application, it creates a film that prevents moisture from penetrating into the room. For a screed for the same purpose, you can use an ordinary thick oilcloth.
- Wood floors... Aligned using lag. At the same time, work on insulation and waterproofing of floors can be performed. Again, for this you can use a regular oilcloth or penofol. It is laid with foil up. On top, you can lay polystyrene or mineral wool. The top is leveled with plywood or OSB.
The cork can be used not only on the floor. Read about wall decoration with cork panels in our separate article.
Details of waterproofing works on balconies and loggias are described here. Preparation rules, choice of materials and work technology.
Read about the types of balcony railings made of metal on this page
Cork floor installation
The methods for installing cork floors may differ depending on the material chosen. Locking panels are mounted in the same way as a laminated board. Their installation starts from the corner and when laying, it is necessary to follow the general recommendations related to floating floor coverings.
Attention: A cork floor with locks can be used for a balcony or loggia only if there is good thermal and waterproofing, and when heating is used. Manufacturing companies of such coatings recommend using it for rooms with increased dampness only in exceptional cases!

The adhesive cork floor is laid as follows:
- On the leveled surface in the middle of the room, four tiles are laid without applying glue. The diagonal is checked, marks are made along the surface.
- The glue is applied simultaneously to the floor and to the material itself with a spatula, after which it is necessary to let it dry (approximately 20-30 minutes). The use of special glue is required!
- The tiles are laid from the center towards the walls. You can press the tiles together with your hands or using a rule. Leave a 3-5mm gap against the walls.
- Glue escaping from the joints is wiped off immediately.
- You can additionally tap the joints with a rubber mallet.

After finishing the installation, the cork flooring needs to be processed. To do this, after the adhesive has dried (the setting time is written on the container), it is necessary to apply a protective layer... This is done as follows:
- The floor is being cleaned. Potential dust is removed with a vacuum cleaner.
- A layer of varnish is applied with a roller. It must be rolled well over the surface. To perform these works, it is better to use a high-quality wide velor roller.
- The second layer of varnish covers all imperfections and omissions. After applying it, you must wait until the paintwork is completely dry.
- With a spatula and fine abrasive paper, all irregularities and small beads are removed.
- A finishing layer is applied.
By applying the varnish three times, a reliable protective layer is created, which protects the coating from moisture and mechanical damage.
Should I do the work myself?
Obviously, work with glue-type cork should be performed by professionals, or by people familiar with the principle of laying this material, described in our article, and able to perform the subsequent application of a protective varnish layer. It is much easier to lay the locking material, but its installation is possible only in rooms with reliable hydro and thermal insulation, so it is better not to use it for balconies or loggias.

Cork flooring installation video
In this section, we bring to your attention a video on the topic of our article "Technology of laying a cork floor: how to put it on a balcony." You will be able to observe the process of laying the adhesive cork flooring.
How to lay a cork floor? Laying a chateau cork floor is not as difficult as it might seem at first glance. Installation videos of floating cork floors and expert advice will help you get the job done.
Floating cork floor. What's this?
Cork chateau floors are often called "floating". The panels are connected to each other in a manner reminiscent of laminate flooring. A comb-groove system is used.
They are not firmly attached to the base. If necessary, the cover can be disassembled. The joints are glued with special glue for cork, which is not afraid of moisture.
For the arrangement of the castle floor, cork panels are used, multi-layer... A veneer made of fine wood or cork is glued on top. The uniqueness of the design of each panel makes the interior unique.
How to properly lay a castle (floating) cork floor
Useful tips for DIY cork flooring:
- Purchase tools and materials before installing the cork floor. Don't forget the plastic wrap and cork backing for the insulating layer;
- After the purchase, the coating must be placed for a day or two in the room where the installation will be carried out, for its acclimatization;
- Do not perform work if the room is cold: below + 17C - + 18C;
- Prepare the base. If the old one is linoleum or carpet, it is important to check that it is perfectly flat. Deviations from the norm are unacceptable - there will be distortions of the cork slabs;
- The concrete surface must be dry, clean and level. Consequences of level violation - poor-quality docking, distortions, etc.
- Use a fine-toothed hacksaw or jigsaw to cut the slabs. It is convenient to mark perpendicular corners with a square.
Video on how to lay a cork floor.
Laying technology
- Work begins with laying a plastic film and a substrate, if the base is a cement screed;
- If the basis is carpet or PVC coating (linoleum), it is enough to clean it;
- The first panels are fixed in the front right corner, always perpendicular to the window. The joints are so invisible;
- In the first row, the end parts of the panels are connected. To do this, the end of each panel, following the already laid one, is applied at an angle of 30 degrees to the previous one;
- The panel is gently lowered to the floor and the lock secures the connection. Tap lightly with a rubber mallet on the short right side through a small piece of panel inserted into the lock on the short side;
- Be sure to leave a 5-10mm expansion gap;
- The second row begins to be laid by trimming the panel located last in the first row. Size - at least 20 cm;
- Experts recommend laying cork panels staggered so that the beginning of every second row is a panel cut, not a whole piece;
- If there are heating pipes on the way, you need to cut a gap in the covering to expand the material. The size is the same as near the walls;
- A profile called a sill will help anchor the cork panels where the doorways are located. It is attached directly to the floor at the junction between the panels;
- The pegs or spacer wedges are removed immediately after the installation of the floating floor from the cork is completed;
- The skirting board is attached only to the wall, leaving a gap that will allow the covering to move.
Video instruction for laying the cork on the floor.
Underlay for cork flooring
When laying the interlocking cork floor, a backing is used. It is made from the crushed and pressed bark of a special cork oak.
Substrate- an important layer that is needed for heat, sound and waterproofing. Natural, eco-friendly, non-flammable, durable cork backing is several times superior in its characteristics to other insulating materials.
Laying the underlay
- A day before the start of work, the technical plug in rolls is brought into the room where work will be carried out to arrange the interlocking floor from the cork;
- The first step is to lay a PVC film to protect the surface from moisture;
- Access to the walls - at least 5cm;
- Pieces of film are laid with an overlap, the stock reaches 20 cm. The parts are fastened together with special tape;
- A roll cork coating is placed on top of the film layer;
- The distance between the wall and the substrate, as well as between adjacent pieces of technical cork, is 15mm.
Castle cork floor prices
The cost of cork flooring varies depending on the reputation of the manufacturer, brand, collection, the presence of a moisture-resistant coating, and the thickness of the material.
How much does a chateau floor from renowned companies cost?
Average price for 1 square meter:
- - 1033 rubles;
- CORKART - 2083 RUB;
- Ipocork - 1103 rubles;
- Go4cork - 1321 rubles;
- Granorte - $ 12
- KWG 349 - 1027 rubles.
Installation prices
If you are not confident in your abilities or do not have the necessary amount of free time for self-laying of cork floors of the castle type, contact the specialists. A team of experienced craftsmen will quickly and efficiently carry out all the preparatory work, installation of the cork floor and give recommendations on its operation.
The complex team, which carries out the installation of the "turnkey" floating cork floor, takes for its services, on average, 130 rubles. for 1 sq. meter... In different regions, prices may vary slightly depending on the demand for the service.
Be sure to conclude a contract that will insure you against unscrupulous performers.
How to care for a cork floor, how to clean
Natural cork floor care pretty simple:
- Wipe the floors with a damp cloth;
- Vacuum them;
- Use detergents, but without aggressive ingredients such as solvents or particulate matter;
- Cork flooring companies offer special care products for their products. Among them: Wicanders Power emulsion (removes dirt and grease), V-Care (adds shine and protects the surface), KorkCare (creates a protective layer to shine and repel dirt);
- To protect the room from street dust and dirt, put a mat near the doors. The base on the inside must not be rubber or latex;
- Stick special felt pads or cork circles on the legs of your furniture so that objects do not scratch the floor or leave dents. Rubber - does not fit!
- If your cork floor is covered with vinyl, once every three years in residential areas and annually in public areas, rub it with a special mastic.

