A sundial made from a glass and a tube. DIY sundial
Hello dear readers of KARTONKINO.ru! Spring ... Somewhere it is already in full swing, somewhere they are still waiting for its arrival, in a month or two, but the sun shines brighter and longer everywhere. And we have a great opportunity to put the sunlight into action by making DIY sundial... Of course, they will not replace the traditional - mechanical and electronic - watches, but this homemade product is very entertaining, and for representatives of the younger generation it is also educational, because the model of a sundial that we will make is the most effective one, and its making will require some knowledge of astronomy and trigonometry.
There are many varieties of this ancient device for measuring time. But among all the variety of sundials that have ever been used, the following types are distinguished as basic or classic:
— equatorial(for such a sundial, the plane of the frame (dial) is parallel to the equator, and the gnomon (the part that casts a shadow), usually a metal rod, is parallel to the earth's axis);

Equatorial sundial on the banks of the Thames (London, England)
— horizontal(the plane of the frame is parallel to the plane of the horizon, and the gnomon has the shape of a triangle, one of the sides of which is inclined to the plane of the frame at an angle equal to the latitude of the place where the clock is installed);

Horizontal sundial (Limassol, Cyprus)
— vertical(as the name suggests, the dial of such a watch is placed in a vertical plane, usually on the walls of buildings).

Wall sundial (Ely Cathedral, England)
We will make an equatorial-type sundial as the easiest to manufacture. Due to the fact that the dial is set parallel to the equator, and the sun moves across the celestial sphere almost evenly, the shadow from the gnomon will shift by an angle of 15 ° every hour. Therefore, hour divisions on the dial are applied in the same way as in ordinary watches, only the marks need not 12, but 24. It is clear that the upper part of the dial is hardly useful, except for the inhabitants of the Arctic, when the polar day comes and the sun shines around the clock.
There is no need to draw the dial yourself, you can use ready-made templates - round or square (which one is more to your liking):
Our task is to correctly orient the sundial in space. The angle of inclination of the dial relative to the horizontal plane is determined as follows:
α = 90 ° -φ,
where φ is the geographic latitude. You can find out the latitude of your place of residence on a map or on Wikipedia.
And knowing the necessary angles, it is very easy to make an inclined stand made of cardboard or paper for our sundial and then stick a printed dial on it or prepare a scan of the watch case with the applied image of the dial in a graphic editor.

We know the dimensions of the dial template. The side of the case is a right-angled triangle. Thus, we know the length of the hypotenuse C and the angles of the triangle, and the lengths of the legs A and B are calculated using trigonometric formulas:
A = C × sinα
B = C × cosα
It remains only to draw a sweep according to the dimensions obtained, it is possible even without side walls.
I made a case with an opening back cover (I will explain below why):


Whatever you do, it still turns out a box
Well, now in the center of the dial you need to install a gnomon. To do this, you can use any suitable rod (for example, a plastic straw from a bag of juice). And you can also make it out of cardboard or paper:
- cut out a rectangular strip 60 mm wide (the length is determined empirically, by eye, so that when folded, a dense tube with a diameter of about 5-6 mm with a small hole is obtained);
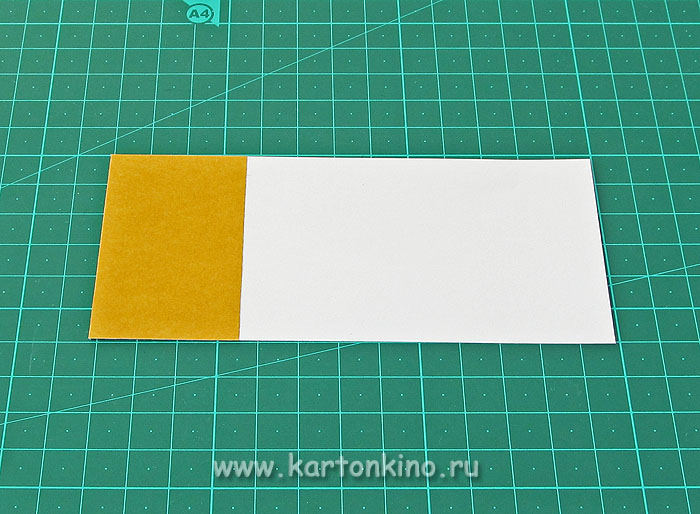
- glue double-sided tape on 1 edge and roll up the tube;

- cut out another rectangular strip 15-20 mm wide and also fold it into a tube with a diameter that matches the diameter of the opening of the first tube;

- cut off a part of the first tube at a distance of 10 mm from the edge (it will be something like a nut)


and connect the parts;

- we fix the gnomon on the dial, fixing it on the reverse side with a “nut” (this is where the opening cover came in handy).


The sundial is ready. Now, for them to work correctly, you need to place them on a sunlit place (on a windowsill, on a balcony, etc.) so that the gnomon "looks" to the north (the direction is determined by the compass).
Of course, it is not worth waiting for the exact coincidence of the readings of such a sundial with the readings of an ordinary watch. First, the sundial, which shows true solar time, does not take into account the standard time in a particular area. Secondly, do not forget that the magnetic and geographic poles of the Earth have a discrepancy, and the fact that we oriented the clock along the magnetic pole will also introduce some error.
And finally, the main point, which will also have to be reckoned with, is that the equatorial clock works only between the days of the spring and autumn equinoxes. The rest of the time, the upper surface of the frame will be in the shadows. But the vernal equinox in the northern hemisphere is coming soon, so there is not long to wait. There is just enough time to make a sundial with your own hands and set it up for work.
Successful experiments!
Did you like the article? There is still a lot of interesting things ahead - subscribe to updates and receive announcements directly to your mail!
By the way, a new master class on making sundials is already ready. This time we are talking about a horizontal pocket watch model.

Until next time in KARTONKINO!
First, let's look at the types of sundials. There are three types of time reading by the sun: with the help of horizontal, equatorial and vertical sundials. At home, the easiest way to do the first two types.
Equatorial. The surface of the dial is inclined relative to the ground level at an angle equal to 90 degrees - the latitude of the area and turned to the polar star (to the north). The arrow is perpendicular to the dial and can be a conventional pin. The hour markings on the dial are every 15 degrees.

Horizontal. The dial is on the ground or on a stand strictly horizontally. The arrow is a triangle with an angle equal to the latitude of the terrain. The direction of the arrow is north. The division of the dial into hours-sectors is made according to the formula.

How to make a sundial
Equatorial.
- On a piece of plywood or plastic we draw a dial with division by hour sectors every 15 degrees.
- In the center of the dial, insert a pin or stick of any length perpendicularly.
Now you need to set the clock correctly.
- We give the finished dial an angle of inclination using a stand. The height of the stand (angle of inclination) is determined for each area separately. For example, for Moscow, the angle will be 90 degrees minus 55 degrees (north latitude) = 35 degrees. Accordingly, if you live in Volgograd, then the latitude of Volgograd (48 degrees) should be subtracted from 90 degrees.
The latitude of each city can be viewed on Wikipedia.
- Having found the angle of inclination of the dial, we orient it on the terrain, directing the now inclined arrow to the north.
The disadvantage of such watches is that they will show the time only for half a year, while in winter they will be in the shade.

Horizontal.
Such a watch can be made very simply with your child.
- Cut out of plywood or plastic with a gnome (triangular arrow). One of the angles is straight (90 degrees), the other is the latitude of your city. That is, in Moscow, it will be a triangle with angles of 90 and 55 degrees, and in Volgograd - 90 and 48 degrees.
- We set the triangle on the terrain where we plan the clock, guided by the compass, to the north.
- We start the timer, and every hour we go out and mark the divisions.

It is good to have a clock in the country that is visible from afar and which is easy to make from scrap material. They will help you to spend time in the country with benefit: after all, you can water the plants only before 10 and after 4 o'clock in the afternoon, and being in the sun from 11 to 3 is strictly prohibited due to the active influence of solar radiation.
The sundial was the first time-telling device. They show the exact time only three days for the entire summer season (spring and autumn equinox and summer solstice). On other days, the difference can be up to 17 minutes, but for summer cottages this is not important. Therefore, you can do without creating an error table or graph that specifies the time every day and hour.
The sundial shows the exact time only on the days of the equinox and solstice.
What are the sundials
There are three types of sundials:
- vertical;
- horizontal;
- equatorial.
Spherical, semicircular and others are varieties of the main types. The principle of all watches is based on the indications of the shadow of an object (gnomon) falling on the divisions pre-applied on the dial (frame) per hour, fifteen, ten or five minutes, depending on the manufacturer's wishes.
A horizontal watch has a frame parallel to the horizon. In the center or closer to the south, a gnomon is installed - a vertical object, the shadow of which will indicate the time.
In a horizontal watch, the dial is parallel to the horizon
From a vertical gnomon, the shadow at any latitude of Russia will have a different length. In order for the shadow to be of equal length, the gnomon is tilted at an angle of latitude of the area, which can be accurately determined using a GPS navigator or on the Internet. For example, Moscow stands at 55th latitude, the tilt angle is 55 ° from the horizon. The gnomon tilts only in the north-south direction along the line of the shortest shadow at true noon. True noon is the moment of the upper culmination of the center of the Sun for a given point on the earth's surface.
True noon usually does not coincide with the official time. Therefore, those who have previously plotted divisions on the frame will simply have to turn the dial by the angle of error. At the same time, the gnomon remains tilted towards true noon.
The midday line indicates the geographic pole, not the magnetic
Equatorial clock
At the equatorial clock, the frame tilts towards the geographical north (for Russia) relative to the horizon at an angle: 90 minus the latitude of this area. That is, the dial will be parallel to the equator line. The gnomon is installed perpendicular to the gimbal, that is, parallel to the earth's axis. Local time corrections are the same as for horizontal clocks.
Equatorial clock readings are visible from afar
The vertical clock is placed on a plane perpendicular to the horizon line, and the gnomon is set at an angle to the frame along the midday line at an angle equal to the difference between 90 ° and the latitude of the area. The midday line is defined by the line of the shortest shadow from the horizontal gnomon.
On a vertical clock, the numbers are not always symmetrical, if the wall does not look strictly to the geographical south
DIY sundial
First, determine the location and purpose of the clock setting:
- if you work in the garden more often than relax in the country, then set the clock in the center on an area open on all sides;
- if the clock should remind you of the time to leave the open sun, then make it in the center of the recreation area;
- on the flowerbed near the country house, the clock will remind annoying neighbors of the transience of time.
After you have decided on the installation location, select the type of clock. The vertical clock is only suitable for the south wall, otherwise it will be in the shade on its own. Horizontal ones are good for open spaces, while equatorial ones will look better on playgrounds or recreational areas.
Making horizontal clocks
The easiest and cheapest way to make a sundial is a pole and stones. Instead of a pole, a piece of reinforcement, a long driftwood or rod, a piece of plastic or iron pipe, even a tall bottle, for example, from a champagne, will do. We take the following actions:
- We choose an area of at least 1 m 2, illuminated by the sun all day. Fans of more accurate time will have to align it or install the base using a building level (you can still take a bottle, pour water into it, without topping up to the edge of 1–1.5 cm, close it with a stopper. In a horizontal position, the air bubble should be exactly in the middle of a straight line parts of the bottle are the horizon line. Of course, this is a less accurate device than a level, but much better than the "by eye" setting).
- We strengthen the pole in the middle of the site.
- We set the alarm clock of our phone so that it rings every hour.
- As soon as the alarm clock rang, we approach the pole and look where the shadow falls. At the end of this shadow, add a pebble on which you can paint time with paint.
- The stones will be placed in an ellipse as the shadow changes its length. To make the clock round, select the shortest shadow and place the rest of the stones along this radius.
Within a few days, such a horizontal clock will deviate by a minute, but true noon (even if it falls on one in the afternoon) they will show exactly.
Photo gallery: horizontal sundial
Having planted grass or low flowers around the clock, we will get an elegant flower bed Cobbled courtyard easily turns into a sundial Laying out a sundial with small colored materials will take your children for a long time Indoor flowers for the summer can become part of a sundial, denoting one hour or another It is easy to make a clock from a wide round flowerpot by placing a pole in the center and noting the clock readings The Equatorial clock, installed in the corner of the site, is clearly visible from all its ends
Video: how to make a horizontal sundial
Whether you tilt the gnomon to get the same shadow or not, you decide for yourself. You can tilt the dial itself, that is, set the equatorial clock. It is not necessary to approach such a clock to find out what time it is, which saves both time and effort of the summer resident.
How to create an equatorial clock
Equatorial watch making process:
- To frame an equatorial clock, you can take a cover from an old saucepan, a piece of plywood, a wide board, or plastic. The main thing is a light background, on which the shadow will be clearly visible even with light clouds. This can be achieved by simple painting.
- We install the gnomon by gluing, drilling or in other ways at an angle of the desired latitude with an inclination to the geographical north.
- We put time intervals and, depending on the size of the watch, mark the readings with corks, bottoms from plastic bottles, old plastic toys, jars of creams - everything that has enough imagination.
Photo gallery: equatorial sundial
Granite clocks will last for many years Globe clocks will be more difficult to make, but nothing is impossible Themed sundial will decorate any flower bed
Video: making an equatorial sundial
A self-made sundial will make the cottage unique and help you better plan the necessary business and rest on the site.
I bring to your attention an entertaining craft made with your own hands from scrap materials. On the one hand, it is just a toy, a souvenir, but on the other hand, it is a serious thing that requires some knowledge and skills in such fields of science as astronomy, geography, mathematics and physics. It will be about an ancient device for determining the time - a sundial, which everyone has probably heard of, some have even seen, someone may have even done it. I think there is no need to describe in detail the principle of operation and design of stationary clocks, everything is described in great detail on the Internet, I will dwell on only a few details and features.
To build this structure, we need:
1. Plywood 3-layer 4 mm
2. Compass with dry needle
3. Brass sheet 1mm thick.
4. Copper wire ø 0.8-1mm.
The instrumental set is as follows:
1. Hacksaw for wood
2. Very sharp knife
3. Normal jigsaw (not electro)
4. Drawing tool (compass, protractor, ruler, etc.)
5. Scissors for metal
6. Soldering iron
7. Set of needle files
8. Building hair dryer
9. Sandpaper of various grain sizes
10. If desired, a burner
From the title of the article it already becomes clear that this device is mobile, that is, portable, which needs orientation relative to earth coordinates to determine the time, namely: the noon line of the clock must coincide with the direction of the meridian. For this, a compass was installed in the design. By the way, this clock will correctly show the time only in the area whose coordinates were used in the calculations. The longitude of the place determines the angle of inclination of the gnomon (clock hands) and the hour divisions of the frame (dial), and the latitude is important for the correction of local time to the time zone (civil time).
Our watch will consist of the following elements:
1 Compass. For a more accurate orientation of the north direction in the watch, a slightly modified conventional arrow compass is used. The revision consists in the fact that the compass card is glued directly to the arrow, and not just glued, but with the correction of the magnetic declination (for our area this is 11 °, which can give an error of about an hour)
To begin with, I disassembled the compass into its component parts:

I simply downloaded the picture of the card I liked from the Internet, printed it in the right size on photographic paper and pasted it on the arrow, taking into account the magnetic declination, since the graduation on the card was already there


I had to tinker with balancing by sanding the reverse side.
And one more function of such a compass - a card, in addition to indicating the direction to the north, works as a level for setting the plane of the watch in a horizontal position. Of course, it would be better to additionally set a bubble level, but in the absence of it, I decided that setting the horizontal position on the card would be enough for a souvenir toy, no one would check the chimes against them.
2 The frame (dial) of the horizontal watch differs from the equatorial one in that the angles between the hour markers are uneven. For horizontal sundials, frame marking can be done in three ways:
The first method is the easiest, but not accurate, you just need to set the clock, strictly orienting it, and then make a mark on the frame every hour and thus mark the entire dial. It is best to do this on days when the correction to the equation of time is close to zero (see "Analemma"). And such a clock will be shown by the civil time already given, taking into account the correction in longitude.
The second method is marking using geometric constructions; it requires a pencil, protractor and compasses.
We draw two mutually perpendicular lines and mark point A.

From which we draw the AC line so that the CAB angle is equal to the latitude of our area.

From point B, draw a perpendicular to the line AC and denote by point D

Next, from point B, draw a circle with radius BD until it intersects with line AB, and mark point O. Now, using this point as the center, draw a circle with radius OB, and divide it into 15 ° sectors, extending each ray to the line BC. The points of intersection of the rays with the line will determine the hour markers of our clock.

Connecting these points with point A, we get half of the dial, or rather a quarter of it, since the hour lines from 6 to 12 are symmetrical to the lines from 12 to 18 relative to the AB axis, and the marks from 18 to 6 o'clock (let's call them night) are symmetrical to the day.

And finally, the third method is trigonometric or calculated. Determine the angles of the hour lines by the formula: tg α = sin φ x tg t
Where α is the hour angle on the frame
φ- latitude of the place
t- time interval, expressed in degree measure (based on 1h- 15 °)
For example, for my case, the angle between the 11 and 12 o'clock lines will be sin57 ° x tg15 ° = 0.8386x0.2679 = 0.2247, which corresponds to 12.6 °, which is why, I repeat again, the compass rose is corrected for the magnetic declination value ( 11 °).
The half-hour and quarter-hour lines are simply marked by dividing the hour section.
So, in one of the last two ways, the frame was marked by us. The resulting markup will show us the local mean time, which differs from standard (civil) time by an amount depending on the longitude of the observation site.
As you know, the time is counted from the Greenwich meridian (GMT), and then after 15 ° the time zones change. For Moscow time (MSK), the time zone is GMT +3, but this is also conditional relative to true solar time, for example, the difference between true and standard time in Moscow is 29 minutes 40 seconds. This means that when the chimes on Red Square strike midnight, true midnight solar time will come only half an hour later. In my area, the difference is 31 minutes, so the divisions are shifted by half an hour. This is how it looks on the finished product:

3 Gnomon (arrow), by definition, must be foldable. The challenge was to maintain the latitude and verticality of the installation plane. You can, of course, just lay it on its side, but in this case, the dimensions turned out to be small and the gnomon seemed to be lost on the plane of the clock, therefore it was decided to make this part lifting. In this case, both the length can be increased to the desired proportions, and the verticality is maintained within acceptable limits (the gnomon's backlash is within 1 °), and the latitude angle is set by sharpening the gnomon's heel, which does not change later.

The parts are made of 1mm thick brass. The choice of material is due to the fact that it must be non-magnetic, so as not to deceive the compass, and lends itself well to soft soldering.
4 Analemma (Greek. ).

In other words, this curve shows how fast or lagging our clocks are in relation to average time. For example, in October, the Sun is at its zenith 16 minutes earlier, and in February, 14 minutes later than noon average annual time. This phenomenon is associated with the ellipticity of the orbit and the inclination of the Earth's axis. We will not go into details, it is important for us to know how many minutes on which day we need to add or subtract from the reading of our sundial in order to determine the time relatively accurately. To do this, we will place this beautiful squiggle on the inner surface of the lid.

Now we put all of the above together.
Let's conditionally divide our device into two parts - the sundial itself and the lid (in our case they are pocket ones, which means they will look like a cigarette case). Cut five rectangles of 100x120 mm from a sheet of plywood.

We cut corners of the blanks by 15 mm. on each side, as seen on the cover details:
To install the gnomon and the compass, cut holes in the frame blanks from the back side and the substrate following it. We deepen the gnomon so that the axis of its rotation lies in the plane of the frame, cutting off one layer of plywood (it is slightly more than 1mm.).

We glue the parts, then, as in a joke, we carefully process them with a file, or, to be more precise, we glue the end parts with veneer from the same plywood and process them with sandpaper. The hinges connecting the cover to the body are made of copper wire and glued with epoxy resin.


And to give an antique look, we will process the product with a hairdryer. As a result, we get just such a toy for adults.
Conclusion. It seems to me that such a gift for a teenager is much more interesting and useful than any newfangled gadget bought in a store (all the more you will not surprise with anything). At least this thing makes the brain work, but if it also awakens curiosity to learn the details in the sciences, it will be just wonderful.
And we have a great opportunity to put the sunlight into action by making DIY sundial... Of course, they will not replace the traditional - mechanical and electronic - watches, but this homemade product is very entertaining, and for representatives of the younger generation it is also educational, because the model of a sundial that we will make is the most effective one, and its making will require some knowledge of astronomy and trigonometry.
There are many varieties of this ancient device for measuring time. But among all the variety of sundials that have ever been used, the following types are distinguished as basic or classic:
Equatorial (for such a sundial, the plane of the frame (dial) is parallel to the equator, and the gnomon (the part that casts a shadow), usually a metal rod, is parallel to the earth's axis);
Horizontal (the plane of the frame is parallel to the plane of the horizon, and the gnomon has the shape of a triangle, one of the sides of which is inclined to the plane of the frame at an angle equal to the latitude of the place where the clock is installed);
Vertical (as the name suggests, the dial of such a watch is placed in a vertical plane, usually on the walls of buildings).

Wall sundial (Ely Cathedral, England)
We will make an equatorial-type sundial as the easiest to manufacture. Due to the fact that the dial is set parallel to the equator, and the sun moves across the celestial sphere almost evenly, the shadow from the gnomon will shift by an angle of 15 ° every hour. Therefore, hour divisions on the dial are applied in the same way as in ordinary watches, only the marks need not 12, but 24. It is clear that the upper part of the dial is hardly useful, except for the inhabitants of the Arctic, when the polar day comes and the sun shines around the clock.
There is no need to draw the dial yourself, you can use ready-made templates - round or square (which one is more to your liking):
Our task is to correctly orient the sundial in space. The angle of inclination of the dial relative to the horizontal plane is determined as follows:
α = 90 ° -φ,
where φ is the geographic latitude. You can find out the latitude of your place of residence on a map or on Wikipedia.
And knowing the necessary angles, it is very easy to make an inclined stand made of cardboard or paper for our sundial and then stick a printed dial on it or prepare a scan of the watch case with the applied image of the dial in a graphic editor.
We know the dimensions of the dial template. The side of the case is a right-angled triangle. Thus, we know the length of the hypotenuse C and the angles of the triangle, and the lengths of the legs A and B are calculated using trigonometric formulas:
A = C × sinα
B = C × cosα
It remains only to draw a sweep according to the dimensions obtained, it is possible even without side walls.
I made a case with an opening back cover (I will explain below why):


Whatever you do, it still turns out a box
Well, now in the center of the dial you need to install a gnomon. To do this, you can use any suitable rod (for example, a plastic straw from a bag of juice). And you can also make it out of cardboard or paper:
Cut out a rectangular strip 60 mm wide (the length is determined empirically, by eye, so that when folded, a dense tube with a diameter of about 5-6 mm with a small hole is obtained);

We glue double-sided tape on 1 edge and roll up the tube;
Cut out another rectangular strip 15-20 mm wide and also fold it into a tube with a diameter that matches the diameter of the opening of the first tube;

Cut off a part of the first tube at a distance of 10 mm from the edge (this will be something like a nut)


and connect the parts;

We fix the gnomon on the dial, fixing it on the reverse side with a “nut” (this is where the opening cover came in handy).

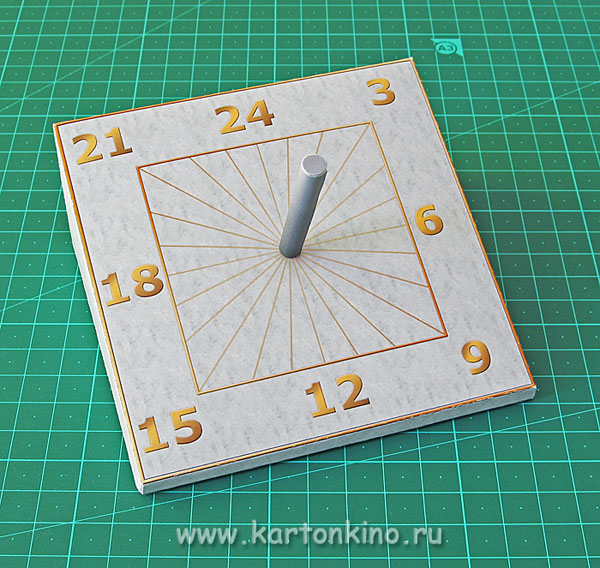
The sundial is ready. Now, in order for them to work correctly, you need to place them on a sunlit place (on a windowsill, on a balcony, etc.) so that the gnomon “looks” to the north (the direction is determined by the compass).
Of course, it is not worth waiting for the exact coincidence of the readings of such a sundial with the readings of an ordinary watch. First, the sundial, which shows true solar time, does not take into account the standard time in a particular area. Secondly, do not forget that the magnetic and geographic poles of the Earth have a discrepancy, and the fact that we oriented the clock along the magnetic pole will also introduce some error.
And finally, the main point, which also has to be reckoned with, is that the equatorial clock works only between the days of the spring and autumn equinox. The rest of the time, the upper surface of the frame will be in the shadows. But the vernal equinox in the northern hemisphere is coming soon, so there is not long to wait. There is just enough time to make a sundial with your own hands and set it up for work.
Successful experiments! And see you again at

