Apparatus for cotton candy do-it-yourself drawings. Homemade cotton candy machine
Today we will tell you how to make an apparatus for making cotton candy with your own hands.
Now we'll talk like cotton candy. The first thing to do is make a cotton candy machine.
To make a homemade cotton candy apparatus, we need:
- bottle with a volume of 5 liters;
- engine from any;
- scissors;
- can lid;
- power unit;
- box.
 The power should be from 6-12V, any can be suitable from. We insert the engine to the bottle cap, fastening it to the screws.
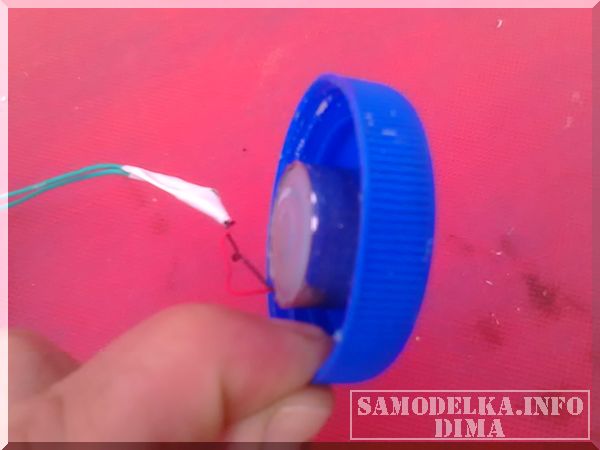
 The main thing is to keep the engine tight, for this you can add a couple of drops of glue. On top of the rotor we attach the lid from the can.
 We connect the power supply, its wire must go through the bottle and connect to the engine. Now he is ready.
  It remains to prepare the desired mixture.
To prepare the mixture, we need:
- metal;
- sugar;
- plate.
First you need to grease the lid from under the can with oil. This is to prevent the mixture from sticking to the lid. Next, pour one tablespoon of sugar into a metal scoop and add water.  There should not be a lot of water, enough so that the sugar is only soaked. Put on the fire and stir constantly. It is necessary for the water to evaporate, and only thick caramel remains. Once the water stops boiling and starts to turn brownish, the mixture is ready. After preparing the mixture, everything must be done quickly so that the mixture does not have time to harden. We launch the miracle unit and with a small stream, drip the mixture onto the lid of the can. Caramel will fly in different directions and sprout cobwebs.
Author of the article “Do it yourself: a device for making cotton candy with your own hands” Dima
Perhaps everyone likes it. However, it is impractical to purchase an apparatus for making it exclusively for household purposes. After all, the installation costs a lot of money. However, you can make a cotton candy machine with your own hands.
Can I do it myself
Almost everyone is able to create an apparatus for making cotton candy with their own hands. This requires few materials and tools. You will need a large saucepan, as well as some accessories that can be found in any pantry. With a little effort, you can create an apparatus without spending a penny. Using a homemade device, you can make any number of treats at any time.
Required parts and tools
So, as already mentioned, a large saucepan is required to make the apparatus. But that's not all. You also need a special container where sugar will be poured. The container must be made of fire-resistant material. After all, sugar will heat up and melt in it. In this case, the container should rotate and throw out thin threads of cotton wool. Of course, this is not all. So, in order to create an apparatus for making cotton candy with your own hands, you will need from tools:

- Several drills, it is advisable to have a very thin one at hand - no more than one millimeter in diameter, and a drill.
- or scissors for metal.
- A set of files.
- Soldering iron.
Component parts of the device
Made sweet without apparatus, it is unlikely that it will turn out so airy and light. And to create a device, you will need the following components:
- Jet lighter. A similar device is characterized by a blue flame. A lighter of this type produces heat, the temperature of which is significantly higher than the heating temperature of conventional lighters. The device does not emit soot when burned. It should be borne in mind that the lighter should be installed so that it can burn on its own. It will be much more convenient.
- Power supply for the electric motor. It can be a regular battery.
- DC electric motor. The device must be powered from low voltage.
- Tin can, for example, from under vegetables.
- Small lid for lighter.
- Bucket or large saucepan.
- Washer, bolt, nut.
- A rod that exceeds the length of a metal or wood pot.
- The tube is 15 centimeters long.
Lighter mount
Consider how to create a cotton candy apparatus with your own hands. First you need to create a lighter stand. To do this, the device must be wrapped in cling film in two layers. To secure the lighter, knead a small amount of epoxy glue, apply it to the milk lid and glue the lighter. When everything is frozen, you need to take the device and remove the film from it. That's all, the lighter stand is ready. It can be removed at any time.

Mounting rod and motor
In order for a ready-made apparatus for cotton candy, created with your own hands, to work, you need an engine. It can be connected using a short tube or a metal rod with a tin can. It is much more convenient. One hole should be made at the ends of the tube or rod. Each of them has its own purpose. One will serve to connect to the motor shaft. You can fix it with super glue. A locking screw can also be used. In this case, another hole is required. However, this method allows the engine to be removed if necessary.
The second hole is for attaching the tin can. It is best to fix the container with a bolt. After that, the engine must be secured to the cross bar. This is done very simply. It is enough to drill two holes in the center of the plank. It is better to secure the motor with two screws.

Preparing a tin can
So, the apparatus for cotton candy is practically made by hand. The tin can will serve as exactly the container inside which the sugar will melt. To do this, you need to pour the product into it and untwist it. A hole should be made along the top edge of the can. The top cover must be completely removed. It is better to clean the edge with a file.
There are many holes to be drilled along the sides of the can, preferably at the bottom edge. To do this, use drills with the smallest diameter available. It is better to retreat one centimeter from the bottom seam, and only then you can make holes.
Installing the capacity
It is worth making a hole in the tin can also for attaching directly to the rod. We will fix the container with a nut and a bolt. If desired, the jar can be simply soldered to a metal rod or nailed to a wooden plank. However, bolting is the best option as it allows the container to be replaced.

The jar should be located above a fire source inside a pot or bucket.
How to cook cotton wool
That's all. The apparatus for cotton candy with your own hands is fully prepared for use. It's easy to use. It is enough to light the lighter, put some sugar in a tin can and start the engine. The lighter should be installed inside a pot or bucket.
When the jar is warmed up, the sugar will begin to melt and fly out through the holes in it, forming cotton candy fibers. After making the required amount of delicacies, it remains to collect everything on a bamboo skewer. As you can see, everything is simple.
Cotton candy (or cotton candy) is cool, but quite expensive. And it looks completely insane to buy a machine for cotton candy in order to spoil yourself with this delicacy only occasionally. This project is assembled with your own hands very quickly from an intact pan and what may be lying around in your bins idle.
The main part of the apparatus for making cotton candy is a container with sugar and holes, which will heat up and rotate, and the melted sugar threads will fly out into these holes. This container will be inside the pot to prevent the sugar strands from scattering throughout the kitchen.
Step 1: Materials Required


To make a device for making cotton candy at home you will need:
- Turbo lighter - these lighters burn with a blue flame, the temperature of their fire is much higher than that of conventional gas lighters, and they do not contain soot. You need a lighter with a latching switch.
- Small electric motor (8 V possible).
- Battery for the engine (I used a pp3 battery - crown).
- Battery connector.
- Tin Can - I used a can of beans. Of course, a can of canned fish would fit better, but cotton candy would also have a fishy smell.
- To install the engine in a mini cotton candy machine - milk bottle caps.
- A deep pot or a clean bucket - the pot shown in the first photo was not large enough, and I ended up replacing it with another, larger one.
- Long stick, longer than the width of the pot. I used a runner from an old dishwasher.
- Threaded rod for stem (approx. 15 cm. I used a 10 cm hairpin, it should be longer than the height of the can.
- Small nut, bolt and washer. I took a steel bolt, it screwed perfectly into a soft brass tube.
Expendable materials:
- Sugar
- Bamboo skewers
- Fast acting epoxy
- Cling film
Instruments:
- Drill with a set of drills (including 1 mm or less)
- Soldering Station
- Needle files
- Tin scissors or can opener
Step 2: stabilize the lighter


The lighter that I used in the typewriter was very unstable. And due to the fact that it was filled from the bottom, I could not just put it on epoxy.
In order to make a lighter stand, you need to wrap it in a couple of layers of cling film. Then mix the fast acting epoxy and fill the bottle cap with it, insert the lighter into the epoxy. After a few minutes, take out the lighter and peel off the cling film. you have a detachable base for a lighter.
Step 3: install the motor on the rail


The motor is connected to the pan using a threaded rod, for this a hole has been drilled on one side of the rod for the motor shaft. Such a hole is very convenient to drill with a bench drill, but I did it by hand. Check if the drilled hole fits the motor shaft.
On the other side of the stud, drill a hole slightly smaller than the diameter of the bolt you prepared. Secure the motor shaft in the hole with super glue.
Now you need to attach the motor to the rail. There was a hole in my dishwasher rail, which only needed to be slightly widened with a file. Drill two holes on the sides for the motor mounting screws.
Step 4: preparing the tin can


In this jar, sugar will heat up and melt, which means that it must be filled with sugar, fixed above the flame and quickly rotate around its own axis so that the melted sugar scatters around the jar.
The first step is to cut a hole in the lid. I used tin scissors and a file. To prevent the sugar from falling out over the edge, I left a small edge. Practice has shown that there is no need for it, which means that the lid can be easily cut out with an opener.
In any case, the edge of the cut must be processed with a file so as not to cut yourself. Then you need to drill holes in the wall of the can along the bottom. I used a 1 mm drill for this, and sugar crystals fly out into the holes. Therefore, it is advisable to use even less drill. I drilled holes about 1 cm apart.
Step 5: install the jar


Now screw the retaining screw into the drilled hole in the end of the threaded rod. If you have a tap to cut an internal thread of the right size, that's great, but if not, then it's okay - brass is a fairly soft metal, you can simply screw the screw into the hole.
Drill a hole in the bottom of the can and insert a motor stud into this hole. Screw on the nut to secure the jar to the hairpin, so it will rotate with the motor shaft hairpin.
The can, which is attached to the shaft, must be well above the flame of the lighter when placed on the pot.
Step 6: making cotton candy


The apparatus for the production of cotton candy is ready, now turn on the lighter, pour a couple of tablespoons of sugar into the jar and turn on the electric motor. Place the lighter under the edge of the can. As the jar heats up, the sugar will begin to melt and scatter through the holes in the jar and over the saucepan. Once you have a few strands of sugar, collect them on a bamboo skewer.
There is hardly a person who has not tried cotton candy. Now it is sold everywhere - in parks, at various public events. You can even find it in stores. But the modern taste of this delicacy cannot be compared with what it used to be.
Many people still cannot understand the principle of preparation of this delicacy. It's actually pretty simple. Homemade cotton candy will be an excellent option that will pamper not only children, but also help adults remember the moments of childhood.
The easiest way to make cotton candy at home is using a special apparatus. But you can do without it. But for this you will have to make an effort and spend more time. Consider step by step with a photo of the instructions for cooking this wonderful everyone's favorite dessert.
Cooking cotton candy using special equipment

The easiest way to make cotton candy is to use a specially designed appliance. It can be ordered on the Internet or found in hardware stores.
It produces large quantities of product in a short amount of time, which is great for frequent guests or organizers of children's events or theme parties.
The apparatus for cotton candy has a rather unpretentious design: a thicket with a metal disk is located on a stable basis, which heats up during operation.

The principle of operation of the unit is very simple, which allows you to easily and quickly create your favorite sweet dish:
- Gently rinse a brand new car with hot water, rinse with a cleaning agent, wipe dry and leave to dry completely;
- Connect the device to the network and let it run for 5 minutes to warm up;
- Pour two large spoons of sugar onto a metal disc. From heating, it will begin to melt and begin to turn into strings;
- Dip a stick into the bowl and collect the finished threads on it. Collect the mixture adhering to the side walls, but do not discard. It can make delicious candies. That's all. Our delicacy is ready.

The unit is very convenient, its compact size makes it easy to clean and store. But everything has its drawbacks. This device is no exception:
- Constant overheating. Because of this, you need to regularly turn off and cool the device;
- You can stain the surrounding space when working;
- Constant cleaning of the bowl and other parts is required, otherwise failure is possible.
There is another way to make cotton candy:
- It is necessary to prepare the sugar-based syrup in advance, then pour it on top of the disc;
- From the rotation of the heated disc, the syrup turns into threads that are distributed along the walls of the bowl;
- The finished product is collected and wound on sticks.

The device allows you to experiment with additives and syrups, which will make your cotton wool original and bright. Nut-caramel, mint-lemon, strawberry-vanilla - these are just a few of the new syrups that can be included in the dish.
DIY cotton candy machine
It happens that there is no money to buy new equipment. There is no need to despair. The machine for making your favorite delicacy can be designed independently. This is especially easy for people with at least a little skills in electrical engineering. The assembly diagram is as follows:

- Prepare two tin lids (can be used from baby food in jars);
- Wash them thoroughly, then remove all paint with sandpaper or a file. This must be taken very carefully in order to exclude the ingress of paint residues into the finished product;
- Create many small holes in the first cap. The resulting threads will come out of them. Provide the second cap with one large hole in the center. Sugar will be poured here;
- Combine the covers so that there is a cavity between them. Reinforce the structure with wire;
- Attach a motor from any small household appliances (for example, a hair dryer or a mixer) to the caps with nuts;
- Now you need to create a solid base for attaching the resulting mechanism. For this, you can use a piece of plywood;
- Align the motor with the terminals of the accumulator or battery "Krona", making sure to observe the polarity. On one side, put a semicircular partition made of a piece of cardboard folded in half;
- Pour 40 g of sugar into the hole, warm up the rotating lid using matches or a lighter;
- When melting, threads will begin to appear and settle on the partition;
- The finished product needs to be wound on a stick.

You will end up with not quite fluffy cotton candy, but a little dense. To make it look more like a store-bought one, sugar needs to be replaced with isomalt - a powder analogue of granulated sugar.

Cooking cotton candy without a device
The preparation of cotton candy can be carried out without the apparatus. The process will be a little more complicated and longer, but the sweetness will be tasty and airy. First you need to prepare:
- Corolla;
- A saucepan or skillet with a thick bottom;
- Ceramic bowl;
- Winding frames for finished products. You can use cocktail sticks, Chinese sticks. Cutlery is also fine.

The ingredients you need are the following:
- Sugar (white or cane) - 2-5 large spoons. Calculate by serving size;
- Water - in a ratio of 1: 3 to sugar. For example, 150 g of sugar has 50 ml of water;
- Vinegar solution (no more than 6%) - 5-7 ml. Prepare it in advance.

Now let's look at the recipe itself, according to which cotton candy is prepared at home:
- We mix sugar and water together, then grind the composition with a fork;
- Pour in vinegar, stir thoroughly and transfer the mixture to the selected container (saucepan or frying pan) for heating on a low flame;
- We warm the composition and mix regularly. We collect the remains from the walls, excluding burning;
- When the consistency of the mixture becomes homogeneous, turn off the flame, cool the product to 30-35 degrees, stirring constantly so that it does not become sugared. Our syrup is ready;
- After cooling down, put the container back on a slow flame, boil the contents, then turn off the fire again and cool;
- We repeat the process about five times, until the syrup stretches and acquires a golden hue;
- We lower the edge of the spoon into the finished product, then raise it up. The mixture should be viscous and not tear;
- We create a kind of frame of sticks by placing them in an upright position and carefully securing them;
- We immerse the whisk in the syrup, then circle it around the frame;
- We repeat the manipulations until we wind the required number of threads. They should be thin, so don't grab too much syrup.

To add new color and flavor, you can add food colors that are sold all over the place. But this is not safe for children. Therefore, natural ingredients such as raspberry, lemon or beetroot juice can be used. You will get a bright fruit cotton wool. In this case, it is necessary to reduce the amount of water, since it will be replenished with juice.
The consistency of the product allows you to create various crafts from it. The kids will love it.

Finally, a few more tips to help simplify the cooking process;
- It is necessary to use exclusively dry bulk sugar. Refined or wet product is categorically unsuitable;
- Before cooking, it is better to protect the table and other nearby parts of the room with cellophane film, because dried drops of syrup are very difficult to remove from surfaces;
- Be careful when handling hot syrup. It is better to get the children out of the kitchen so that they do not burn themselves;
- The finished product is best consumed immediately. After a while, the delicacy becomes dense and not so tasty.

As you can see, it is quite simple to prepare cotton candy at home. You just need to stock up on time and patience. Then you can please your loved ones with this amazing delicacy.
Video: Cooking cotton candy at home using a special apparatus

