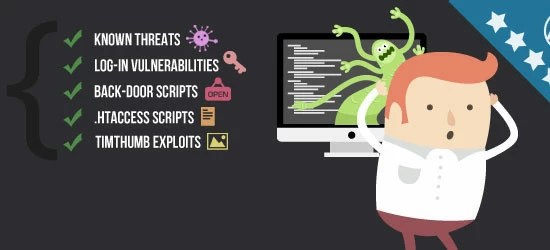
The best WordPress plugins for virus protection. Protecting WordPress from Basic Threats, Viruses and Attacks Antivirus Plugin for WordPress
Before figuring out how to clean up a WordPress site, you need to understand what, in fact, we will be dealing with. In a broad sense, the term "virus" refers to malicious software that can cause one or another damage to the owner of a web resource. Thus, this category includes almost any code embedded by cybercriminals into engine scripts. These can be hidden links that lead to pessimization in search results, backdoors that provide a hacker with admin access, or complex structures that turn a site into a zombie network node, and even a bitcoin miner. We will talk about how to detect and eliminate viruses of various calibers, as well as how to defend against them.
Many of the tips mentioned in previous articles can keep your site from getting infected. For example, "contagion" can be found in pirated templates and plugins, the complete rejection of such components is an important step from a security point of view. However, there are a number of more specific nuances.
1. Install a reliable antivirus
A malicious program can be introduced not only from the outside - the source of infection may well be the computer from which the project is administered. Modern Trojans can not only steal the FTP password, but also independently download the executable code, or modify the CMS files, which means that the safety of the web resource directly depends on the security of your working machine.
The IT market offers a variety of antivirus solutions. However, the smartest choice is the products of large companies:
● Among the domestic, the leading positions are occupied by the proposals of the Kaspersky Lab and Dr. Web.
● Among the foreign commercial solutions are the Norton line from Symantek corporation and the popular ESET NOD;
● If we talk about free options, then Avast and Comodo are unconditionally in the lead.
2. Crawl the site using online services
When suspicious activity is detected (engine errors, brakes, pop-ups and third-party banners), the simplest thing you can think of is to run the resource through an online scanner that can determine the fact of infection. The undisputed leader here is VirusTotal, located at virustotal.com. To use it, just go to the "URL" tab, drive in the link of interest and click on the "Check!"
After a while, the system will issue a report with the following content:

It should be clarified: VirusTotal is not an independent project, but a kind of aggregator of antivirus scanners. In this regard, it becomes possible to scan WordPress for viruses simultaneously on 67 systems. An undoubted advantage is a detailed report, which provides data on all supported services. After all, antiviruses are very fond of sounding false alarms, so even if the detection rate differs from the ideal (for example, 3/64), this does not mean that the resource is infected. Focus, first of all, on large players (Kaspersky, McAfee, Symantec NOD32 and others), small offices often identify certain sections of the code as dangerous - do not take it seriously!
3. Use Yandex.Webmaster
You've probably noticed that some of the links in the search results are provided with a warning message: “The site may threaten your computer or mobile device”. The fact is that the search engine has its own algorithms for detecting malicious code, notifying users of the potential risk. To be aware of what is happening and be the first to receive notifications, it is enough to register in the Webmaster service. You can view all the necessary information on the "Security" tab:

If a threat is detected, information about infected pages will be displayed here. Unfortunately, selective scanning of WordPress for viruses is impossible - Yandex scans itself, and besides, not all uploaded web documents are included in the sample, but only a part of them, determined randomly.
4. Check Google reports
The most popular search engine in the world offers an even easier way to monitor - just follow the link google.com/transparencyreport/safebrowsing/diagnostic/?hl=ru, and enter the address of the site of interest in the appropriate field. You will receive comprehensive data on the resource, and see if Google has any claims in terms of detecting malicious scripts:

How to clean Vodpress website from viral links?
Let's move on from general recommendations to specific ones. Let's start with the common variants of malicious code - the injection of extraneous URLs and redirects to the target web resource. Unfortunately, black CEO is still popular, which means that hackers are not sitting idle, since this task is one of the simplest. Let's sort it out in order.
1. Redirect to third-party resources
Imagine a situation: you go to your own website, but you are immediately transferred to the next catalog of "leisure", or a landing page offering to make money on Forex. This almost certainly means that the web resource has been hacked, and several new lines have appeared in .htaccess. The cure is simple: you open the file, find the directives containing the address to which the redirection is going, and then delete them. So, for a conditional malwaresite.com, the required constructs may be as follows:
| < IfModule mod_alias. c>Redirect 301 https: // website / http://malwaresite.com/ |
| < IfModule mod_rewrite. c>RewriteEngine On RewriteBase / RewriteCond% (HTTP_HOST)! ^ tekseo \. su [NC] RewriteRule ^ (. *) http: //malwaresite.com/$1 |
A more sophisticated option is a permanent redirect written in PHP. If you've checked and found nothing suspicious, the problem is most likely in the index.php file. The redirection here is done by sending the desired headers to the visitor:
include ("redirect.php"); exit ();
Remember - there are no such fragments in the original index.php, so you can safely delete them all. Also find and remove the include file (in our example, this will be redirect.php located in the root folder).
A more cunning move is a redirect for mobile gadgets. Accessing your resource from a personal computer, you will never reveal the fact of infection, however, users of smartphones and tablets will be unpleasantly surprised when they find themselves on another page. Such a redirect can be implemented:
1. .htaccess
The simplest way, which is easily calculated. The device is identified by the presented User Agent. It might look like this:
| < IfModule mod_rewrite. c>RewriteEngine on RewriteBase / RewriteCond% (HTTP_USER_AGENT) ^. * (Ipod | iphone | android). * [NC] RewriteRule ^ (. *) $ Http: //malwaresite.com/ |
2. PHP
Similarly, a redirect is implemented in PHP. The construct below can be found in the index file. Again, don't forget about the ubiquitous includes:
| "/(android|bb\d+|meego).+mobile|ip(hone|od)|blackberry|zte\-/i", substr ($ uagent, 0, 4))) header ( "location: http://malwaresite.com/") ; ?> |
3. JavaScript
This is where the screen resolution is checked, if the width is 480 pixels or less, the visitor is redirected to a malicious site. If your project uses a similar method, be sure to check this block for a change in address.
| < script type= "text/javascript" >if (screen. width<= 480 ) { window. location = "http://malwaresite.com" ; } |
2. Checking outgoing links
However, a redirect is too crude and explicit. It is much more common to find URL embedding hidden by CSS and other methods. With what you do not see, it is practically useless to fight. However, you can use the awesome Xenu Link Sleuth utility to rate your WordPress link profile. The last version of the program was released in 2010, nevertheless, it is relevant to this day, and even works great under Windows 10.
With Xenu installed and running, click File - Check URL. You will see a window:

Here you just need to enter the project domain and click OK. It is also possible to add filters by mask:
● Consider URLs beginning with this as ‘internal’ - consider URLs containing a given fragment as internal;
● Do not check any URLs beginning with this - allows you to exclude certain links from checking (for example, if you want to see only outgoing links, enter the site's domain here).
Upon completion of the procedure, the utility will offer to check WordPress for the presence of so-called orphan files - web documents to which there is not a single URL.

If you answer in the affirmative, a window for entering data for FTP authorization will appear:

This function can be useful if the site is old and has undergone a lot of changes during its existence: you can use it to clean directories from "garbage". However, we are more interested in the scan results:


Thus, if there are viruses on WordPress that cause hidden URLs to appear, Xenu will help to identify the fact of their presence. The only question is how to proceed.
3. Find and destroy
Imagine that Xenu found active links to a conditional malwaresite.com. How can I find and remove them? Sometimes the task is extremely simple. Non-professionals act rudely, limiting themselves to hiding the URL from prying eyes, but the address itself can be written explicitly in the code. The following options are possible:
1. Placement of url in the footer instead of copyright;
2. Using the orphan files described above (for example, an html document is loaded into a directory with images - search engines can also index it);
3. Manipulations with cascading style sheets:
● text-indent: -9999999999px / position: absolute; left: -9999999999px - move the link outside the display;
● display: none / visibility: hidden - make the text invisible;
● font-size: 1px; - single-pixel URLs that cannot be seen.
To find and remove a virus from a WordPress site, all you have to do is scan the entire engine for a line containing “malware.com”. On Windows, this can be done using the free file manager Unreal Commander:
1. Download all project files to a local folder on your computer using FileZilla as described in the previous article;
2. Launch Unreal Commander and click on the spyglass icon to go to the search interface;

3. Select the desired folder, check the box “With text”, enter “malwaresite.com”, specify all encodings and click “Start Search”.

The result will be a list of files in which the phrase was found. Now it remains to edit them by deleting the lines of code responsible for displaying the link.
Using PHP Antivirus for WordPress
The cases described above are just the tip of the iceberg. A professional hacker can find a non-standard approach even to such a simple task as placing a hidden backlink. As a rule, you will not be able to find anything on your own without the help of the appropriate software. Fortunately, there are solutions like this, and many of them are also free. Let's take a look at the most effective ones.
1. Ai-Bolit
Probably the most popular antivirus product from Revisium. Available in two versions: to work directly on a hosting, and a local machine running Windows (compatible with 10, does not require installation). Unfortunately, the * nix version does not have a web interface and is only suitable for a VDS or Dedicated server, so we will analyze how to work with the tool on a PC.
1. Download the utility from the link revisium.com/kb/scan_site_windows.html and unpack it to any convenient location on your computer. Please note: the path to the directory should not contain Russian letters, so the easiest way is to place it in the root of the disk;
2. Inside the archive you will see the following: a folder with the antivirus itself “aibolit”, “site” (you need to copy the scanned web documents here, they will all be scanned, regardless of the nesting level), as well as three bat-files:
● start - for a quick check;
● start_paranoic - deep scan with detection of any suspicious code fragments;
● scan_and_quarantine - the script will place all dangerous files in the archive.
3. To get started, double-click on any of the provided bat-files, depending on what result you want to get. Scanning will start, according to the results of which the report AI-BOLIT-REPORT.html will be generated (can be viewed in any browser). In quarantine mode, it will be archived with suspicious scripts


Of course, there is actually no malware at all. And, as you can see in the screenshot, the developers themselves warn about the likelihood of errors.
2. Manul
In addition to monitoring, Yandex invites everyone to use a free proprietary antivirus. The Manul utility, written in PHP, can be run on almost any web server and is compatible with most popular CMS. In addition, the script can not only detect but also remove dangerous code. Below is a step-by-step guide to identifying and treating viruses.
1. Download the program at https://download.cdn.yandex.net/manul/manul.zip;
2. Unpack the archive to the root directory of your site;
3. Follow the link site_name / manul / index..php);
4. Come up with a password. The script has serious security requirements: the passphrase must be at least 8 characters long, contain capital letters, numbers and special characters.
5. Now you can start scanning by clicking on the button of the same name. Also, the script can be customized by setting the request interval. The larger this value (in seconds), the longer it will take to check. The coefficient can be set to zero, but on low-power hosting this can lead to a significant increase in response time, up to the unavailability of the resource.
6. After that, the check will start - do not close the tab until it is finished!
7. When scanning is complete, a window with a button to download the report will appear. Click on it to download scan_log.xml.zip.

8. In another browser tab, open the analyzer located at https://antimalware.github.io/manul/. Click on the "Upload file" button and send the resulting archive for verification.

9. At this stage, we proceed directly to removing viruses from the WordPress site. You will see a window in which you can select operations on dangerous files (depending on the degree of threat, they are marked with a red, yellow, or green flag). The "Quarantine" button allows you to archive suspicious files, and "Delete" - to get rid of them permanently.

10. Having completed the desired actions, scroll down the page and copy the code that appears in the "Prescription" field

11. Now return to the Manul tab, go to the "Treatment" section, paste the received code into the appeared field and click "Execute".
Https: = "" lazy = "" lazy-hidden = "">
13. Upon completion of all procedures, a log window will appear on the screen. You can also download the quarantined files, if any

3. Santi
A relatively young project designed to detect and eliminate viruses on a WordPress site. The product is currently in beta testing and is free, the only paid service is SMS notification of the owner about detected threats. In addition to the monitoring module itself, the script offers consumers many tools to eliminate the consequences of cybercriminals. But about them - later, first we will deal with the installation.
1. Download the distribution kit from the official site santivi.com. Unpack the contents of the archive into a folder previously created on the hosting in the root directory, for example: / var / www / site / public_html / santi_av
The above is a simple name, but it is best to use a random sequence of lowercase Latin letters and numbers.
2. Go to the antivirus page. In our example, the address will look like this: https: // site / public_html / santi_av

4. At the first start, you need to configure the script by checking the automatically set parameters, and making adjustments, if any. Also, be sure to change your authorization data:
5. Register on the product website, then fill in the “Personal Information” section by entering the received SANTI ID, E-mail address and mobile phone (optional - needed for SMS-mailing). Subsequently, you can turn on the preferred methods of notification on the "Information" tab.
6. On the "Files and DB" tab, you should specify information for connecting to MySQL, as well as select a method for backing up the files of the web resource. The following options are supported:
● creating a local copy;
● Using an FTP server;
● Yagdeks.Disk;
● Google.Drive;
● Dropbox.
7. After finishing the above manipulations, click on the "Finish" button. If everything went well, the following will appear on the screen:

You can change the settings in the section of the program with the same name.
Santi has an intuitive interface and contains everything you need to effectively remove viruses from your WordPress site. The tools are divided into thematic sections. Let's consider each of them:
1. Home.

Here you can find the most important information about the protection status. From the notifications section, you can issue commands about actions to be taken with detected threats.
2. Autopilot

Allows you to customize the actions performed by the script in automatic mode. Among them:
● File Monitor - scans the integrity of web documents, excluding dynamic ones (access logs, errors, etc.). Checks the modification date, hash sum, the appearance of new directories and files.
● Database Monitoring - records suspicious activity in MySQL.
● Backing up - completely archives the site at regular intervals, saving a copy on the server or in the cloud storage. You can configure the parameters through the appropriate tool in the “Utilities” section (there is a possibility of selective selection of directories and files). As a result, you will receive an archive in a specific .sabu format - only Santi itself can process it, as well as a proprietary Windows-based PC program.
● Website scanning through the eyes of search engines - uses information from Yandex and Google about threats detected on the resource.
● Website scanning through the eyes of desktop antiviruses - scanning based on signatures provided by the largest companies developing solutions in the field of cybersecurity for PCs.
3. Utilities.

Here is a set of helper tools designed to help you maintain your site and keep it secure. Let's consider the most interesting ones:
● Date search. It is useful if the period of infection is approximately known. Using filters, you can set the time range, as well as list file extensions and specify how to process them (exclude from search or check).
● Configurator.ftpaccess. Used to configure FTP servers based on ProFTPD and Pure-FTP.
● Removal of malicious inserts. It will be useful if your WordPress site is affected by a virus and you know its code for sure. You can specify the beginning and end of the dangerous fragment, list the file types that need to be processed / excluded, separated by commas, and select the action “search” or “search and treat”. In the latter case, the specified sequence will be automatically deleted upon detection.
● File editor. Supported work in several encodings, line numbering, elementary syntax highlighting.
Specialized aviviruses for WordPress
In addition to the above, there are more narrowly focused solutions made in the form of plugins for CMS. Let's analyze the most effective ones.
1. AntiVirus
How to check WordPress templates for viruses? The answer lies in a small module with an extremely uncomplicated name and a very ascetic interface. The settings window invites us to run Manual malware scan, or enable automatic monitoring of the project (Check the theme templates for malware). The second checkbox allows you to connect Google Safe Browsing databases. It is also possible to enter an e-mail address - in this case, reports will be sent to your E-mail.

If you click the “Scan the theme templates now” button, all the templates installed in the system will be immediately scanned. A page will appear:

The utility highlights suspicious fragments with a red frame. Of course, false positives are also possible - in this case, AntiVirus has allocated a block of code that is responsible for prohibiting the display of messages about erroneous authorization. In such cases, just click on the “There is no virus” button.
2. TAC
Another highly targeted module is Theme Authenticity Checker. After installation, it will appear in the "Appearance" section of the admin panel. There is no need to configure and run anything here at all - the plugin conducts a fully automatic scan and issues a conclusion without any details:

3. Quttera
A more advanced module that scans the entire engine. There are two types of verification available: external - using an online service:

and internal - using the script of the plugin itself. To start them, just click on the "Scan Now" button.

The result of the check will be the following report:

As you can see, the antivirus separates all found files into potentially dangerous, suspicious and malicious. This classification is largely arbitrary - like its counterparts, Quttera tends to raise false alarms. It is best to put the plugin on a known clean site and start primary monitoring, according to the results of which all “rejected” files are added to the whitelist. To do this, just go to the “Detected Threats” tab and click “WhiteList File” under each alert.

4. Sucuri Security
This plugin is the most advanced of the specialized ones. The disadvantages include mandatory registration on the official developer resource and obtaining an API key, otherwise the functionality will be limited. The corresponding warning will appear immediately after activation.
By clicking on the button, you will see the following window:

The domain name and administrator's email are determined automatically, but the latter can be changed. The DNS Lookups checkbox should only be checked if you are using CloudProxy.
Before figuring out how to protect WordPress from viruses, you need to correctly configure the extension in the Settings section. Here you will see several tabs at once. In General, you can set the main parameters:
● Plugin API Key - allows you to enter the API key;
● Data Storage Path - indicates the path to the directory where Sucuri Security stores logs, a list of scanned files and other service information (by default - / uploads / sucuri;
● Reverse Proxy and IP Address and IP Address Discoverer - activate if external proxy services or firewall are connected;
● Failed Login Password Collector - enables tracking of unsuccessful login attempts on the site;
● User Comment Monitor - check the content of comments added by users. Helps to protect against both spam and malicious inserts;
● XML HTTP Request Monitor - filters Ajax requests, can negatively affect the response time of the site;
● Audit Log Statistics - display of event statistics, here you can set the number of analyzed records (by default - 500);
● Date & Time - allows you to change the time and date if they are defined incorrectly;
● Reset Options - reset the default settings (useful if you begin to experience problems with the site's performance, or the work of scripts after installing the plugin, but cannot understand what is wrong).
The “Scanner” tab allows you to:
● Launch a forced scan with the “Fast Scan” button;
● Choose one of three algorithms (SPL - the fastest, Global - the slowest and most thorough, or OpenDir - the golden mean);
● Set the frequency of checking (by default - 2 times a day);
● Enable and manage the file system scanner (FS Scanner);
● Configure the report analyzer and clear the logs.

On the “Alerts” tab, you can specify an email address for sending notifications, as well as set a message template by choosing from the proposed ones, or by entering your own in the “Custom” field.

Also here you can set the frequency of sending letters and parameters for detecting brute force attacks.

Below is the ability to fine-tune alerts. In addition to the default checkboxes, it is worth activating all the checkboxes related to user actions - this will help to successfully catch spammers and brute foresters.

It is also worth including all the items related to the status of plugins (marked with a plug) and templates (marked with a brush). This will not load the system, but it will help to identify the actions of an attacker who gained access to the project and made changes to its configuration.

The "Ignore Scanning" section allows you to specify directories that do not need to be scanned (you must specify the absolute path to the folder). Here it is worth adding the location of video and audio files: checking them is pointless, while it will eat up a lot of server resources, which will negatively affect performance.

“Ignore Alerts” allows you to exclude from notifications changes to content of a certain type (post-types).

The “Trust IP” tab allows you to set ranges of IP addresses, actions from which will not be registered by the system. It is convenient if the work with the project is carried out by a group of people from the same subnet.

“Hearbeat” helps to configure the API of the same name, which is used for two-way server-browser communication. It is mainly used in workgroups, and if you are the sole owner of the site, it is better to disable it altogether. This will remove additional vulnerabilities and improve engine performance.

After making all the edits, you can start scanning in the Malware Scan section with the corresponding button:

In addition to the scanner itself, Sucury Securyti includes a number of useful tools to help protect WordPress from viruses even before the site is hacked. All of them are collected in the Hardening section. I will list the possibilities:
● Verify WordPress version - monitors the relevance of the engine core and allows you to launch a forced update;
● Website Firewall protection - CloudProxy connection (WAF must be preconfigured on the appropriate tab);
● Remove WordPress version - removes the display of the CMS version;
● Block PHP files - blocks access to service files via .htaccess (for Apache), or offers recommendations for configuring Nginx;
● Verify PHP version - checks the current version of the installed interpreter;
● Security key - will let you know if you forgot to update the security keys in wp-config.php;
● Information leakage (readme.html) - removes the Readme file containing information potentially useful to a hacker;
● Default admin account - checks if the admin login is used for the super administrator account;
● Plugin & Theme editor - blocks the built-in template editor in one click;
● Database table prefix - reminds of the need to replace the MySQL table prefix with a unique one, instead of the default wp_.
The Post-Hack section comes in handy after you've cleaned your WordPress site from viruses. Three tools are presented here:
● Security keys - allows you to create a new set of security keys and replace the compromised ones;
● Reset User's Password - will help you to perform a bulk reset of passwords of registered users of your choice;
● Reset Plugins - rolls back all installed plugins to known safe versions, with the exception of premium add-ons.
Let's summarize
After reading the article, you are convinced that the fight against malware is not something out of the ordinary. Thanks to the availability of specialized solutions, operations such as checking a WordPress template for viruses, monitoring the CMS core and cleaning the site in case of infection can be performed even by a non-professional. But as in medicine, in the field of IT the key to success is not treatment, but prevention. Remember - hackers pose a threat not only to you and your brainchild, but also to website visitors. Often they are the ones who are attacked by visiting infected pages. This is fraught with the loss of the most important thing - trust on the part of users, which will inevitably result in the loss of regular readers, and even customers. Therefore, it is very important to attend to security issues as early as possible, minimizing the likelihood of hacking.
The security of your blog should be dealt with from the very beginning, not postponing it for a vague "get it up and running." Moreover, now you have a detailed instruction on how to protect a wordpress site from hacking, viruses and other troubles.
I used to think about security, but not so seriously. And after this article on the site A. Borisova took the matter seriously. I found on the Internet all the problem areas of the system and methods for their elimination. It turned out to be a rather long article with 14 points!
How to protect a wordpress site
1. Change the standard login. First of all, hackers break through such popular logins as admin, user, moderator, administrator. If you use one of them, then you have done half of the work for the cybercriminals. Especially often used is admin - short, easy to remember, you can immediately see that it is an important bump, so site owners do not change it to something more complex.
There are many options for changing this username, but the simplest one:
- Go to the admin panel, go to the Users section - click Add.
- Come up with a complex login for a new user (you can just a set of letters and numbers), and select the Role - Administrator.
- Log out of the current user (at the top right, select Log out).
- Log in with the new user you just created.
- Work with this account: create new articles, edit old ones, add / remove plugins. In general, check whether he really has all the powers of the Administrator.
- Delete user with nickname admin.
2. Set a complex password- this is exactly the case when you cannot use your standard password in the form of qwerty. You need to come up with a unique password, very complex, of 20 characters with different case, numbers and different symbols. If you're afraid to forget, write it down on a paper notebook. But don't store it on your computer. How to come up with a complex password can be found in this article.
A complex password should be used not only for the wordpress admin panel, but also for other services related to the site: mail, hosting, etc.
3. Hide login- no matter how you try to come up with a super complex login, there is a loophole that allows you to see it and copy it. To do this, enter in the address bar http: //your_domain.ru? Author = 1, substituting your domain. If the link does not turn into / author / admin, where admin is your new username, then everything is in order.
But if, nevertheless, your login is displayed there, you need to urgently hide it using a special command in the functions.php file:
/ * Change login in comments * /
function del_login_css ($ css) (foreach ($ css as $ key => $ class) (
if (strstr ($ class, "comment-author-write_active_login")) (
$ css [$ key] = 'comment-author-write_fictional_login'; ))
return $ css; )
add_filter (‘comment_class’, ‘del_login_css’);
Now we set up redirection to the main page, for this you need to open the .htaccess file in the root folder (using filezilla), and here after the line
RewriteRule. /index.php [L]
Add given text:
RedirectMatch Permanent ^ / author / real_login $ http: //your_domain.ru
4. We update WordPress in a timely manner. From time to time, new versions appear, notifications hang right in the control panel. Make a backup copy of the site, update and check the functionality. The newer, the more difficult it is to hack the system - new layers of protection appear, and the old hacking techniques do not work.
5. Hide the WordPress version from prying eyes. By default, this information is displayed in the page code, and attackers should not disclose it. Knowing your version, it will be easier for him to recognize flaws and hack the system.
So open functions.php for editing and then add this line:
remove_action (‘wp_head’, ‘wp_generator’);
This simple function prevents the display of system data.
6. Remove license.txt and readme.html from the root folder. They are not needed by themselves, but they can be used to easily read information about your system and find out the version of WordPress. They automatically reappear if you update wordpress. So clean your files every time you install updates.
7. Hide the wp-includes, wp-content and wp-content / plugins / folders. First, check if the contents of these folders are visible to strangers. Just substitute your domain in the links and open the links in the browser:
- http: // your_domain / wp-includes
- http: // your_domain / wp-content
- http: // your_domain / wp-content / plugins
If you see folders and files when you go to these pages, then you need to hide the information. This is done very, very simply - create an empty file called index.php and place it in these directories. Now this file will be opened during the transition, i.e. blank page without any information.
8. Don't put free themes- this is information from personal experience, although everyone writes about it. But I decided to bypass the system, and put a free theme from the Internet on my other site - I really liked it. And at first everything was fine.
After about six months, I started checking outbound links from the site, and I found 3 incomprehensible links. I could not find them on the pages themselves - they were very cleverly hidden. After studying the question, I found information that this is a very common problem when code for remote link placement is embedded in free templates. I had to spend a whole evening, but I fixed the problem and now everything is in order. But how much harm it could do!
9. Install the necessary plugins for protection, but be sure to install from the official site ru.wordpress.org or from the control panel.
- Limit Login Attempts - to limit login attempts. If you enter your login and password incorrectly 3 times, access will be blocked for N minutes / hours. You set the number of attempts and the blocking time yourself.
- Wordfence Security is a plugin for scanning a website for viruses and malicious changes in codes. To start, just install and click Scan. But after checking, it is advisable to disable it so as not to create additional load on the site. Check your blog for viruses at least once a month.
- WordPress Database Backup - automatically sends a backup copy of your website database by email. You can set the regularity yourself - once a day or weekly.
- Rename wp-login.php - changes the login address to the control panel from the standard http: // your_domain / wp-admin.
- Anti-XSS attack - protects your blog from XSS attacks.
10. Check your computer for viruses- sometimes viruses come straight from your computer. So install a good antivirus program and keep it up to date.
11. Make systematic backups- either using the WordPress Database Backup plugin, or manually. For some hosters, this happens automatically, so you can restore the site at any time in case of problems.
12. Work with a trusted hoster, because in many respects the security of the site depends on the quality of the hosting. I moved to Makhost a month ago, and the difference with the previous one is palpable (I described the move in this article). I will not recommend strongly, since I have not been with them for long, although my friend has been with them for a year and cannot get enough of it. In general, do not take rates for 100 rubles for the sake of saving, then you can pay dearly.
13. Different mailboxes for the site and hosting... It is very easy to pull out a mailbox from Wordpress, then you can hack it and gain access to data. And if the hosting is tied to it, it will not be difficult to change the password and take the site for yourself. So set up a separate hosting box so that no one knows or sees it.
14. Connect a dedicated IP address so as not to coexist with porn sites, filtered sites or viruses. So if you have the opportunity - get a separate IP, so as not to worry about it. By the way, there are unconfirmed rumors in the bloggers' sphere that the dedicated IP improves the position in the search results.
Now you know the simplest ways to protect a wordpress site, and you will be spared from commonplace threats. But besides this, there are many other dangers from which it is not so easy to save. Just for such serious situations, Yuri Kolesov created the course “
Using a security plugin protects your WordPress site from malware, attacks and hacking attempts. This article is a compilation of the best WordPress security plugins recommended to use to secure your site.
Why Use a WordPress Security Plugin
Around 18.5 million websites are infected with malware every week. The average site gets attacked 44 times every day, including WordPress and other CMS websites.
A security breach on your website can seriously damage your business:
- Hackers can steal your data or data belonging to your users and customers.
- A compromised website can be used to spread malicious code, infecting unsuspecting users with it.
- You may lose data, lose access to your website, or your site may be blocked.
- Your site could be destroyed or damaged, which can affect your SEO rankings and brand reputation.
You can scan your WordPress site for a security breach at any time. However, cleaning a hacked WordPress site without professional help can be quite daunting for novice webmasters.
To avoid hacking, you must follow the site security guidelines. One of the important steps in securing your WordPress site is using a security plugin. These plugins help simplify WordPress security and also block attacks on your site.
Let's take a look at some of the best WordPress security plugins and how they protect your site.
Note!
Note. You only need to use one plugin from this list. Having multiple security plugins active can lead to errors.
Note. You only need to use one plugin from this list. Having multiple security plugins active can lead to errors.
1. Sucuri

Sucuri is a leader in WordPress security. The developers offer a basic free Sucuri Security plugin that helps you harden your security and scans your site for common threats.
But the real value lies in the paid plans that come with the best WordPress firewall protection. The firewall helps block malicious attacks when accessing WordPress.
Sucuri internet firewall filters out bad traffic before it reaches your server. It also serves static content from its own CDN servers. Security aside, their DNS-level firewall with CDN gives you tremendous performance boosts and makes your website run faster.
Most importantly, Sucuri offers to clean up your WordPress site if it gets infected with malware at no extra cost.
See also:
2. Wordfence

Wordfence is another popular WordPress security plugin. The developers offer a free version of their plugin that comes with a powerful malware scanner. The plugin detects and evaluates threats.
The plugin automatically scans your site for common threats, but you can also run a full scan at any time. You will be alerted if any signs of a security breach are found. You will also receive instructions on how to fix them.
Wordfence comes with a built-in WordPress firewall. However, this firewall is running on your server before WordPress is loaded. This makes it less efficient than a DNS-level firewall like Sucuri.
3.iThemes Security

iThemes Security is a WordPress security plugin from the developers of the popular BackupBuddy plugin. Like all of their products, iThemes Security offers a great clean user interface with many options.
It comes with file integrity checks, security hardening, login restrictions, strong password enforcement, 404 error detection, attack protection, and more.
iThemes Security does not include a website firewall. It also doesn't include its own malware scanner, but uses the Sitecheck Sucuri malware scanner.
4. All In One WP Security

All In One WP Security is a powerful WordPress security checker, monitoring and firewall plugin. It makes it easy to apply basic WordPress security guidelines on your website.
The plugin includes login blocking features to prevent attacks on your site, IP filtering, file integrity monitoring, user account monitoring, scanning for suspicious database input patterns, and more.
It also comes with a basic website-level firewall that can detect some common patterns and block them. However, it is not always effective and you will often have to manually blacklist suspicious IP addresses.
5. Anti-Malware Security
Anti-Malware Security is another useful plugin for WordPress malware protection and security. The plugin comes with actively maintained definitions to help you find the most common threats.
The plugin makes it easy to scan all files and folders on your WordPress site for malicious code, backdoors, malware and other known malware attack patterns.
The plugin requires you to create a free account on the plugin website. After that, you will have access to the latest definitions, as well as some premium features like attack protection.
Nuance: while the plugin does rigorous tests, it often shows a large number of false positives. Matching each of them with the source file is a rather painstaking job.
6. BulletProof Security

BulletProof Security isn't the prettiest WordPress security plugin on the market, but it's still useful thanks to some great features. It comes with a setup wizard. The settings panel also includes links to extensive documentation. This will help you understand how security checks and settings work.
The plugin comes with a software scanner that checks the integrity of WordPress files and folders. It includes login protection, session outage, security logs, and a database backup utility. You can also set up email notifications in security logs and receive alerts when a user is locked out.
If your site has been hacked, don't panic.
In this article, you will learn 2 ways to cure a site from malicious code and spam manually, and 1 way using a plugin.
In the first method, you Export a database and several files. After that, you will reinstall WordPress, Import the database back and import a few settings from the saved files.
In the second method, you will delete some of the files and try to find the embedded code using commands in the SSH terminal.
In the third method, you will install the plugin.
Make sure the site is hacked
If you think the site has been hacked, make sure it is. Sometimes the site may behave strangely or you may think that the site has been hacked.
Your site has been hacked if:
- You see spam appearing on your site in the header or footer that advertises casinos, wallets, illegal services, and so on. Such an ad may be invisible to visitors, but visible to search engines, for example, dark text on a dark background.
- You make a request for site: your-site.ru in Yandex or Google, and you see content on the site pages that you did not add.
- Your visitors are telling you that they are being redirected to other sites. These redirects can be configured so that they do not work with the site administrator, but work for regular users and are visible to search engines.
- You have received a message from your hosting provider that your site is doing something malicious or spamming. For example, that your site is sending spam, or there is a link to your site in Internet spam. Hackers send spam, including from infected sites, and use infected sites to redirect users to their sites. They do this because they want to avoid spam filters so that their sites are not subject to search engine sanctions. When an infected site gets caught in spam filters, hackers leave it and take advantage of others.
Make a backup
After you are convinced that the site is hacked, make a backup of the entire site using a plugin, backup the application on a hosting or via FTP.
Some hosting providers may delete a site if you tell them that the site has been hacked, or if the hosting provider determines it. Hosting owners can delete the site so that other sites do not get infected.
Also make a backup of the database. If something goes wrong, you can always go back to the hacked version of the site and start over.

Go to Scan Settings.Sign up in the right window Updates & Registrations and press Run Complete Scan.
Services where you can check a site for malware
- Unmask Parasites is a fairly simple service for checking a website. The first step is to determine if the site has been hacked.
- Sucuri Site Check is a good service for finding infections on a website. In addition to the scanner, it shows whether the site is included in the lists of malicious sites. At the moment there are 9 lists.
- Norton Safe Web is a site crawler from Norton.
- Quttera - scans the site for malware.
- 2ip - checks for viruses and inclusion in Yandex and Google blacklists.
- VirusTotal is the coolest website scanning service that uses more than 50 different scanners - Kaspersky, Dr.Web, ESET, Yandex Safebrowsing and others. You can scan a site, IP address or file.
- Web Inspector is another good service that checks your site for worms, Trojans, backdoors, viruses, phishing, malware and suspicious software, and so on. Generates a fairly detailed report within a couple of minutes.
- Malware Removal - scans the site for malware, viruses, embedded scripts, and so on.
- Scan My Server - scans a website for malicious software, SQL injection, XSS and so on. Free registration is required to use. Quite detailed reports come by e-mail once a week.
What to do with infected files
Depending on what you find, you can delete the entire file or just the part that the hacker added.
- If you find a backdoor file containing only a malicious script, delete the entire file.
- If you found malicious code in a WordPress, theme or plugin file - delete the entire file and replace it with the original one from the official page.
- You found malicious code in a file that you or someone else created manually - remove the malicious code and save the file.
- Perhaps you have a clean version of the site in your backup, you can restore the site from the old version. After restoring, update WordPress, plugins and theme, change password and install security plugin.
Site visitors receive warnings from firewalls and antiviruses. What to do?
Similarly with the list of infected Google sites, you need to remove the site from the lists of all antiviruses: Kaspersky, ESET32, Avira, and so on. Go to each manufacturer's website and look for instructions on how to remove your site from the list of dangerous sites. This is commonly referred to as whitelisting. Search for eset whitelist website, avira site removal, mcafee false positive to help you find the right page on these sites to exclude your site from the list of sites containing malware.
How do I know if my site is on the list of dangerous sites containing malware?
https://transparencyreport.google.com/safe-browsing/search?url=your-site.ru
There you can also check the subdomains of your site, if any. On this page you will find detailed information about your site, whether it is listed by malware or phishing sites, and what to do if it is.
What to do to prevent the site from getting infected again?
- Update your WordPress version, themes and plugins regularly as new versions are released. ...
- Use complex logins and passwords. Password recommendation: The password must be at least 12 characters long, contain upper and lower case letters, numbers and symbols.
- Choose themes and plugins from trusted authors.
- Use reliable hosting. ...
- Install the security plugin. ...
- Set up automatic backup of all files and database. ...
- Remove all old versions of the site from the server.
- Read on.
I was hacked. You know as a page on VKontakte. But they did not beg for money, but created many "left" pages with links to various sites. Then I thought about protecting my blog. And I found the perfect solution.
The first thing I did was contact technical support with a request to restore my site the day before the hack, and after ten minutes I had my normal blog.
Then I installed a lot of plugins to protect WordPress from hacking. But the blog began to slow down terribly. Pages loaded in five to ten seconds. It is too long.
I started looking for plugins that do not load the system that much. I read reviews on these plugins and more and more often began to stumble upon All In One WP Security. According to the description, I really liked it and I decided to put it on my blog. And he protects me to this day, since I have never met anything better.
What All In One WP Security can do (all-in-one wordpress protection):
- Makes backups of the database, wp-config. and the .htaccess file
- Changing the login page address
- Hides WordPress version information
- Admin panel protection - blocking in case of incorrect authorization
- Robot protection
- And many more useful things
I can safely say that the All In One WP Security plugin is the best wordpress site protection.
Setting up All In One WP Security
Going to the Settings section, the first thing you need to do is make backups:
- database;
- wp-config file;
- htaccess file
This is done on the first page of the All In One WP Security plugin settings.
Make a backup (backup) before starting work
I will go through only the most important points.
 plugin settings items all in one wp security
 Control Panel
Here we are greeted by the "Security Meter" counter. It shows the level of protection of the site. Your site should be at least in the green zone. There is no need to chase the maximum bar - unnecessary settings can disrupt the functionality of the site. Strike the middle ground.
 Site protection counter on wordpress
 When you change the plug-in protection settings, you will see a green shield with numbers in each item - these are the numbers that are added to the general security account.
 the figure is added to the total security score
 Settings
WP Version Info Tab
Checking the Deleting WP Generator metadata checkbox.
 Deleting WP Generator Metadata
 This is done so that the version of the WordPress engine you have installed is not displayed in the code. Attackers know which version contains vulnerabilities, and knowing the version of WordPress you have installed, they will be able to hack your site faster.
Administrators
WP custom name
If you have a login to enter the admin panel admin, then be sure to change it. Admin is the most popular login. Many CMSCs offer it by default, and people are just too lazy to change it.
Attackers use various programs to hack websites. These programs pick up usernames and passwords until they find a suitable combination.
Therefore, do not use the admin login.
Display name
If your nickname coincides with the login, then be sure to change the login or nickname.
Password
If you enter your password here, the plugin will show how long it takes to hack your site.
Recommendations for enhancing password strength:
- Password must consist of letters and numbers
- Use lowercase and uppercase letters
- Do not use short passwords (minimum 6 characters)
- It is desirable to have special characters in the password (% # _ * @ $ and detailed)
 Password complexity
 Authorization
Authorization Blocking tab
Be sure to include. If within 5 minutes someone enters the password incorrectly 3 times, then the IP will be blocked for 60 minutes. You can put more, but it's better not to do it. It may happen that you yourself enter the password incorrectly and then wait for months or even years :)
Check the box “Immediately block invalid usernames”.
Let's say your login is hozyainsayta, and if someone enters another login (for example login), then his IP address will be automatically blocked.
 authorization blocking options
 Automatic logout of users
Check the box. If you go to the site's admin panel from another computer and forget to leave the admin panel, then after a specified period of time the system will log you out by itself.
I put 1440 minutes (that's 24 hours).
 Automatic user logout options
 User registration
Manual confirmation
We check "Activate manual approval of new registrations"
 Manual approval of new registrations
 CAPTCHA on registration
We also tick the box. This cuts off attempts to register a bot-robot, since robots cannot cope with captchas.
Registration Honeypot
We celebrate. And we do not leave the robots a single chance. This setting creates an additional invisible field (such as Enter text here). This field is visible only to robots. Since they automatically fill in all the fields, they will write something in this field as well. The system automatically blocks those registration attempts for which this field will be filled.
Database protection
DB table prefix
If your site has existed for a long time and there is a lot of information on it, then you should change the database prefix with the utmost care.
be sure to make a backup copy of the database
If you have just created your site, then you can safely change the prefix.
 Database table prefix
 Database backup
We turn on the automatic creation of backups.
Select the frequency of backups.
And the number of files with these backups to be kept. Then they will start being overwritten.
If you want these files to be additionally sent to your e-mail, then we mark the appropriate checkbox. For these purposes, I have a separate folder in my mailbox, all backups (my and client's sites) are sent there.
 Database backup settings
 File system protection
Here we change the file permissions so that everything is green.

Editing php files
We put it in the event that you do not edit files through the admin panel. In general, you need to make any changes to the files through the ftp manager programs (like filezilla). So in the case of any "jamb" you can always undo the previous action.
Denying access. By this action, we can hide information important to hackers.
Black list
If you already have IP addresses that you want to deny access to the site, then enable this option.
 Blocking users by IP
 Firewall
Basic firewall rules.
Firewall and firewall is a software package that filters unauthorized traffic.
These rules are entered into the .htaccess file, so we back it up first.
Now you can put down the necessary checkboxes:
 Activate basic firewall functions
  Protection against XMLRPC and WordPress Pingback vulnerability
  Block access to debug.log
 Additional firewall rules
On this tab, mark the following checkboxes:
- Disable directory browsing
- Disable HTTP tracing
- Disallow comments via proxy
- Disallow malicious strings in requests (May break functionality of other plugins)
- Activate additional filtering of symbols (We also act with caution, we must look at how it affects the performance of the site)
- Each item has a button "+ More" there you can read in detail about each option.
6G Blacklist Firewall Rules
We mark both points. This is the checked list of rules that the WordPress security plugin provides.
 Firewall (firewall) settings
 Internet bots
There may be problems with the indexing of the site. I do not enable this option.
Prevent hotlinks
Check the box. So that images from your site are not shown on other sites using a direct link. This feature reduces the load on the server.

Detecting 404
Error 404 (there is no such page) appears when you enter the page address by mistake. Hackers brute force to find pages with vulnerabilities and therefore enter many non-existent URLs in a short period of time.
Such hacking attempts will be recorded in the table on this page and by checking the box - you can block their IP addresses for the specified time.
 404 error tracking settings
 Protection against brute force attacks
By default, all sites on WordPress have the same authorization page address. And therefore, attackers know exactly where to start hacking the site.
This option allows you to change the address of this page. This is a very good protection for a wordpress site. We will definitely change the address. I did not tick this box, because mine automatically changed this page for me during the installation of the system.

Protection against brute force attacks using cookies
I did not enable this setting, as there is a possibility of blocking myself when logging in from different devices.
Login CAPTCHA
If your site has a lot of users or you have an online store, you can enable Captcha when logging in at all points.
 Captcha protection during authorization
 Login whitelist
Do you go to the admin panel only from your home computer and are you the only user of your site? Then enter your IP address and everyone else will be denied access to the authorization page.

