Braid on the steering wheel: tips for choosing a braid and help with steering wheel trim. Learning to make beautiful seams How to make a leather steering wheel pattern
Having gained some experience in this matter, I lay out the algorithm in relation to our restyled steering wheel.
First, remove the steering wheel from the car, here it is. On it we mark with a white pencil the places of the seams of the joining of the parts of the skin

We cut grooves in order to fill the seams in them later, it’s scary to cut, but we need to, in general, we do it badly, so that later it will be good

wrap with food transparent film - this is a sublayer for a future pattern

glue everything with masking tape this is the basis of the pattern

We draw on the pattern where the seams will pass

Cut along the seam lines

transfer the pattern to the skin 


After we cut out the skin for stitching the ring for fitting on the steering wheel, yes, before applying the pattern to the skin, you need to take into account the direction of stretching the skin so that it does not stretch along the braid tape, but vice versa across.
We sew the parts on It is important that the machine can sew a 5 mm screed

try on, pay attention to the fact that the seams fit exactly into the cuts in the donut
When trying on, we check the dotted lines of the seams with the steering wheel for an exact match and the allowances for stretching the skin when tightening on the steering wheel, if everything is fine, then we sew and cut off the allowances, tighten.
When the leather ring is stitched and the diameter is verified, it is important that the dotted lines, that is, the stitching lines, coincide with the inner edge of the steering wheel "such a tubercle from which the flash is removed at the factory" taking into account the stretch, in a free state with a gap of 3-4 mm


When screeding, jambs with seams in the area of the steering wheel spokes are found, so you have to unwind the machine seam and restore it, the threads after the machine must be left with a margin.
Here is a seam map from one of the tuning studios.
the first 5 seams are made with a sewing machine, that is, a straight line, the line is pulled together with a thread, and from 6 onwards, by hand
That's it, it's easier to write than to do.
The work is done in one day.
Materials: automotive leather 0.4 sq / m -350 RUB
threads 150L lafsan - others are not suitable weak,
sewing machine for seams like macrame or sports, like mine,
it is possible without it, if the seam is a pigtail, as in the Japanese.
a lot of perseverance and desire to achieve results.
The steering wheel is the part of the car that is most susceptible to abrasion. Usually the braid "nourishes" up to two hundred thousand. However, this does not happen with all car models. After 3-5 years, the steering wheel becomes flabby and scratched. Naturally, when selling a car, the buyer’s eyes rush to the steering wheel braid. Therefore, it is important to preserve its factory condition as much as possible.
Today's article will be useful not only to car owners, but also to those who sell cars in the secondary market. So, how to sheathe the steering wheel with leather with your own hands? Consider below.
Material
The first problem the owner faces is the choice of material. There are many finishing options. In our case, it is required to sheathe the steering wheel with leather. Moreover, its quality should be at a high level. Steering wheel restoration work is quite difficult. Our goal is to restore the former state of the material for the longest possible time.
What is better to sheathe the steering wheel - leather or eco-leather? It all depends on the preferences of the owner. Of course, genuine leather will cost much more than a substitute (that is, material with the prefix "eco"). Note that eco-leather of good quality is not inferior to the characteristics of natural. It is elastic and fits the steering wheel well. The material has a homogeneous structure. This steering wheel looks very organic and presentable. The main thing is to make a sketch correctly.

Important point! The most convenient skin in use - only perforated. This is the softest, most elastic, pleasant to the touch material. It is very easy to work with him. The coating takes any shape (especially for those who want to sheathe the steering wheel of a complex configuration with notches in leather).
What thickness to choose the material? The optimal value is from one to one and a half millimeters. The main requirements for leather are resistance to temperature extremes, mechanical damage and, of course, to abrasion.
There is also smooth skin. According to the characteristics, it is no different from the previous one. Here, as they say, a matter of taste.
Instruments
Before you skin the steering wheel yourself, you need to prepare a small set of tools and materials. We will need:
- rubber adhesive.
- Construction tape.
- Pattern.
- Stationery knife.
- Marker.
- Pencil.
- Awl.
- Pliers.
- Nylon thread (at least one meter is required for work).
- Two (it is recommended that they be semicircular).
Work should be done in a well-lit room.
Getting Started - The First Step
First you need to dismantle without removing it is almost impossible. This is a very labor intensive process. Dismantling will significantly reduce the time of work performed. To remove the steering wheel from the column, use a special puller. It looks like this:

Without it, dismantling will be quite difficult, especially if the steering wheel is removed for the first time. The fastening nut itself is also unscrewed (use the “27” key). Do not try to pull the steering wheel by force, and even more so use extraneous tools. So you only damage the interior elements.
Note! Before removing the steering wheel, make a small mark with a pencil on it and on the column shaft. So when installing the element will not stand crooked.
Step two - sketching
Having removed the steering wheel from the car, we proceed to the manufacture of a sketch, according to which material will be cut out for further application. As a layout, you can use construction tape. We glue it around the perimeter of the steering wheel and cut out the pattern strictly along the lines with a knife. For a sketch to be of high quality, apply adhesive tape in several layers (three to five are enough).

Now we remove the layout from the steering wheel and transfer each marked sector to the material (leather).
Note! Cut the skin is required with a small margin. Leave 1-1.5 centimeters from the edges of the sketch for a seam allowance. The excess can then be cut off, but it will be impossible to restore the missing piece.
Step three - fitting
Now we apply the cut material to the steering wheel.

After making sure that all the lines correspond to the actual size, cut off the excess edges. Next, soak the material in warm water for 20 minutes. With the help of an awl, we make small holes every seven to eight millimeters.
Step Four - Overlay
Now carefully fold all the details in the order in which the overcasting will be done. It is recommended to use for stitching leather (since they are the most durable). Try not to make too much effort so as not to tear the material. Leather, especially perforated, is not only easily stretched, but also torn. Try not to leave wrinkles.

Next, we tighten the edges of our material. It is necessary to fix the wheel so that it is securely held on the surface when stitching. Leather upholstery isn't that easy. The part tends to slip out of hand. Take care in advance that the steering wheel does not move from side to side.
An important point: before the final tightening, check the condition of the material. It should be evenly stretched. Sagging and creases are excluded. They greatly spoil the look of the steering wheel, even with new skin.
What seam to tighten
There are three types of seams:
- Sports.
- Macrame.
- Pigtail.
It is impossible to say that only a specific of these types should be used for steering wheel trim.

Everyone chooses according to their taste. All seams look very organic on the steering wheel. The main thing is to grease the steering wheel when tightening the edges. This way you will prevent premature peeling of the material in case of a seam break. Although the threads are quite strong.
Step five - installation
After the new material has been successfully applied, you need to wait until the glue dries. After an hour, you can install the steering wheel in place. Do not forget to put it strictly according to the marks that were made in pencil. A washer is put on the nut. Further, the steering wheel is assembled according to the standard scheme.

If the car is equipped with an airbag, disconnect the terminal on the battery, otherwise the airbag may shoot. Also connect all sensors so that their signal does not light on the instrument panel at startup. That's all. After installation, you can start full use.
Conclusion
So, we figured out how to properly sheathe the steering wheel with leather. It is worth noting that the process is quite laborious and not every person can cope with it, especially if the steering wheel has a non-standard shape and wooden inserts.
There is always a great risk of improper skin fitting. Therefore, many motorists entrust this work to professionals.
Where is the leather steering wheel? They often turn to specialized workshops. They also reupholster seats, door cards and other interior details. The price of works - from three thousand rubles (including material).
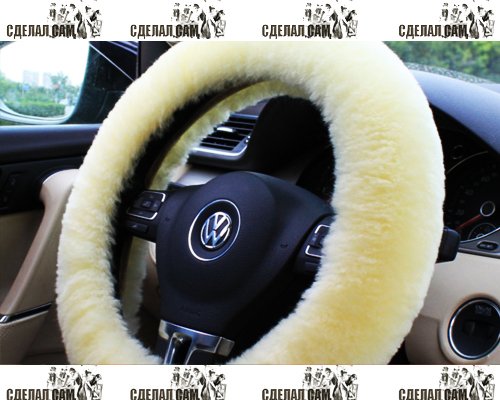
The braid prevents hands from slipping on the surface of the steering wheel of the car, thereby allowing the driver to carry out more precise maneuvers, especially in extreme cases. In addition, it is a stylish highlight in the interior design of the car, emphasizing the individuality of its owner, especially made by hand. Let's consider a master class on how a fur or fur cover is made on the steering wheel. The Niva compact SUV can be purchased at http://auto.ironhorse.ru/category/usa/chevrolet/niva.
Making a Braid Template
First, select the fur that you want to decorate the steering wheel of your car with - it can be mink, arctic fox, or maybe you prefer faux fur. The most practical option would be sheepskin.
Materials, tools:
Roll of cling film.
Wide tape.
Sheets of thick cardboard.
Felt pen or marker.
Sharp knife.
Scissors.
Manufacturing technology:
- To take measurements and cover the steering wheel, you need to dismantle it.
- Wrap the surface very tightly with foil. On top of the film, also tighter, apply several layers of adhesive tape.
- Mark up the details of the pattern, preferably no more than four fragments. Otherwise, it is difficult to sew a large number of small pieces.
- Further, the workpiece with a sharp knife should be divided into parts according to the markings, which need to be held under pressure for some time.
- Place the resulting templates on sheets of thick cardboard. Carefully circle with a felt-tip pen and cut along the contour. Do not forget to number all the details so as not to confuse them in future work.
braid pattern
Tools and materials:
Any kind of fur.
Templates.
Sewing pins.
Cotton threads.
Needle set.
Scissors.
Work technique:
- The cutting of the material begins with fixing the pattern on a piece of fur. To do this, place the fur with the fleecy part below, and the wrong side on top.
- Using sewing pins, fix the patterns on the surface. In order to be able to sew these fragments, it is necessary to leave an allowance of up to half a centimeter around each.
- We sew the details, you can manually, but with the help of a sewing machine, of course, the seams are stronger and neater. The fur edge needs to be overcast so that the pile does not fall.
Fixing the cover on the steering wheel
Tools:
Prepared cover.
Strong threads from kapron.
Hardened sewing needles.
Glue moment.
Thimbles.
Completing of the work:
- Put thimbles on your fingers.
- Sew the edges of the braid as if you were lacing up shoes. The cover should be very tight around the steering wheel.
- Mounting knots must be fixed with glue.
In addition to the design element of the interior of the car, the steering wheel braid made of genuine leather has a number of other useful qualities. Firstly, such a leather cover is always "warmer" than the plastic surface of the steering wheel or covers made of synthetic materials. Secondly, the thickness of the steering wheel increases, which reduces finger fatigue.
It is not difficult to make a steering wheel braid with your own hands. You don’t have to buy leather in the store, just take apart an old leather jacket or bag, cut out three pieces measuring 40cm by 9cm and sew them together. Leather lacing can be cut in a spiral, which will significantly reduce the amount of leather used to make the case.

First you need to measure the diameter of the steering wheel and its thickness. The length of the braid can be calculated using the formula from the geometry course for grade 7 (2PR) or measured with a centimeter tape. The average value of the length of the braid for the steering wheel of a passenger car is within 120 cm, and the girth of the thickness of the steering wheel is approximately 9 cm. But since you will be sewing yourself, do not rush to sew all the parts of the cover at once in a circle. It is better to try on the steering wheel cover before making the last seam, trim the extra centimeters, then it will sit tighter on the steering wheel, with a little tension, which is desirable for such an extensible material as genuine leather.

In addition to leather, you will need a hole punch and a cord, approximately 2 - 3 meters long. Both can be bought in the store, especially since the punch is inexpensive, but it will come in handy more than once. You can make a narrow leather strip instead of a nylon cord and use it not only for lacing the cover, but also for decorating the surface of the braid. A cover with such lacing will be much softer at the junction, and its appearance will be more solid. We will tell you how to make leather lacing below.
Since the steering wheel braid must have at least one connection, we recommend immediately dividing the total length into three equal sections of 40 cm (approximately). First, a long piece of leather (120cm) can only be cut from a whole hide. And secondly, pieces of leather can be combined, for example, two gray, one black or otherwise. You can even make 5-7 or more sectors, but this is up to you.

You need to connect three or more sections of the cover on a sewing machine. Two layers of thin leather can be easily stitched by any sewing machine. The only thing you should pay attention to is the fit of the top layer. To reduce it, place a narrow strip of newspaper or tracing paper under the foot. After the seam is done, the paper can be easily removed.
See Leather Handling Recommendations.

One more moment. Allowances on the wrong side must be smeared with rubber (or leather) glue and pressed for a few minutes. So that the seam almost does not stand out, you can tap on it from the wrong side with a hammer or handles of large metal scissors.
The connecting seam on the front side of the braid can be decorated with two decorative stitches, approximately 0.5 cm on each side of the join line. But it is better not to do this, since the connection will not become stronger from this, but on the contrary, many needle punctures will weaken this area of \u200b\u200bthe skin and over time, tears may form in this place. The braid connection looks quite good without a finishing stitch (photo).
Punch holes for the lacing with a punch. Choose the distance between them yourself, but keep in mind that 1 cm is too small, and 2 cm is too much. Be sure to mark the holes with chalk (on the wrong side) or with a helium pencil on the front side. Holes on both sides should be symmetrical, paired.
See do-it-yourself braided belt.

This diagram shows how to perform lacing. Choose any of them and first try it on a braid without a handlebar and without tightening the cord. Then pull the braid over the handlebar, placing the butt joints symmetrically. For example, one seam at the top, two on the sides. By the way, the wheels must be placed exactly so that the steering wheel is exactly as in a straight line.

The easiest way to lacing is shown in this diagram. By the way, think about how you will lead the cord into the holes of the braid. You can make a hook from a pin, you can buy a special needle with a large eye. In the sewing accessories store, you can also buy a special device for threading thin elastic, cords into a drawstring, belt, etc.
Don't overtighten the lacing right away. It is best to do this when the entire cord or leather strip is completely braided into the case. Then, gradually tightening each stitch, you can evenly and gently tighten the entire lacing.

Leather lacing strips will look much more interesting on the steering wheel than a nylon cord. But for such lacing, 2-3 meters of a narrow leather strip will be required. It is not always possible to carve them out of the remnants of the skin, especially if you make a braid from small pieces of leather. Then take advantage of these tips. Take a piece of skin with a diameter of 8-10cm. Tie a helium pen to the knitting needle (with adhesive tape). Place the point of the needle in the center of this piece so that the pencil also touches the surface of the skin. Start drawing the spiral with a pencil, aligning the needle with the already drawn spiral line. It will be a guide for the needle. In this way, you can carve out a fairly long part of the lacing from a small piece of leather.
The width of the leather strip for lacing should be at least 3-5mm.
5. Cord for steering wheel braid

Leather lacing has a number of technological difficulties. Not only is the lacing quite difficult to cut into perfectly even narrow strips, they still need to be connected together later.
In addition, it is quite difficult to stretch it into the holes, and even so that it does not turn inside out, which will be evident. Indeed, in genuine leather, the wrong side often has not only a matte raw surface, but also a completely different color.
Therefore, it will probably be much easier and easier for you to sew a braid for the steering wheel from two or three pieces of leather, punch holes, and perform lacing with an ordinary nylon cord to match the skin color.
We offer you several ways how you can quickly and easily make a phone case with your own hands from genuine leather.
The steering wheel, as you know, is the link between the car and the driver. And the material that is pleasant to the touch, the comfort on the hands and many other factors affect how the driver feels the car. The steering wheel for the driver is not only the most significant detail, it is also significant in terms of the interior of the cabin. Shabby, torn in places, worn to holes, the material that covers the steering wheel indicates that it is time to change the skin, no matter how familiar and comfortable it may be.
Everyone has different tastes, someone likes a smooth polished steering wheel, someone is covered with almost snake skin, but almost everyone chooses the classic black leather. Any car enthusiast wants individuality, originality and chic. And one of the most popular ways to bring original design to the interior of the cabin is the steering wheel reupholstery. However, it is also an excellent element of car tuning.
It is worth noting that the service finish of the steering wheel is an expensive pleasure. Therefore, the best way in this case is to reupholster the steering wheel with leather with your own hands, which will save money and add individuality. Everything that is done by hand is exclusive in a single copy.
Tightening process

Before proceeding directly to the hauling, you need to decide what material the steering wheel will be covered with and choose its color.
The most comfortable leather to use is perforated leather, it is softer and more elastic, it is more convenient and comfortable to work with it than with smooth leather. While smooth leather has its merits, it is more durable than perforated leather. The optimal thickness of the skin should vary between 1.2 - 1.4 mm.


Covering the steering wheel with leather is not ideal for everyone. Working with leather requires certain knowledge and skills, so such an expensive pleasure as covering the steering wheel with leather should be done by a master of his craft. Otherwise, you can ruin expensive material, as a result, just waste money. Among other things, the most popular steering wheel is leather - it is comfortable, pleasant to the touch and durable.
Video
Below you can see the installation instructions for the steering leather braid:
A photo


