Ways to dry garlic after digging. How to dry winter garlic after digging at home
Despite its specific smell and pungent taste, garlic is actively used by housewives, who flavor first and second courses with it, as well as salads. Gardeners know that difficulties may arise in preserving the harvest, since garlic (especially winter garlic) can become unusable before all of it is used. The easiest way to preserve garlic is to dry it. This master class is designed to tell you how you can make dried garlic at home.
Ingredients:
Winter or spring ripened garlic in heads.

How to dry garlic for the winter in a dryer
For drying at home, select mature, clean, healthy heads of garlic with a whole shell. Garlic damaged by pests, rotten, or with sprouted cloves is rejected. Crushed heads are also discarded. After sorting and rejecting, the garlic is cleared of its hard shells. The “root-butt” is cut off on each clove. If, after all, the garlic has sprouted and you want to dry it, then you should cut out a green sprout from each clove, which is removed along with the core.

Depending on the size of the clove, it is crushed. Perhaps it is enough to simply cut the clove into two halves. You can also cut it into thin slices along or across the clove. The thinner the slice, the faster you will get dried garlic.

Sliced garlic cloves are laid out in a single layer on the trays of an electric dryer. It is recommended to leave a distance between the garlic blades, which will improve air circulation during drying, which has a beneficial effect on drying time.

After loading all the trays, the dryer is closed with a lid and the device is plugged into the mains. If there is a thermostat, the temperature is set within 50-60 degrees. It is recommended to shuffle the trays once every half hour / hour. This is necessary to achieve more uniform drying of the garlic.

Dried garlic at home is left to cool on trays, after which it is packaged in well-sealed containers (jars, zipper bags, plastic containers). It is recommended to store dried garlic in a dry, cool place with good air circulation.

Surely housewives are interested in the question of how to dry garlic in the oven? After all, not everyone has a dryer. Garlic is prepared and crushed in the same way as for drying in an electric dryer. Then the plates are laid out on a baking sheet and sent to the oven, heated to 50-60 degrees. During drying, the garlic should be stirred periodically.


Garlic dried at home can be used to make a powder. Why is it passed through a coffee grinder or the dried cloves are crushed in a food processor or blender. Ground dried garlic, sealed in a container, can be stored for more than a year. You can also use it to prepare various spicy mixtures with other dried vegetables. If the garlic sometimes grinds poorly, then it should be dried (this is possible if it was initially poorly dried or was left in a room with high humidity).

Garlic salt can be made from garlic powder. Take one part garlic powder to three parts salt. It is recommended to rub meat and fish with this spicy-salty mixture before cooking. It will also add piquancy to dishes of fresh and boiled vegetables.
Prepare your own garlic! Garlic powder from the store cannot compare in aroma with the product you make yourself! Bon appetit!
Leftovers so they don't go to waste.
Chemical composition of the product
The composition of dried garlic is identical to that of fresh vegetables. Garlic contains a large amount vitamins and most useful minerals. So, dried garlic is rich in:
- choline;
- vitamins of group B, C, E, PP;
- macro- and microelements: potassium, magnesium, zinc, selenium, copper and manganese, iron, cobalt, phosphorus, sodium.
Dried garlic is a natural source phytoncides, which are involved in the fight against all currently known types of pathogenic microorganisms.
Benefits and harms
Regular consumption of dried/fresh garlic has very beneficial effects on health.
Dried garlic - beneficial properties:
- helps in the treatment of various viral diseases;
- increases immunity;
- provides antibacterial effects on the body;
- participates in reducing blood levels cholesterol;
- prevents the development of diseases cardiovascular systems;
- reduces risk stroke and heart attack;
- destroys helminthic infestations;
- helps in treatment articular diseases;
- used as an adjunct to the treatment of diseases liver;
- warns impotence in men.
With all the advantages of the product, dried garlic contraindicated for use by people suffering from functional disorders of the digestive system, as well as in case of individual intolerance.
How to dry garlic at home?
Preparation
If you decide to dry this root vegetable, you need to choose garlic of certain bitter varieties - Silver, Creole.
The thing is that other varieties, after going through the drying process, can lose your taste, and garlic of certain varieties will remain just as aromatic and tasty.
So, before you start drying the garlic, you need to prepare it. To do this, the vegetable heads should be divided into cloves and peeled.
Important: there is an opinion that peeled garlic is necessary rinse with running water. However, this opinion is erroneous, since after such a procedure it is much more difficult to dry the product, and its shelf life is reduced.
Garlic juice has a very aggressive influence on human skin. Therefore, after the teeth have been cleaned, it is recommended to wear rubber gloves on your hands. For air drying, the prepared cloves are cut lengthwise into 2 parts.
 If drying is provided in an oven or electric dryer, then cut the cloves using a sharp knife across with thin “petals”(you can use a grater to speed it up).
One of the important conditions for preparing garlic for drying is cutting it indoors. with good ventilation, since the substances contained in garlic will very soon begin to irritate the mucous membranes of the nose and throat.
Methods
Like any other product, garlic can be dried naturally or artificially.
Air drying
How to make dried garlic at home? To dry in the open sun, place the chopped garlic on a baking sheet, first covering it with parchment paper, foil or a thick, clean cloth.
It is necessary to lay out the cuttings in such a way that clove core(incision site) was looking up.
This is done so that the garlic no juice leaked out during drying and was not absorbed into the material with which the baking sheet was covered. The natural drying process lasts 5-7 days.
Oven
How to dry garlic at home in the oven? Place crushed garlic cloves in one layer on a baking sheet previously lined with baking paper or foil. Place the baking sheet in the oven, heated to 55-60°C.
Drying is carried out with the oven door slightly open for 30-40 minutes. Periodically, the garlic “petals” must be stirred so that they do not burn. After the allotted time, the garlic is removed from the oven and cooled at room temperature.
 Electric dryer
How to dry garlic for seasoning in the dryer? Drying garlic in an electric dryer gives excellent results - quickly and without unnecessary hassle.
The prepared product is placed on racks and the electric dryer is turned on. at full capacity.
And already after 6-7 hours the spice is ready
How to dry garlic in an electric dryer? Tips for drying garlic at home in an electric dryer in this video:
If you are interested in how to dry at home, or, read our articles about this.
Storage
How to determine readiness? Ready dried garlic crunches and crumbles in hand.
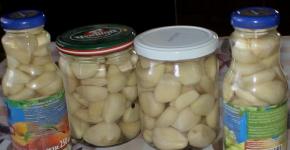
How and where to store dried garlic at home? Dried garlic is stored in a tightly sealed container. glass containers in the refrigerator compartment. Shelf life - 3-5 months.
In order for the product didn't spoil ahead of schedule, it must be removed from the container using clean, dry cutlery.
Dried garlic can be stored the same way in powder form, for the preparation of which the dry product must be crushed with a blender, in a coffee grinder or using an ordinary hand mortar. Garlic powder can also be stored in the refrigerator.
Garlic deserves to be called a natural healer. The combination of the availability of the vegetable and its beneficial properties makes garlic very in demand product. Both fresh and dried garlic should be included in daily diet every person, bringing the aroma of health and vigor into the house.
You can say about garlic the same way as about onions - it is “from seven ailments.” But garlic not only helps to avoid many diseases and cure existing ones, but is also a vegetable that improves the taste of a dish and increases appetite.
Garlic can be stored well at home. But if there is a lot of it, for example, you have your own garden with a garlic bed, but there is nowhere to store it (although there may be other reasons), then the garlic can be dried. After all, this is not such a labor-intensive process as it seems at first glance. Dry garlic also takes up little space and is very convenient to use.
How to prepare garlic for drying
The following varieties of garlic are suitable for drying: Kirovogradsky, Starobelsky White, Southern Violet, Bronitsky, Ukrainian White, Kalininsky, Rostovsky, Creole and others.
If you are harvesting your own garlic, do not water it for several days before digging it up, since the soil must be completely dry. For the same reason, they do not dig immediately after rain.
The garlic must be ripe. This is evidenced by the leaves themselves, which turn yellow and fall to the ground.
If you dig up garlic that is not yet fully ripe, its bulbs will be loose and loose. They will be poorly stored and dry.
But overripe garlic is also not very good, since when it is dug up, the scales are easily separated from the heads, as are the cloves themselves. This makes further processing difficult. After all, the cloves can become stained with soil, and it is not recommended to wash garlic that is going to be dried. Such garlic will take a very long time to dry and may simply become moldy and spoiled.
Only healthy, clean, undamaged and fully formed garlic is suitable for drying.
Garlic is dried by taking it into pieces, cutting it into slices or making powder out of it.
How to dry garlic in a bunch
Immediately after digging, the garlic needs to be dried. Primary drying is carried out directly in the field. To do this, it is pulled out of the ground and left to lie there for several days. During this time, the tops and roots will dry out and the garlic will ripen. The scales will also dry out and press tightly against the bulb. In rainy or cold weather, drying is carried out in a warm room at a temperature of about 30°C for six to eight days.
When the tops dry, they are cut off, leaving a small stump. But most often, garlic and tops are braided into braids and hung by them in a dry, cool room.
How to dry garlic without destroying the bulbs
Garlic is peeled from the upper hard scales without destroying the bulb itself.
Then the garlic is cut into pieces 5 mm thick.
Place on sieves or baking sheets lined with parchment and dry in an oven or oven at a temperature of about 50°C. To avoid steaming or uneven drying, the garlic should be stirred periodically.
Garlic can also be dried in the sun, spread out in a thin layer. But this method is inconvenient because you need to make sure that moisture from rain or dew does not get on the garlic.
Garlic is considered dried when the slices no longer bend and break easily.
The crushed garlic is well cooled by placing it on a cloth or on the same sieves.
The garlic is then winnowed by hand to separate the slices from the flakes.
Ready garlic is packaged in boxes, paper bags, hermetically sealed glass jars and stored in a dry, dark, cool room for about a year.
How to dry already peeled garlic
Garlic heads are disassembled into cloves and completely peeled. The root collar of the cloves is cut off. Check that the cloves are free of damage and brown spots.
Some people advise grating the garlic, but this method releases a lot of juice, which makes drying the garlic almost impossible. You can chop the garlic using a food processor, but the slices should not be very wet. Therefore, the best cutting method is still manual. That is, armed with a sharp knife, the cloves are cut into thin slices and immediately laid out on a baking sheet covered with parchment.
This garlic is dried in an oven or electric dryer at a temperature of 50-60°C.
The chopped garlic is periodically stirred with a spatula and ventilated, occasionally opening the door. This must be done so that the raw materials do not steam and dry evenly. Drying continues for several hours.
Method 2. Garlic is disassembled into cloves, peeled and the root collar is cut off. The cloves are cut in half. They are laid out in one layer on a baking sheet lined with parchment, cut side up. Dry in an oven or oven in the same way as in the previous case.
The drying time depends on the quality of the garlic, the degree of grinding, the drying temperature and the choice of drying unit.
Ready dried garlic breaks easily.
It is cooled in air and packaged in paper bags or hermetically sealed glass jars.
How to Make Garlic Powder from Dried Garlic
Well-dried and cooled garlic slices are ground in a coffee grinder or blender until powdered. Then sift through a sieve so that the resulting powder is homogeneous. You can chop the garlic to coarse crumbs, then the prepared topping will taste good in the dish.
If the garlic cloves do not chop well, it means they are not dried enough. You need to additionally dry them in the oven, cool again and grind.
Store garlic powder in glass, well-closed jars. Shelf life is about a year.
Step 1: prepare the garlic.
The most crucial moment is to chop the garlic so that it is convenient to store later and so that the juice does not leak out of it! You can use different devices. This could be a blender that will chop the garlic into smaller pieces, or you can use a coarse grater. But this will be a real stress for our main ingredient. Therefore, we will reserve strength and patience and chop the garlic with a knife. We take 2-2.5 kilograms of fresh garlic to later get only 0.5 kilograms of dried garlic pieces. But it's worth it! After all, such a product contains many more useful substances than ready-made spice mixtures or bags of garlic powder. So, first, separate the garlic cloves from the head. Using a knife, peel the garlic from the husk. To better separate it from the ingredient, lightly press each clove with the handle of a knife on a cutting board. Place the peeled garlic in a deep bowl.
  Now the important moment! Be sure to wear kitchen plastic gloves on your hands. In the process of working with the plant, it will secrete juice, which in large quantities will begin to corrode unprotected areas of the skin and irritate the membrane of the nose. Therefore, it is better to prepare garlic in a well-ventilated area and turn on the ventilation. Using a knife on a cutting board, cut the garlic into slices across the cloves. Place the crushed component back into the bowl and take the next clove. And so on until not a single clove remains.
 Step 2: dry the garlic.
 There are several ways to dry garlic. Who has a special dryer in the kitchen or you decided to make garlic in the middle of summer and are just going to the dacha, then feel free to dry the ingredient using such a device or at the dacha under the hot sun! I suggest using my grandmother’s old proven method! When the garlic has already been chopped, place each piece on a baking tray lined with food foil. Turn on the oven at 50-55°С and dry the plant within 30-40 minutes. We monitor the temperature so that the garlic does not burn. The finished dried ingredient will be crunchy! After the allotted time has passed, turn off the oven and take out the baking sheet to let the garlic pieces cool. And after that, transfer the garlic into a jar with your hand and close it tightly with a lid. The lid must tightly close the jar, since garlic can be stored for a year. And if the smell disappears from the jar or moisture gets in, the taste and beneficial properties of garlic will be lost, and our work will be in vain.
 Step 3: Serve the garlic.
 Garlic is added to various meat dishes, sauces, salads and soups. It’s not for nothing that the Caucasus is famous for its meat masterpieces, and India is called the land of spices. Therefore, when preparing any dish in which it is appropriate to add garlic for aroma and piquant taste, do not forget that we have a jar of this miracle plant. To make powder from dried garlic, take a few pinches of garlic flakes and put it in a regular coffee grinder. And if you don’t have such equipment at hand, then a blender or a regular hand mortar will also work. Enjoy your meal!
 - – To make the garlic more flavorful, it is better to take hot varieties of garlic.
- – If you still decide to use drying in the country with the help of the real summer sun, then the cooking process will be changed. Cut the cloves into two halves and place them on a baking sheet lined with parchment, foil, or regular cloth, so that the garlic core faces up into the sun. This way the juice will not leak out and be absorbed, for example, into the fabric. Drying time for garlic in the country will take from three to five days in good sunny weather. At the same time, it is necessary to check the garlic for its degree of readiness. If it crunches, it means it has already dried out enough.
- – To dry the plant, you must use ripe garlic. Therefore, after peeling, it is necessary to examine each clove and, if necessary, cut off damaged areas.
- – When preparing garlic in any way, the ingredient must be stirred from time to time with a wooden spatula so that it can dry out on all sides.
Kira Stoletova
Garlic is one of the popular food additives that can retain its healing properties for a long time. There are several ways to prepare this seasoning, but before drying the garlic, you need to follow the cleaning rules and prepare the storage area.

Otherwise, the taste of the teeth will be lost as a result of rotting. To avoid this, you must adhere to a certain algorithm of actions.
Rules for harvesting bulbs
Digging up the crop is an integral part of preparing plants for storage. Improper harvesting of fruits can affect the integrity of the heads, which will cause rapid spoilage of the bulbs.
- The main indicator of crop ripening is the foliage of the plant. As soon as most of it has turned yellow, the garlic can be dug up.
- Also, to determine the ripening of the bulbs, one arrow is left on the bed. The appearance of seeds indicates the readiness of the variety.
- Species that are planted for the winter are usually dug up closer to August. Spring varieties can ripen until mid-autumn.
Plants should be dug up as carefully as possible. First, the bulb is dug up, after which the garlic is pulled out of the ground by the base of the stem. After harvesting the garlic, the soil should be dug up and planted with green manure. If this is not done, the soil will lose many useful substances.
How to prepare crops for drying
Before drying garlic after harvesting, it should be subjected to primary processing. The heads should be cleaned from the soil by hand and dried for a week. Afterwards, the shoots and roots are removed with a knife or pruning shears, leaving a stem 2 cm long.
There are also several rules that must be followed during primary processing. These include:
- Preserving foliage after digging. This will allow the bulb to gain maximum nutrients after drying.
- Accuracy in relation to the harvest. It is not recommended to knock the heads together to shake off the soil. Any mechanical damage to the husk affects the shelf life of the bulbs.
- Lack of moisture. After digging, you cannot wash the garlic - this will lead to rotting of the bulbs.
These recommendations will help you properly prepare the harvest. When cleaning the heads, you can remove the top layer of husk. There are several ways to dry garlic. Their choice depends on the means at hand and the amount of harvest.
Drying outside
This type of heat treatment is the most popular because it does not require additional materials. After initial processing, the crop should be dried outside, weather permitting. The drying process can only be carried out during the day; it is better to hide the garlic at night, since the amount of precipitation increases at night.
Drying garlic lasts from three to five days. This method is also welcomed by farmers due to the increased resistance of fruits to various diseases. However, you need to monitor the sun's rays - under direct ultraviolet light, the heads can get burned.
Experts also advise not to remove excess foliage from the stem. This will keep the cloves from drying out and will increase the beneficial properties of the onion.
Drying indoors
This method of drying crops for the winter is used if the weather does not allow leaving the bulbs outside. Rooms with good air circulation are suitable for drying.
It is also desirable that the room is darkened and the air is moderately humid. For these purposes, you can use a balcony or attic.
Oven drying

In the modern world, an oven is used to dry crops in an apartment. Before drying garlic, it should be completely cleaned of excess leaves and roots, and then rinsed thoroughly under running water.
The cloves are cut into plates a couple of millimeters thick. The slices are laid out on a baking sheet, having previously covered it with parchment or foil. The plates are stacked in one row. The oven temperature should not exceed 50 degrees, otherwise the slices may burn and acquire an unpleasant brown tint. Once dried, the garlic can be ground into granules and stored as a powder. A similar method is used in industrial production, since storing the onion in powder form is convenient and practical.
Drying in an electric dryer
This method of drying garlic at home is considered the simplest, since its use minimizes the risk of spoiling the harvest. To dry garlic in an electric dryer, you should thoroughly peel it and wash it under running water for a while. After this, each clove is cut into two or three parts and placed in special containers in an electric dryer.
The slices should be laid out with the cuts facing up. This will allow the bulbs to dry out faster. Using this method, you can dry the crop in ten hours. This method takes the least time and allows you to dry a large amount of crop. Once dried, the slices can be ground and stored as a powder.
Storage at home
Before drying homemade garlic, you should prepare a place for storage during the winter. It will determine how long the harvest will last. Dried garlic can be stored for several months in an apartment or special storage areas. However, to make the cloves stronger, various additional materials should be used. The most effective are considered:
- kitchen salt;
- paraffin;
- onion peel;
- a mixture of oil and iodine.
Salt
Table salt is placed at the bottom of the jar, after which the container is filled with garlic. Add another layer of salt on top and pull a nylon cloth over the neck of the jar. In this form, the bulbs are stored for several months. You can also add a handful of wheat flour. These components remove excess moisture and help prevent the process of rotting. In addition, they protect the cloves from pests and diseases.