How to decorate the bottle with twine and coffee. Bottle dressing with string
Master Class. A gift with your own hands. Decorating a bottle.
Handicraft from waste material "Fantasia"
Orekhova Vera Alexandrovna, educator MBDOU "Kindergarten of General Development Type № 125", Voronezh
Description: This master class is intended for children of senior school age, teachers, and just creative people.
Purpose: The souvenir can serve as an interior decoration or can be presented as a gift.
Purpose:
Making a souvenir, gift from the junk material with their own hands.
Tasks:
Develop a sense of color, shape, composition;
Develop an eye and fine motor skills;
Foster autonomy, initiative;
Develop visual-figurative thinking, imagination, fantasy;
To cultivate perseverance, accuracy in work;
To develop an interest in arts and crafts;
To cause a desire to do crafts with their own hands.
Some interesting information.
As it has already happened, since time immemorial, people give each other presents. Their size or cost is not important, only the attention that we want to give a person is important. Remind him that there is someone in the world who loves and remembers. Now they are gaining more and more popularity. handmade gifts.The habit of making gifts was instilled in us from the children's bench. All who, when it was in school, remember how girls gave boys postcards for the holiday on February 23. To which the boys in return gave them gifts for March 8. And it didn’t matter what the gifts were, then it was impossible to give gifts, because most of them were made with their own hands at the lessons on labor, which are now called lessons of applied art, and even were given marks for them.
Well, let’s say, an adult person to make a gift with his own hands, if he is not a sculptor or a master in any form of applied art?
Abroad, have long found the answer to this question. There, for example, there are specialized centers where you can practice making gifts with their own hands. At one time, these centers were created to rehabilitate people with nervous disorders, as it is proved that creativity allows us to get rid of the effects of depression and stress. But later they opened the door to everyone. Already the people who got rid of their problems, they liked to make things on their own so much that even after the end of treatment they continued to attend classes and even brought their friends and acquaintances.
In our country, unfortunately, such centers have not yet become the property of the broad masses of the population, and in the few art studios that offer us to make a gift with their own hands, prices are still so high that few can afford this luxury. But you should not despair because progress in the field of creativity does not stand in one place, it is constantly evolving according to our desires.
The solution to the problem of making gifts with your own hands can be a rapidly developing novelty in the field of creativity.
gifts with their own hands.
Handmade gifts, have many privileges over souvenirs bought in the store, their main advantage is exclusiveness. Another plus in favor of handmade gifts is that you can display in your creation the individuality of the person to whom the gift is intended.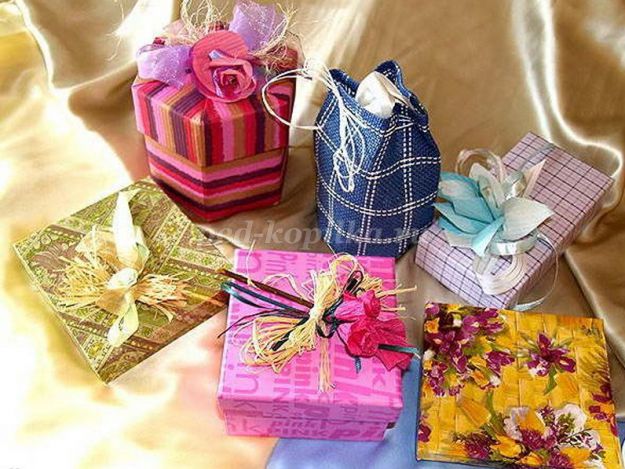
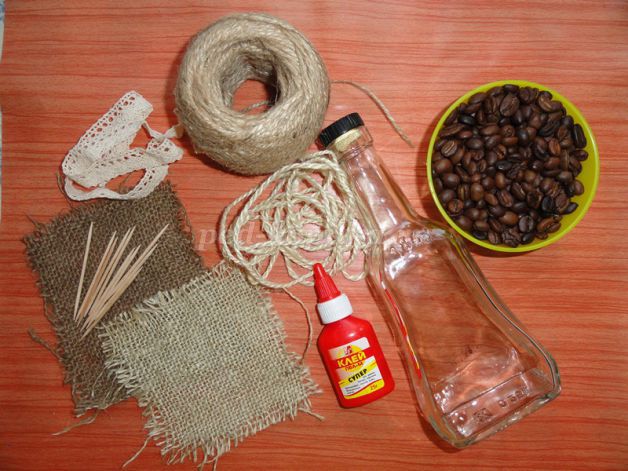
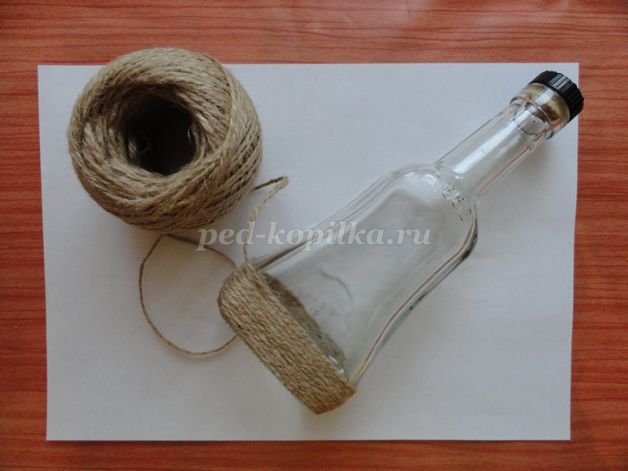
Today, I bring to your attention a master class on decorating a bottle with string and coffee beans.
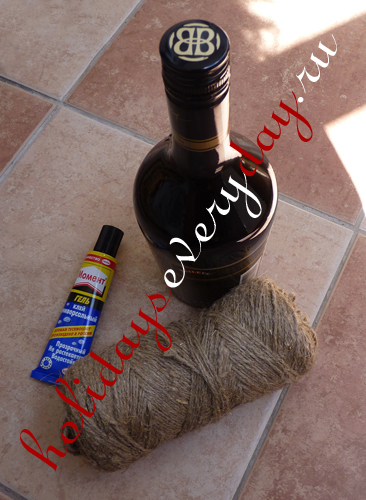
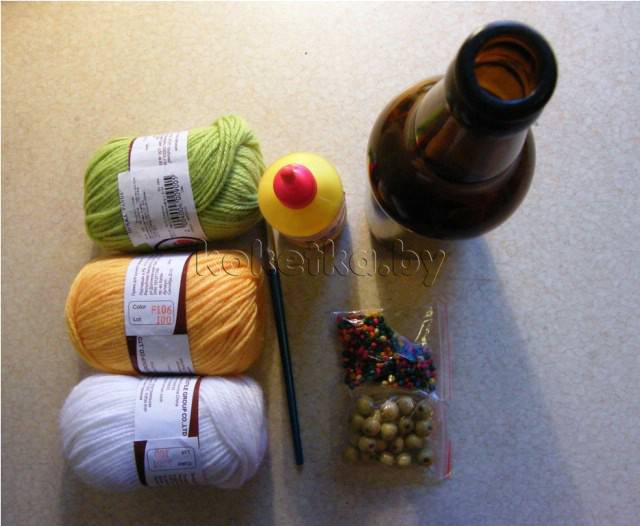
Materials required for work:
1. Bottle;
2. Twine (natural color and bleached);
3. Sticks (toothpicks);
4. PVA glue, glue moment, glue gun;
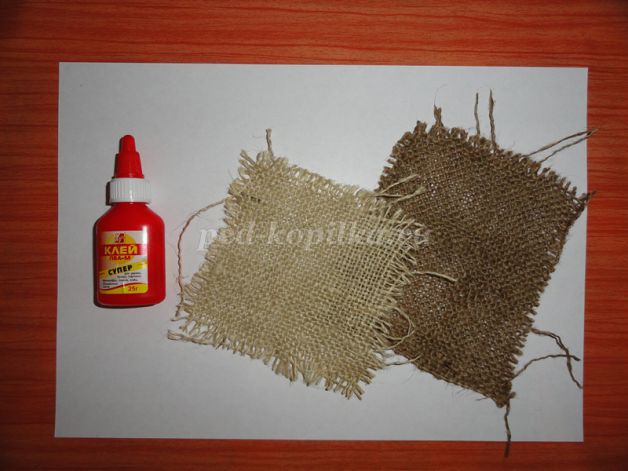
5. Burlap (natural color and bleached);
6. Band.
To whiten burlap and twine, they need to hold some time in a solution of whiteness.
Step by step process of the work:
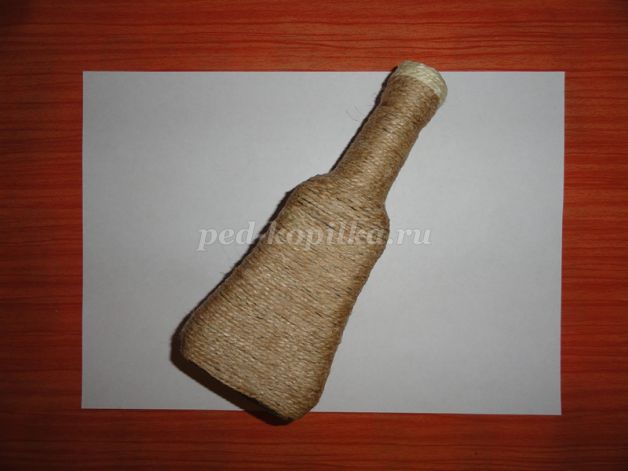
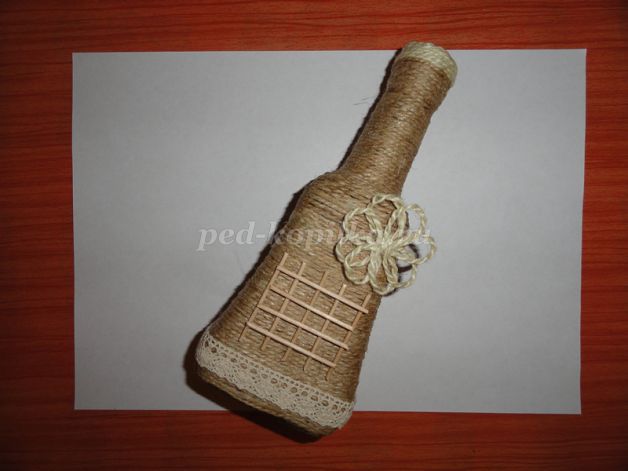
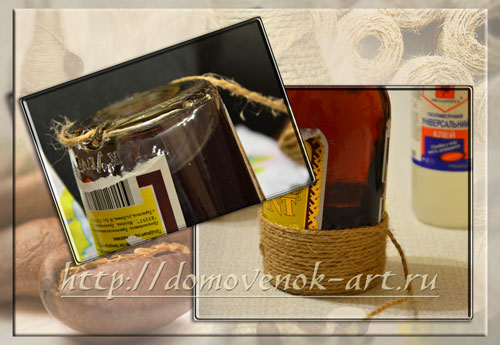
We take our bottle and begin to wrap twine around, smearing the bottle with PVA glue.
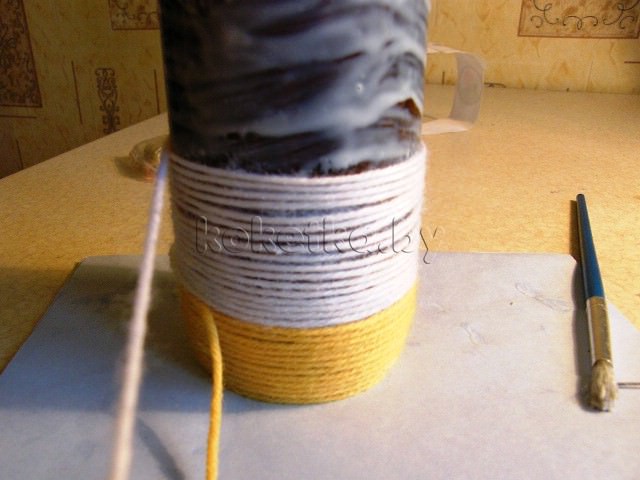
The top can be wrapped with a light-colored twine.
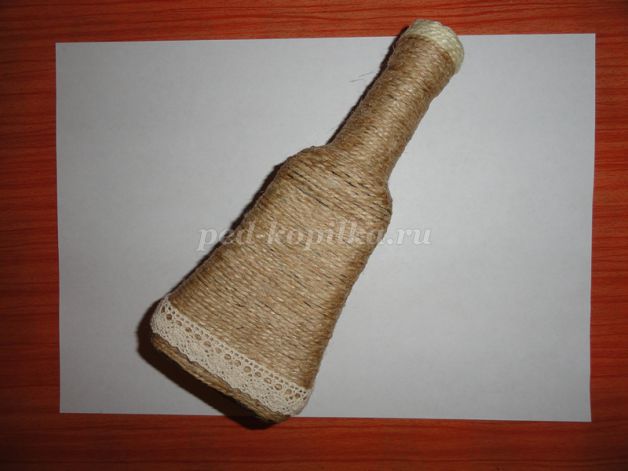
On the bottom of the bottle glue the tape.
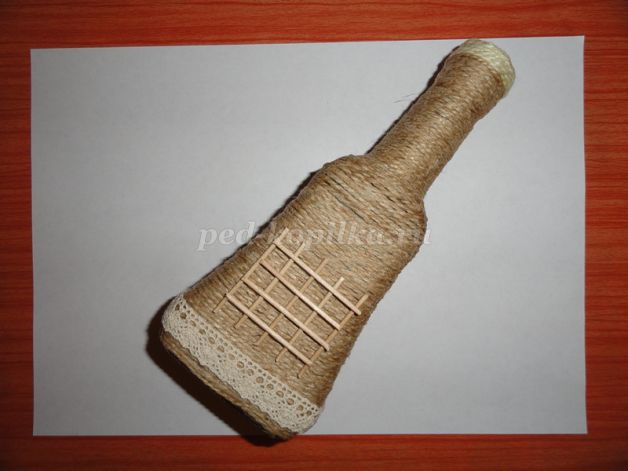
Take sticks (toothpicks) and cut off sharp tips.


Glue on the bottle in the form of a mesh.
From light twine do flower.
![]()
We glue.
Add core.
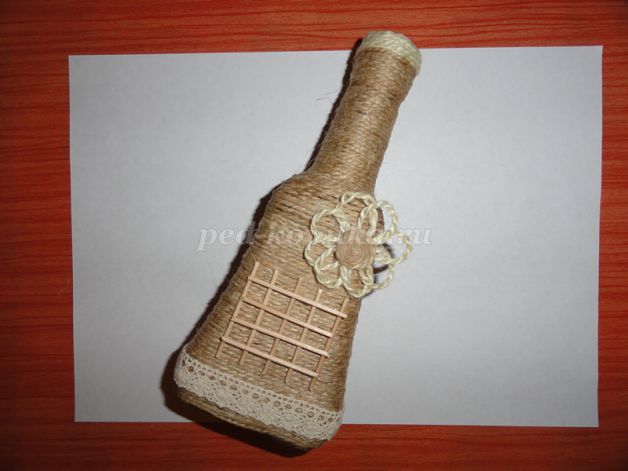
From the twine we make small circles and glue on the mesh.

![]()
Glue the coffee beans.
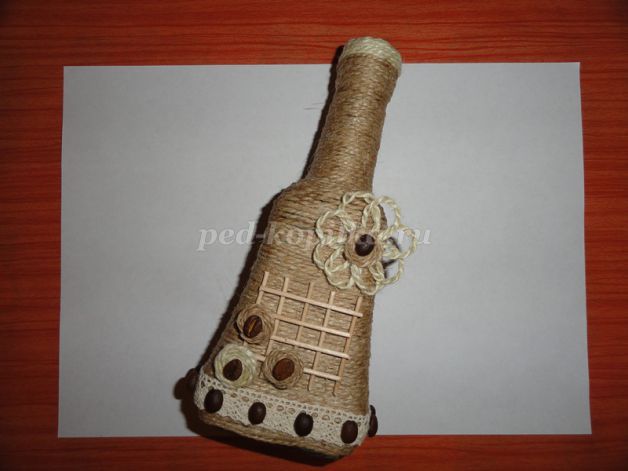
On the upper part of the bottle we glue the tape.
We take the sacking and glue of PVA.
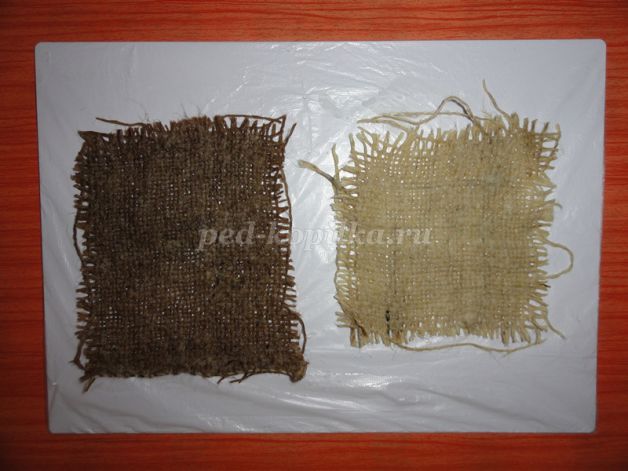
Good soak glue burlap.
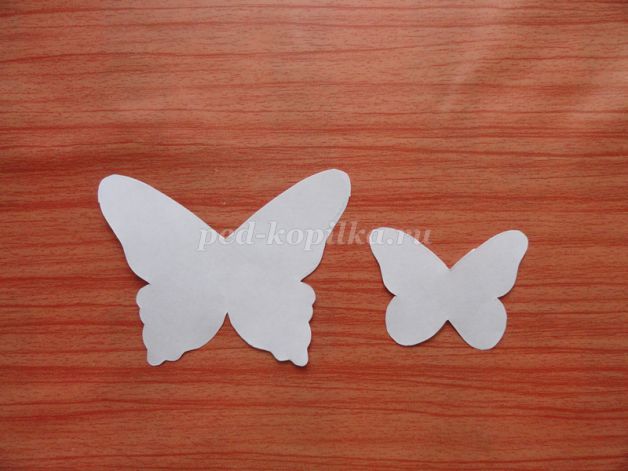
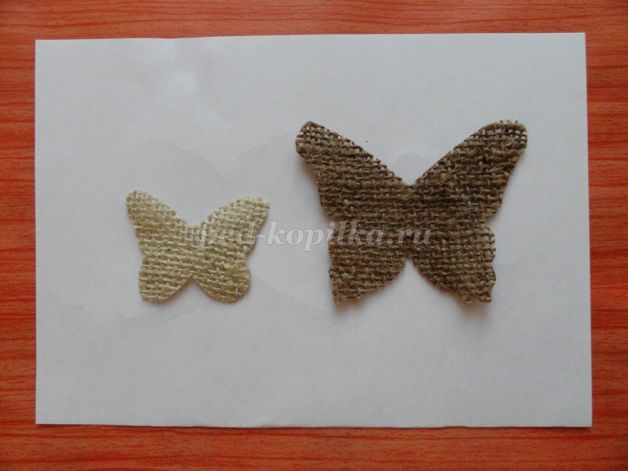
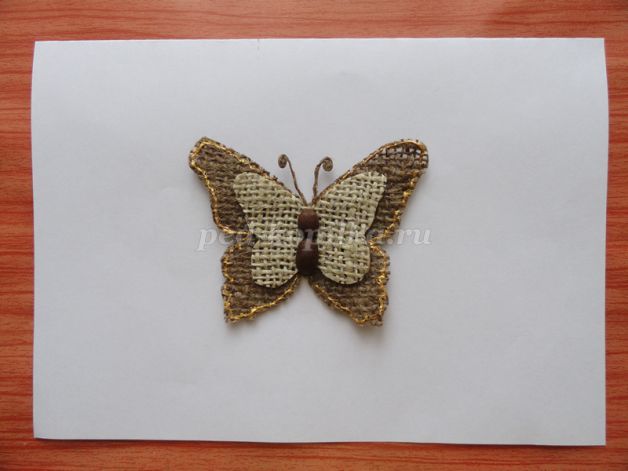
While the burlap dries, we are preparing patterns for making butterflies.

Cut out.
When the burlap dries, it will be tight, and it is good to keep the shape, not to crumble.
Attach butterfly patterns and cut out.
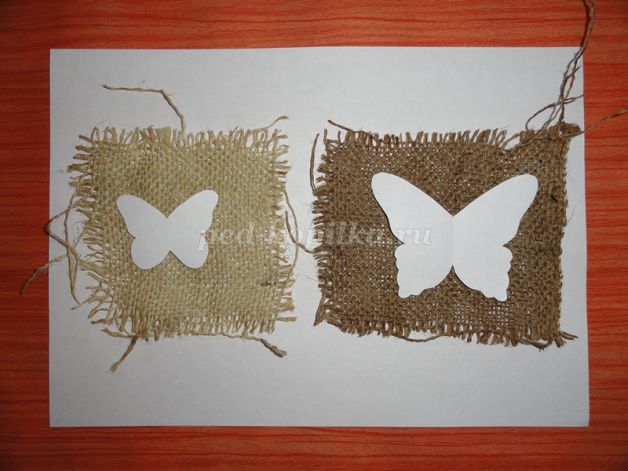
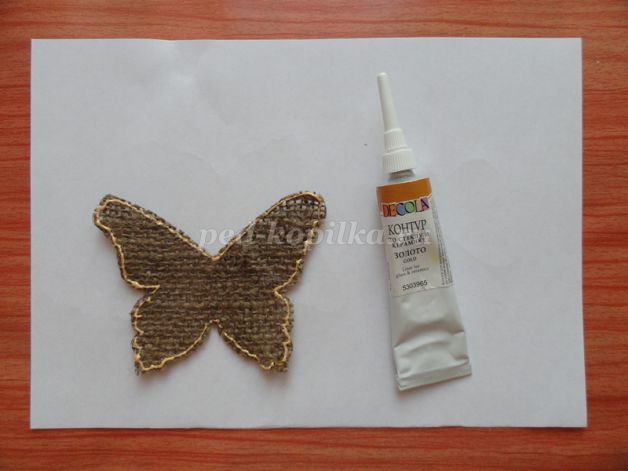
On the edge we apply the contour of gold color.
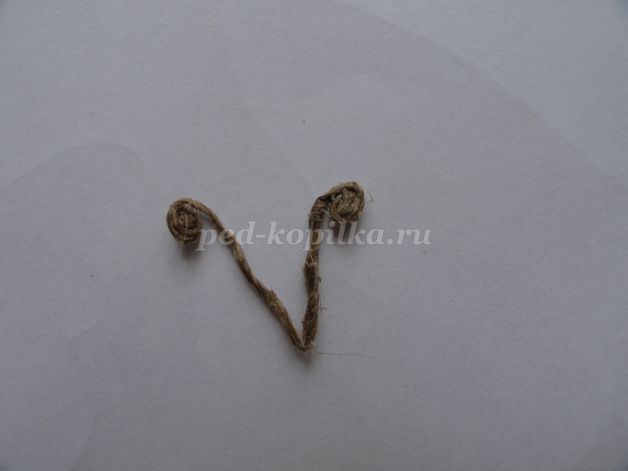
Make the antennae for the butterfly.
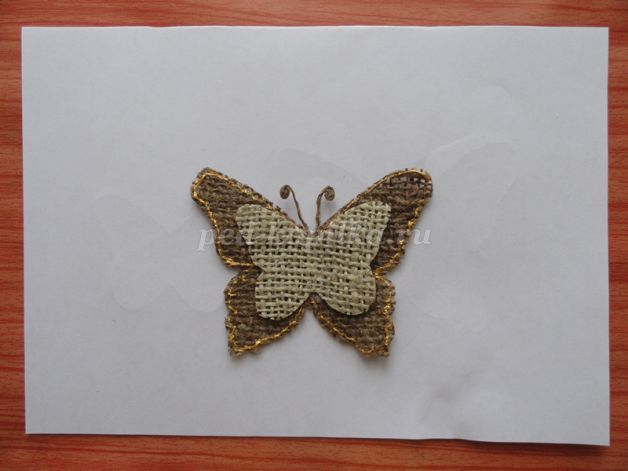
We glue all the parts, in the middle we glue the coffee beans and the butterfly is ready.
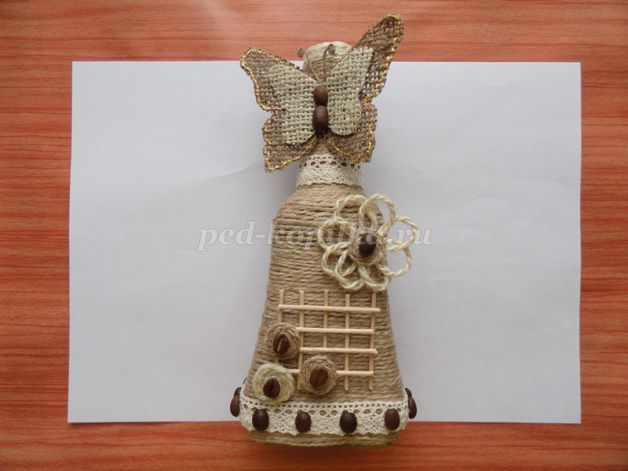
Glue it on the bottle.
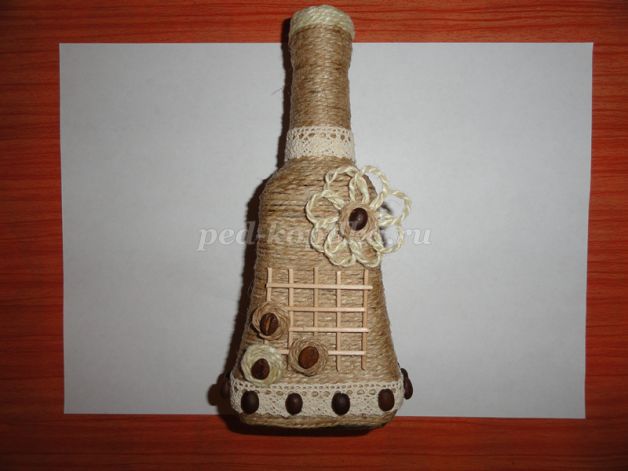
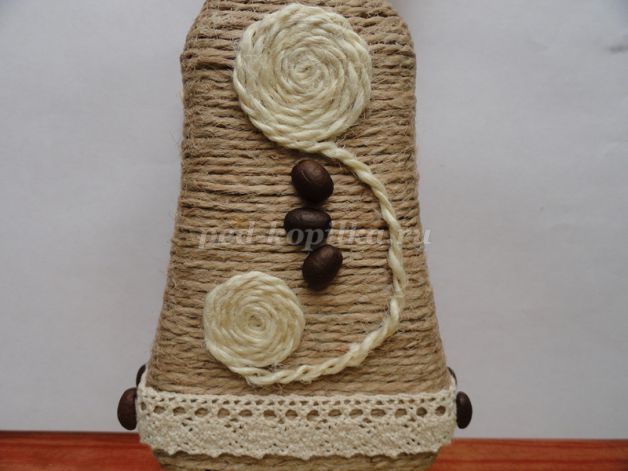
On the other side of the bottle of twine of light color we make and glue the pattern.
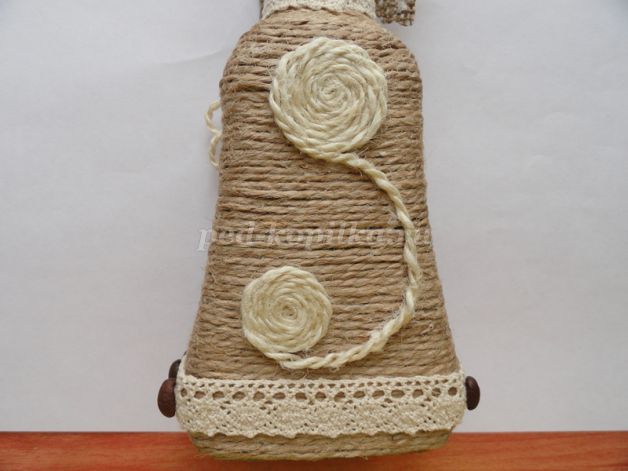
Add coffee beans.
Cut out circles from burlap.
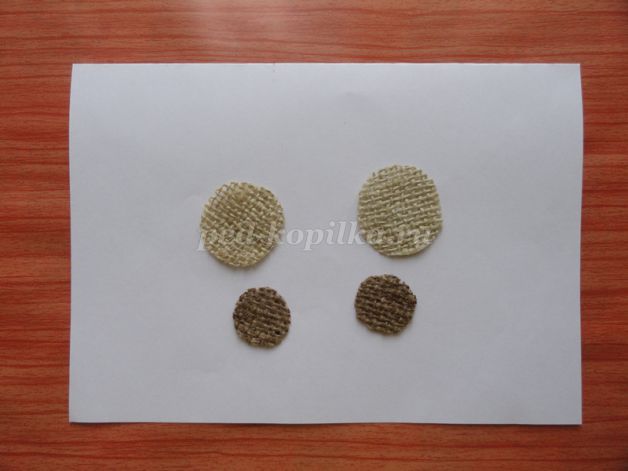
We glue.

Glue on the side of the bottle, add a coffee grain.
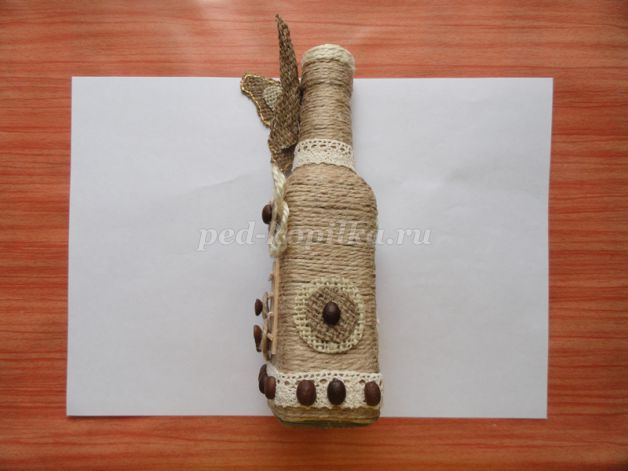
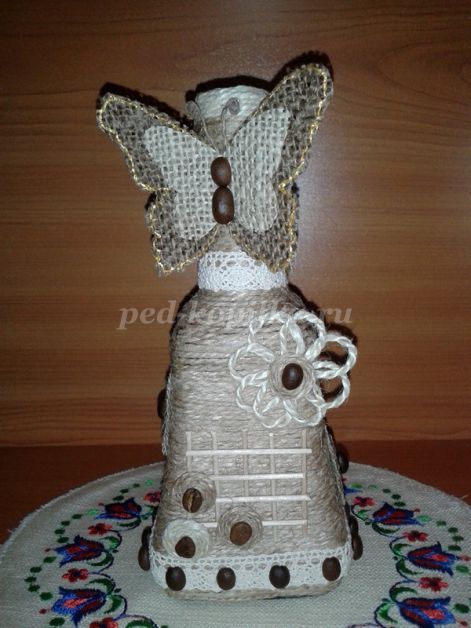
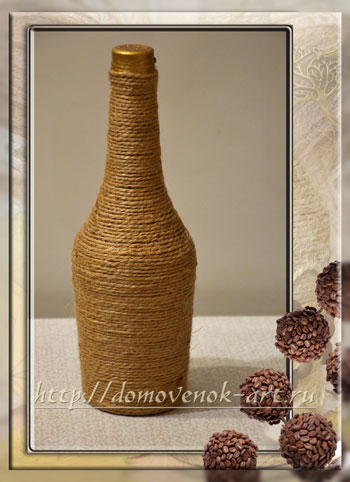
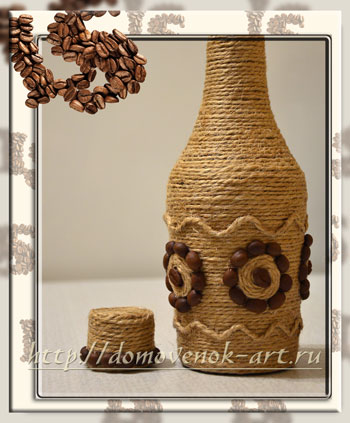
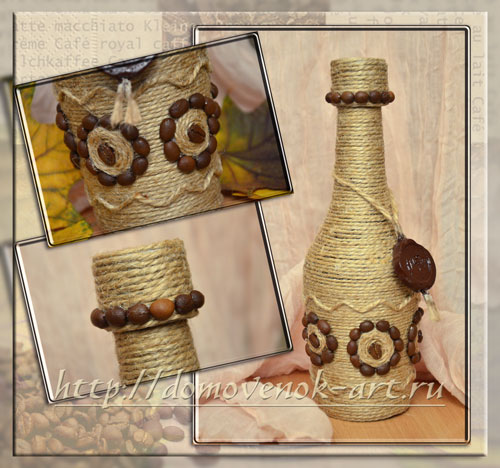
We got such a coffee-jute bottle.
Hello everyone! Holidays and more holidays! It is with this motto that we live the second half of February - the beginning of March. You did not have time to bestow your beloved valentines, as you immediately need to think about what to give your man on February 23 (and to someone for his birthday).
In today's master class you will see how to quickly make original gift for a man with his own hands. Not sure what to give? Universal option - a bottle of something! But just to give a bottle is pretty boring and trite. After all, the gift must be with the soul. So, we need to do a small miracle with our own hands - to decorate the bottle.
There are many ways to decorate tara: it is decoupage, and cereal, pasta, and burlap, and much more. I decided to stay at bottle dressing with string. Already repeatedly wrote how I like this material. It looks gorgeous, this is an excellent material for weaving small baskets (here, by the way, a master class on this topic:).
And now in the piggy bank using this material, you can add bottle decoration with a string. I really like the fact that the design work is quite simple, you do not need to know a lot of subtleties, and the materials are all available. And the result is simply beautiful. Well, see for yourself.
For the decoration of bottles with string we will need:
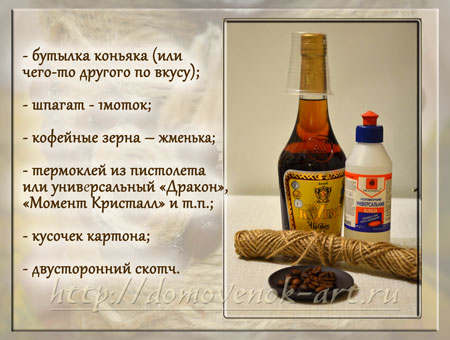
First of all, let's remove the stickers first. It is not necessary to clean everything under zero, it is enough to tear off where it easily leaves.
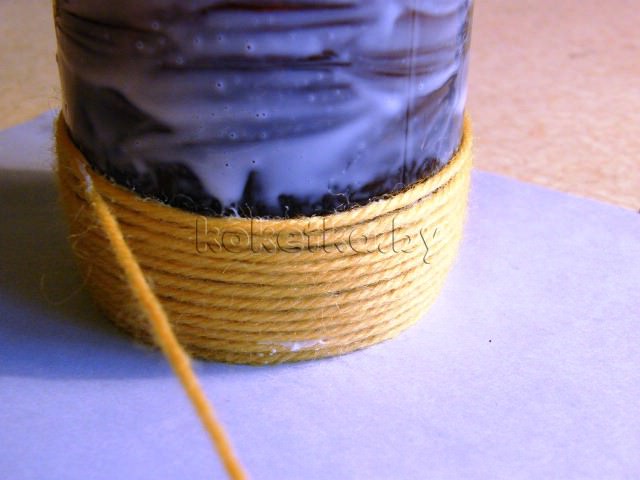
Dressing bottles with string start from the bottom. I was lucky, on my bottle there was a small depression on the side of the bottom, just what we needed. Glue the tip of the twine in this groove, put the thread on the wall.
Glue the bottom of the bottle and begin to tightly glue the string around. I do not recommend smearing the whole bottle with glue right away, make everything gradually better.
We bring the twine to the top. That's what we do. I did not decorate the bottle with a string up to the neck, because it is still sealed. Thus, it is necessary to leave room for opening the lid.
I agree, you have to do something with riding. I propose to make a small cap - cap. She will just put on the bottle on top. The process of creating a cap is very similar to the manufacturing process or
We measure off a strip of cardboard about 3 cm wide and a length corresponding to the girth of the throat in the place where the twine is wound.
We fold this strip into a ring, I used double-sided tape to fix it. You can use the usual glue.
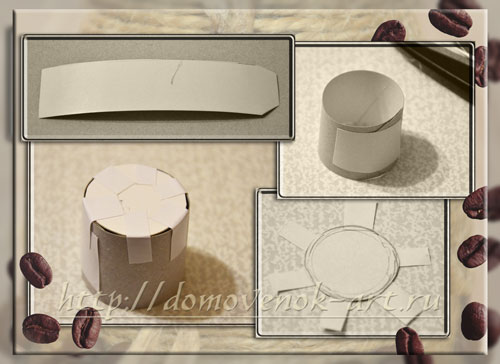
Draw a circle on cardboard with a diameter equal to the diameter of the hole of the resulting cylinder, cut out. Glue the circle using strips of double-sided tape to our cardboard ring. No scotch, use thin paper.
Before proceeding to the further work on decorating the bottle cap with a string, remove the protective strips from the adhesive tape. And now we apply universal glue first to the center of the cap. Glue the end of the twine. And then circle around the entire surface of the lid.

How to decorate the bottle decorated with twine
For the decoration of this bottle with twine, I decided to use coffee beans and, in fact, the twine itself, which at the most suitable moment began to end. Therefore, I present to you the economy version of decorating the bottle.
First we glue two waves above and below. Then we twist from twine here such 5 ringlets, naturally with the help of glue.
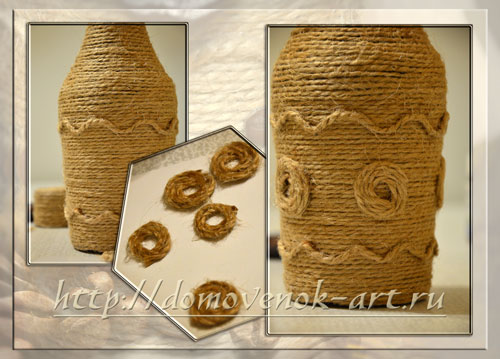
Slightly dried rings are glued to the bottle with equal pitch.
Now it's coffee beans. One grain is placed in the center of each ring and several grains of suitable size around.
In general, this is where my splits ended. Therefore, for the decoration of the lid, I had only coffee beans.
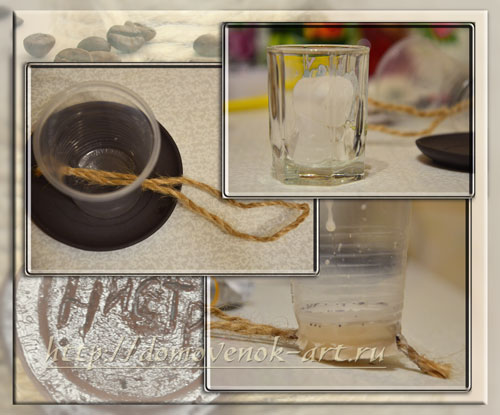
And another little thing: I should write after all, what kind of drink inside. Let's make it in the style of wax seal. For making we need a candle, a cup, a small piece of twine, as well as brown wax crayon or acrylic paint.
On the water bath melt a piece of the candle. Then either crumble into melted paraffin, brown wax crayon, or leave as is.
In the cup we make 2 holes opposite each other, we thread twine in them bent in half. Fill the wax in a glass and put in the fridge.
After full hardening the glass we tear. With the help of a wooden skewer we apply the necessary inscriptions. I decided to dwell only on the name of the cognac “Nistru”.
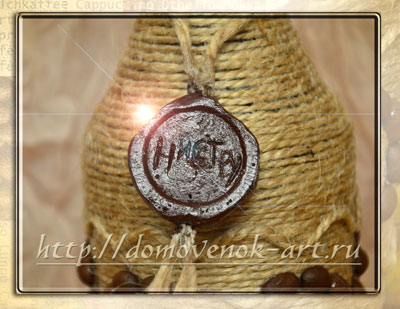
I didn’t have chalk, so I painted the finished seal with brown acrylic paint. We hang it on our bottle. Now the original gift for a man is ready with his own hands! In my opinion, very good and certainly non-standard.
Agree, bottle decoration with a string is not such a difficult and costly task. But how much joy can be delivered by giving such an exclusive! What do you think? Have you ever made out the bottles (and not necessarily the twine)? Share your experiences and thoughts in the comments below. And if there are photos of the finished bottles, we’ll be happy to take a look at them.
Merry you creativity! And come to visit for new ideas!

With love, your little Elena.
How to make a designer object from an ordinary glass bottle? There are many ways. In this master class I present a way bottle dressing with string. It seems to be a coarse material - twine, but it gives the bottles a special charm of antiquity, a summer motive. And most importantly, to make such a vase under the force of each.
We will need a nice or not very glass bottle or jar, hemp twine, Moment glue-gel. Available materials, right? If you take a coffee can, then you get a pencil holder, a flower vase or a decorative object, etc. comes out of a wine bottle. In any case, your product will look original.
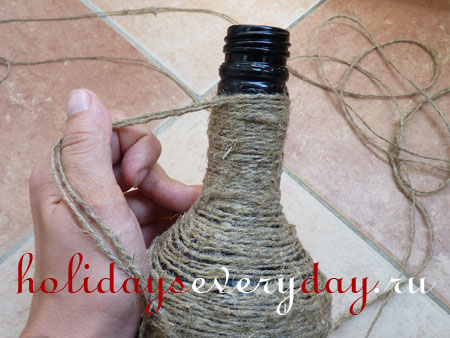
Begin the process of decorating the bottom of the bottle. We smear the line near the bottom with a thick layer of glue.
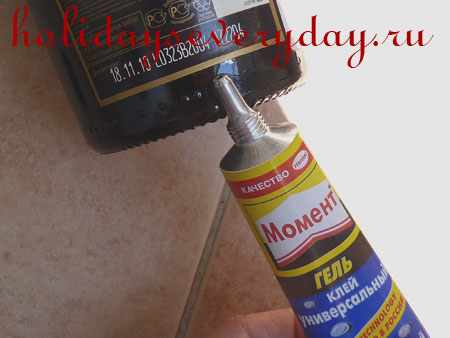
Gently glue one end of the twine, and begin to wind it on the bottle in a spiral, gluing along the very edge.
We continue to twist tightly twine, adding a drop of glue in 2 -3 places a bottle on each circle.
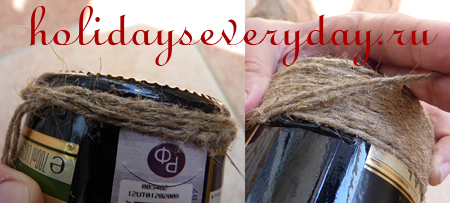
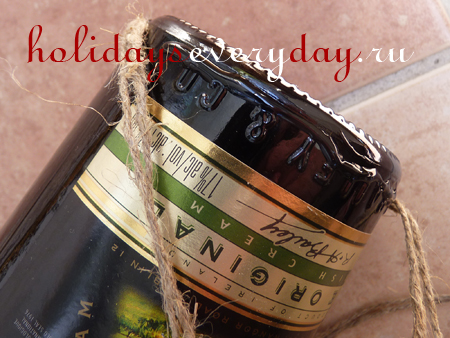
When we reach the narrow part of the bottle, it is necessary to coat the neck with the glue over the entire surface onto which the next string of twine will glue. Pull the thread so that there are no gaps.
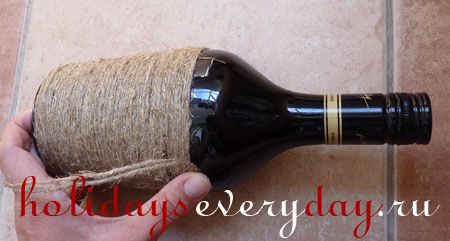
Decorate the neck tightly wrapped with a cord. In this case, it is better not to glue the glue, so that the harness holds well.
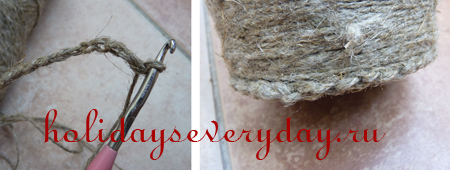
Bottom bottles will make pigtailscrocheted from twine thread. Take the hook number 3 or 4. When you knit a pigtail, try on it to the circumference of the bottom of the bottle so that there is no excess tip or, conversely, there is not enough pigtail.
Glue the pigtail to the very edge.
Now decorate the bottle. Here you can show imagination. I decided to draw a bottle of curlicues. Cut off seven identical strips of twine. Each part twisted into a spiral. Spirals curls pasted to the bottle, and in the center of each spiral glued coffee grain. I decorated the bottle cap in the same way. I left the bottom of the bottle without decor for sustainability. But if there is a desire, you can glue the twine in a spiral to the bottom.
And this story began with the fact that I, cleaning the house, broke my favorite vase. As a result, I have left all sorts of glamorous, with flowers, donated by people who have a weak idea of my taste. And then I remembered that you can make a vase with your own hands. Having reviewed a lot of ideas on the Internet, I saw what I was looking for - vases from a bottle in a twine winding. And as an Ethno lover, I immediately fell in love with them.
And then, in search of ideas, I dug up a lot of interesting things related to the twine and thread trim. And she took everything away to her place for ideas. So, in my bins were ...
Capacity
The most popular item, which is decorated with the help of threads or twine, is various containers for flowers. At the same time, anything can be used as a basis. As a rule, high, narrowed juice bottles, glass jars, and plastic containers are used to create vases in a winding of twine. Tanks for bulk products are excellent. In short, everything that you can then put the flowers.
Most often, needlewomen choose round-shaped containers - they are easier to wrap. But if you adapt, then even more original vases are made from a rectangular pot.
Winding
As I have already said, twine is used as a finishing material for handmade vases.
But not only. You can wrap the bottle with any colored yarn or with thick enough threads. A bottle in a colored winding may already be in itself a decor, even without flowers.
Winding may be monochrome. But if you use threads of different shades, you get an incredible beauty.
Mounting method - on glue
I found at least two ways of attaching a cord or twine to the surface of the bottle. The first method of finishing is very simple. It is necessary to wrap the container from the outside completely layer by layer with thread or twine. To fix the threads on the surface of the dishes used glue. You can PVA, you can "moment." But in the building stores there is a special glue.
Capacity is completely greased. Apply glue to gradually as wrapping. This is necessary to ensure that the glue does not have time to dry out. Then on the surface of the bottle we wind in a spiral twine (cord or thread). It is more convenient if the reel with the threads remains fixed, and you rotate the bottle along the axis, then the twine is wound as if by itself. When winding, the thread should be well tightened, and the layers should be pressed tightly against each other so that there are no gaps left. Exception, if the gaps of a certain width are provided in advance in the decor.
The thread must begin to glue from the bottom of the pot. Initially, the circle behind the circle completely closes the bottom, and then you can proceed to pasting the base. Thus we cover the entire surface of the bottle. From time to time we glue the bottle with the glue so that the string is glued. Make sure that the layers that are already wound do not move. We press them with a palm to fix it better. We cut the rope (twine, thread) near the neck and hide the tip under the last 2-3 layers (gently moving it with a needle or a thin needle).
That turned out to be a vase. And maybe not one - if there were several bottles.
Fastened to double sided tape
There is another way to fasten the twine - double-sided tape. In this case, the bottom is not closed by winding.
Attach a strip of adhesive tape to the two sides of the bottle vertically. Remove the edge of the paper tape covering the tape below the bottle. We wind the twine in a spiral, tightly pressing it in those places where it touches the scotch. Also we pay attention that there were no gaps. Thread or twine need to tightly tighten to winding held better.
When the winding reaches the neck, you need to cut the twine in the place where there is an adhesive strip to secure the tip of the thread.
Finish
In principle, I like the bottle in the winding by itself. But it can be decorated. Anything is used for decoration. Parts are glued to the surface with glue.
Excellent look as decorative elements of shells, pebbles, buttons, cones and much more.
I especially liked the decor of dried flowers. 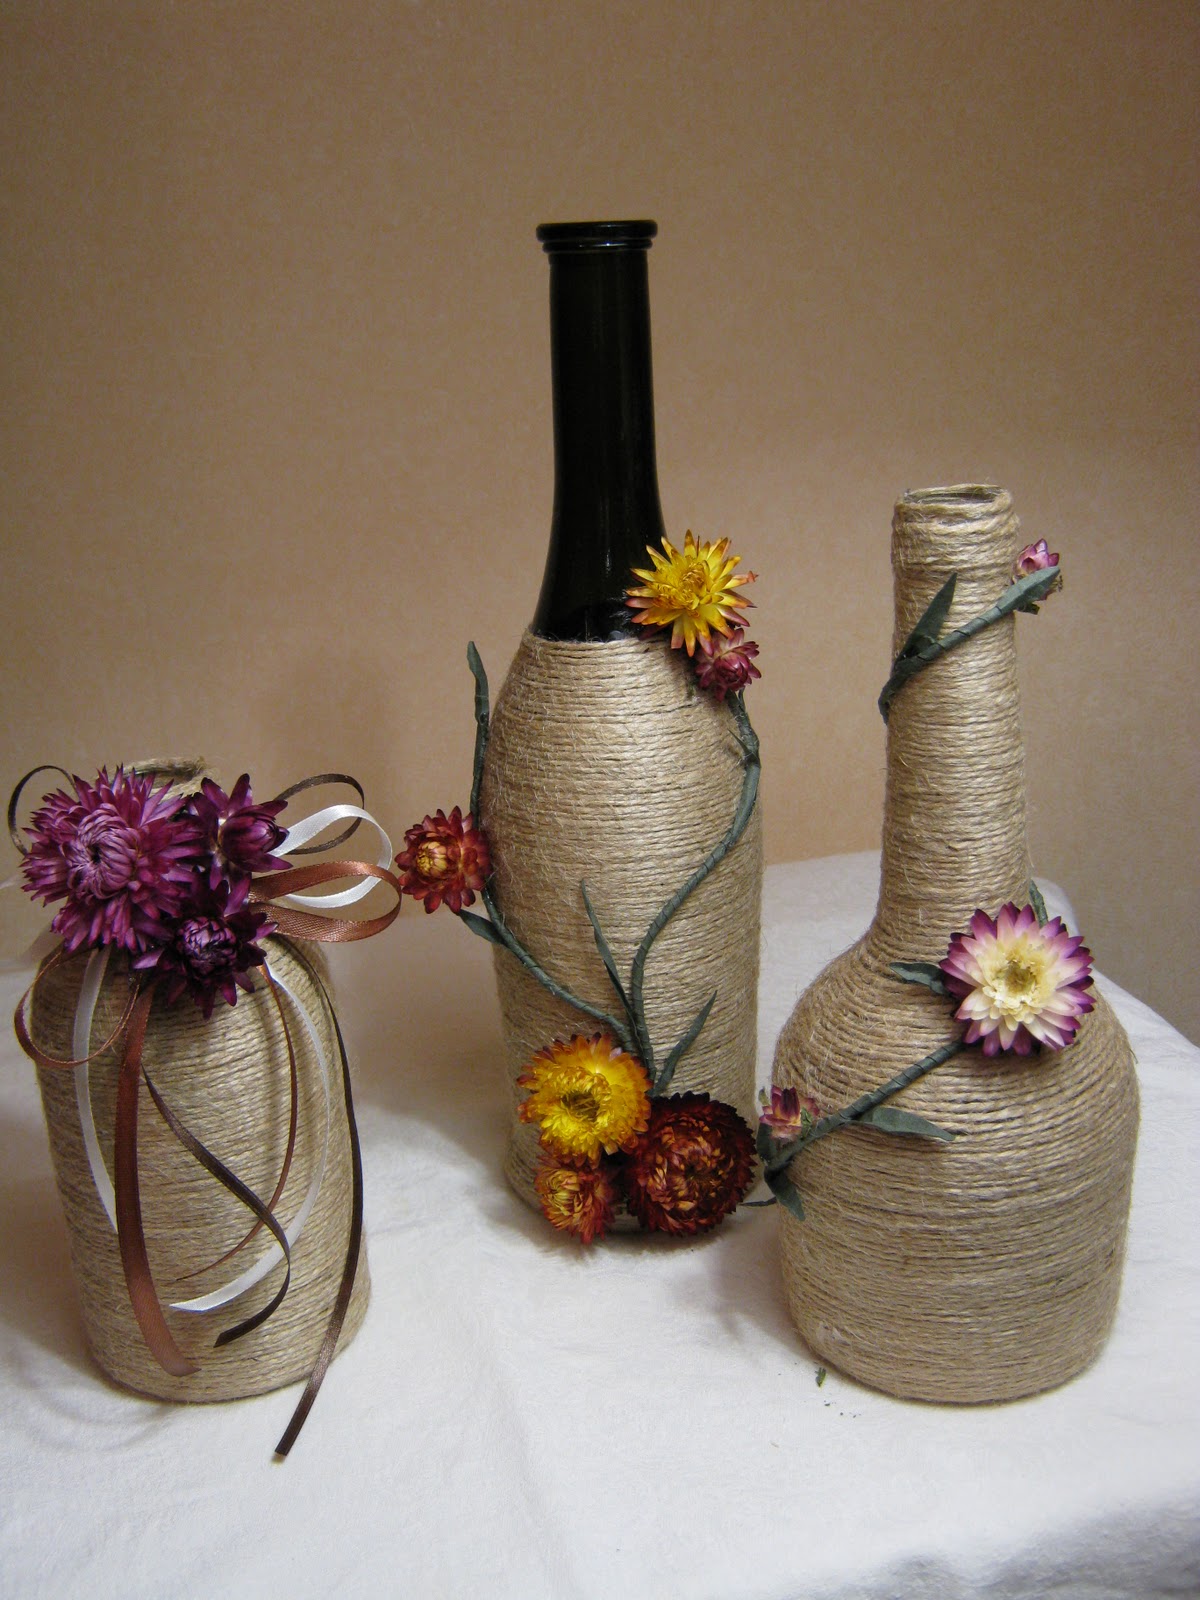
Colored handmade vases from bottles are also beautiful and without decor. But the decorations will make them even more original.
Craftswomen who know the art of decoupage can combine the finishing in this handmade technique with a cord winding.
Of course, to limit one vase from a bottle is very difficult. Surely, if you have enough twine or yarn, you wrap a few bottles a day. And this is quite logical. Firstly, one such vase in the interior looks, to put it mildly, not very. But a few will make a great ensemble. Secondly, it is better to combine such vases with other elements of decor in Ethno-style. For example, I wanted to make not only a vase, but also a box wrapped with twine, and it would be interesting to decorate flowerpots in this way. But this is a slightly different story.
Surely many homes have empty bottles that are not thrown away for various reasons. so that they do not stand idle. We offer you the option of how to decorate them and turn them into an interior detail. - this is no news to anyone. However, it is not always clear how this is done. We offer you a master class on this topic.
You will need:
- bottle,
- thread,
- pVA glue,
- tassel, beads.
Check the size of the hole in the beads, it should pass the thread. And remember: decorating bottles with threads is a very painstaking exercise, requiring special perseverance.
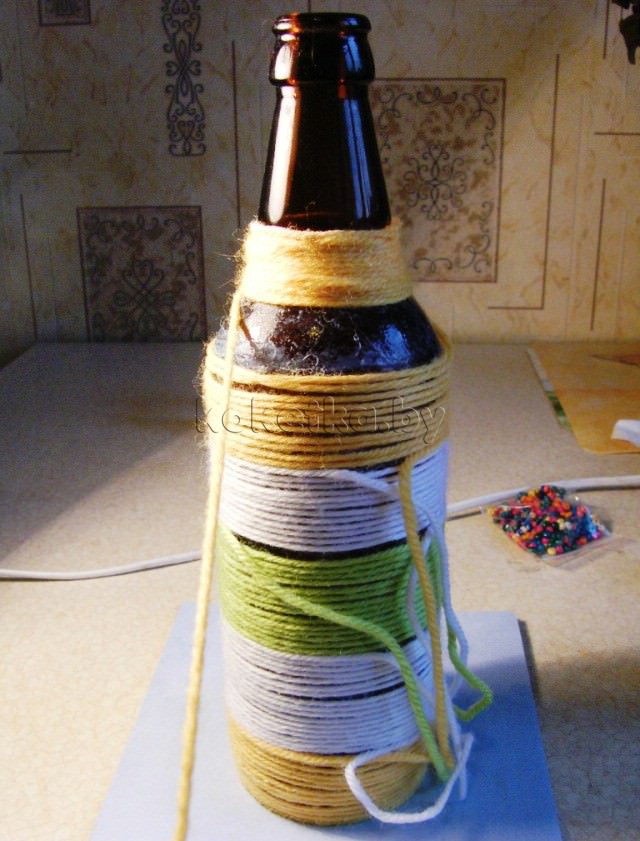
So, first of all we treat the surface of the bottle with glue. Try to apply it as evenly as possible. It is not very thick, otherwise the thread will get dirty.
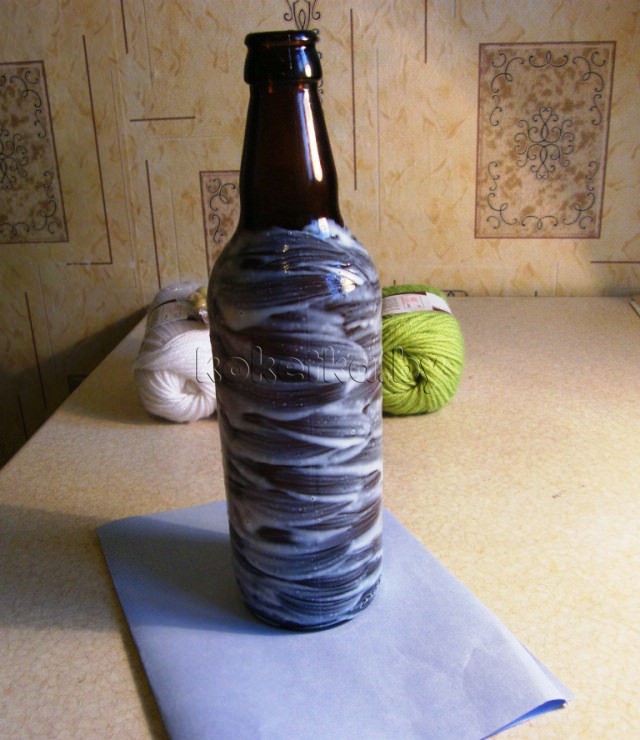
Now we begin to wrap the bottle with threads. To secure the first circle, hold the thread tip with your finger.
Do not be afraid that cracks may form between the threads. You can wrap the bottle with any number of layers.
When the turn of the neck winding comes, the threads will begin to slide off. Let them do it and start winding the neck as the thread will wind it itself. That is, do not interfere with the natural course of events.
After winding up the bottle, you can begin to decorate it with beads.
As you may have noticed, we still have threads on the place where the docks of various colors dock. We will fasten the beads on them, tying the remains of threads on the knot.
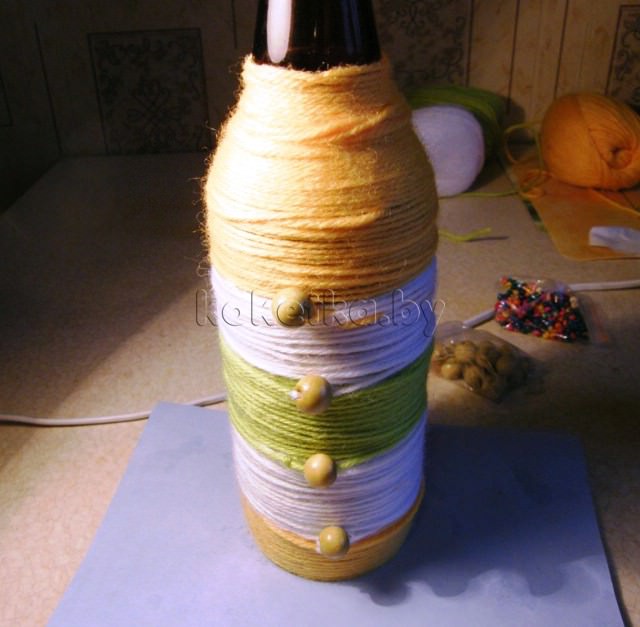
The bottle is ready. You can use it as a vase, as a storage container, for example, knitting needles, and so on. To make the bottle look more original, you can use threads of different widths and densities. Also, you can choose absolutely any shape of the bottle itself.