Decoration bottles of sheet music. Making a special holiday - do-it-yourself bottle decoration
In order to turn ordinary glassware into a masterpiece of design art, we will need:
- Acrylic paints.
- Tassels
- Capacity with water.
- Varnish to secure the picture.
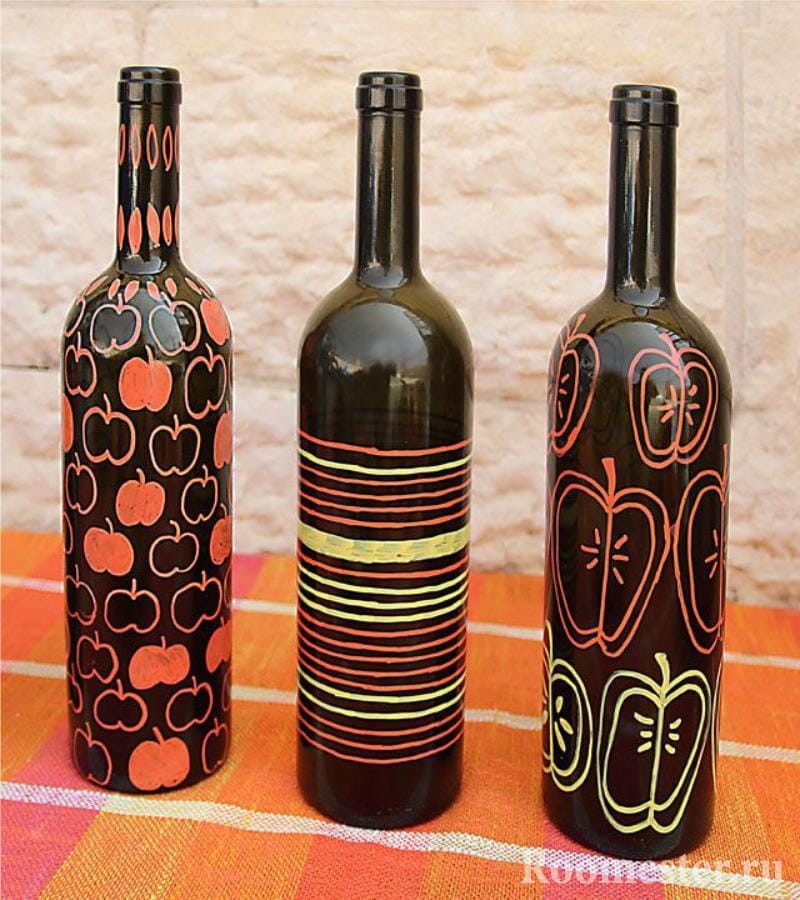
To get exactly what is seen in fantasy at the planning stage, you should act a clear plan, then the beginner will cope with the task for 5+:
- Carefully wash and clean glass and labels.
- After drying, primer paint the color that will become the main background of the picture.
- We apply contours on the dried paint. You can draw anything - perhaps the idea will be given by the form of the tank itself or the interior in which it is supposed to be placed.
- Fill the contours with flowers, bring the drawing to perfection.
- We fix the image with the help of varnish (water-based varnish is optimally suitable).
How to apply such a decorative object is also a matter of fantasy. Today there are many interior ideas where bottle decor will be appropriate.
![]()
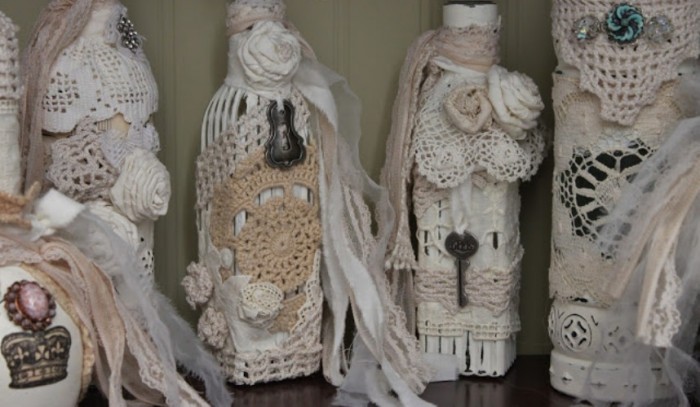
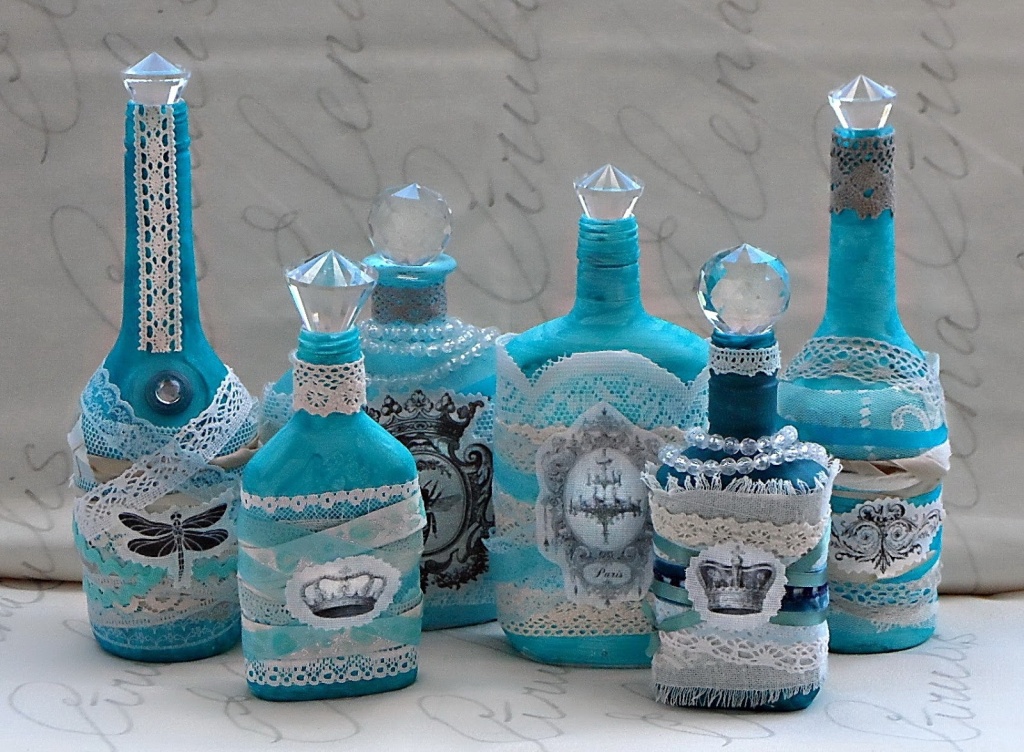
Lace - one of the favorite materials of needlewomen. They can turn even the roughest things into tender and mysterious things.
To make the decor lace, you will need:
- Glass bottle of any shape.
- Acrylic paint.
- Lace, old curtains, napkins, strips of fabric.
- PVA glue.
- Scissors.
- Decorative details - beads, cameos, rhinestones, etc.
Decorating glass containers with lace is simple, the main thing is to apply fantasy. Everything will turn out perfectly from the first time, if you follow the instructions:
- The surface is the same as in the previous version, my, cleaned of labels and glue, dry and paint in the base color.
- We think over the composition. Excellent look combination of several types of lace or lace and coarse fabric, coarse rope.
- We measure materials and cut off the necessary piece.
- Glue the lace on the glass using PVA.
- After the glue has completely dried, we finish the decor with beads, rhinestones, cameos, etc.
Such a bottle will be an excellent gift, for example, for a wedding, if there is champagne in it, and imitation of rings on it.

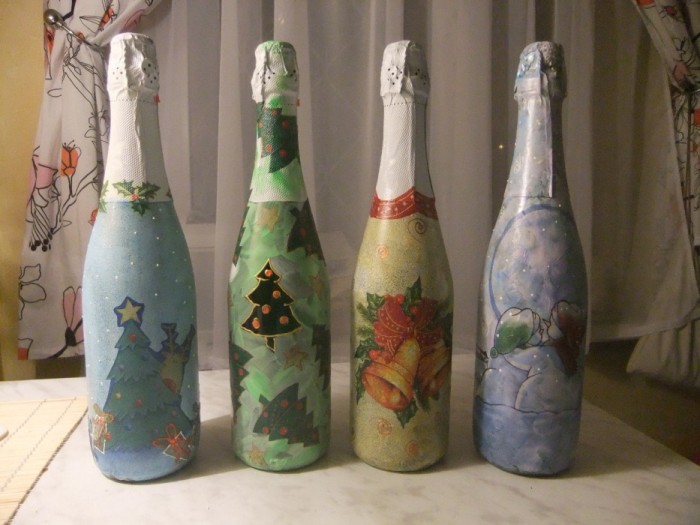
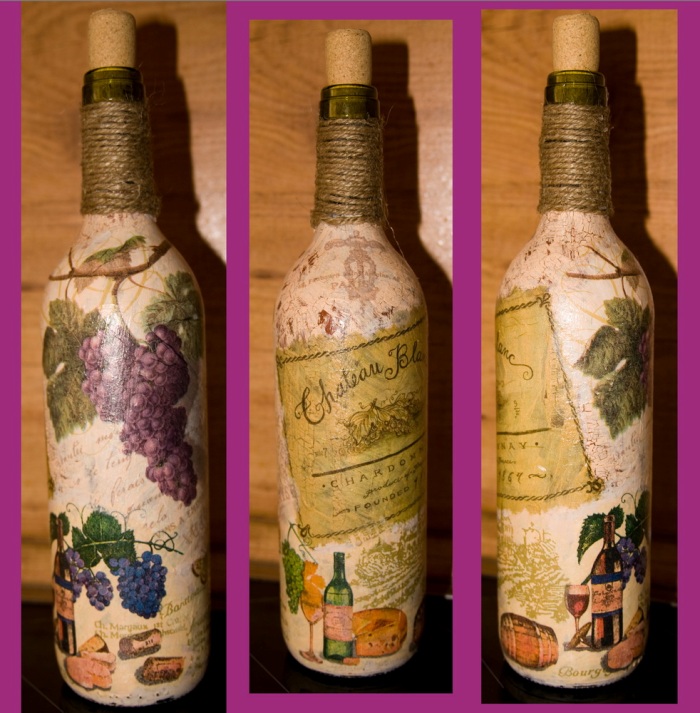
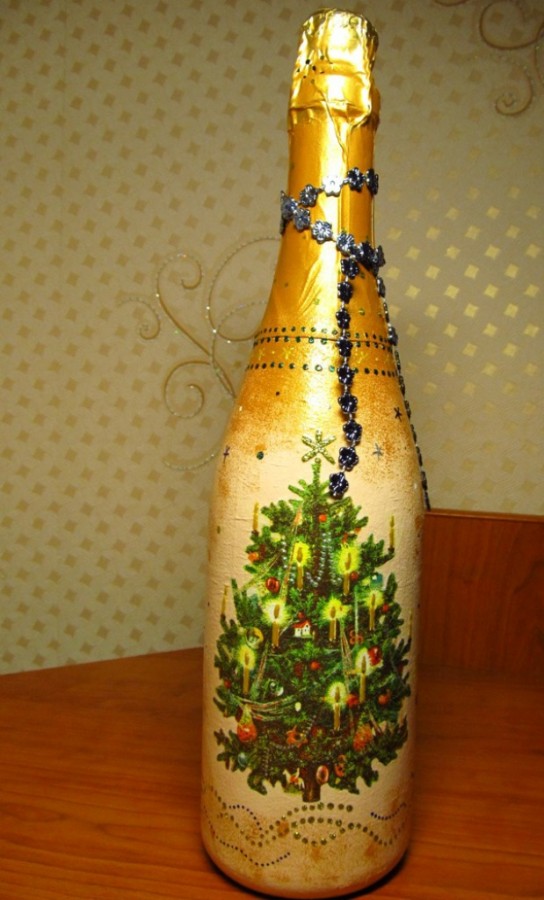
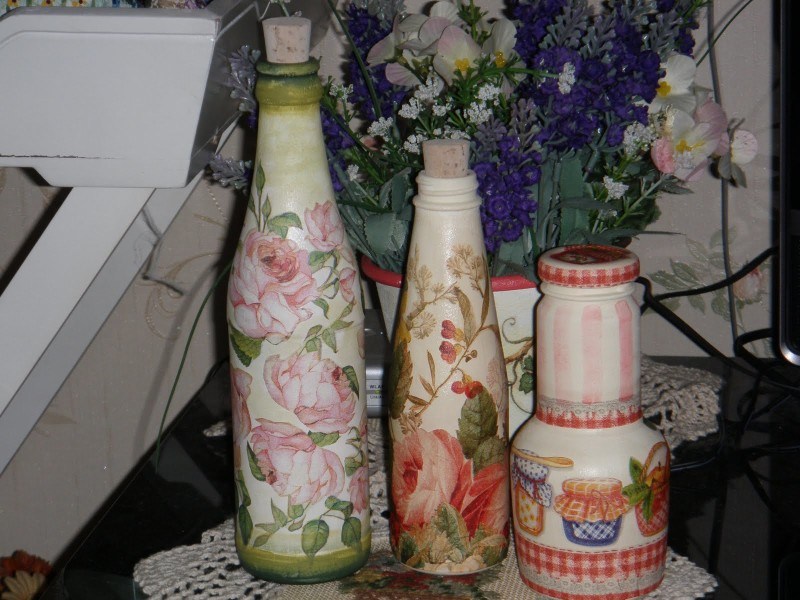
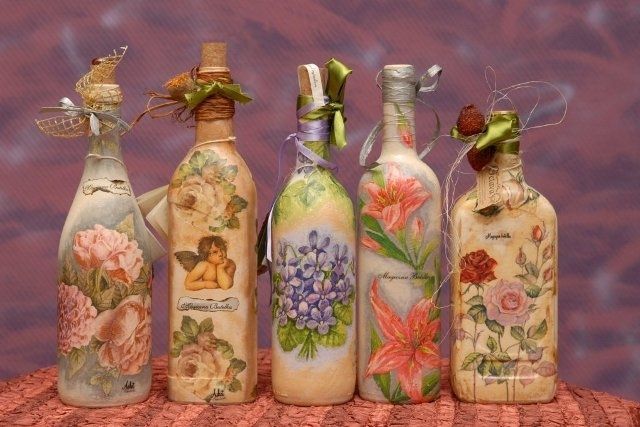
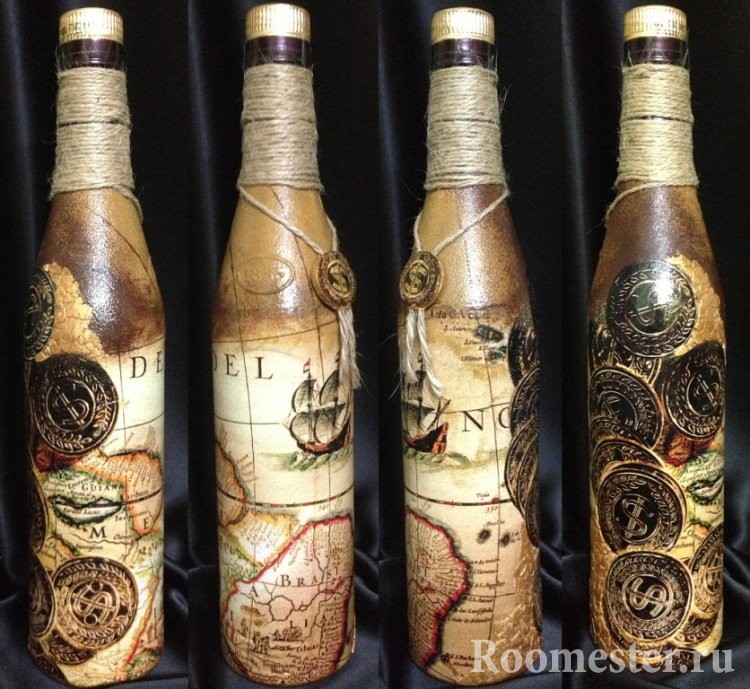
Decoupage is a varnished appliqué. Is the most popular method of decoration, not only glass, but in principle, any surfaces. To decorate the container in the decoupage technique, we will need:
- Glass bottle of any shape.
- Acrylic paint.
- Three-layer napkins for dekpazh.
- PVA glue.
- Scissors.
- Brushes.
- Varnish to fasten.
Decorating with this method will require some skill and skill. The project is a little more complicated than in the previous versions, however, it can be mastered with it if you use the instructions for decoupage yourself:
- The bottle is prepared, as in the previous cases: cleaned, degreased, painted.
- Cut out the napkins fragments, which should be transferred to the glass.
- Moving the fragments, we find the perfect composition, and only after that we take on the glue.
- Separate the two bottom layers of the napkin element, apply it to the surface and gently coat it with glue from the center to the edges. We do this with all the elements.
- After complete drying of the elements, contours are applied using acrylic paint or paint mixed with glue.
- After drying the contours, the composition is coated with varnish in one or two layers.
- If desired, you can use additional decorative elements. For example, coarse string.

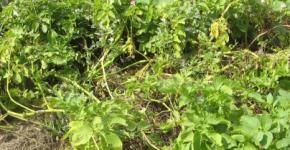
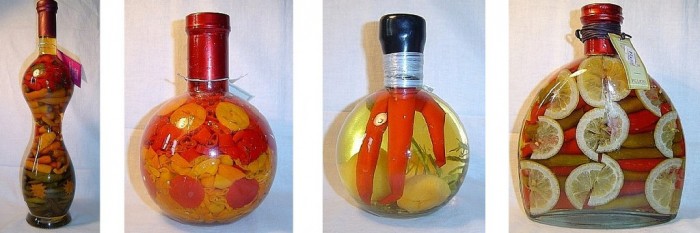
With your own hands you can decorate not only the outer part of the jar, but also the inner. Such a composition will perfectly fit into the open shelves of kitchen cabinets or complement the atmosphere on the summer terrace.
To decorate containers with fruits and vegetables will need:
- Glass bottle or any shape.
- Raw material
- Paraffin (wax).
- Preservative
- A long knife or other tool that will conveniently place the raw material in the container.
Everything that your fantasy finds beautiful is suitable for raw materials: green beans, chili peppers, cherry tomatoes on a sprig, citrus slices, garlic ... Concentrates of acetic acid or saline, gelatin with sugar (1: 1), ethyl alcohol can be an excellent preservative. True, the vegetables gelatin gives a dull color, but the salt solution is ideal for any raw material.
Step-by-step instruction:
- Banks and bottles are sterilized by steam.
- Pre-washed and thoroughly dried vegetables, if necessary, cut into pieces.
- In the container tightly laid raw materials, as for conservation. You can alternate rows of different vegetables for greater decoration.
- Close the lid tightly and seal with melted wax or paraffin.
- We keep the “conservation” for a week in a dark and cool place, after which you can put it on display.
A lot of techniques came up with creative people to design bottles with their own hands. This is an exciting lesson, the more often you do it, the more ideas appear. It all depends on what method of decorating the bottles you choose. Based on this, you should prepare the materials and tools with which to work. To create the drawings on the bottles, prepare the following:
- bottles (glass or plastic)
- paints: in cans, oil, stained glass or acrylic
- contour for glass
- acrylic varnish (water based)
- brushes (thin and medium)
- some fixture to fix the bottle
- hair dryer for drying paint and varnish
But before embarking on this fascinating activity, the bottles need to be prepared. To do this, wash them with any dish detergent. Remove all labels and stickers. Now wipe the bottle with a clean cloth and dry. The bottle is ready.
You can leave the bottle transparent, then apply a pattern on a well-cleaned and degreased glass surface with paints. To degrease the glass, use alcohol-containing liquids, acetone, or nail polish remover.
To draw on glass is not what to draw on paper. You need to adapt, adjust, pick up paint. It should be allowed to dry each color, and then apply the next.
But you can make the bottle and opaque. To do this, ground it, and then proceed to decorating. This can be done not only with spray paint, but also with an ordinary sponge, dipping it into the paint. When the bottle is completely dry, then proceed to the next stage of decoration.
If you’ve never done bottle decorating, start with simple ways. For example, with elementary staining. Paint a bottle of white from a can, and then apply some simple pattern with a brush and acrylic paints.
To learn how to draw beautifully on bottles, you need to train and try many times. Of course it is possible, if you are not endowed with the talent of an artist, you will never draw any masterpiece, but this does not mean that you should not do it. This is a fascinating activity and you can come up with some of your own sweet heart drawings on the bottles. Those that you will get better than others.
Perhaps you will invent your technique of painting on bottles. After all, any skill comes to a person in the process of labor. The drawing on the bottle can be supplemented with other decorative materials.
Draw the pictures on the bottles with acrylic varnish in two or three layers. Then the bottle can be cleaned and even washed.

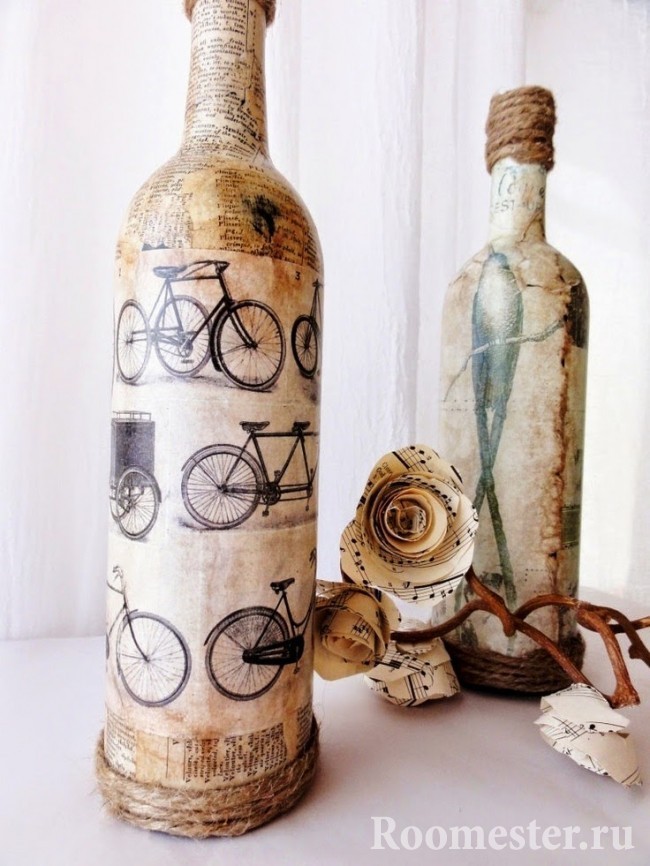
But, if you don’t get to learn how to draw, don’t despair. You can use the technique. Its essence is that fragments of drawings already drawn by artists are taken and pasted on the object that you want to decorate. You can use three-layer napkins, in which the top paint layer is removed and neatly glued onto the bottle with the help of PVA glue, diluted with water one by one. A usual sponge we press a napkin to a bottle and we watch, that there were no wrinkles and bubbles. When the napkin dries, cover the bottle with acrylic varnish. You can paint on some details, for example, paint the neck of the bottle or brush the stripes around the bottom with a brush.
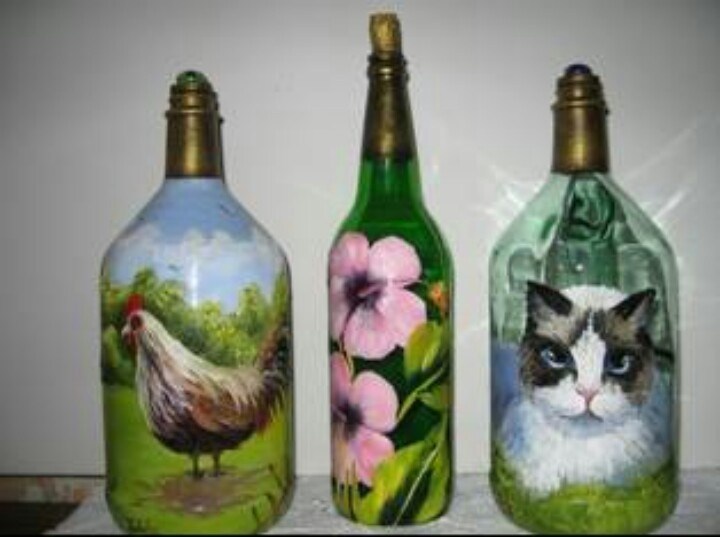
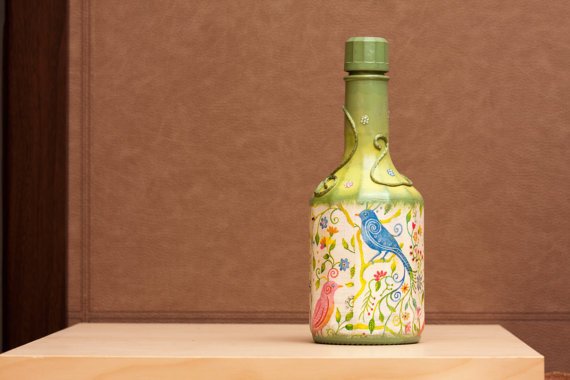
For a nursery we make out bright and joyful bottles. For decoupage, you can choose pictures with birds, fish or animals. And, of course, kids love cartoon pictures.

With the help of technology, you can arrange a lot of bottles and give them to anyone you want.
Lace, tulle and lace, as well as beautiful fabric flowers will help create a romantic mood. Simple glass decanters will turn into exclusive items if you decorate them with the help of technology and add

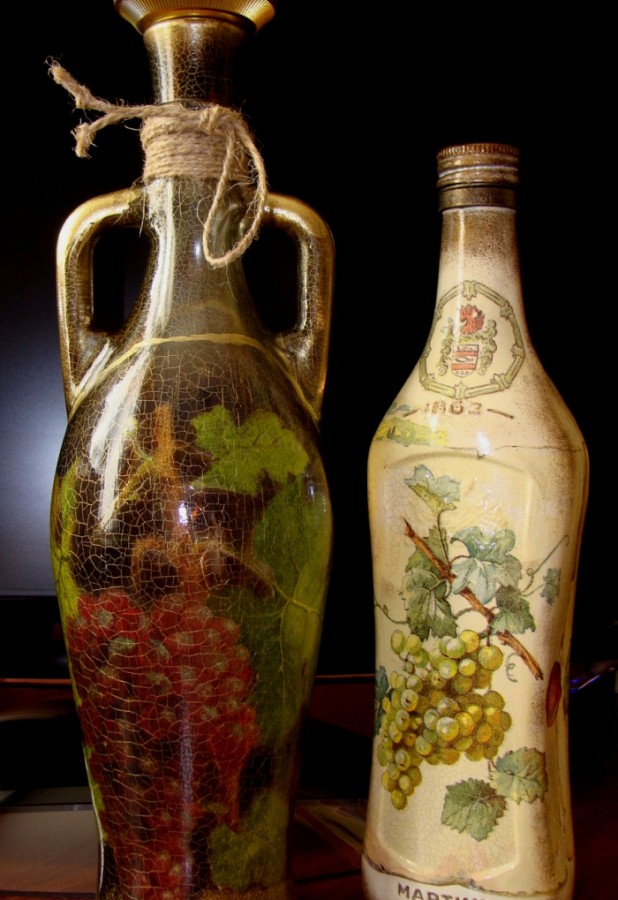
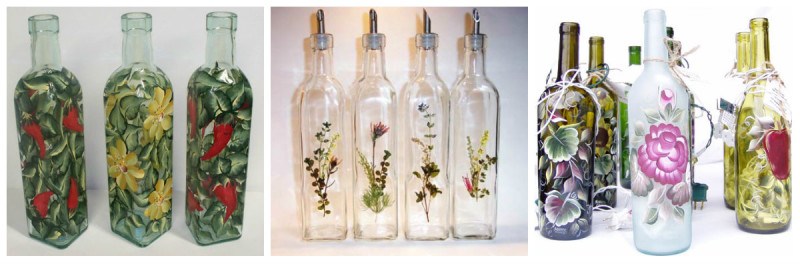
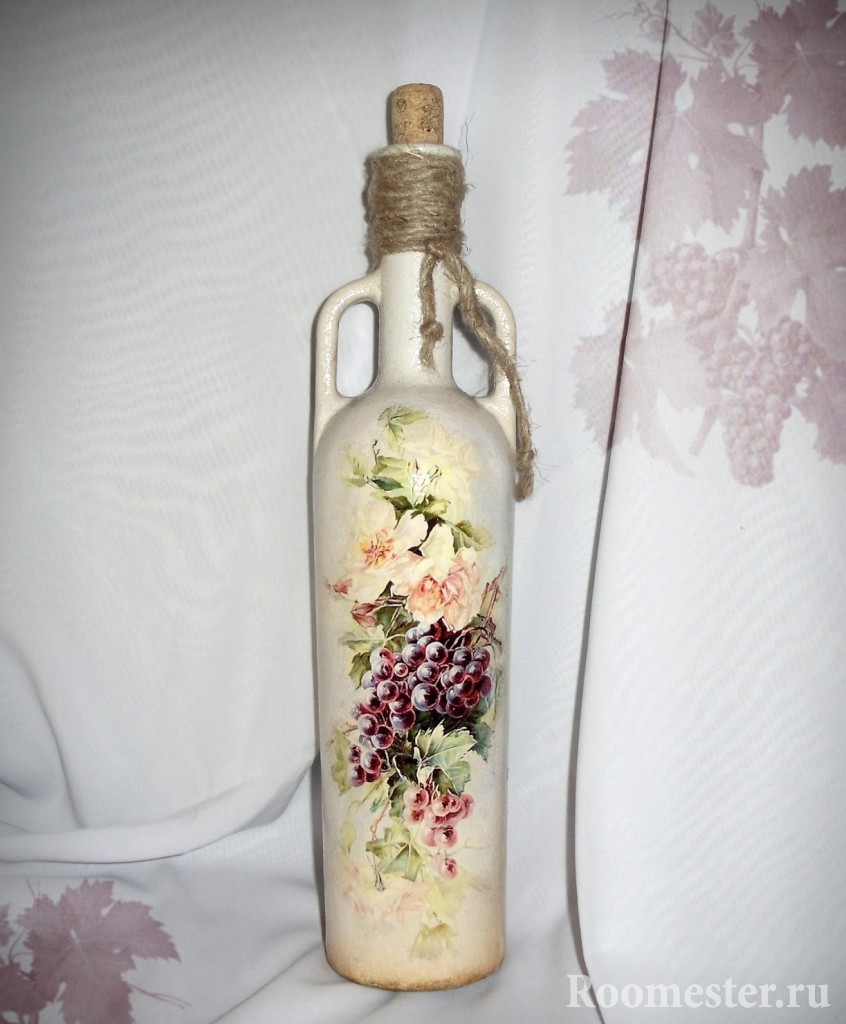
Besides decoupage There are other techniques and techniques with which you can create interior bottles. One of these techniques craquelure. Its essence is that cracks are artificially created on the surface of the paintwork. To achieve this, you need to use special craquelure paints or paints.

Rounded bottles are well chosen for decoration with a branch of grapes. The grapes are cut from the usual three-layer napkin and glued to the bottle using the decoupage technique. But previously the bottle was primed with white paint and treated with craquelure varnish.
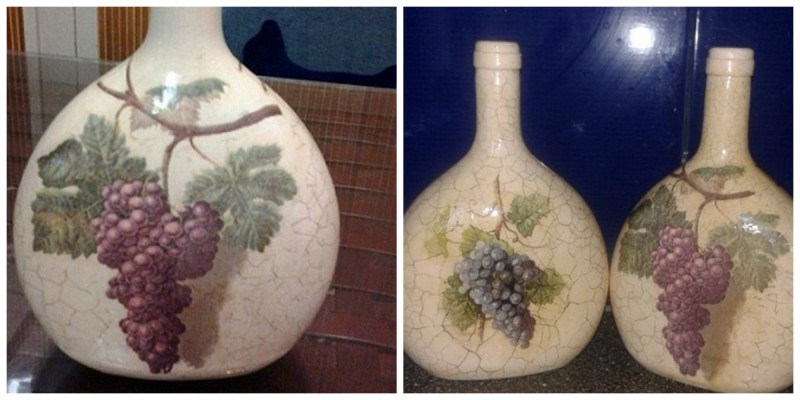
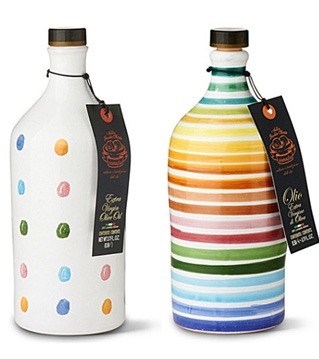
When designing bottles, you can combine several techniques, but leave a general theme for decoration. And then you get a good result. Any hostess with pleasure will use such bottles for various types of vegetable oil.
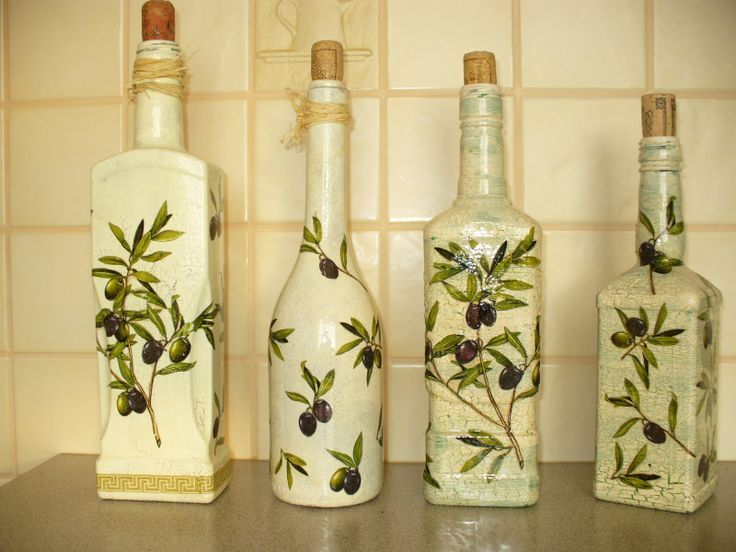
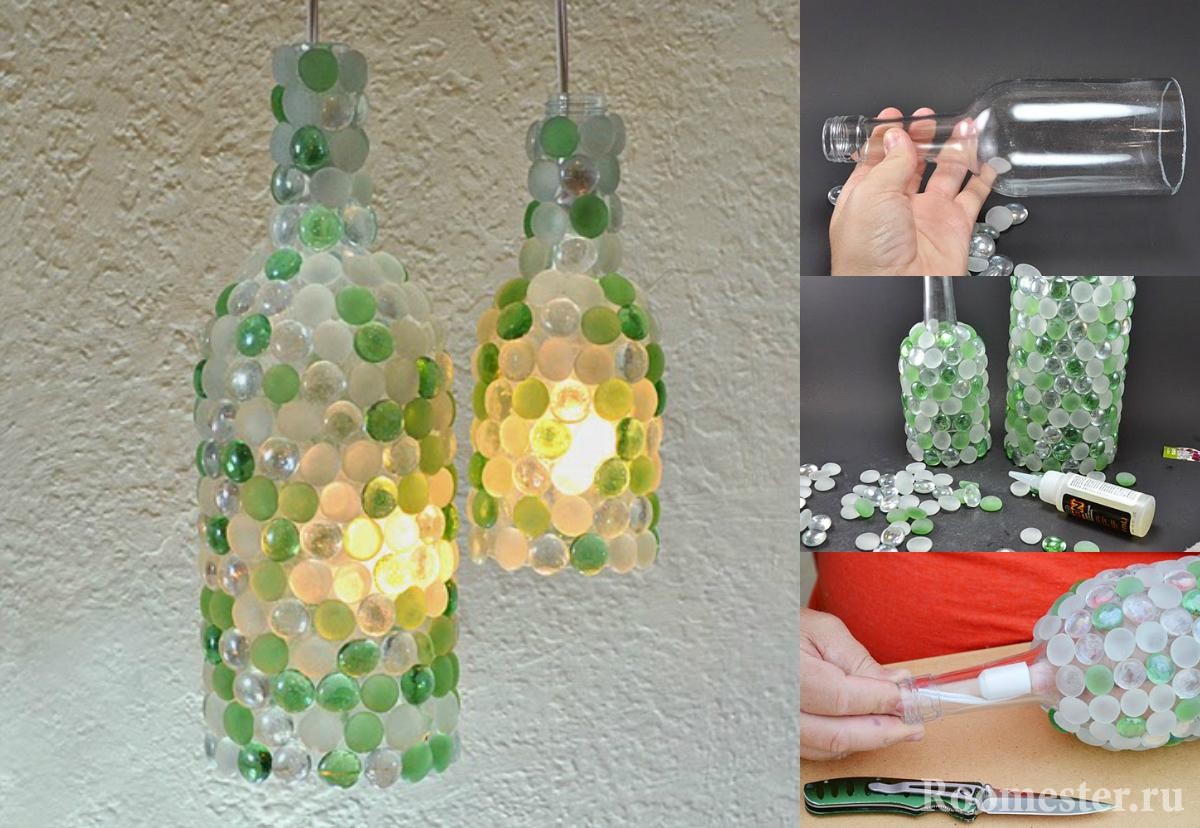
The technique of decorating bottles with glass cabochons has become widespread. With their help, you can create compositions depicting a bunch of grapes. If you consistently stick glass circles on a hot glue, you get grapes. It remains only to supplement the green leaf.
Ordinary glass bottles, which most people throw away, can be turned into a beautiful element of decor. And most importantly, it does not take much time and does not require large financial expenditures. If you like hand-made things, then this master class is for you. Such things will fit into most styles, such as or vintage.
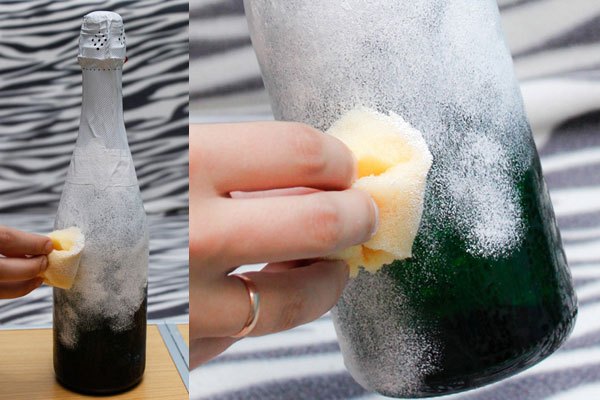
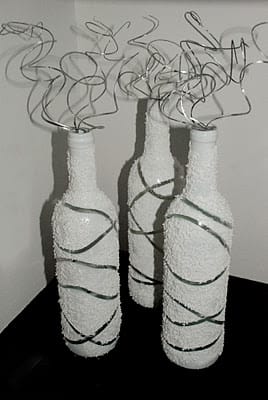
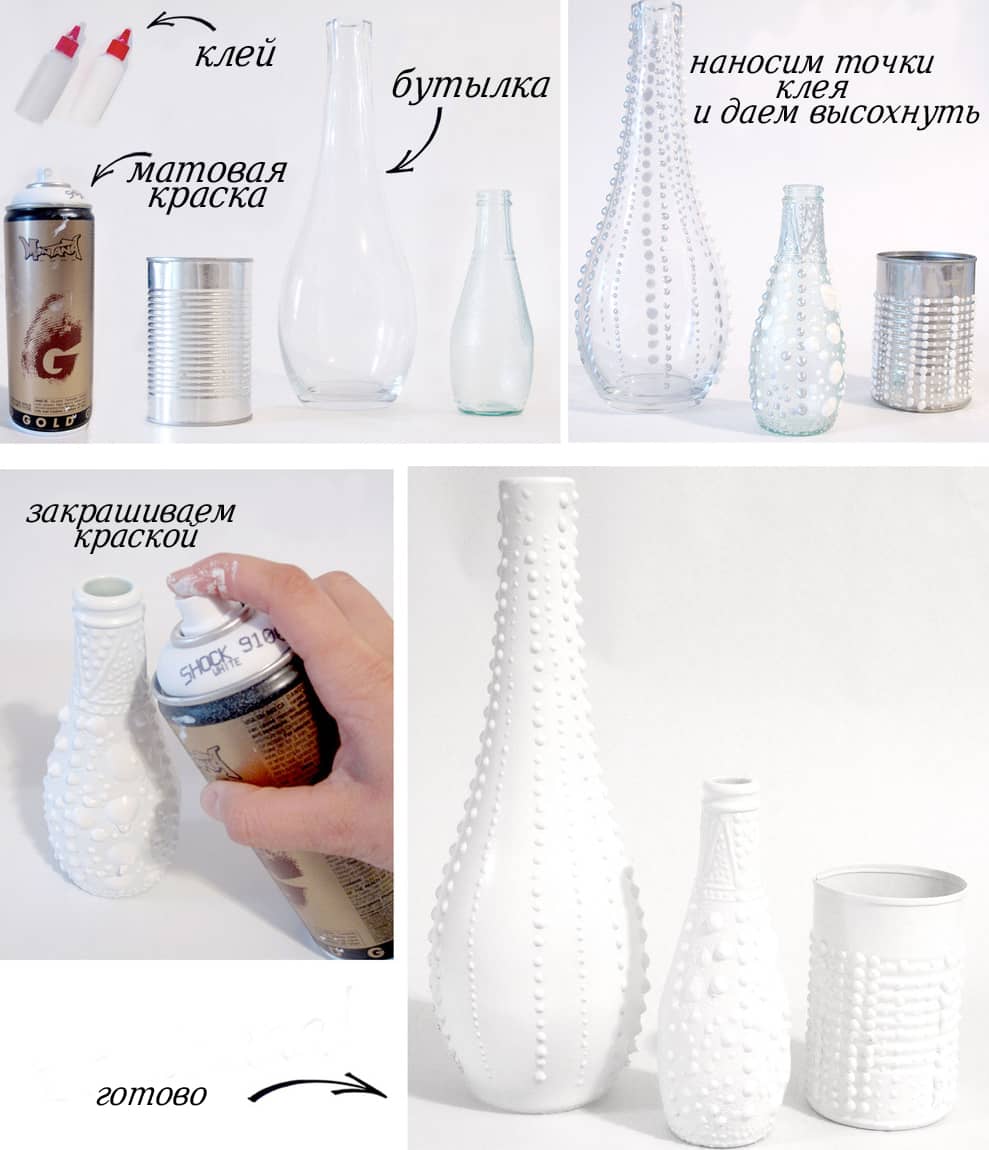
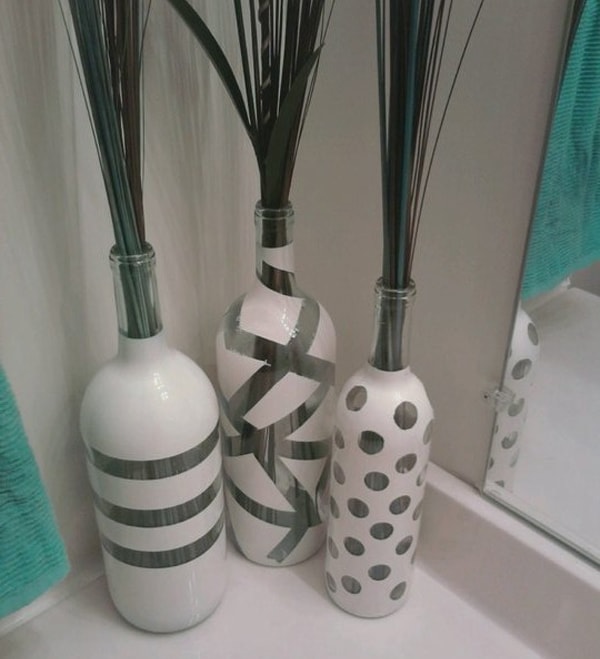
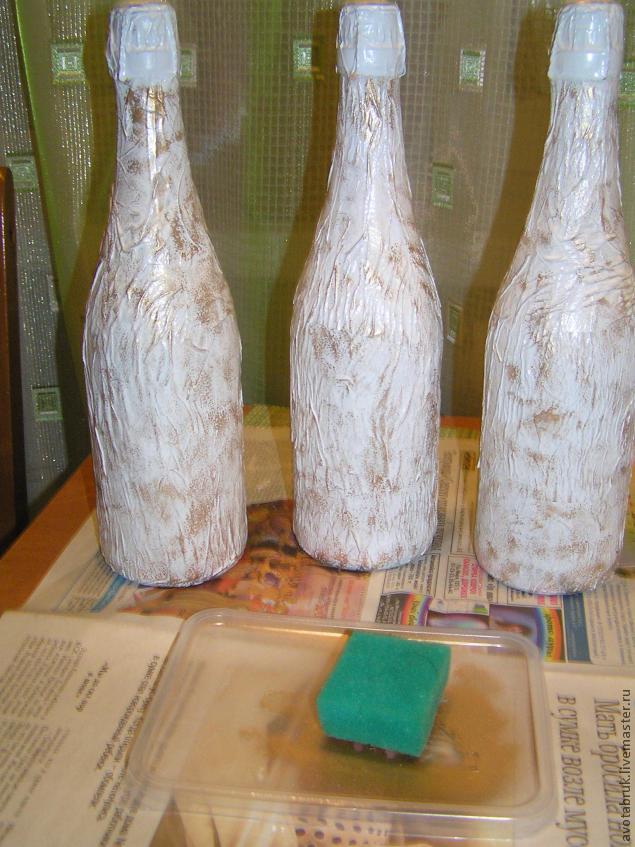
The first version of the decor glass bottle: white and salt
What is necessary:
- Transparent bottles (clean, unlabeled, dry)
- White paint
- Gum thickness of at least 50 mm.
- White bath salt
On the bottle you need to wind the gum. It is necessary to do this carefully, so that the layers of gum lay tightly to the glass and never tucked around.
Then the bottle must be placed in a protected place. If the painting takes place on the street, it is necessary to choose a space without wind and dust, so that the dirt does not fall on the freshly applied paint. For this you can use cardboard from the old box. Paint is evenly applied to the bottle and left to dry.
After the paint is completely dry, the bottle must be smeared with glue. Pour salt on paper and roll a bottle over it. After that, leave to dry. When the glue is dry, you can remove the gum. This should be done very carefully so as not to damage the layers of paint and salt. 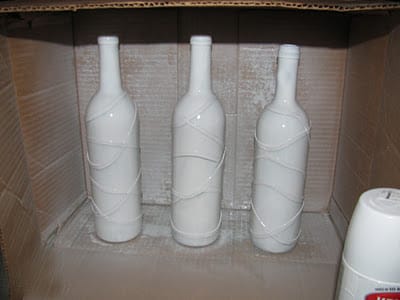
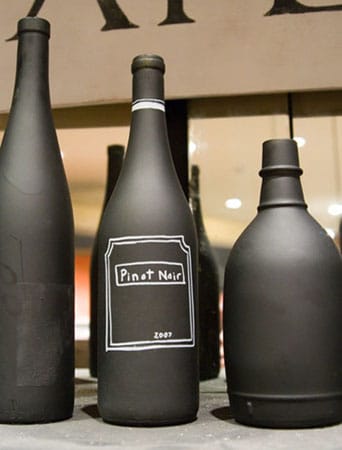
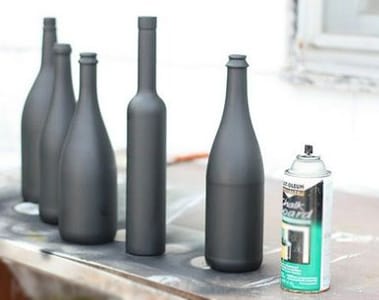
The second version of the decor glass bottle: matte black
For this decor you also need a clean and dry bottle. As well as matt black paint, which is suitable for glass dyeing.
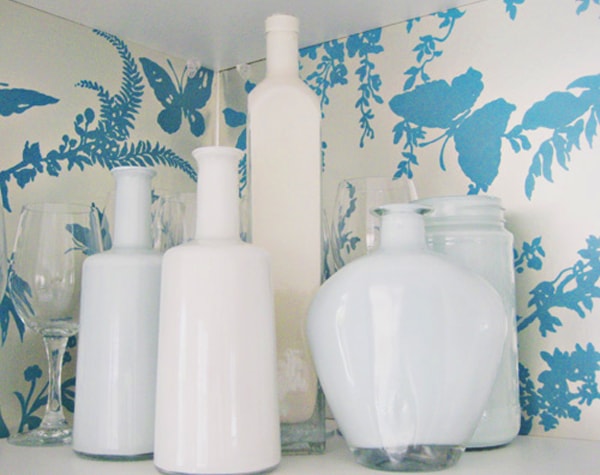
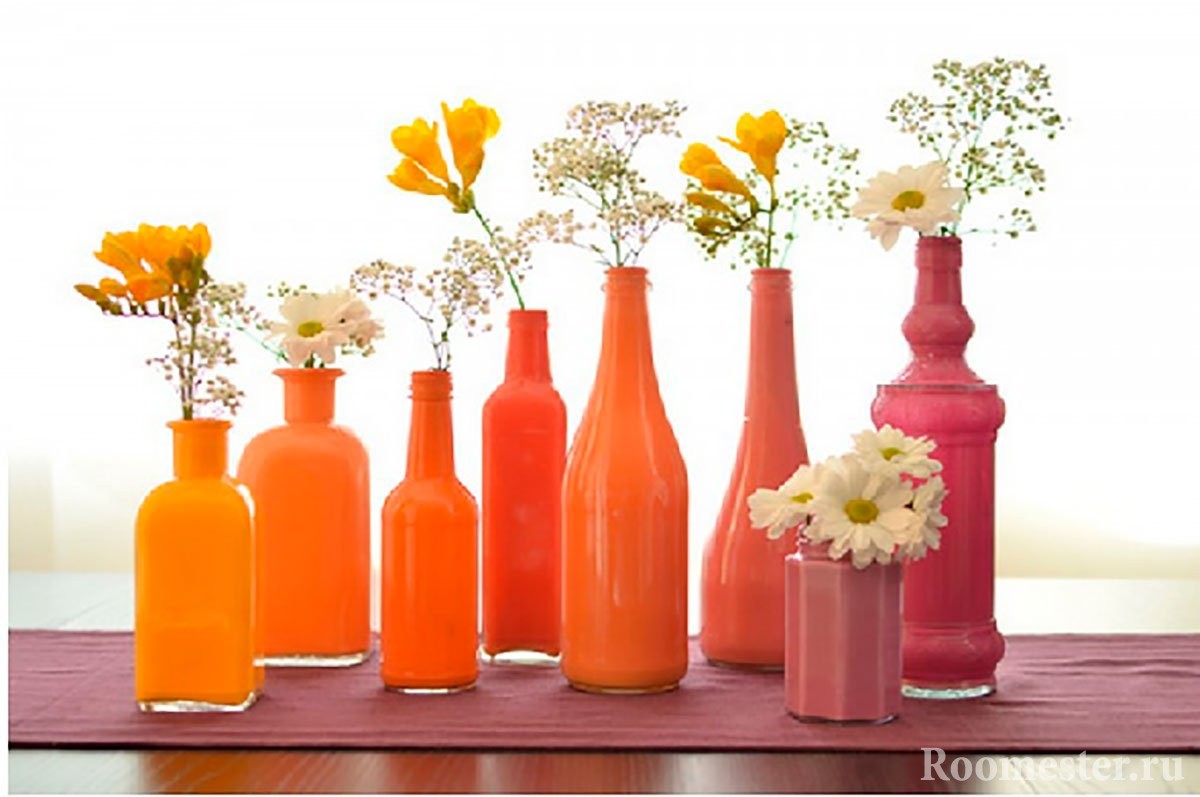
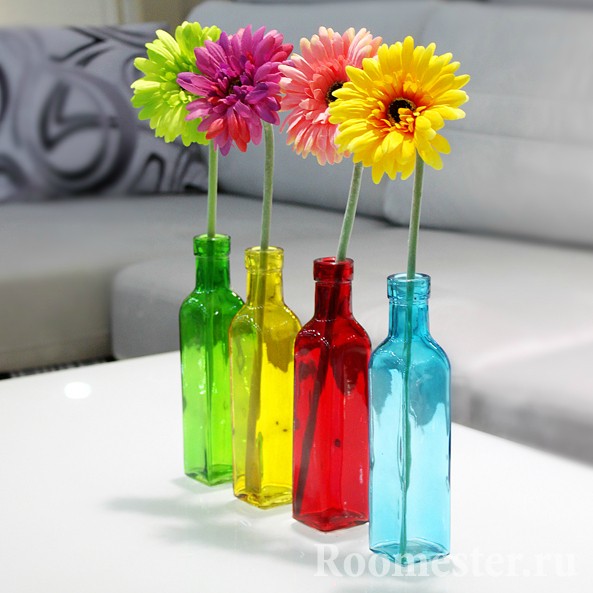
The third option of glass bottle decor: painting from the inside
For this option, any bottle fit, even the most complex, with grooves and grooves. Any paint you like is taken. The paint must be poured into the bottle, then shake and twist the bottle and put it down the neck. When the first layer dries and excess paint runs out, you can repeat the procedure so that there are no gaps left.
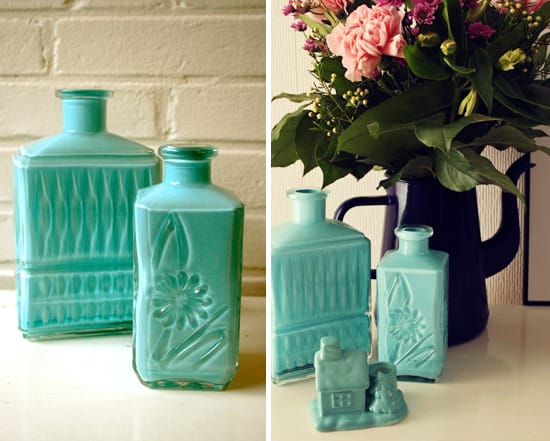
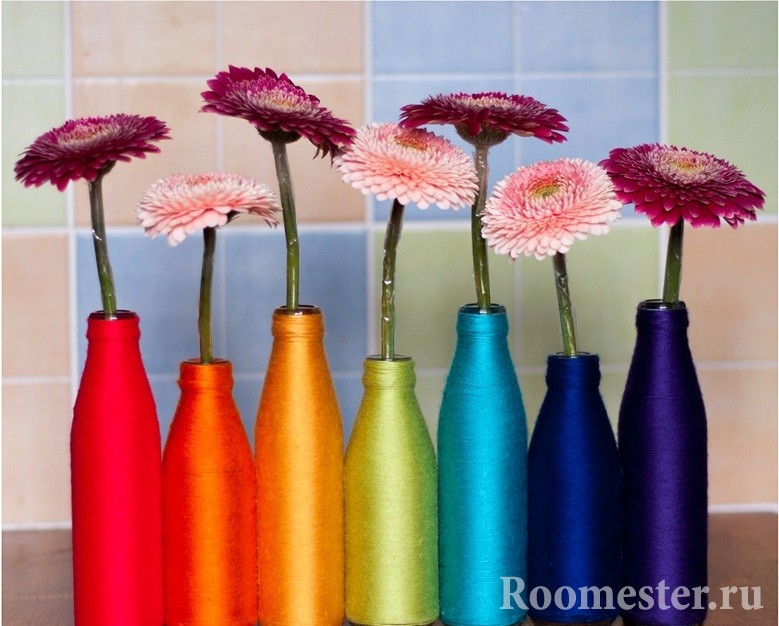
Bright bottles will be the highlight of any interior. Such a vase can decorate the bedroom and living room and kitchen.
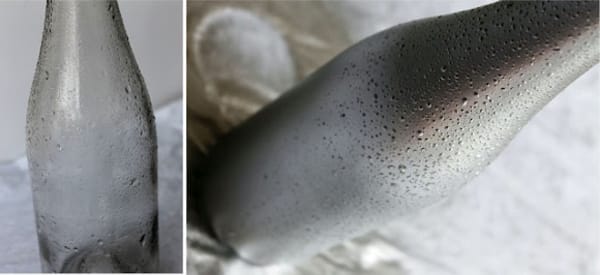
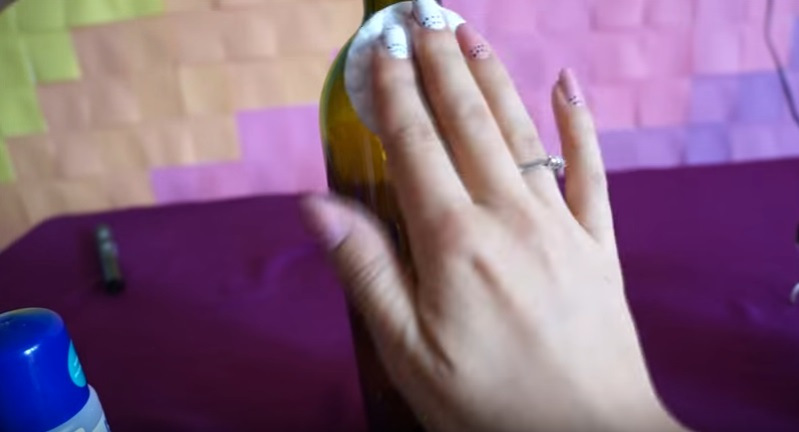
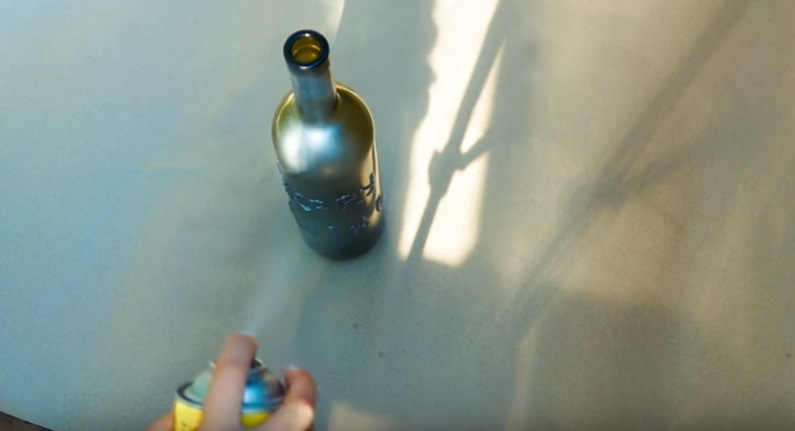
Fourth option glass bottle decor: water drops
In order to create such an interesting effect on the surface of the bottle, it is enough to use only spray paint. Need metallic paint. The bottle must be washed and not wiping it, while there are drops of water on it, apply paint on it. Let it dry.
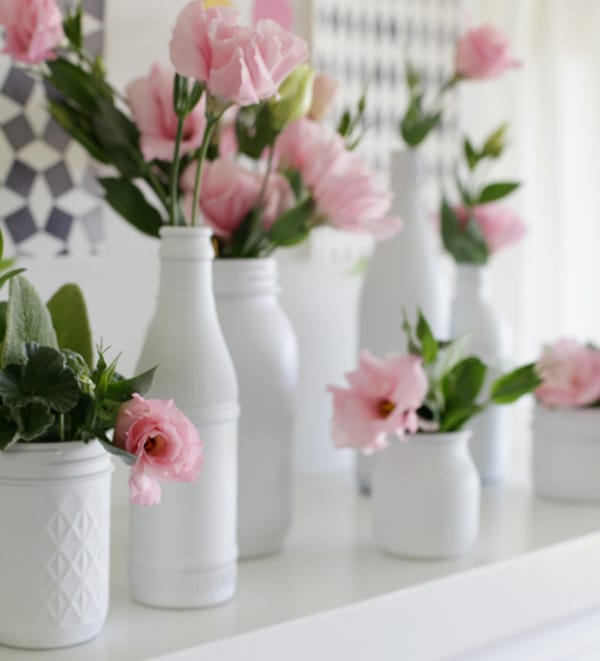
DIY bottle decor: photo selection
White hand-made vases can be placed in the bedroom and please flowers every day.
Do you want to decorate your home interior in an original way or make an unusual gift for your friends? Then try decorating your own bottles. I will tell you how this can be done, and illustrative examples of finished works will give a general idea of this type of decoration.
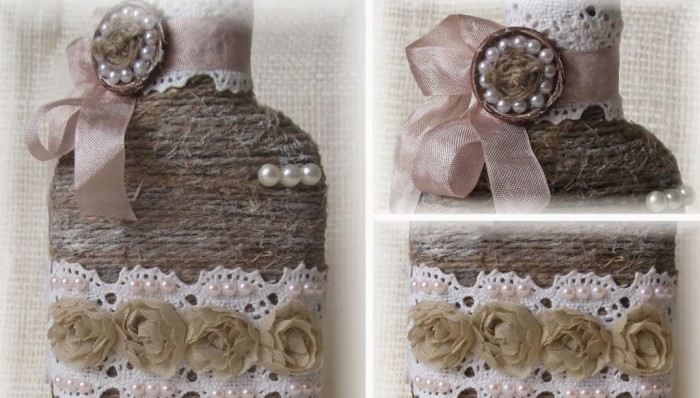
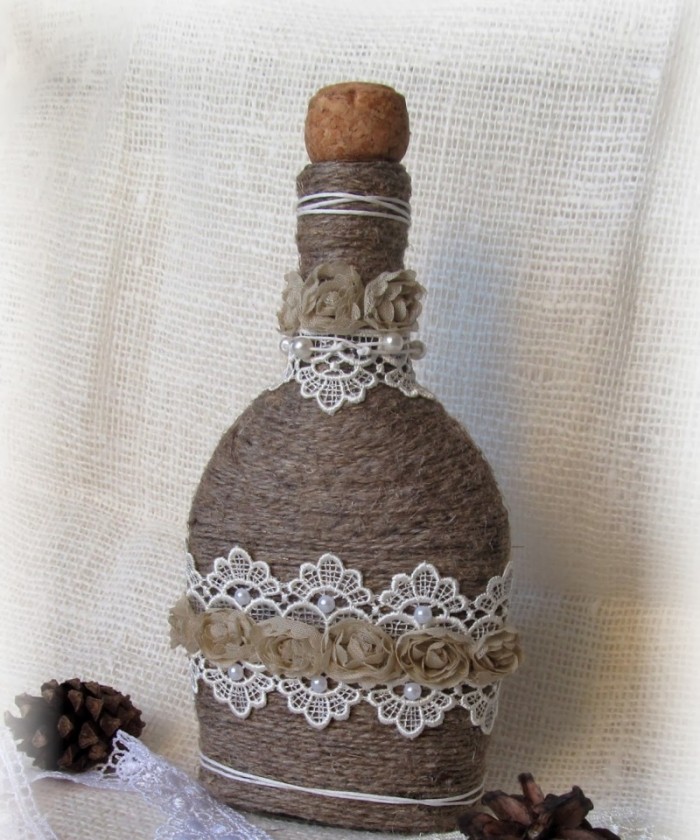
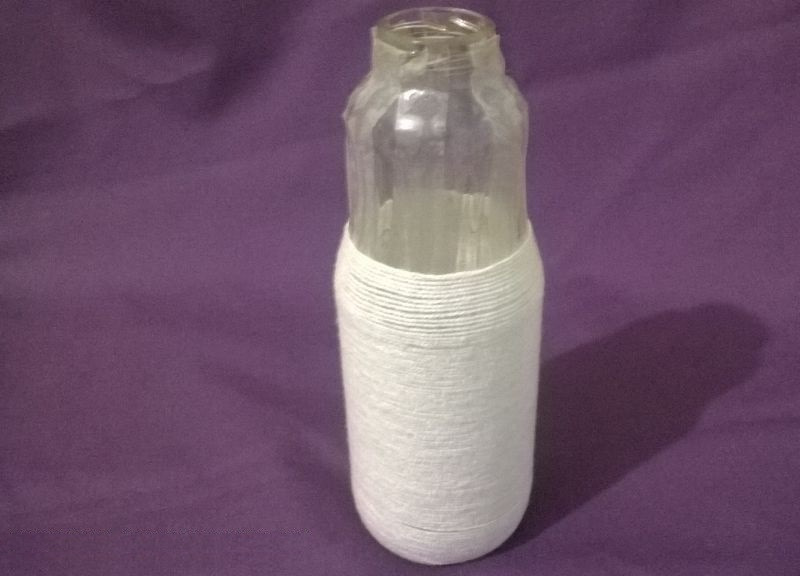
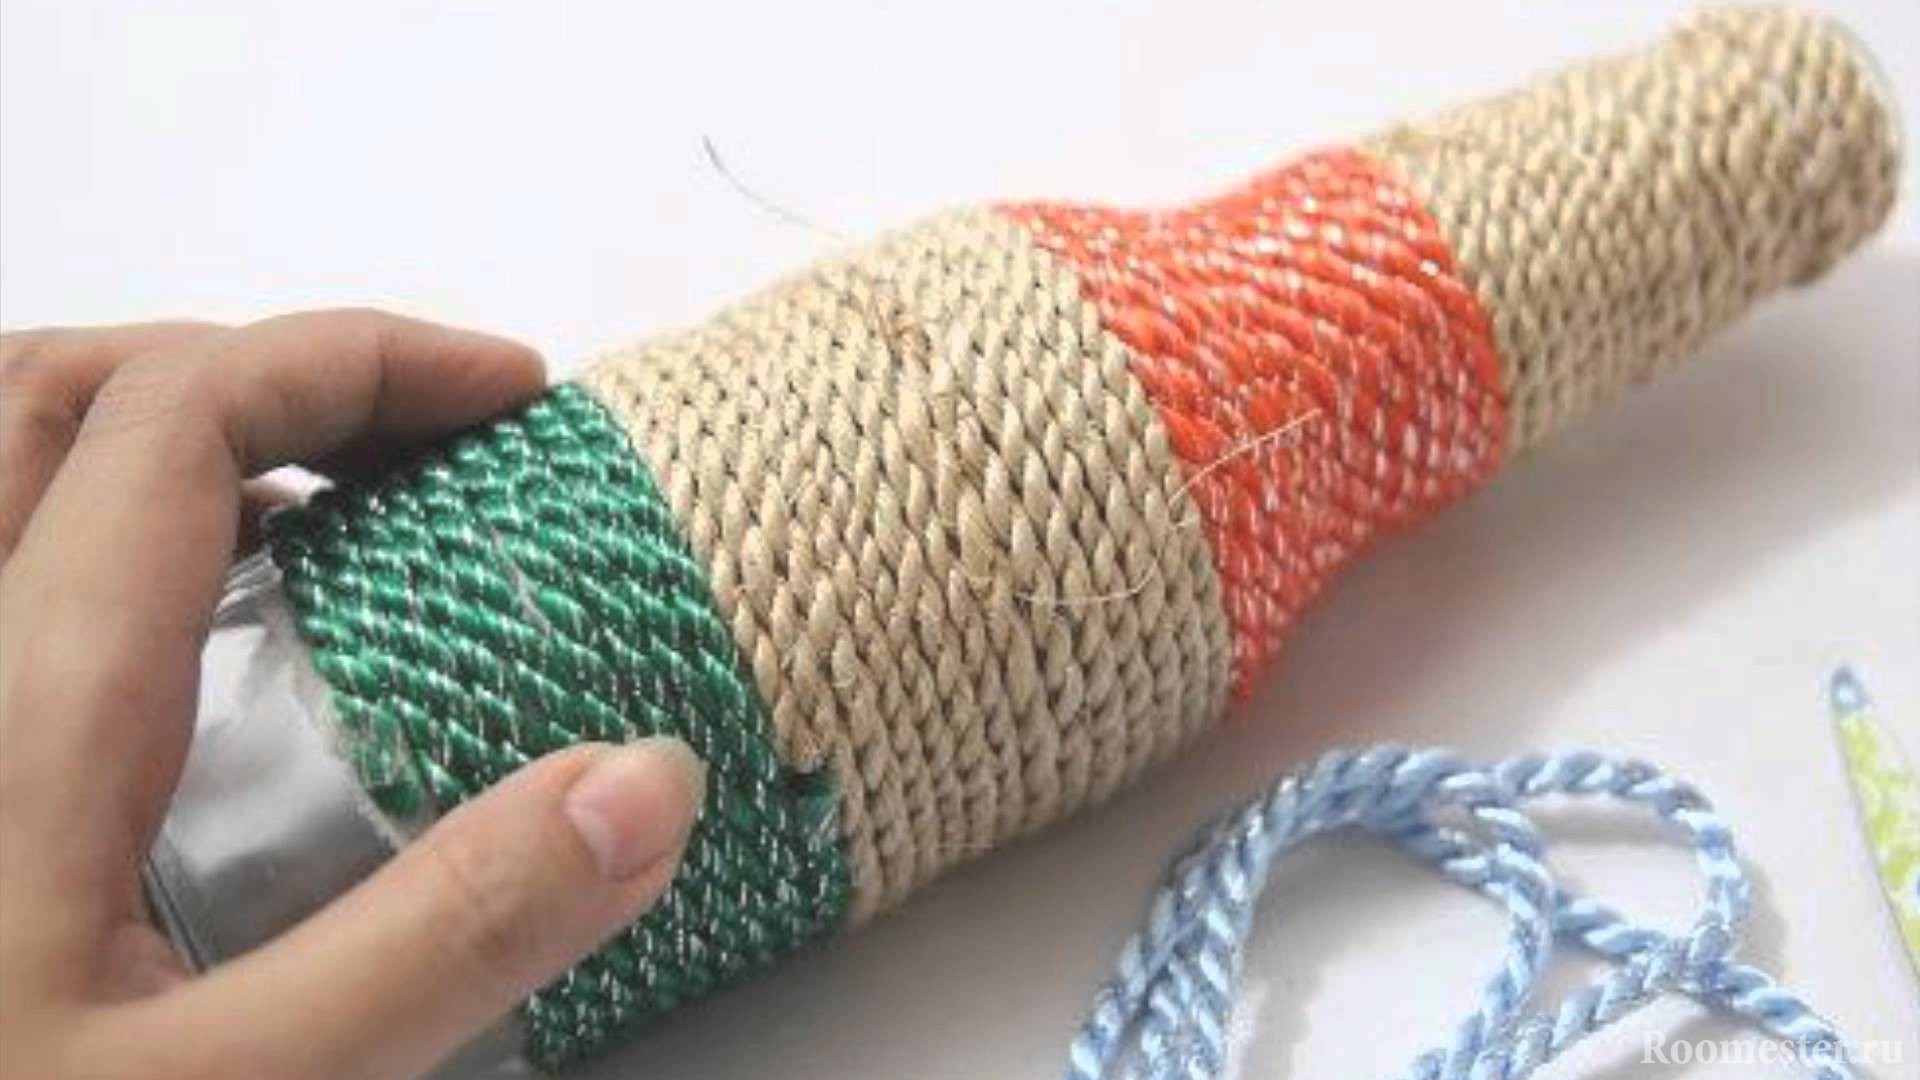
Example 1: decoration with a string
![]()
Before you decorate the bottle with your own twine, let's prepare everything you need:
| A photo | Name and purpose |
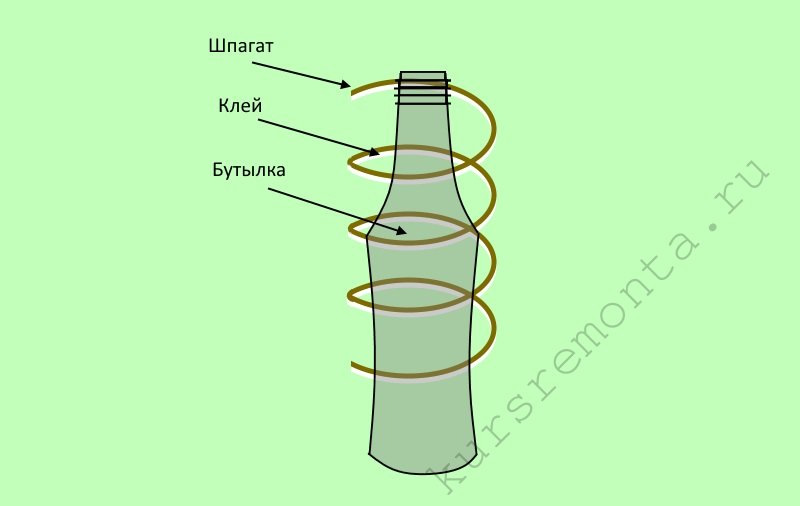
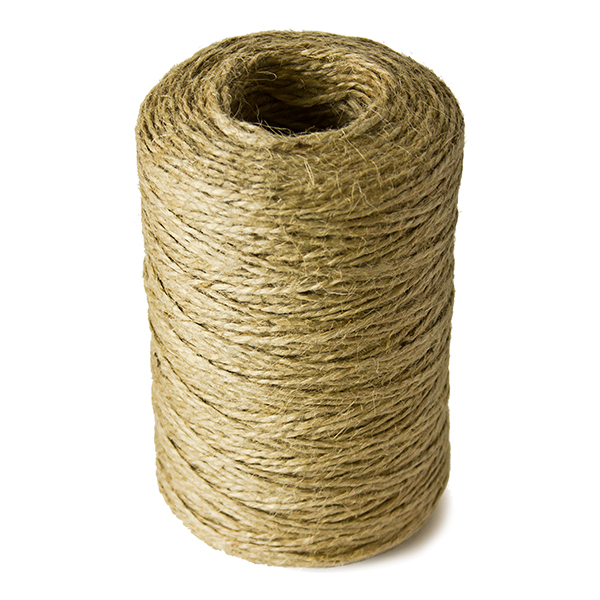 | Twine. Facing the glass surface of the bottle. |
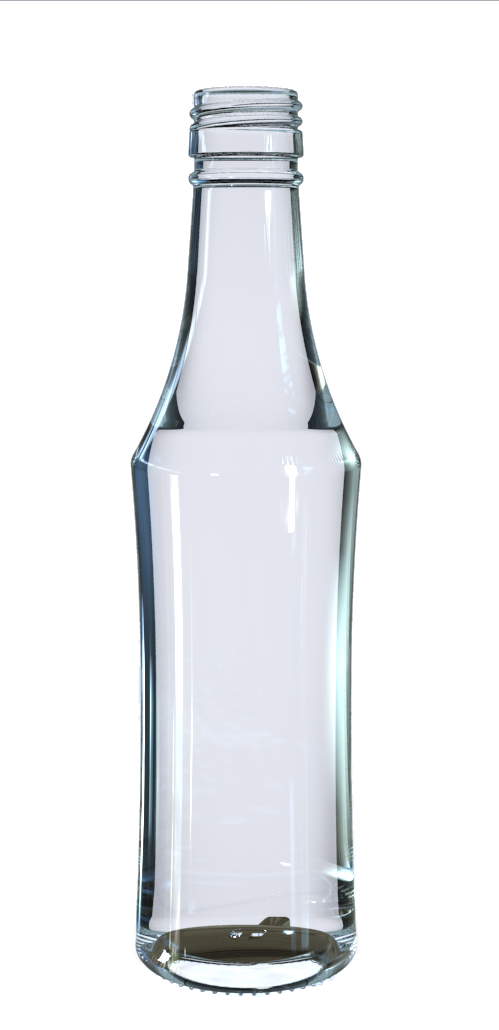 | Glass Container. The basis of crafts. In this case, you can choose any bottle, the main thing is that it is clean and you like its shape. |
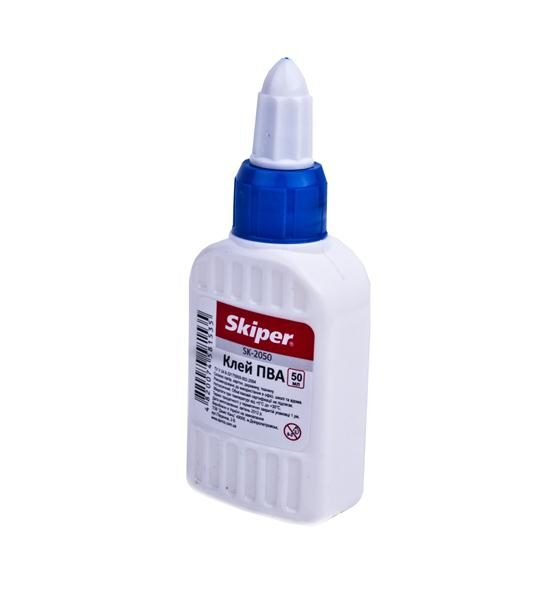 | PVA glue. Fixing twine and other decorative items. |
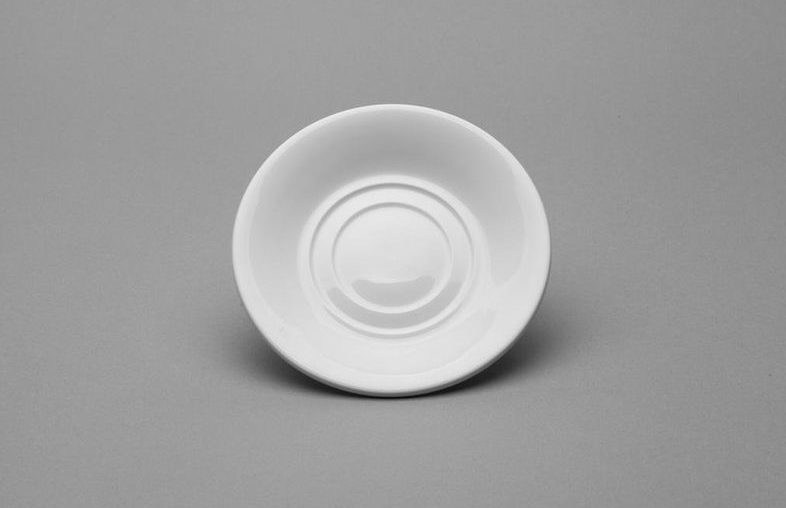 | Saucer. Capacity for glue. |
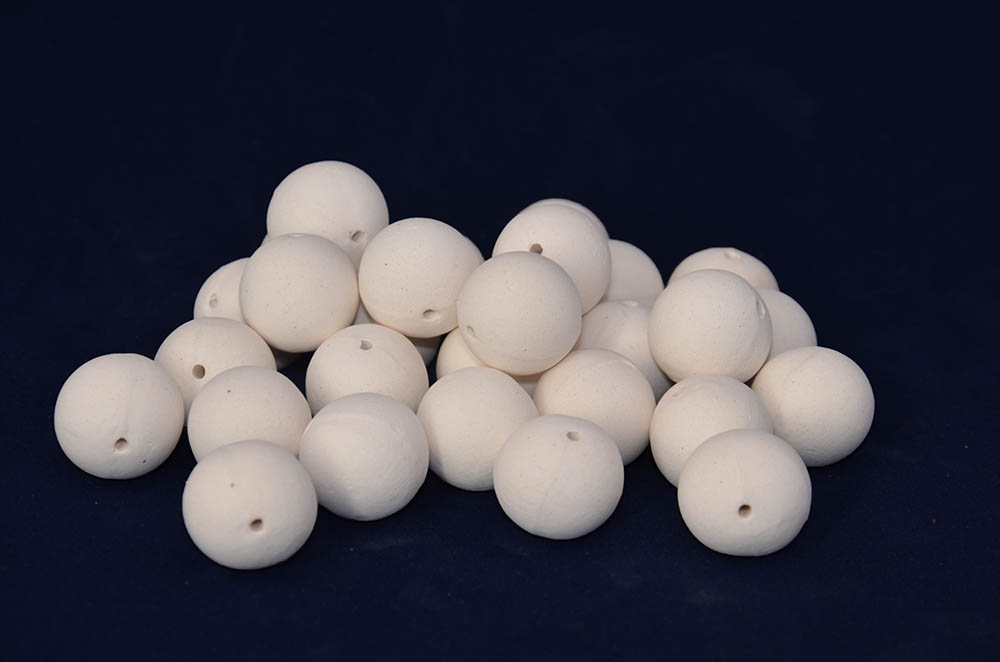 | Beads and other jewelry. Decorative design crafts. |
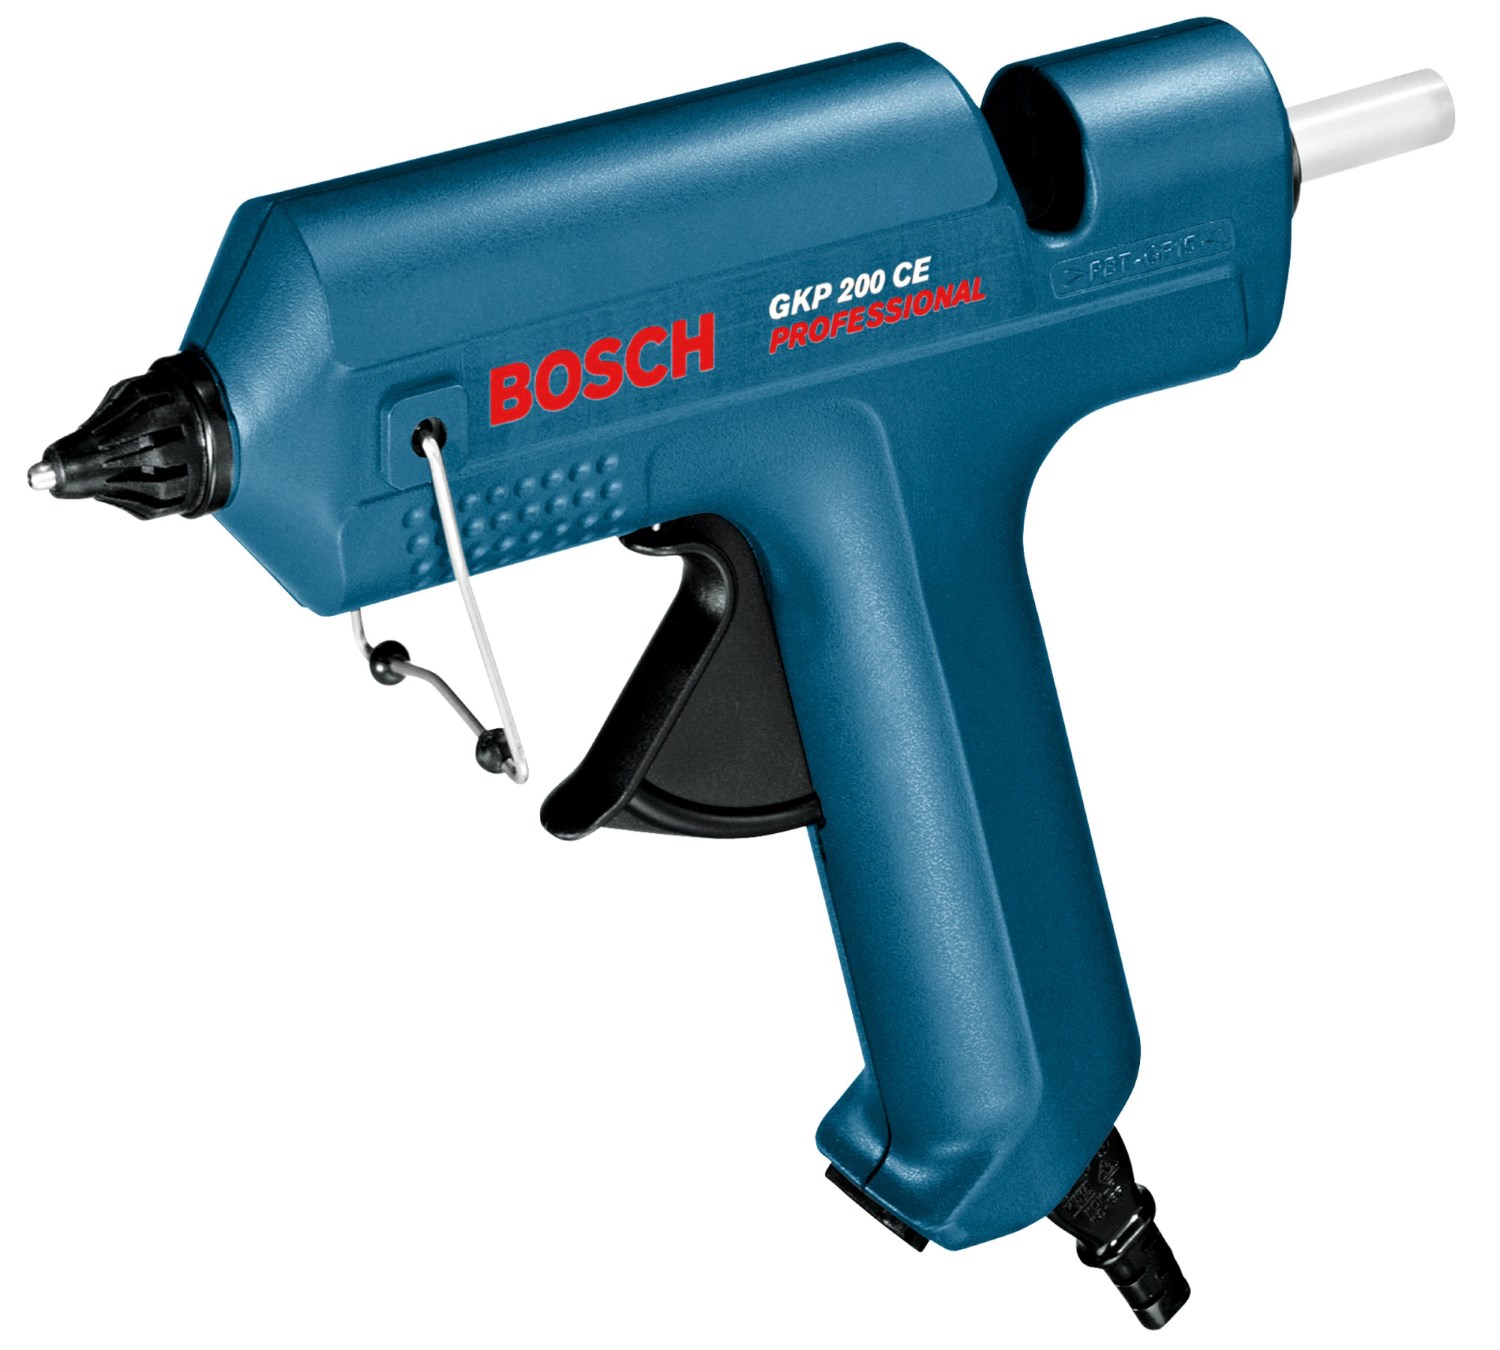 | Glue gun. Applying glue. In the absence of such a tool, you can use a regular thin brush. |
In the case of using instead of twine linen thread or braid, bottle decor is obtained in ethnic.
Progress
| Picture | Description |
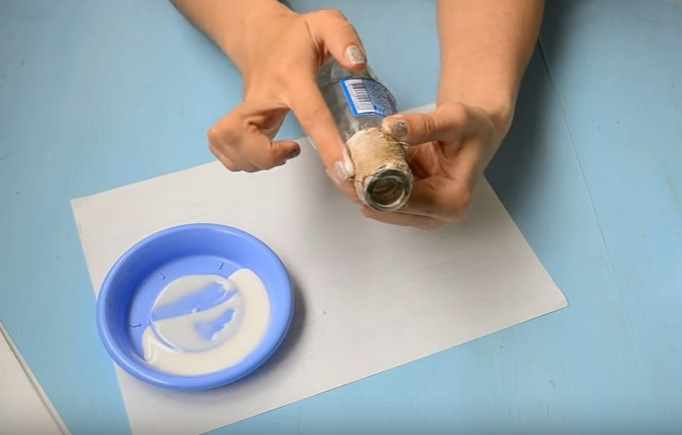
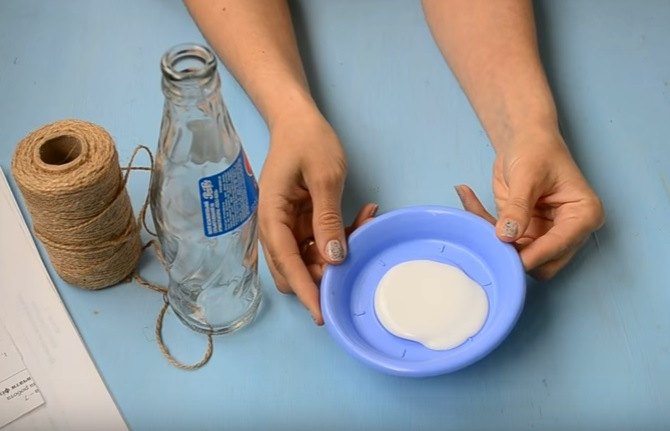 | Fill saucer glue. |
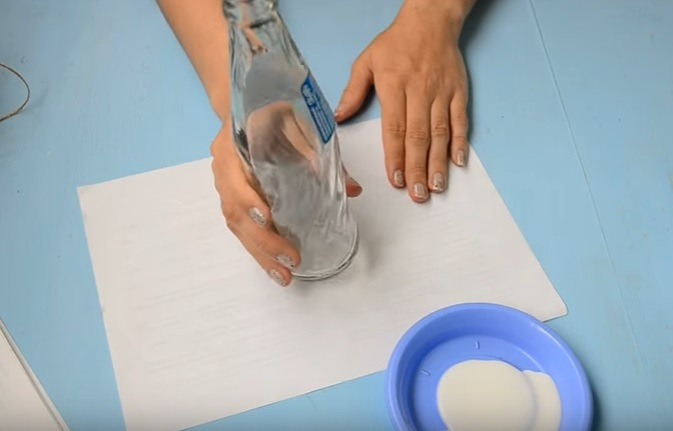 | We putbottle on a sheet of paper. This will not stain the table with glue. |
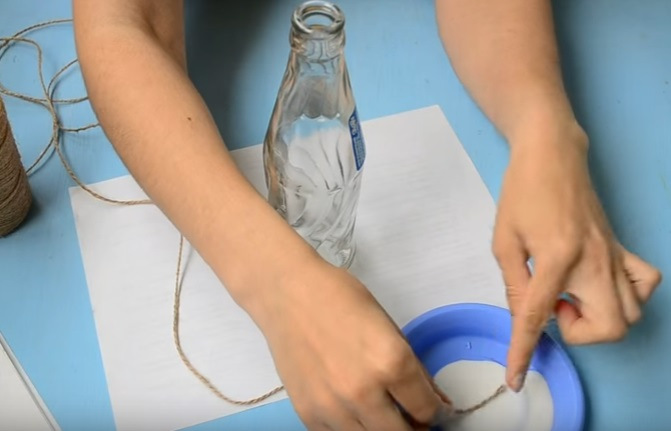 | Dippingedge of the twine in the adhesive solution. |
 | We tie the edge of the bottle soaked in glue with the edge of the twine. |
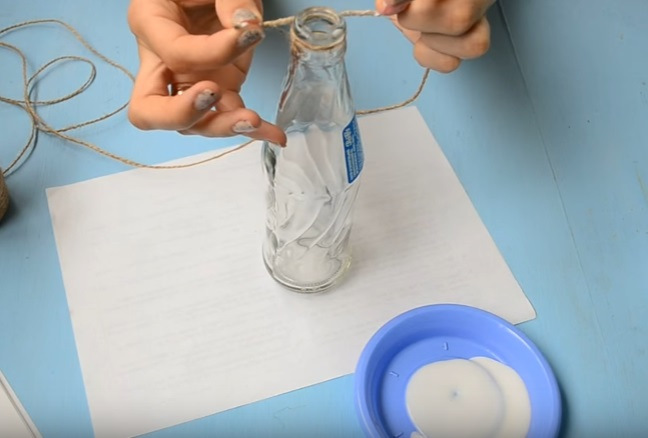
 | Reels rope on the bottle, promazyvaya its every piece of glue. |
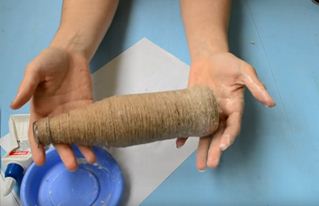 | Reserve to dry the glass product completely wrapped with twine. |
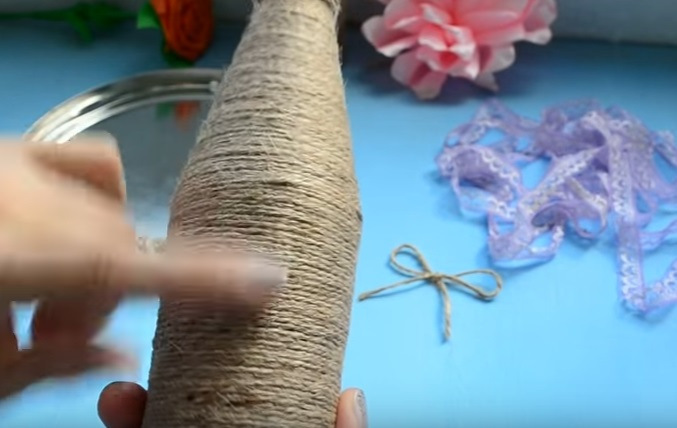 | Check the quality of the winding after drying crafts. If all the threads hold tight, and the dried glue is not visible, then everything is fine and you can move on. |
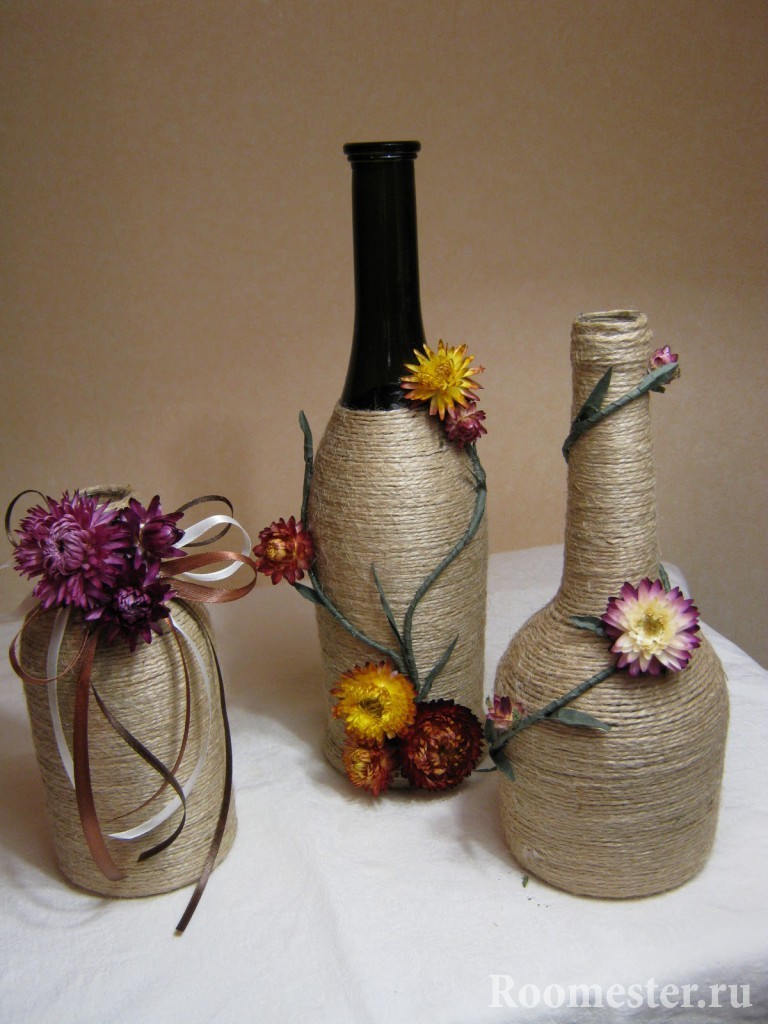
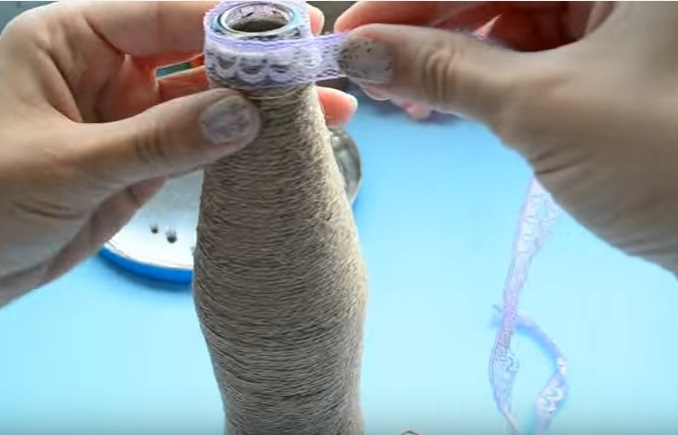 | Neck we decorate with lace braid, fixing it with the help of PVA. |
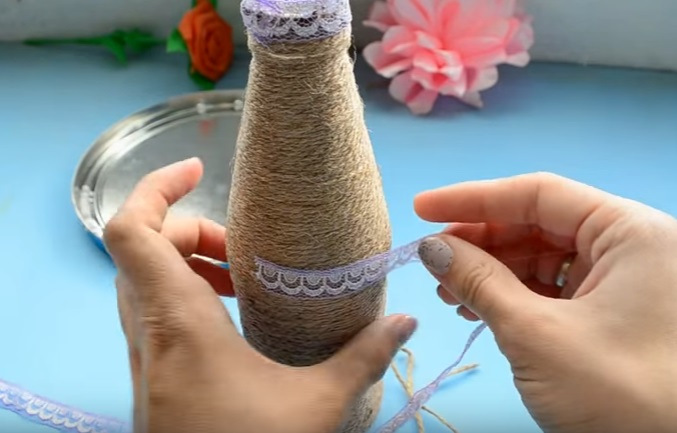 | In the middle bottles also stick a ribbon with lace. |
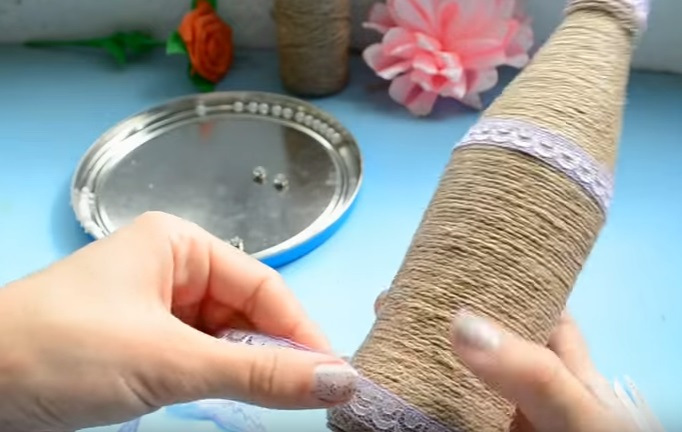 | On the bottomwe repeat the products with a braid, similarly putting it on glue. |
 | Bind with a bow twine and glue it onto the central tape. |
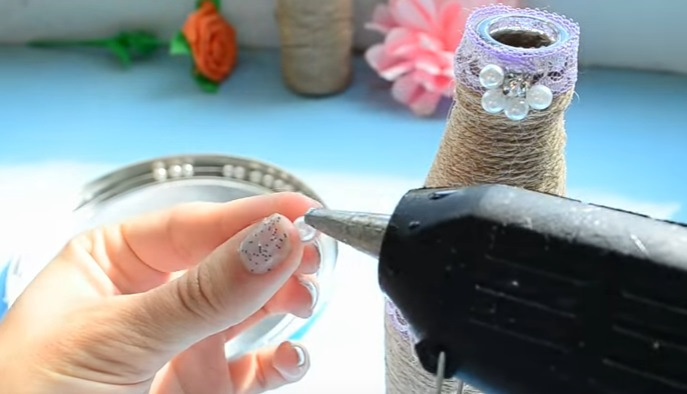 | We collect from a shiny pebble and beads a flower on the neck, sizing each piece with a gun or brush. |
 | We make out the whole bottle is similar flowers in increments of several centimeters. |
 | Decorate string semi-beads, pre-moistened with glue. |
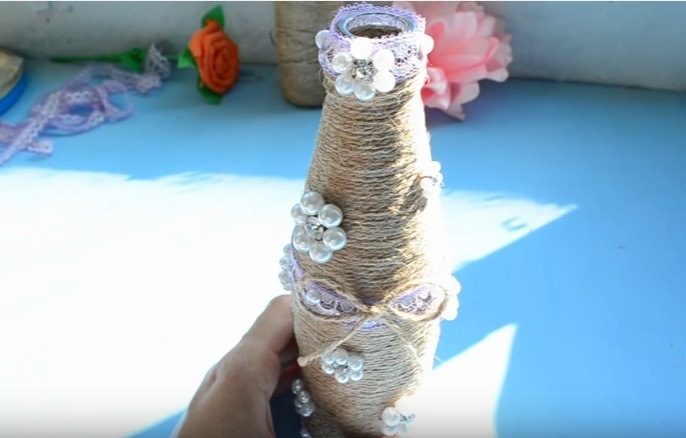 | We present finished result. |
When decorating glass bottles with twine, you can use double-sided tape instead of PVA glue. In this case, the process will be cleaner, and the craft itself will turn out collapsible.
Example 2: creating a convex inscription
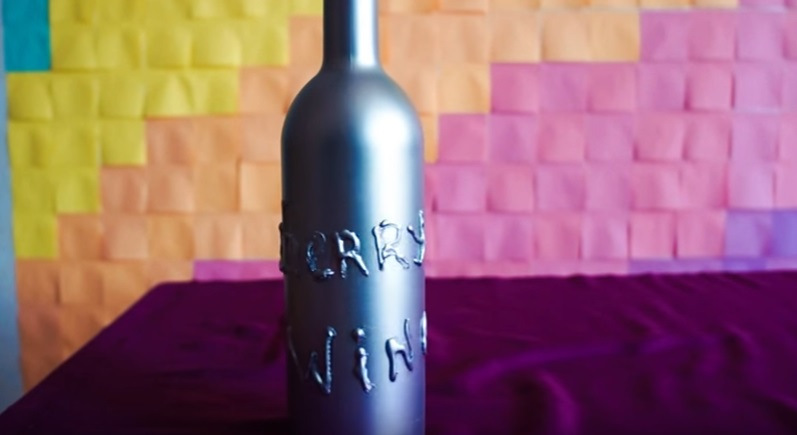
Original looks bottle with protruding letters. In this case, the inscription you can make any, what you want. For example, it may be the name of the person to whom you are going to give crafts.
Preparation of materials and tools
| A photo | Name and purpose |
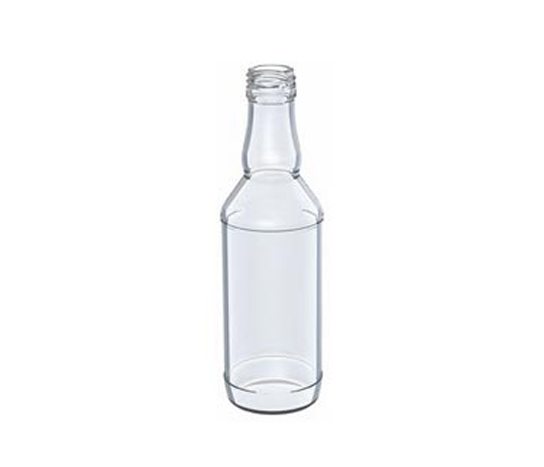 | Glass bottle. The basis of crafts. |
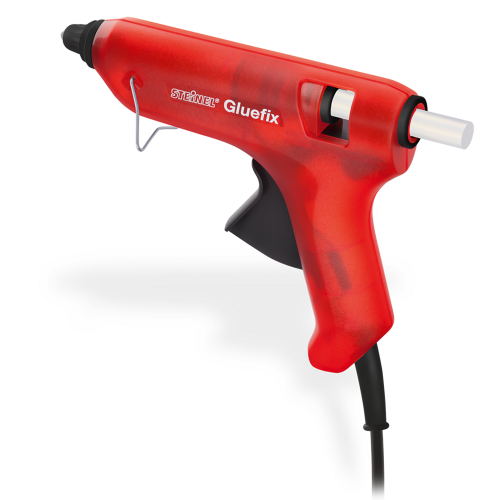 | Glue gun. Creating a convex part of the inscription. |
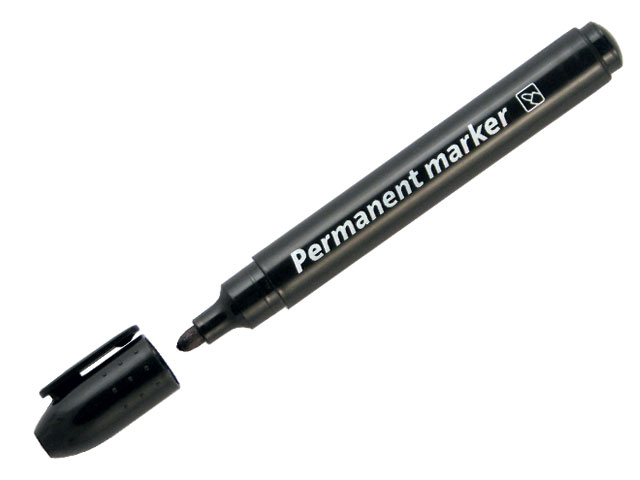 | Marker. Inscription. |
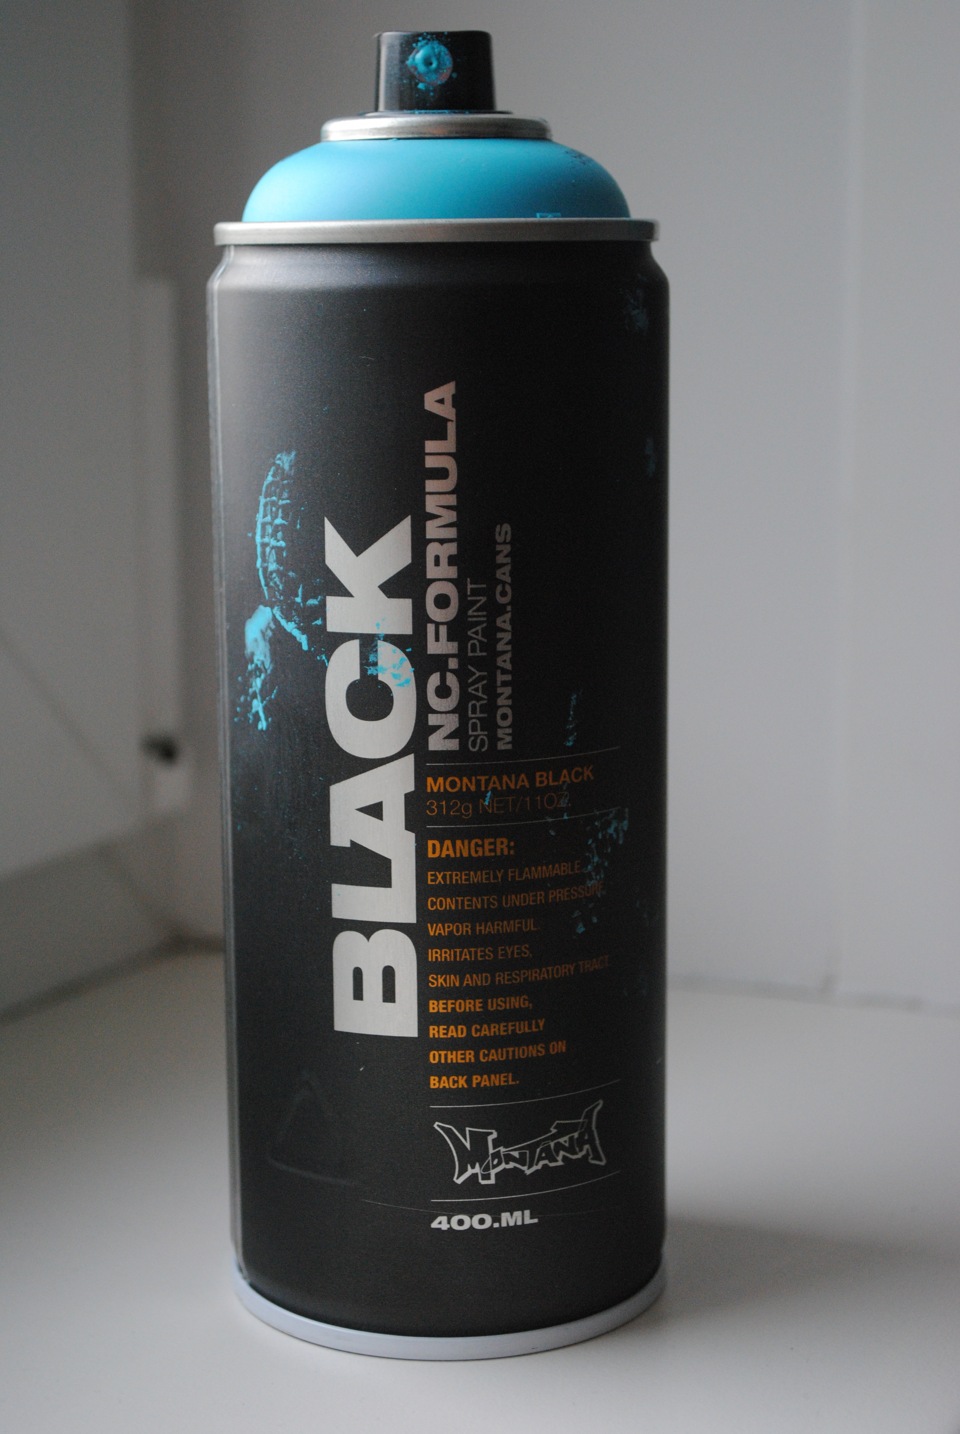 | Spray can. Decorating crafts. |
In this case, the surface of the container should be perfectly clean, as the spray-paint falls on a very thin layer and any remnants of old glue or other debris will rather emphasize, but not hide. As a result, the finished product will not look very nice.
Progress
| Picture | Description |
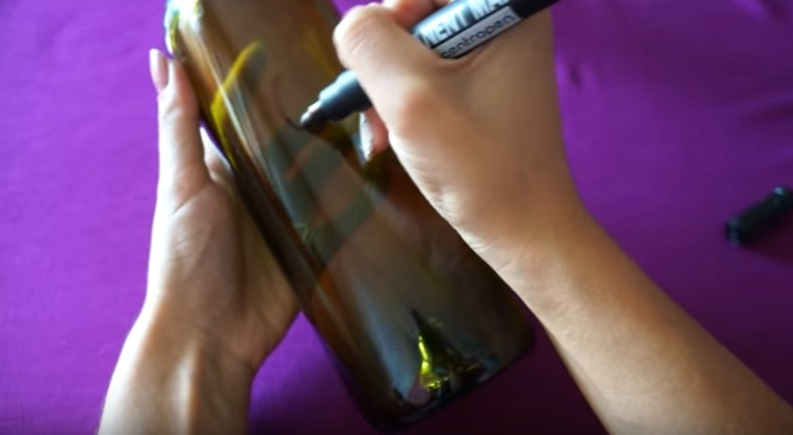 | We writemarker on the glass surface the desired inscription. |
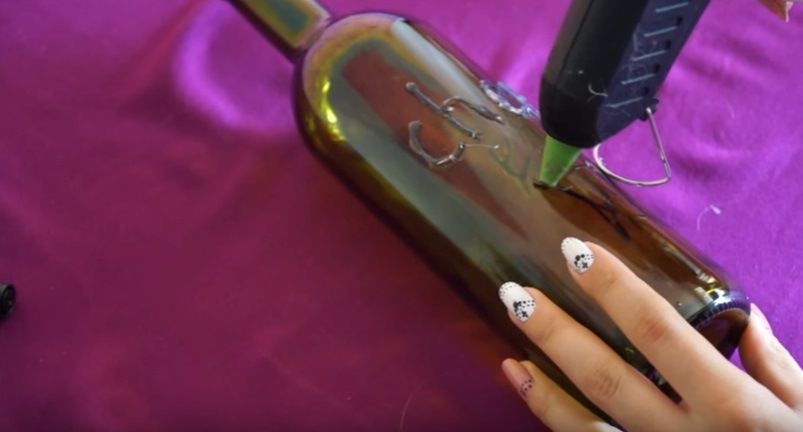 | Apply on the finished letters glue with a glue gun. |
 | Remove acetone fingerprints from the glass. |
 | We paintbottle using spray can. |
Sample number 3: filling with sand
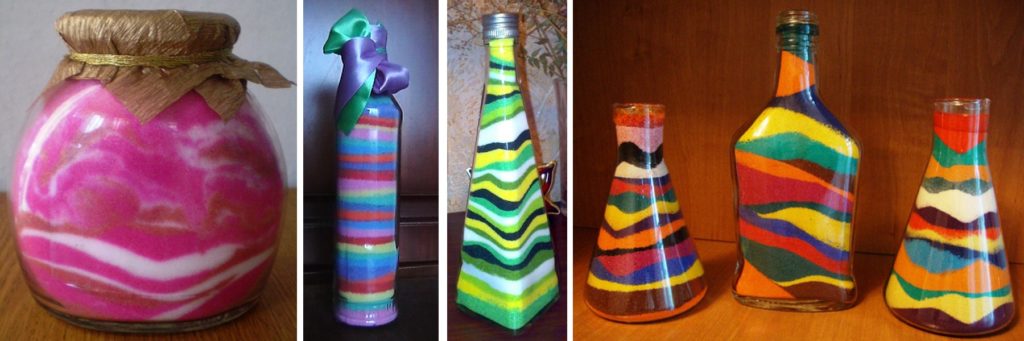
Glass containers filled with colored sand can be a real boon for the interior of a living room or bedroom. They will introduce a dosed portion of bright colors, which will allow you to look at the room in a completely new way.
We prepare tools and materials
| A photo | Name and purpose |
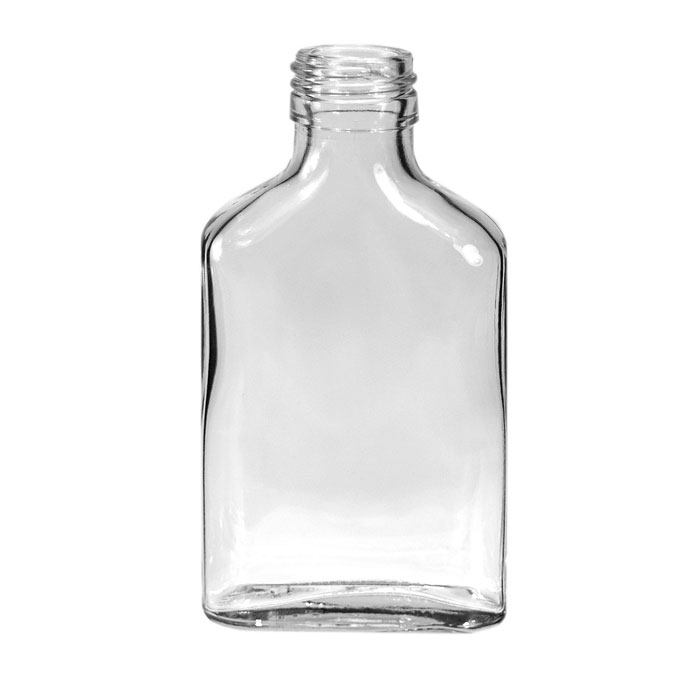 | Glass bottle. The basis of crafts. |
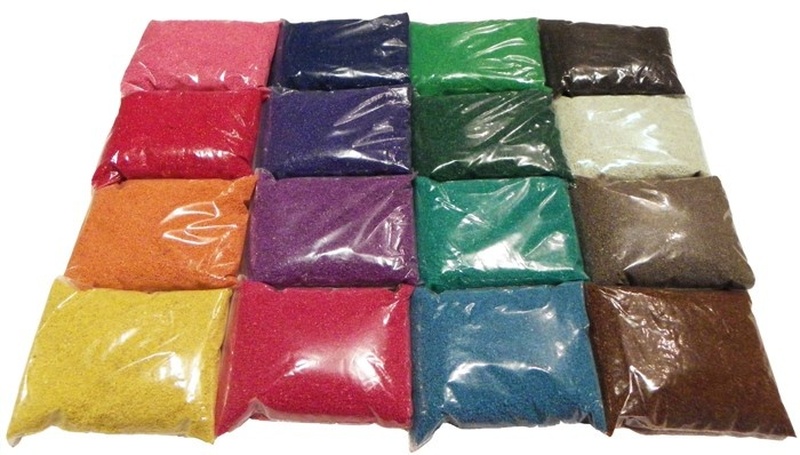 | Colored sand. The formation of the picture. |
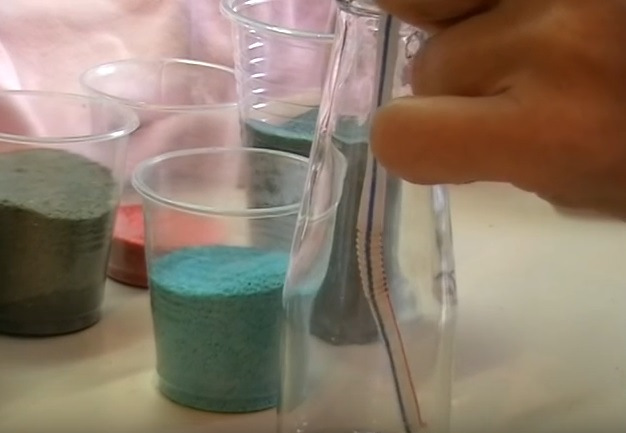
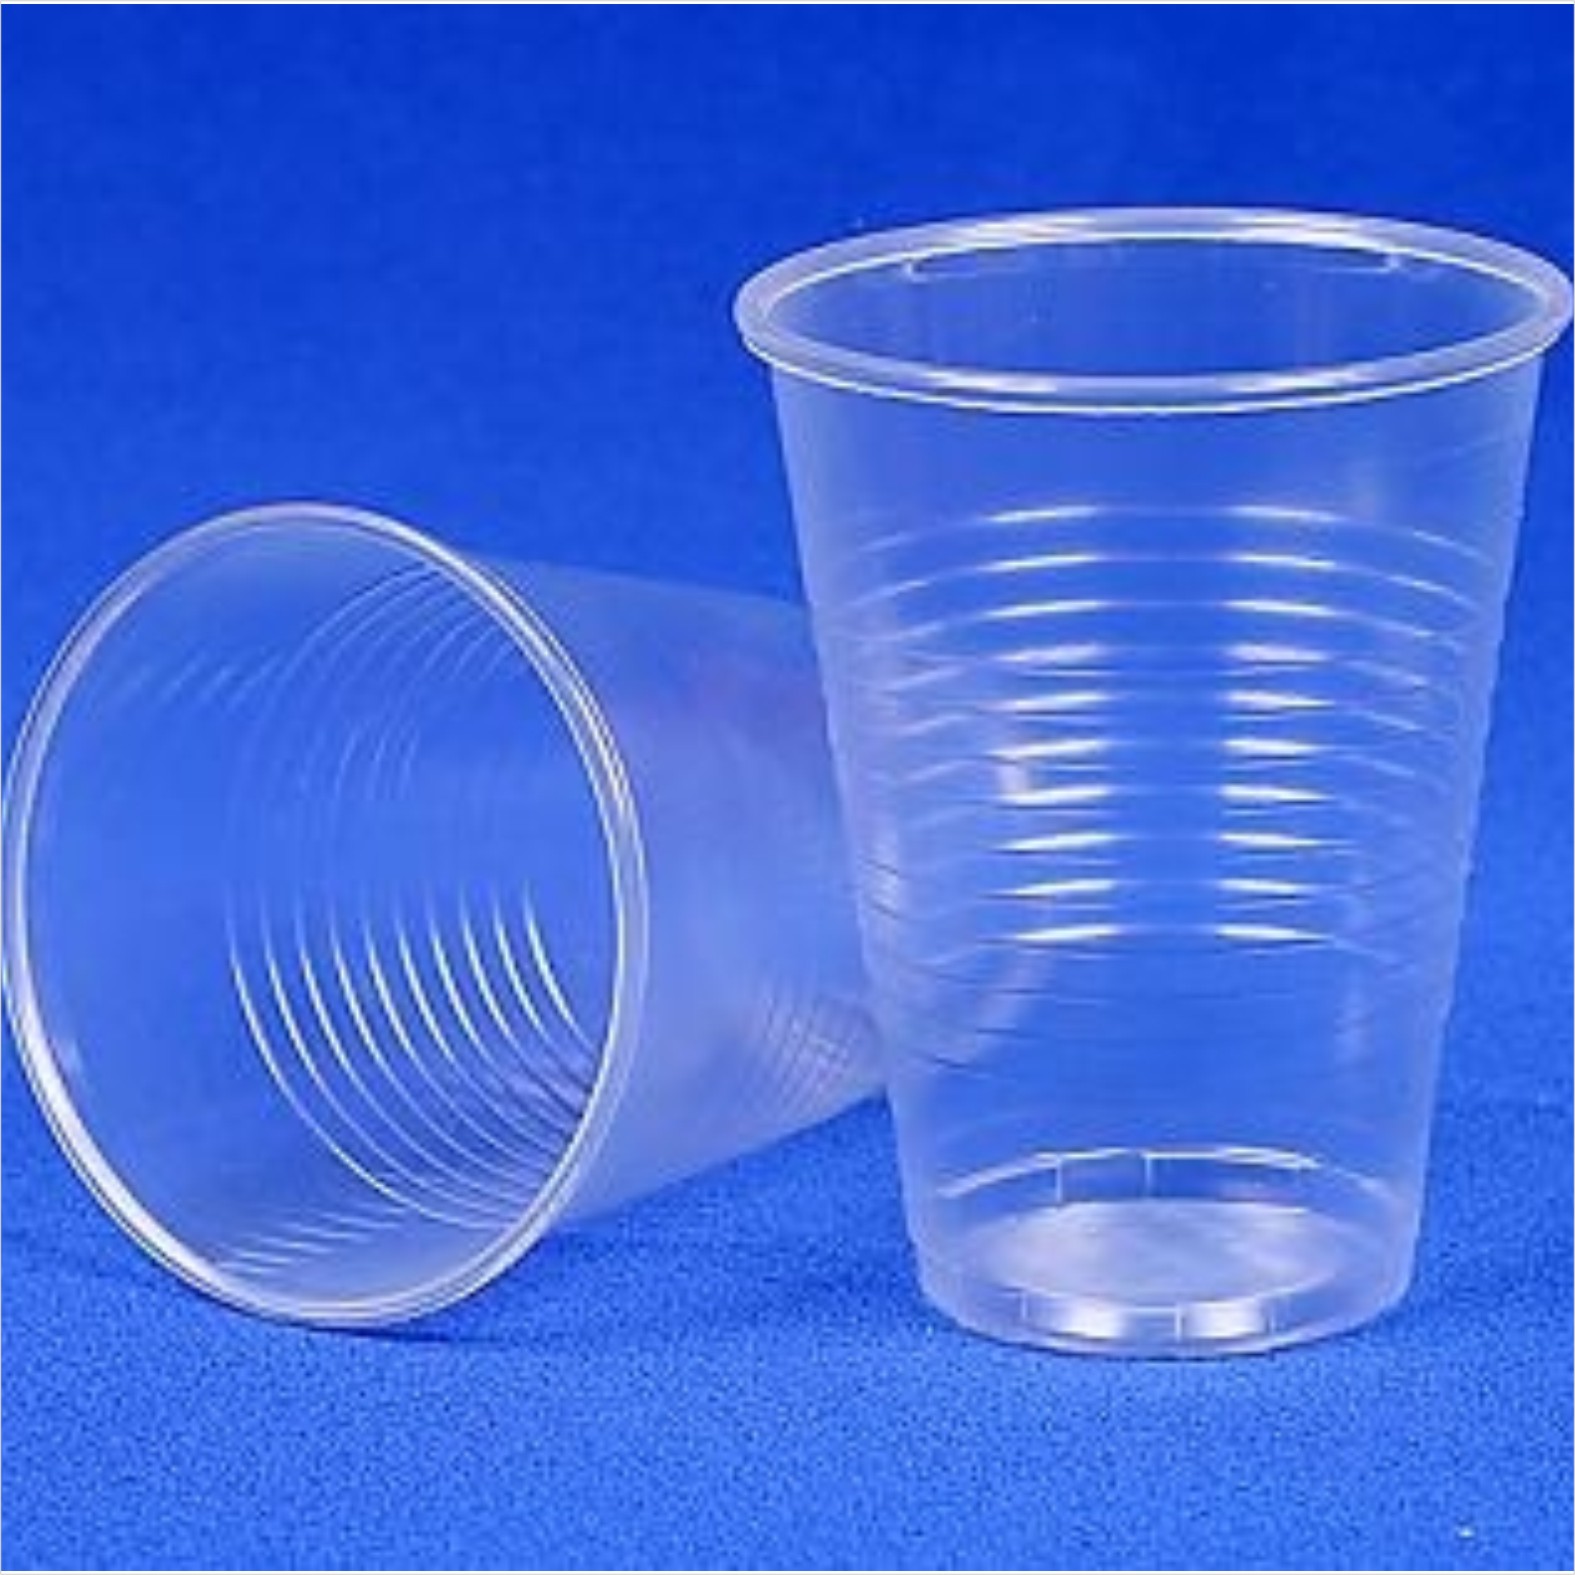 | Plastic cups. Sand distribution tanks. From them it will be much more convenient to work with him. |
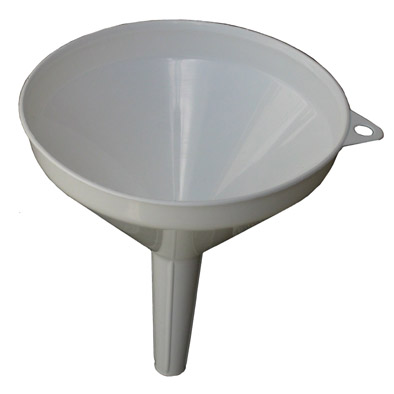 | Watering can. Transportation of sand through the narrow neck into the bottle. |
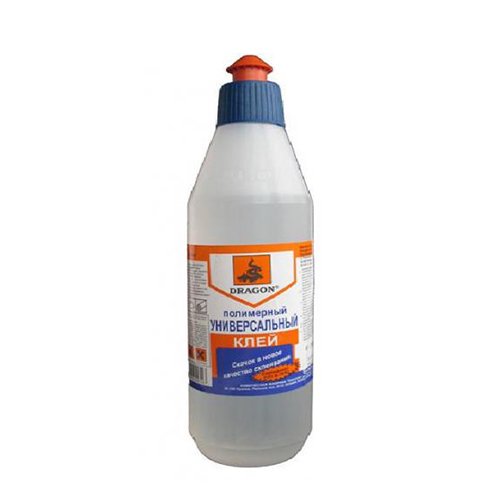 | Clay "Dragon". Creating a preservative cork. |
If you want to make a drawing more complicated than a multi-colored zebra, then you can make a watering can yourself from a cocktail tube and a paper funnel. She will be able to fill not just the layers, but separate sections of the composition.
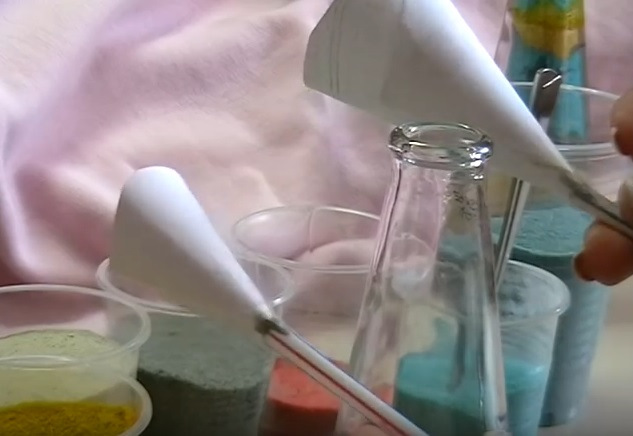
Progress
| Picture | Description |
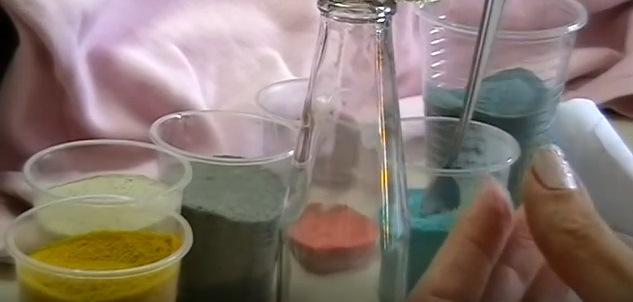 | We scatter sand on plastic cups. |
 | Omit homemade or purchased watering can in the bottle. |
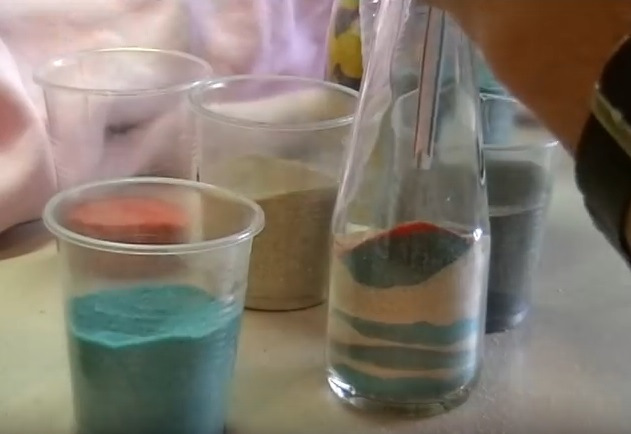 | Fill capacity alternately sand of different colors, falling asleep in the funnel with a teaspoon. For the first time, simply alternate the contrasting shades layer by layer. In the future, the design can complicate and create a real picture. |
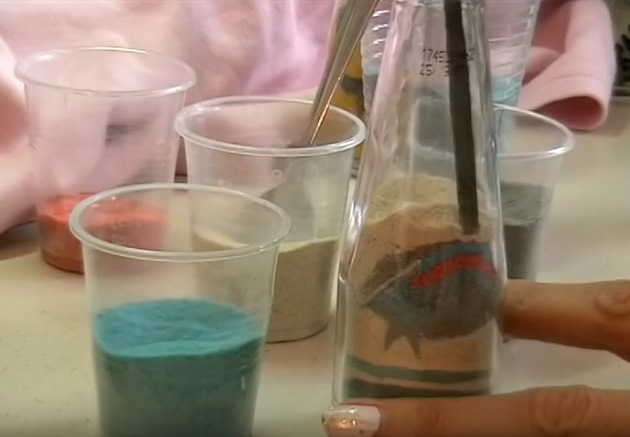 | Tamper Sand in the right places as the filling of containers performed with a long metal stick. |
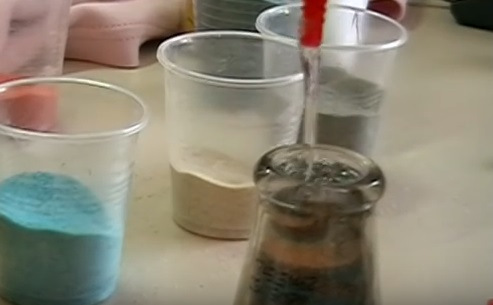 | Fill the neck on top of the sand composition with glue. After it hardens, the bottle will have a tight and reliable cork. |
 | We present finished result. |
Other options
When you make bottles you can use almost everything that you have on hand. In order to broaden my horizons, besides the examples detailed above, I want to offer you a couple more interesting options for decorating glass containers for consideration:
- Cereals and pasta. The bottle can be decorated even with what you can find in the kitchen. In fact, this method is similar to that where the twine was used, only pasted instead of rope buckwheat, pasta, rice and other products, which are then painted;
![]()
- Toilet paper. Even such an unremarkable household item can turn glass containers into a work of art:
- First, with toilet paper, paste over the entire bottle;
- Then we twist thin flagella out of it and glue them in the form of various patterns;
- After the glue dries, paint the background of the composition with white acrylic paint, after which we direct the remaining fragments in other colors;
The advantages of decorating bottles with their own hands
Finally, I propose to deal with the advantages that do-it-yourself bottle decoration:
- Lowprice. It will be much more expensive to buy a ready-made original gift or decorative item. So now, when you go on a visit, you can both please the hosts and save the family budget;
- Opportunity to part withvarious unnecessary items. Instead of the same pasta, you can use parts from a broken household appliance, which was supposed to go to a landfill, toilet paper is easily replaced by old newspapers, and even instead of twine, no one will forbid you to use threads from a sweater eaten by moths;

- Fascinating hobbywhich can even grow into extra income. Indeed, as I have already noted, the original beautiful handicrafts are not cheap;
Conclusion
You have learned how to decorate a glass bottle with your own hands. This process can be not only exciting, but also profitable.
The video in this article contains additional material on the topic, and in the comments you can ask any questions you are interested in.
For any person, the house is considered the territory of personal space, which the owner draws up in accordance with their preferences and taste. It is in the house with the help of small details that a balance of comfort and functional convenience is achieved. A pinch of imagination, a few spoons of free time, a couple of pieces of patience, half a cup with creativity and a recipe for the perfect decoration of your home is ready. Decorating bottles with their own hands refers to the type of design activity, which is now called “hand-made”, that is, something made with your own hands. Quite often we throw away used things or objects that, it would seem, have already served their time and have no right to a second life.
Decorating bottles or “recipes” of their design can pleasantly surprise with originality, beauty and refinement.
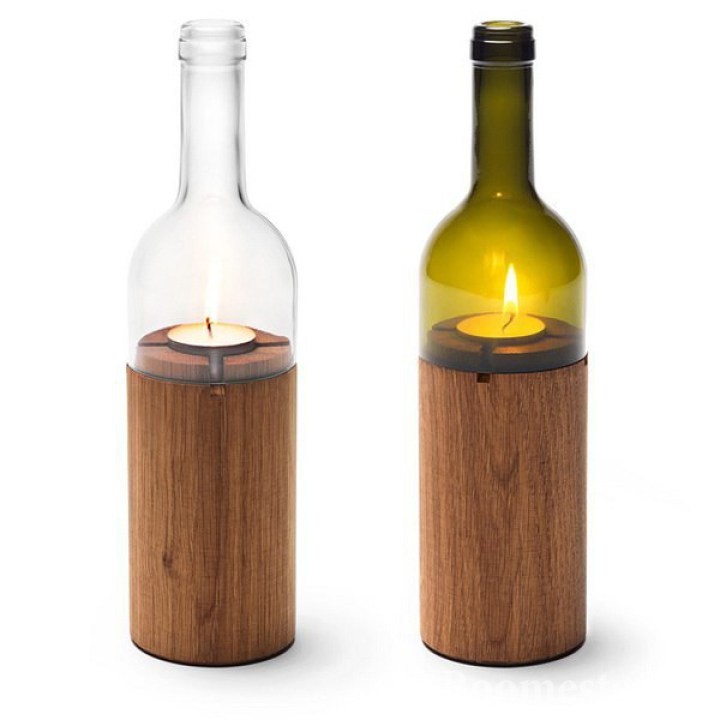
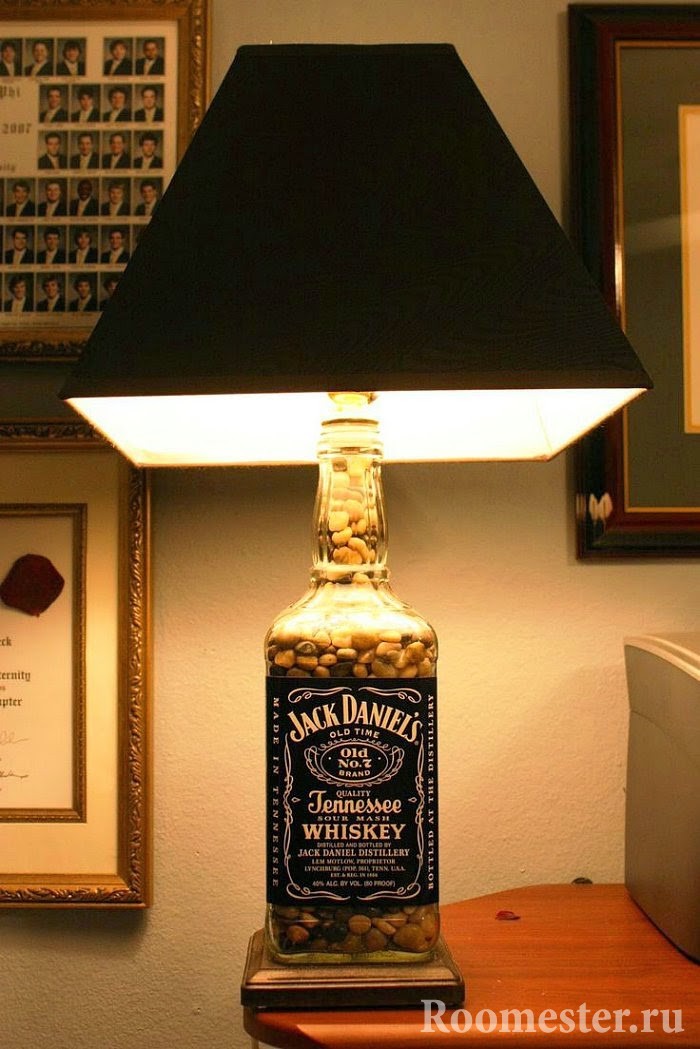
In fact, this is just a container that is of no interest in itself, however, using simple materials from glass bottles, you can make lamps, candlesticks, flower vases, ceiling lamps, painted pencil coasters, lampshades, bird feeders.
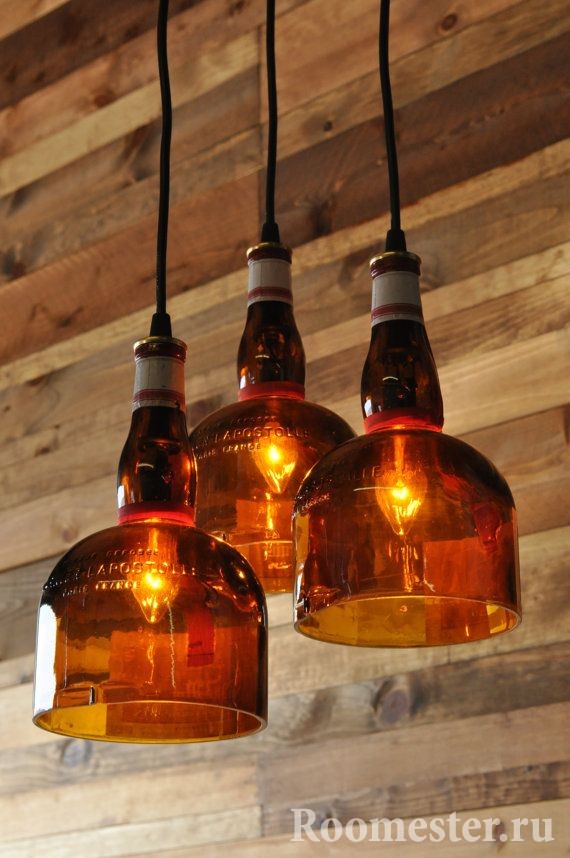
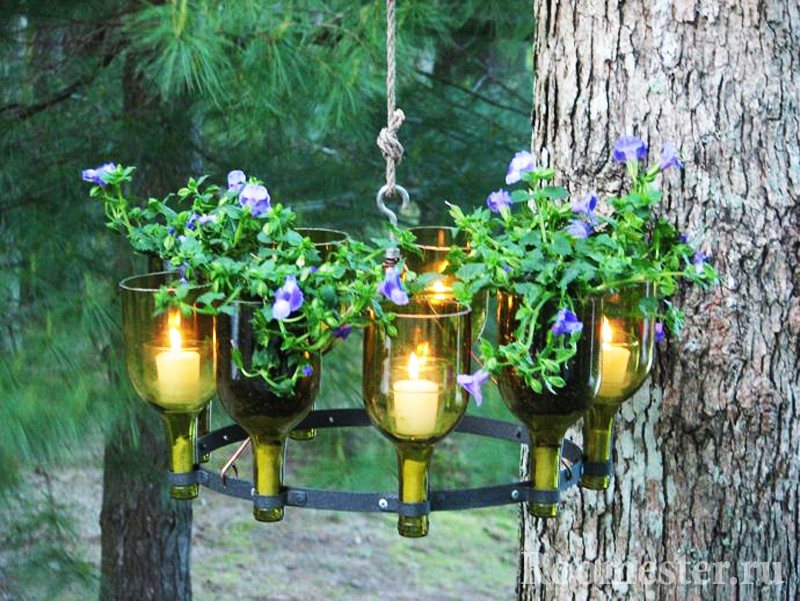 Chandelier from cut wine bottles
 Candlesticks can be made of three types: ordinary under long candles, which will require only decoration work on the glass; candlesticks covering a candle with a cut off bottom; hinged with a cut-off bottom, in which the candle is mounted on a special chain, stretched through the neck.

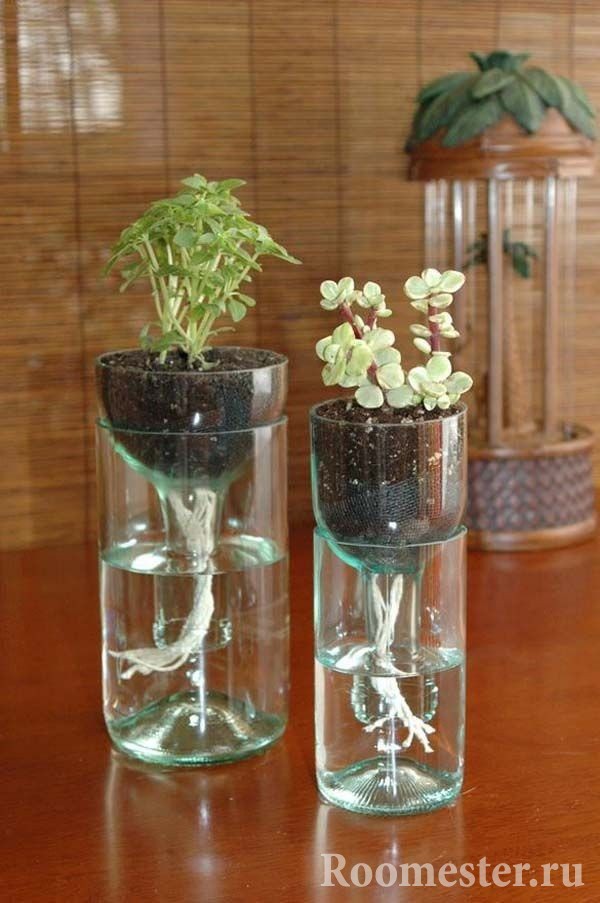
The most original are vases from under the bottles with cut-off necks: sections on several bottles are made at different angles and the original composition in the style of minimalism is obtained.
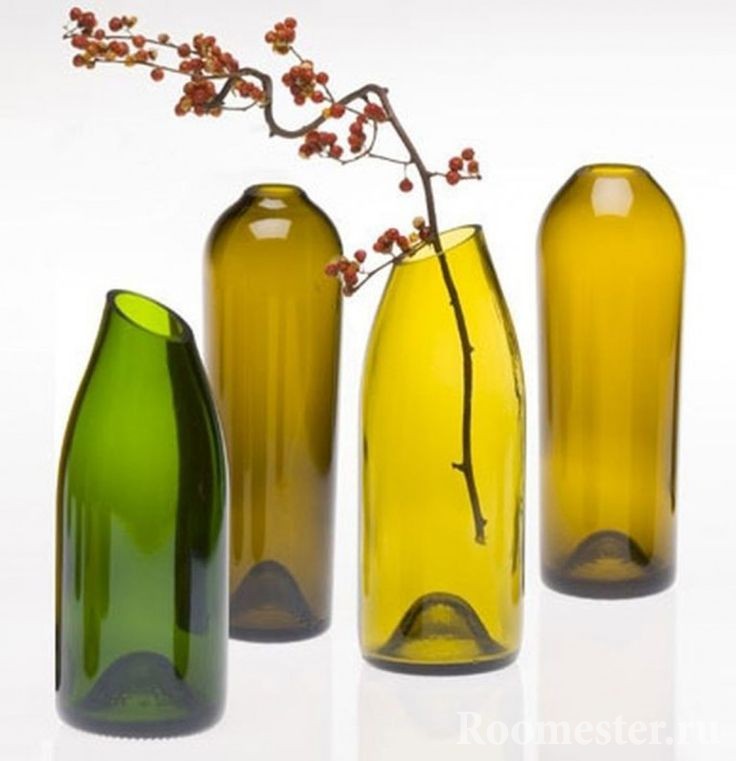
If the colors of the glass are beautifully chosen, then you don’t even need to paint. Now use of bottles as the bearing "sides" of shelves enjoys wide popularity. In the wooden shelves or table tops, holes are drilled with a diameter under the neck of the bottle and “put” on an empty glass container, which holds it well. Some on the upper tiers in the open neck insert dry flowers and cute trinkets.
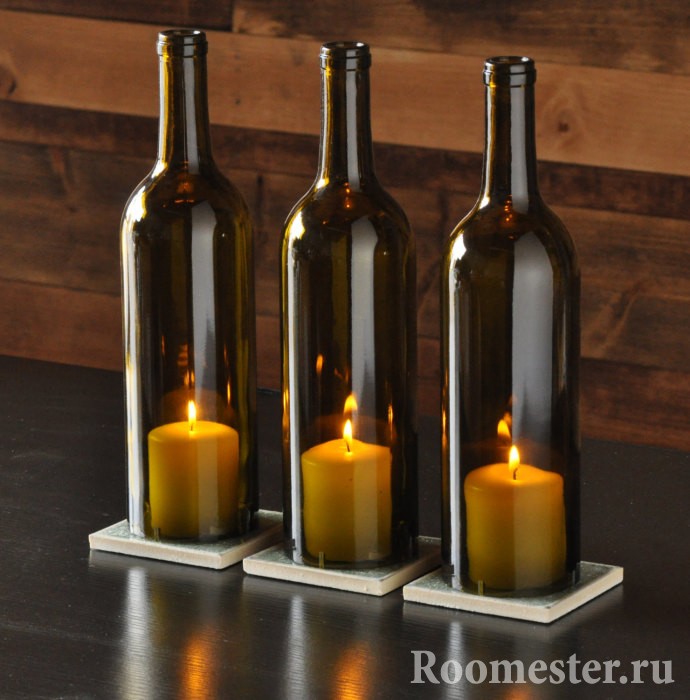
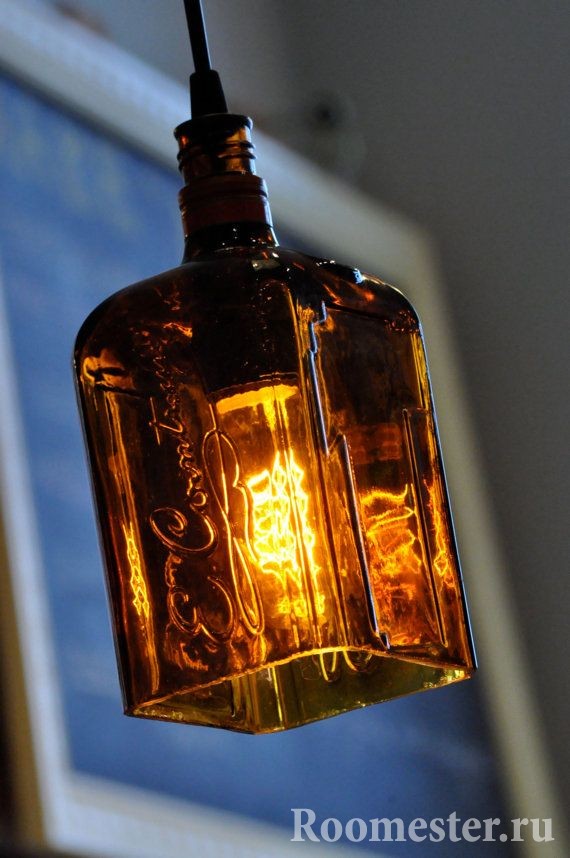
 The lamp from the bottle with a candle inside
 Cooking and glass cutting rules
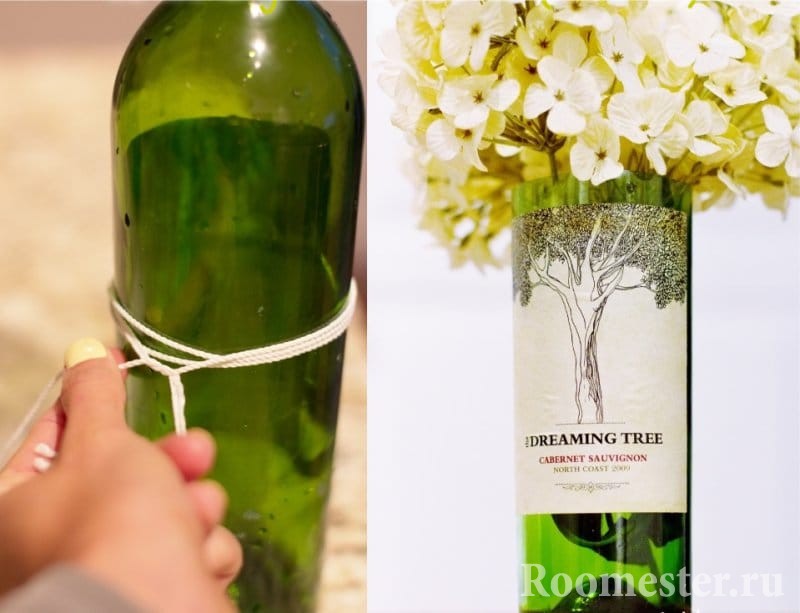
Before proceeding to the decoration of the bottle, it must be cleaned of labels or possible remnants of the contents. To do this, the glass must be dipped in hot (but not boiling) water, and kept in a bowl for several minutes. After the glue under the label loosens its grip, you can wash the paper with a sponge. Now the glass has become clean and you need to decide whether to cut the container and, if necessary, in what way. Cutting the bottle with a special glass cutter is considered the simplest. If this tool is not available, you can use a little time consuming, but effective way.
To do this you will need:
- Severe thread;
- Alcohol-containing substance (White Water can be used);
- Bowl with hot water;
- Bowl with cold water;
- Matches
The bottle at the site of the future cut must be wrapped in several layers with a harsh thread well impregnated with an alcohol-containing solution. The thread must be set on fire and while it is burning, quickly rotate the container. Then put it in hot water, hold it for about four minutes, drastically pull it out and dip it in cold water.
The temperature difference provokes the occurrence of cracks in the place designated by the thread. The only drawback with this method may be not quite an even cut. If you need perfect accuracy, you will have to use a glass cutter.
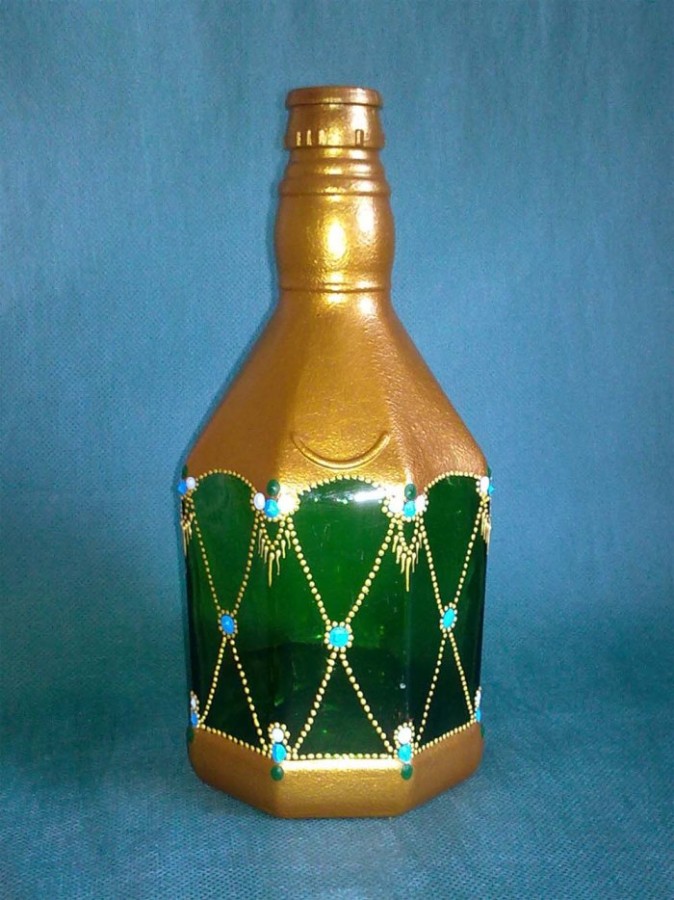
Drawing pattern
The material is ready, the necessary sections are made now you can proceed to the most creative part of the work-decorating. If you can't draw, it won't be a serious obstacle.
Sketches of the picture can always be found on the Internet and use the already finished works of talented artists. It is easy to decide on paints: stained glass paints specifically designed for glass are considered to be the best option.
To work with stained paints, a degreaser is needed, which needs to be lubricated before applying the paint. You can also use acrylic, but its effect will be somewhat different: acrylic will not completely fill the glass, no matter how many layers you apply.

The next item will be the choice of style in which the painting will be made. Now the most popular are dot painting and stained painting. For the first one, the drawing is characterized by small droplets-dots, for the second - an almost indistinguishable resemblance to mosaic glass, made of separate pieces of different colors. Combining a technician requires a certain amount of preparation and “full hands” in drawing.
If it is difficult for you to rush off the bat, you should practice on paper. For beginning artists, it is important to remember that the main details of the drawing are drawn first, and the little things are left at the final stage. It should stock up with cotton buds, with which you can correct minor flaws.

Pasting as a decoration method
Another excellent design option for a bottle with your own hands can be pasting glass with various trifles: from silk ribbons and rhinestones to buttons and beads. Very popular bottle decoration using ordinary twine.
The thread is glued to the glass with layers and with the help of various twists they create a composite pattern. As a result, a “semi-antique” effect with rustic motifs is created. These bottles will look great in the kitchen.
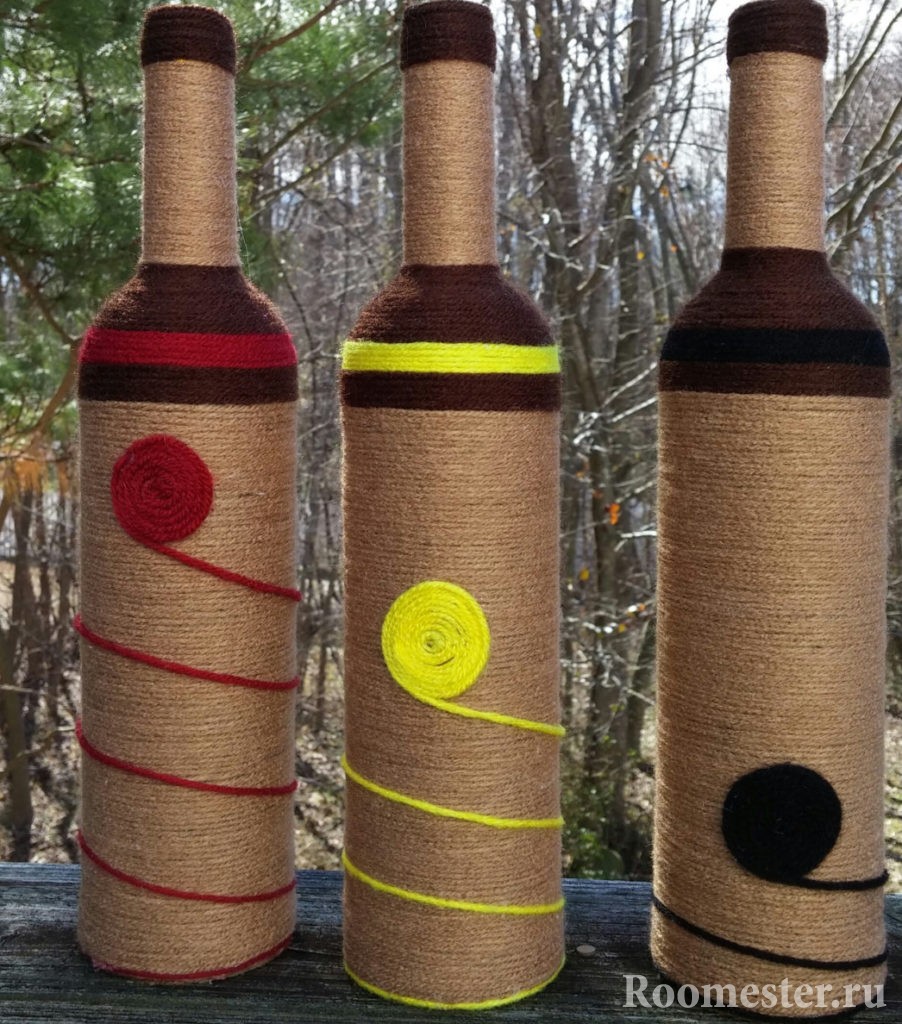 Jute bottle decoration
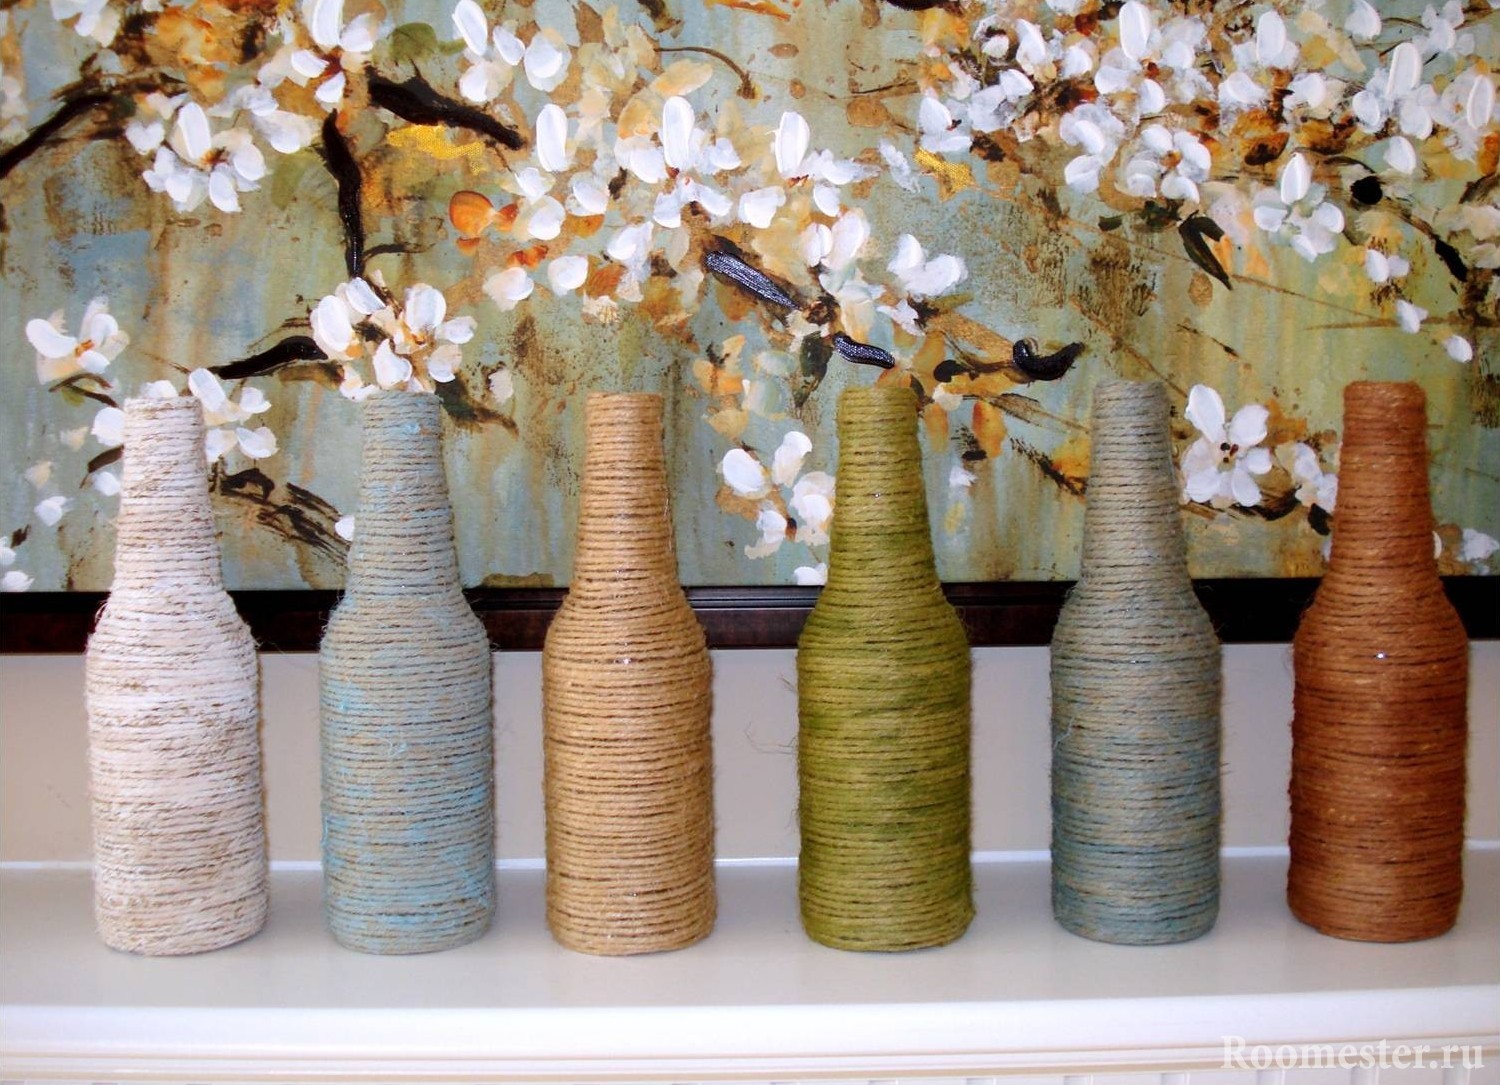

Specifically, for this room you can fill a transparent container with peas, grains of corn, chopped carrots and pour all this food variety with heated 9% vinegar. Spread slices of products you need layers, it will help to achieve a slim composition. You can either clog it with a regular cork or with a cork covered with a cloth (most often with a checkered pattern), and wrap with a twine on top.
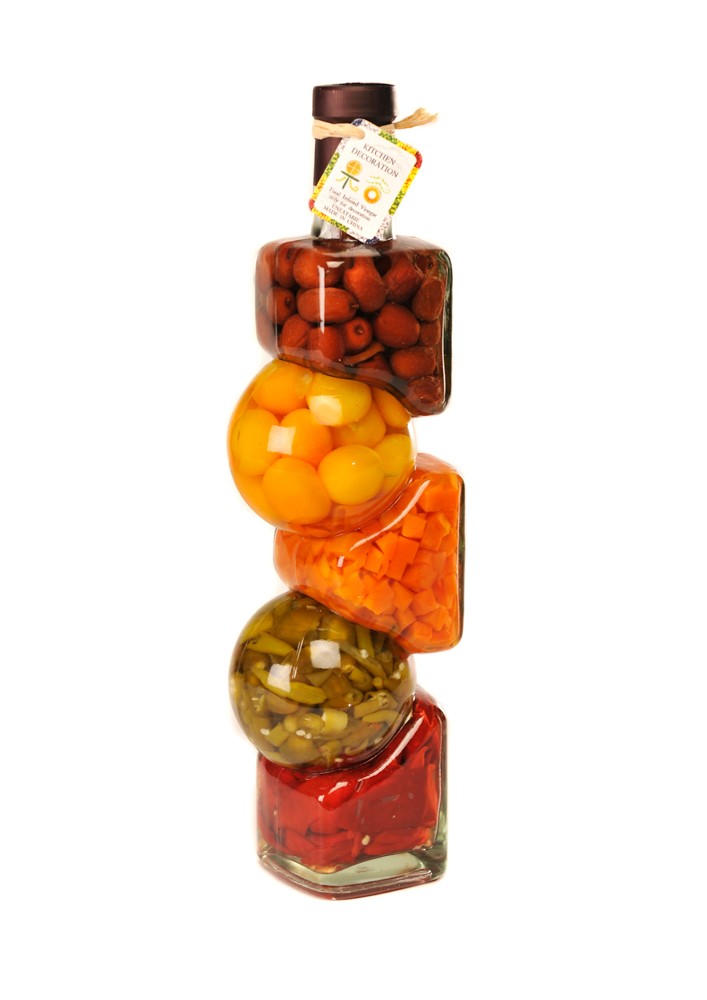

Several of these bottles and cans will be the original design decision that will decorate a kitchen shelf.
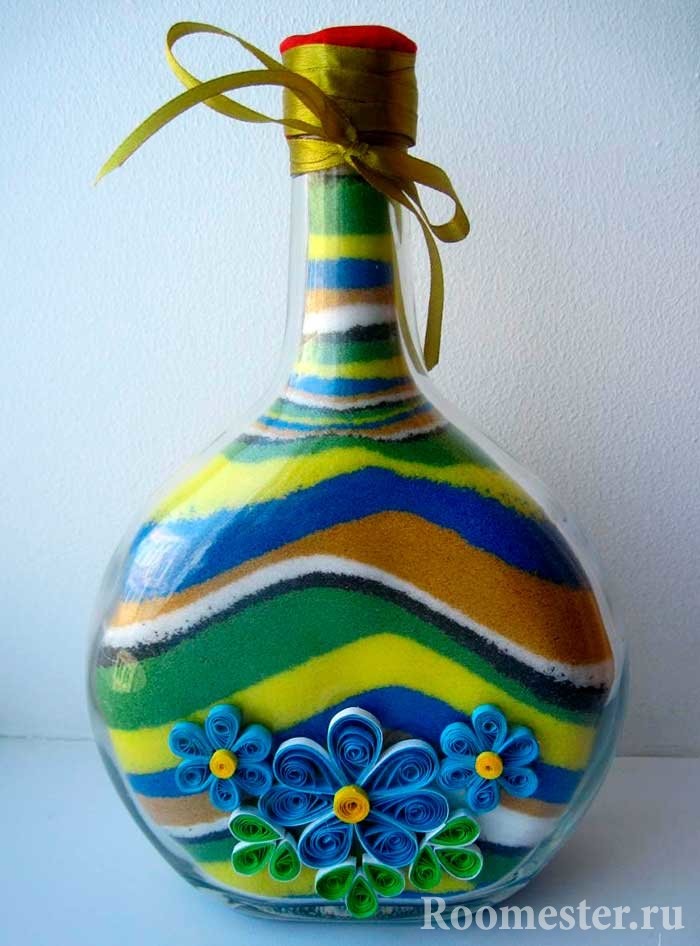 Color sand in a bottle with quilling
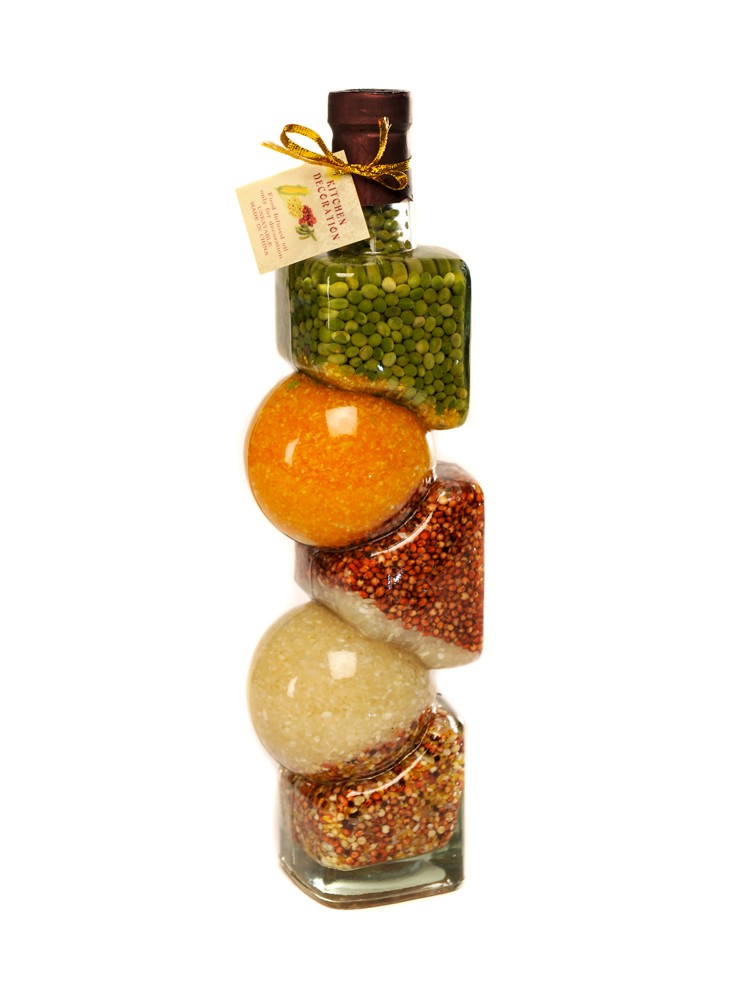
Decoupage technique
The essence of decoupage is to transfer the image / pattern to the surface and fix it with a special varnish. Decoupage is a very old technique of decorating bottles and not only.
She received a new life just a decade ago, when many craftswomen began to learn it from scratch and gradually dilute it with modern design techniques.
For work you will need:
- Tassels;
- Glue;
- Basis with a picture;
 Painting on toilet paper on wine bottles
 A clean surface is coated with varnish and transferred onto it. After complete drying, the pattern is coated with varnish for fastening. It is best to use bristle brushes for such purposes. At the discretion of the needlewoman, you can add a border of silk ribbon or beads to the pattern.
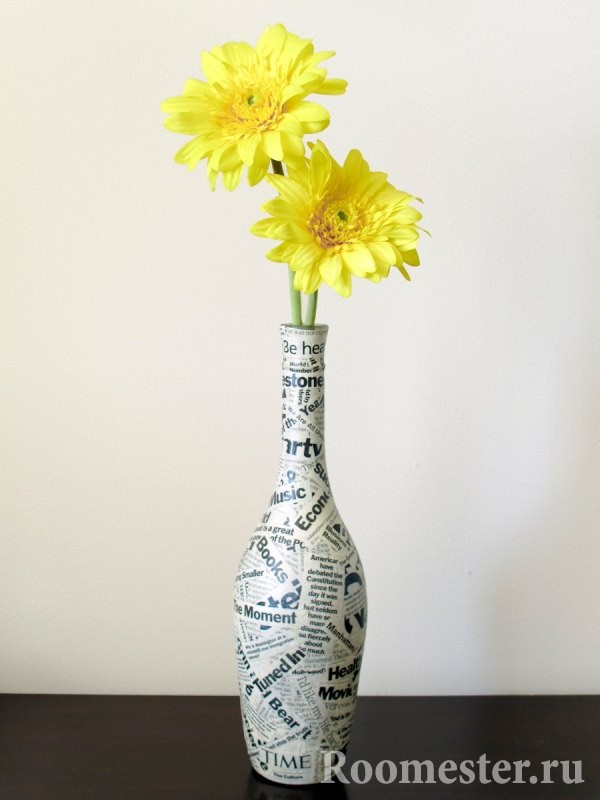 Pasting a bottle with a newspaper at home is a simple and effective technique.
 Focus on the little things
Letting your imagination fly, you can create a truly magnificent element with your own hands, worthy of a creative exhibition.
Thanks to the little things in your house there will be a feeling of unique comfort.
This applies not only to the decor of the bottles: small embroidered pads, cute trinkets, embroidered linen, beaded trees, knitted plaids, painted ceramic objects.
You can always bring a drop of heat into your personal space, spending not too much time. And even if it seems to you that you have no talent for needlework, only a few hours of work will show you how exciting this process is.
Do-it-yourself bottle decor can be not only an exciting creative process, but also a wonderful pastime for the whole family.