Champagne for the young with their own hands. Decorating a champagne bottle for a wedding.
It involves the use of wedding symbols and respect for the general style of celebration. You can try decorating wedding bottles with your own hands!
Wedding decoration of champagne bottles in the clothes of the bride and groom
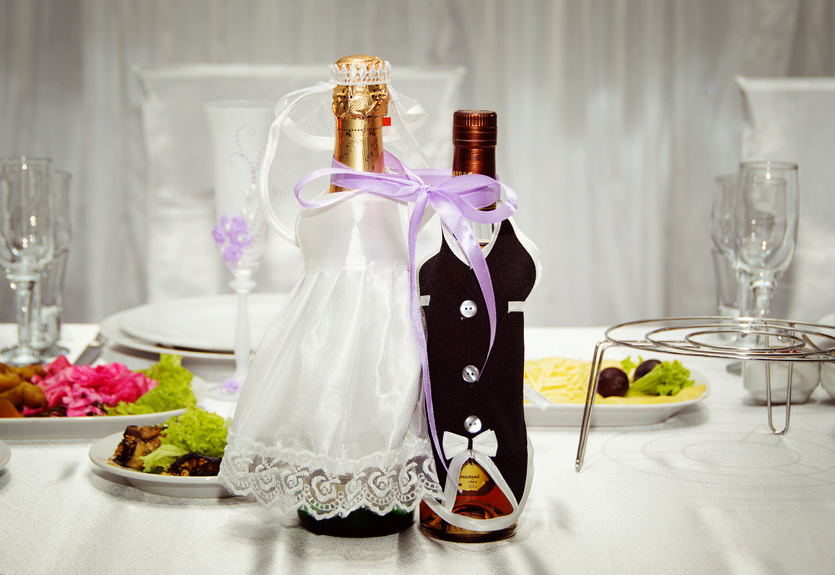
According to the tradition, two bottles of champagne are put on the wedding table next to the newlyweds, which are stored until a certain time - one before, the other - until the child is born.
These two wedding bottles are made in an original way to decorate in various ways, which we will consider in our review.
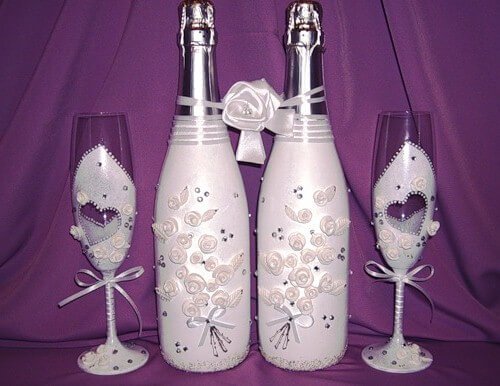
Wedding champagne bottles beautifully decorated and rhinestones
You can decorate not only champagne, but also other alcoholic and non-alcoholic beverages. They will decorate the wedding table with their original look. Decorated bottles are also customarily played at wedding contests and auctions.
Wedding bottle decorations: original ideas
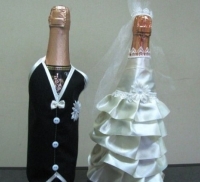
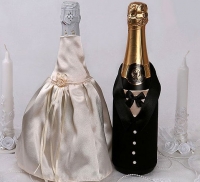
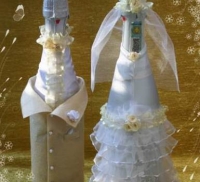
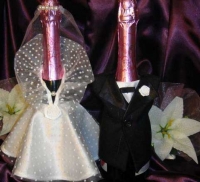
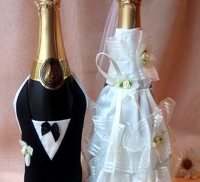
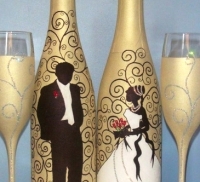
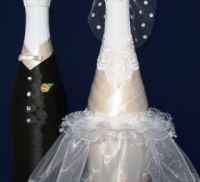
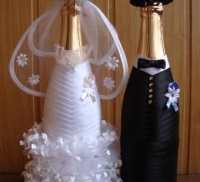
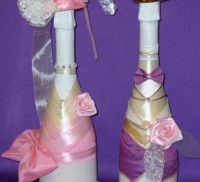
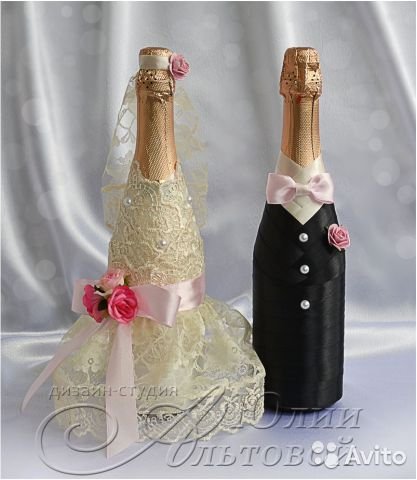
Decoration of bottles for the wedding: “Bride and Groom”
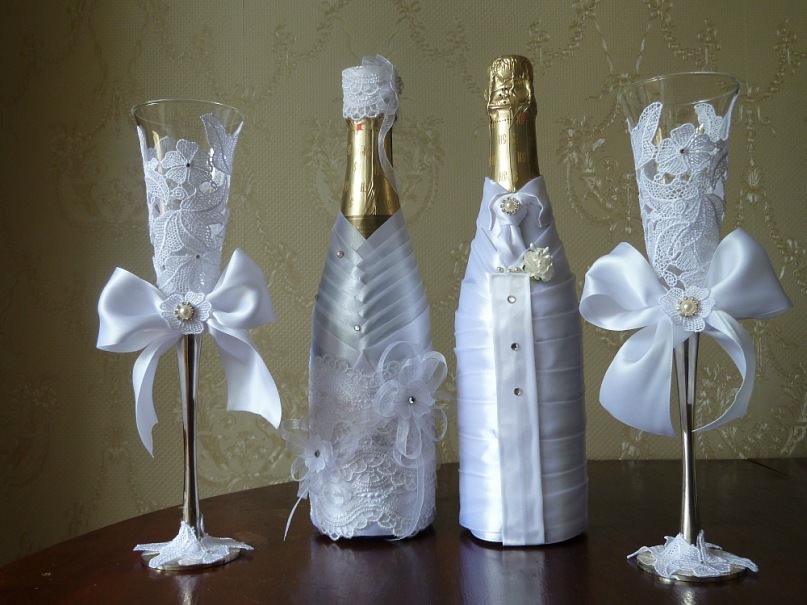
Most often, the champagne bottles are “put on” by the wedding dresses of the bride and groom, using pieces of velvet, organza and lace.
Also, wedding champagne glasses can be decorated in the symbolic style of the bride and groom.
Do not miss our unique!
Try to decorate the glasses for the wedding with the help of our master class!

Here are some more stylish options for decorating your wedding glasses in the “bride and groom” style:

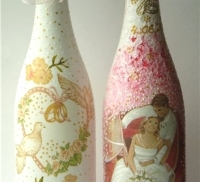
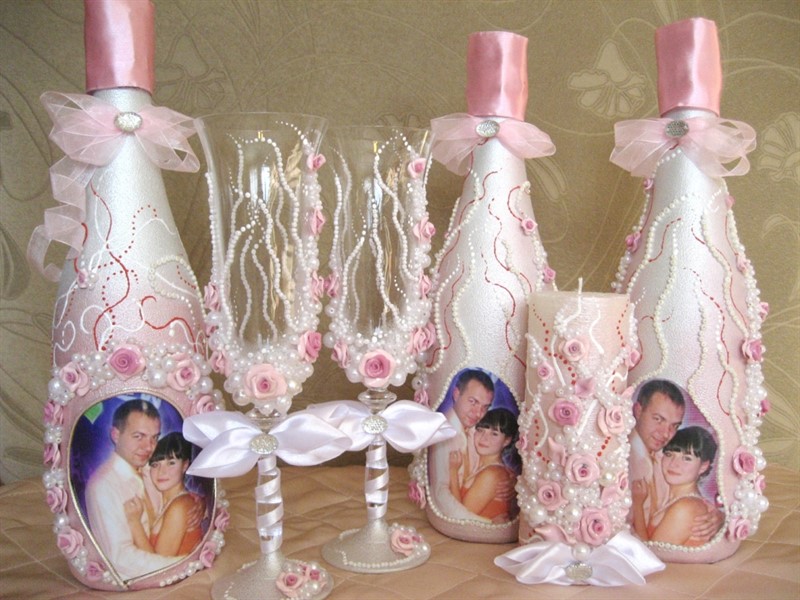
Decoration of bottles for the wedding using the photo of young
Labels with photos of newlyweds or with any other images of the wedding theme are stuck on the bottles. Labels can be ordered from any printing company that prints photographic images on self-adhesive film or paper.
Decoration of bottles for the wedding in the style of your wedding
Bottles are decorated in accordance with the theme of the wedding. To do this, use the most appropriate means, including stickers with thematic drawings and photographs.
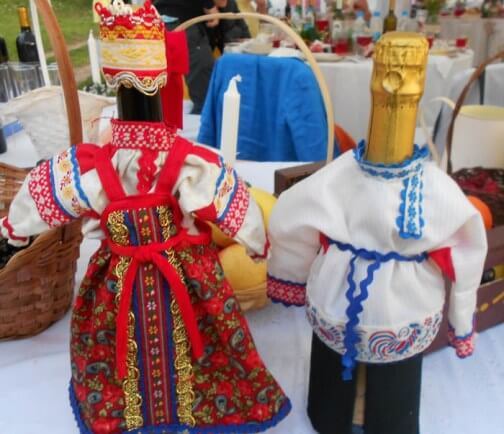
Rustic-style wedding bottle decoration
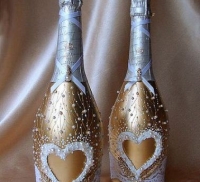
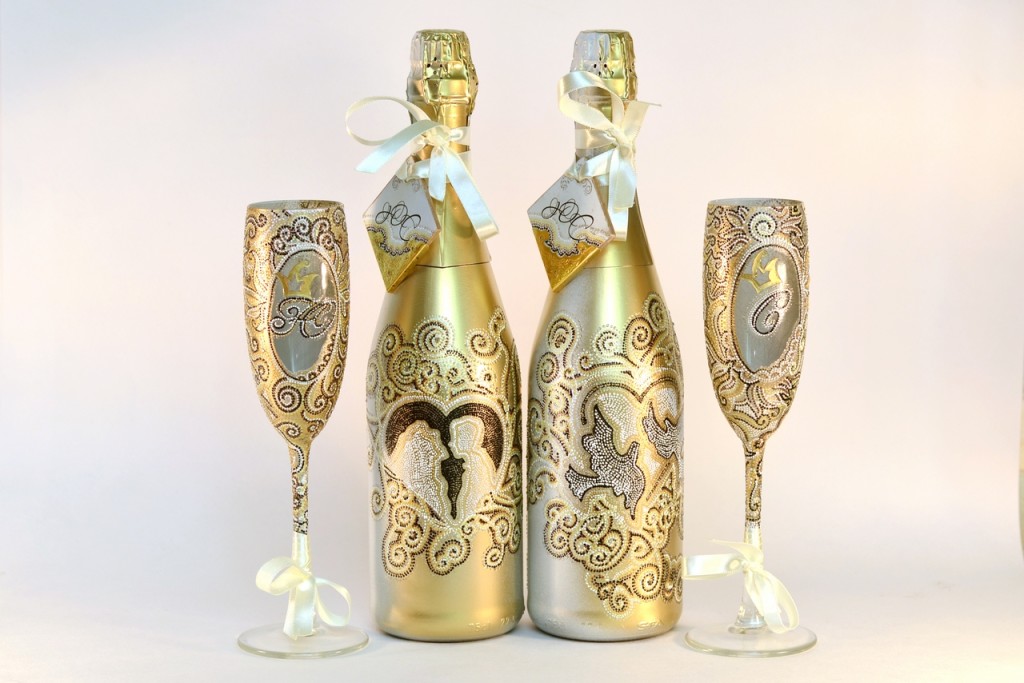
Decoration of bottles for a wedding with the help of velvet and rhinestones
A velvet coating is applied to the bottle (black on one, white on the other), on which pictures of Swarovski crystals are laid out. It can be drawings of hearts, rings, the initials of the newlyweds and other wedding symbols.
Wedding bottles decorated with rhinestones and decorated with wedding rings
Decoration of bottles for a wedding with an original decor
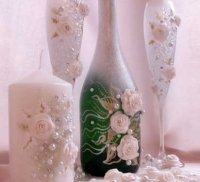
You can paint your own bottles for a wedding with the help of pearls, beads and other jewelry. The main thing is that the decoration of your wedding bottle coincides with the overall style of your wedding.
![]()
Decoration of bottles on the wedding engraved on glass
The engraving on the wedding bottle in the form of inscriptions and drawings is perhaps the most unusual. You can order such a bottle decoration for a wedding in an engraving workshop.
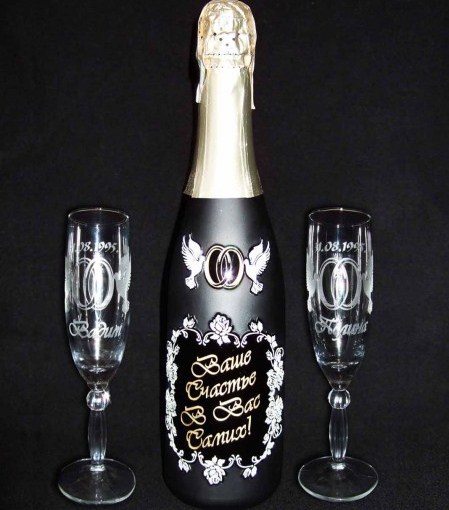
Engraving on a wedding champagne bottle
Technician, techniques and ways to decorate the bottle quite a lot. Consider the technique of decoupage and decoration of the bottles for the wedding with ribbons.
Decoupage wedding bottle do it yourself
For decorating bottles using decoupage technique, you will need:
- brushes, paints, glue,
- pieces of tissue, skin,
- various decorations
- and, of course, fantasy.
Experience and training in this matter will also be useful.
Paints need to take acrylic, contour and special for glass.
For decoupage wedding bottle will need more and varnish.
You can use beads, sequins, beads, feathers, shells, textile flowers and other nice little things as jewelry.

We offer in our article with a detailed illustration of the work.
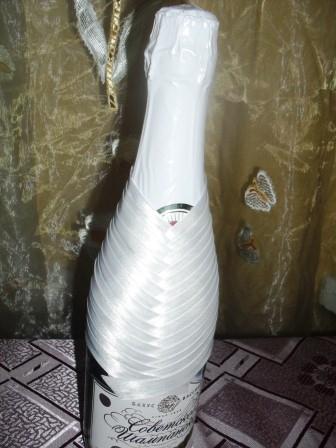
Decoration of bottles for wedding ribbons
- Take the tape, measure the cut, wrapping the neck with tape, cut it.
- Apply a little glue to the bottle and carefully glue a piece of tape. Do this until you seal the bottle completely.
- Places of joints can be masked with a vertical strip of the same tape or to glue decorations on them.
- For the bottle representing the bride, the tape is taken white, for the groom - black.
- The first two stripes for the bridegroom bottle are pasted white - it will be a shirt collar.
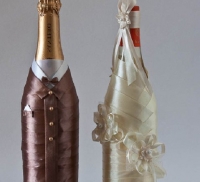
Bottles with glued ribbons are decorated with flowers, pearls, beads, pieces of organza, tulle or lace.
For greater persuasiveness, you can put a butterfly and a top hat on the bottle of the groom, and sew an air skirt and veil to the bride.
Soon wedding with your friends or relatives? White dress and veil at the bride, business suit or tuxedo - the groom. And ... of course champagne.
Wedding champagne is an indispensable decoration for the festive table of the newlyweds. In addition, interestingly decorated bottles can be beautiful.
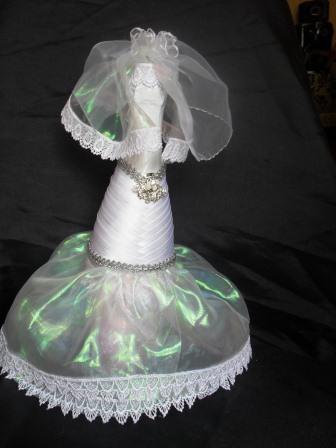
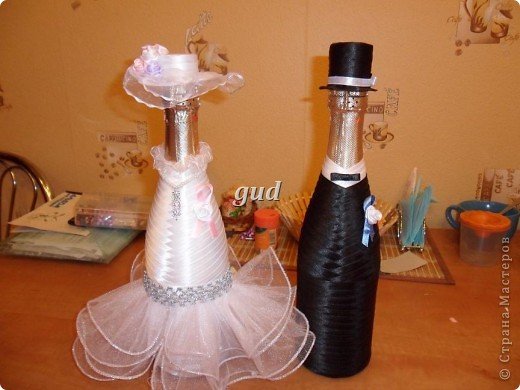
Wedding Champagne Bottle Decoration Bride
Getting Started. We take a kosobeyku, try on the bottle and cut off a piece of the desired length. We glue. We work carefully with glue - put a few dots on the entire length of the tape and glue it.
In exactly the same way we try on, cut off and glue the following pieces of kosobey.
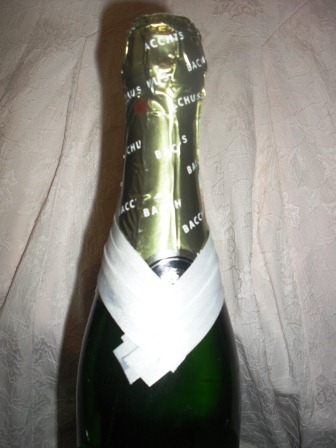
In the end, should get something like this kind of mummy
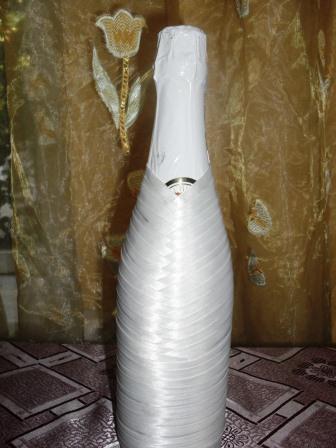
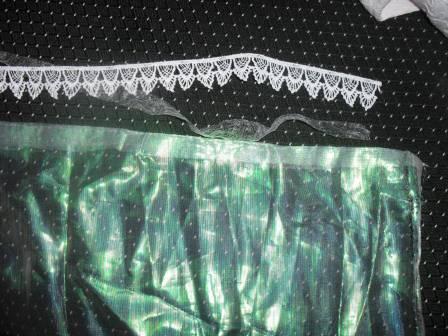
Now we will make our bride a skirt. Cut off the organza of such length, how long do we want to make the skirt to the bride. The width of the organza should be 2 times the radius of the champagne bottle. With the help of adhesive non-woven we glue the tape to the bottom of the future skirt.
Sosofarivaem, trying on the bottle
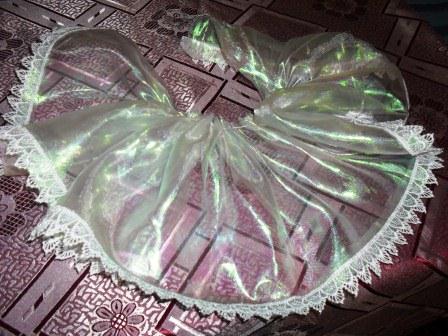
With the help of glue, we attach the skirt to the bottle, top we make up with a braid.
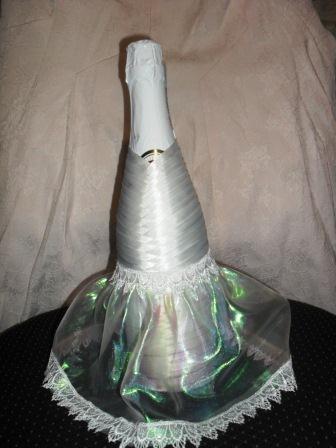
The second tier of the skirt is made similarly, is attached over the first
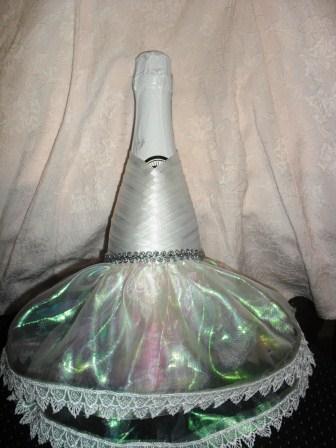
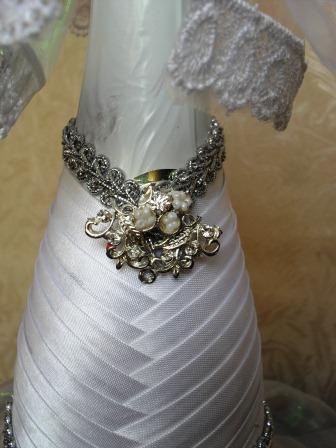
Now we decorate the bride's bodice: neatly fasten the silver band around the edge and in the middle with the help of glue - bijouterie
Just as the skirt is done, the veil is only going to be stronger. First, a piece of braid is fastened on the bride's “head”, and then a veil is stuck on the “top of the head”. The veil can be made from organza, tulle or from the usual wide white bow. Braid is also selected at will.
Just like that you can decorate the wedding bottle of champagne Bride.
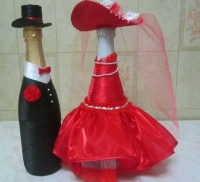
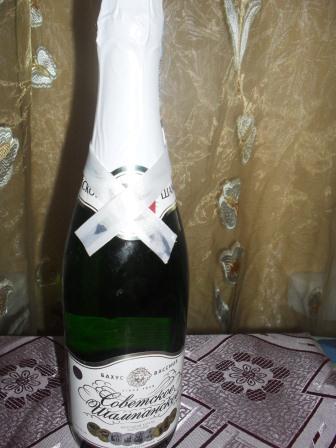
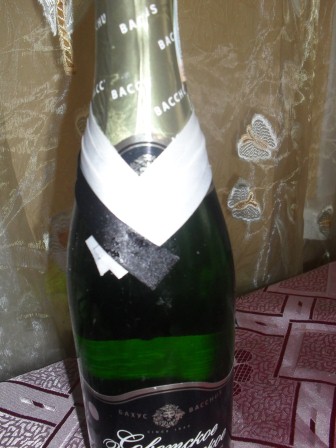
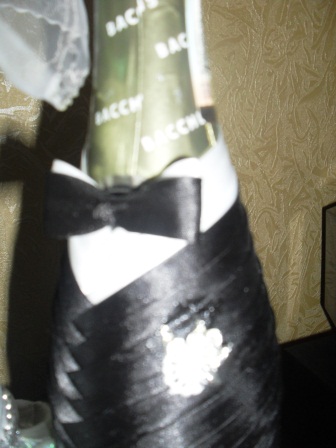
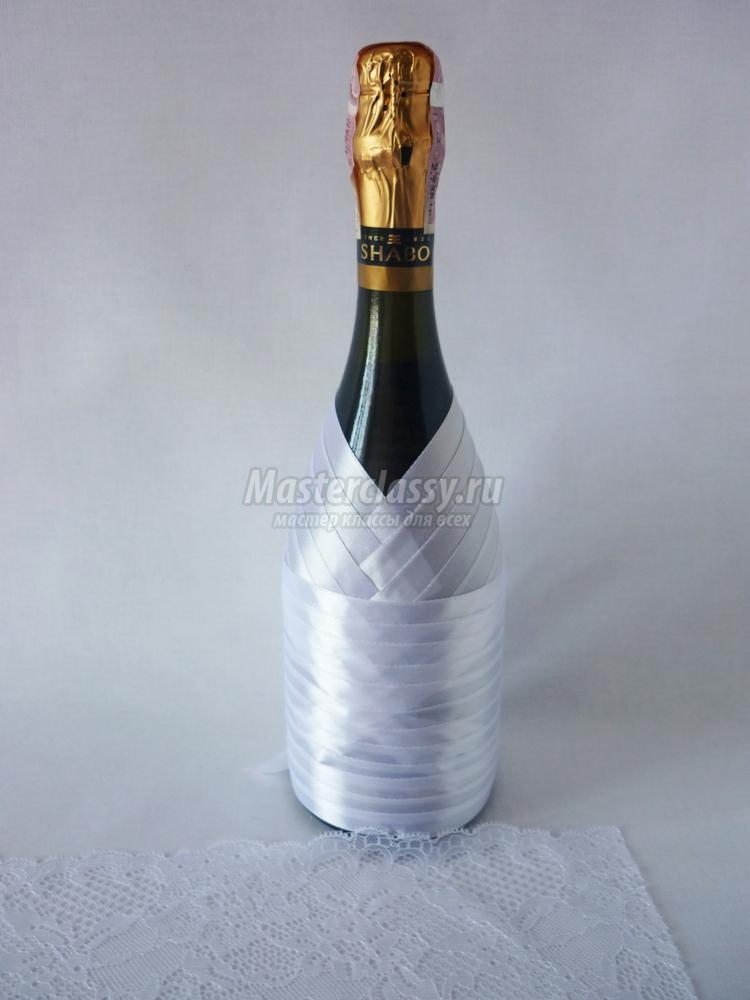
We begin to decorate the champagne bottle from the neck. First we make a "shirt".
We take a white slanting inlay, try on our bottle, cut it off, glue it. Thus it is necessary to glue 3 strips.
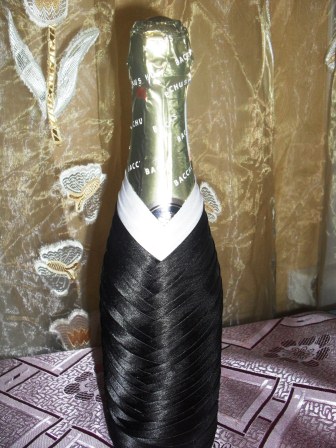
Getting down to tailcoat. Cut off a piece of the required length from a black slanting inlay and glue it.
Glue the bottle with strips of black oblique bakey to the bottom.
Making a butterfly. To do this, cut off the black and white oblique Bakey on a small segment, put a black segment on top of the white segment. We fold all our construction in half, sew along the side edge. You should get a two-color ring. From this ring we form a butterfly and glue the “bridegroom” to a tail coat.

Making a hat. Cut out a cardboard rectangle. Trying on the "head" of the groom, glue the cylinder. We cut 2 circles out of cardboard: the diameter of one is equal to the diameter of the cylinder, the diameter of the second is taken according to the desired width of the fields of the future hat. Everything is going, glued, dried. Then we paint our hat with black gouache. Dry again.
We cut off a strip from a white slanting bake, a little more than the diameter of a hat. We fold the strip in half (inside the strip you need to drop a little bit of glue so that it does not unfold), attach it to the hat.
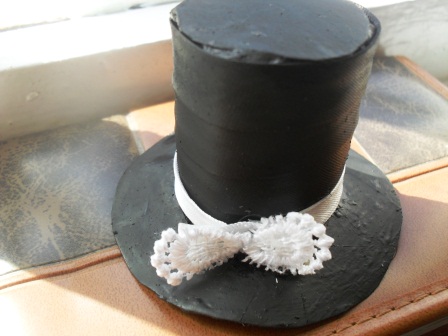
On the "lapel" attach any decoration. Dress the hat on the wedding bottle Groom.
I hope you yourself found out that decorating wedding champagne bottles is very easy. And it looks very beautiful at the wedding table.
Author - Elena Bolshakova or sigma87 specifically for the site Poradka
Traditionally, on the table of the newlyweds during the celebration there are two additional bottles of champagne, tied with a satin ribbon or simply decorated. These young bottles will take home with them, one will be opened for the wedding anniversary, and the second one - for the birth of a child. For a long time these bottles were not particularly decorated. Champagne just put on the table in a separate basket. Recently, however, champagne for young people is becoming one of the main table decorations.
How to decorate a bottle of champagne for a wedding: options and traditions
Where this tradition has come to us is difficult to say now. In ancient Russia, it was customary for young people to take a keg of honey with them so that they could drink it on their honeymoon, but there is no reliable information about jewelry.
There is a version according to which, instead of champagne, they initially gave a couple of cows and tied them with horns. After the birth of the first child, the young family organized a feast and treated the guests with milk. Over time, apparently, the cattle was replaced with champagne.
Decorating bottles of champagne have become relatively recent. To this end, you can turn to professionals, ordering decor and even the champagne itself, or do it yourself, if time permits. Beautifully decorate champagne for a wedding is not as difficult as it seems. First, you can practice on empty bottles or go to a master class. There are less sophisticated decoration techniques that everyone can master, as well as a huge amount of decoration material that simplifies the process: stickers, figurines, sets for creativity with detailed instructions and stencils, etc.
Among the decorations for champagne the most popular are the following options:
- Satin ribbons. A very common type of bottle design. To master it yourself will not be difficult. Ribbons serve not only to create flowers and bows, they can completely close the glass of the bottle.
- the cloth. With the help of the fabric, you can create any outfit for champagne. Most often it is the bride and groom outfits. However, this is quite a laborious process if you want to get realistic outfits. They are made to order or bought in special stores, and then attached independently.
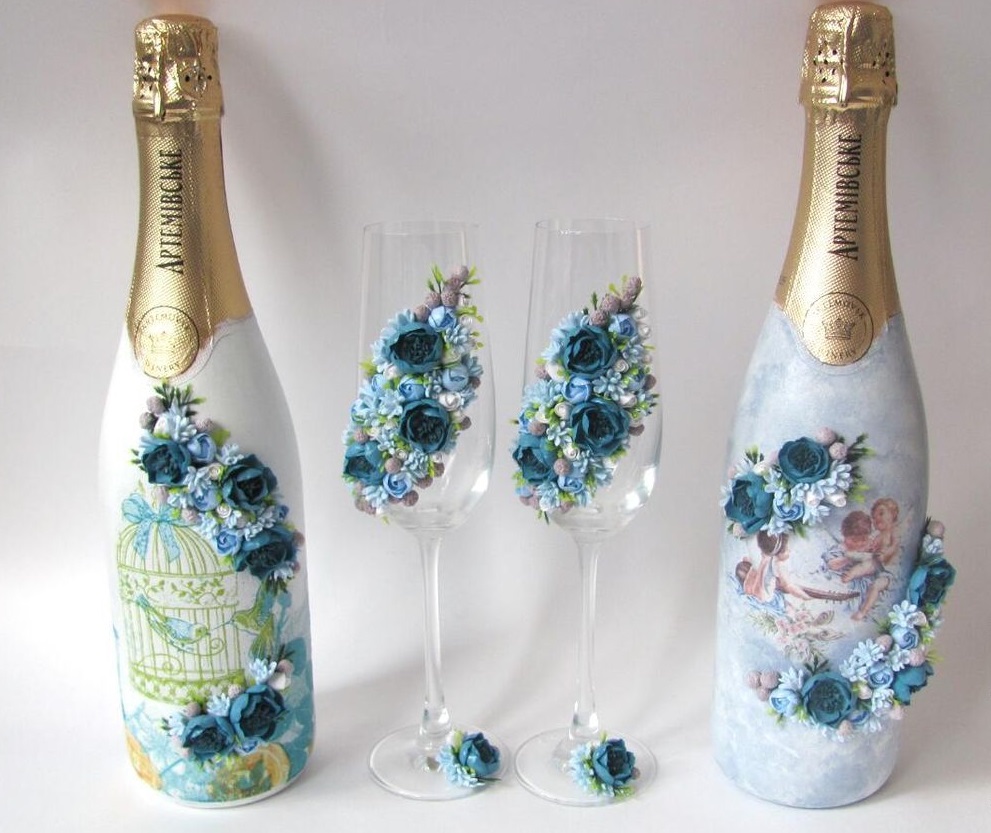
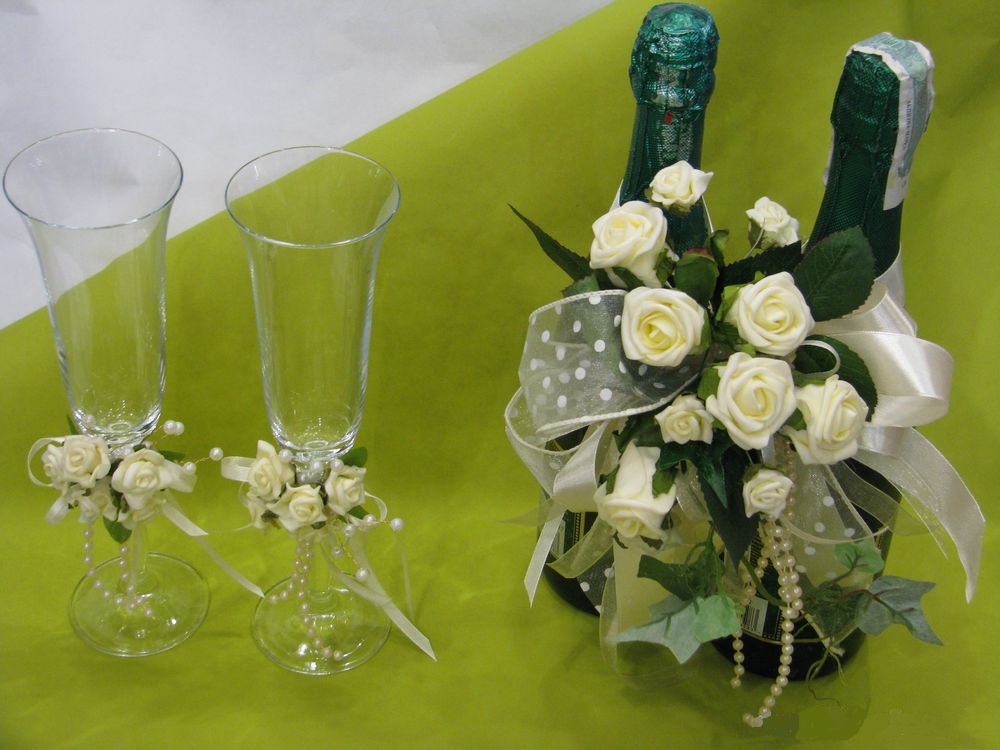
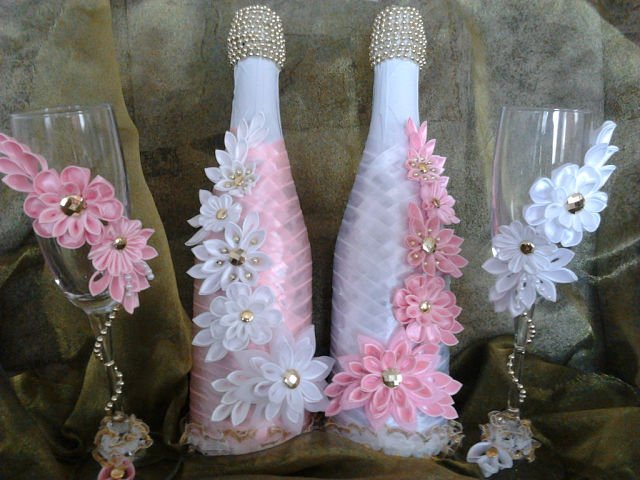
- Flowers from fabric or polymer clay. Very beautiful and delicate decoration, both separately and together with paints, paintings, rhinestones and ribbons. Polymer clay flowers are very realistic, but with such decorations you cannot overdo it, otherwise the basket with bottles will be too heavy.
- Beads and Rhinestones. The easiest and budget option. Usually, beads and rhinestones complement the decor, but you can also use them separately, laying out patterns with beads. It is advisable to remove all labels beforehand.
- Decoupage. Decoupage technique is not as complicated as it may seem at first glance. It consists in transferring a picture or an entire picture onto glass or another hard surface. There are special sets for decoupage, which will easily and quickly turn an ordinary bottle into a work of art.
- Natural flowers. Not the most durable decoration option. Bottles of champagne should be stored for a long time, and the flowers will wither. Such decorations are used as a supplement and are removed after the holiday.
How to decorate champagne for a wedding with your own hands with a cloth
Most often they use velvet, because this material looks especially rich and beautiful. But it is worth remembering that black velvet will collect dust. You will need to periodically care for this material so that by the anniversary the bottle is still beautiful.
Choose stretch velvet, it stretches and will fit the bottle well. You will also need black and white threads, scissors, a simple pencil and paper. This will be necessary only for the dress itself, but you will also need decorative elements: beads, bows, rhinestones, ribbons, flowers, etc.
The first thing to do is patterns. They make the size of the bottles. But since champagne bottles often have a standard size, you can find sizes on the Internet.
According to the pattern you need to cut pieces of material and sew them in the form of covers. You can sew both manually and on a typewriter. Machine seam is usually smoother and stronger. The finished case is simply worn on the bottle and decorated with bows and beads-buttons. If the case does not hold too well, the fabric can be grasped with glue.
You can make a veil for the bride bottle from transparent white fabric and elastic band, and a hat for the groom from cardboard and velvet remnants. If there is a desire, a skirt is made of lace for the bride. It is necessary to glue beads and rhinestones to velvet very carefully so that no glue marks are visible on the fabric.
Another master class on decorating champagne with a cloth:
How to make champagne for a wedding satin ribbons
You can decorate champagne for the wedding with the help of ribbons. Practically any decoration of bottles with ribbons is reduced to attaching a ribbon to the bottle by the type of oblique bakey.
You can start to attach the tape from the neck itself, it all depends on the idea. For bottles, you can choose white and black ribbons or make monochrome decorations from ribbons of any color, and decorate with beads and flowers on top.
It is not necessary to cut several identical lengths of tape at once, the bottle has bends, so the tape is cut along the way. The bottom edge of each glued segment is hidden under the top edge of the new one. And so on until the very bottom of the bottle.
Decorating champagne for the wedding with ribbons will be easier if you buy the right and transparent glue. It is important not to overdo it with glue, otherwise grease stains will appear on the tape. It is convenient to choose the glue moment. It dries quickly and holds well, but any other glue will do (but not PVA).
It is not necessary to decorate the whole bottle at an angle. You can wrap the straight way across the bottle, and the top to decorate additionally. To hide the flaws directly glued tape, on top you can attach a thin transparent lace.
The decoration made of ribbons of different colors, as well as the decor with bijouterie and feathers, looks very beautiful.
You can see an example of bottle design in this video:
Rarely, a transparent ribbon is used to decorate the entire bottle. Usually it serves only as an additional element of decor, but you can use it for pink champagne.
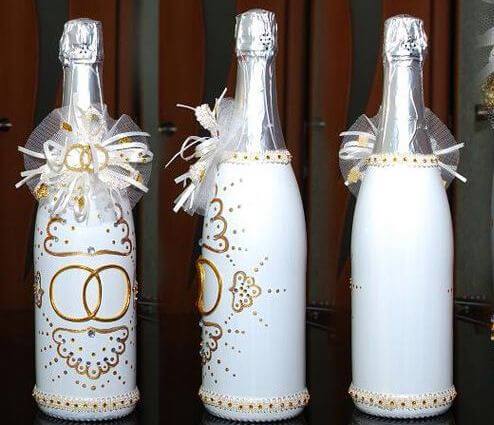
How beautiful to decorate champagne bottles for a wedding with decoupage
This is a very simple and beautiful way to decorate bottles with your own hands. First you need to prepare the bottle for decoupage. To do this, remove all labels and traces of glue from it, be sure to degrease the glass with an alcohol wipe or acetone. And then you can proceed to the procedure itself.
- The bottle must first be “primed”. Special mixtures are sold for this purpose, or you can mix white acrylic paint with white glue. Put on disposable gloves on your hands and apply the mixture on the glass with a soft sponge.
- When the mixture dries, apply a white layer of acrylic paint with an even layer and let it dry too.
- For decoupage, you can choose any pattern, such as doves, hearts, flowers, etc. The picture should be cut out so that there is a minimum of white paper around it.
- Put the picture on the usual stationery file image down and pour water until all the paper is saturated.
- The picture with the file must be carefully and evenly attached to the bottle. Spread the file with the picture with your hands so that there are no wrinkles.
- Glue is applied over the picture with a soft brush for decoupage. When the glue is completely dry, you will need to remove the pieces of paper outside the pattern with a piece of sandpaper.
- After applying the pattern, you can leave the bottle white or evenly apply paint of a different color.
- After drying all layers of the bottle is covered with acrylic varnish.
An example of decorating a champagne bottle with decoupage can be viewed in this video:
Champagne decoration with polymer clay
To manage polymer clay, you do not need to be a professional. It is very easy to sculpt from it if you do not set yourself impossible tasks.
To make a flower, you will need polymer clay itself, a softener, special paints. Each petal is molded separately, then folded into a flower and baked in the oven. The finished composition can be glued to the bottle.
You can purchase self-hardening clay. Most often, the bottles for the wedding are decorated with roses. To facilitate your task, you can buy a set for modeling, where there are already various molds and stencils.
To make a medium-sized rose, we take 3 identical balls of clay of the desired color with a diameter of not more than 1 cm. We roll one ball into a flat cake and roll it with a roll, this will be the middle of the rose. Then we also turn each of 6 petals around the middle. It is best to make flat cakes already with a deliberately thinner edge, which will be adjacent to the middle.
Then each petal needs to be slightly turned off or straightened, so that the rose is more open. If there is too much clay at the base of the bud, it should be twisted and cleaned carefully. The finished rose should be baked or hardened, and then glued to the bottle.
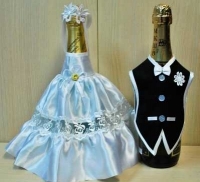
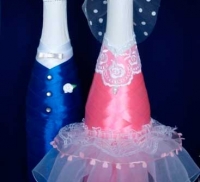
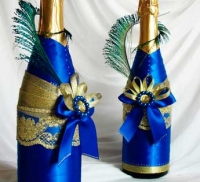
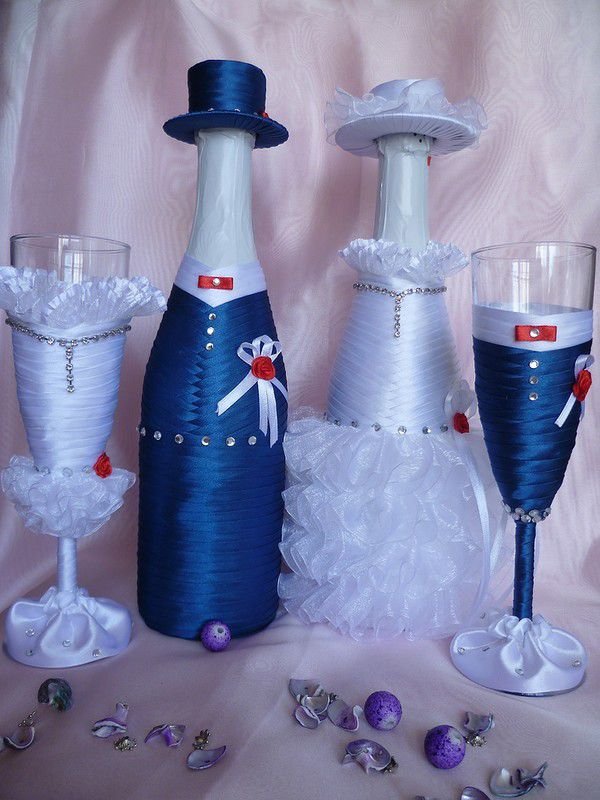
Preparation for the wedding pay special attention. Especially it concerns wedding accessories and ornaments. In this master class we will decorate wedding champagne bottles do it yourselfthat after the wedding will wait in the wings and please the newlyweds. We will imitate the suit of the groom and the dress of the bride.
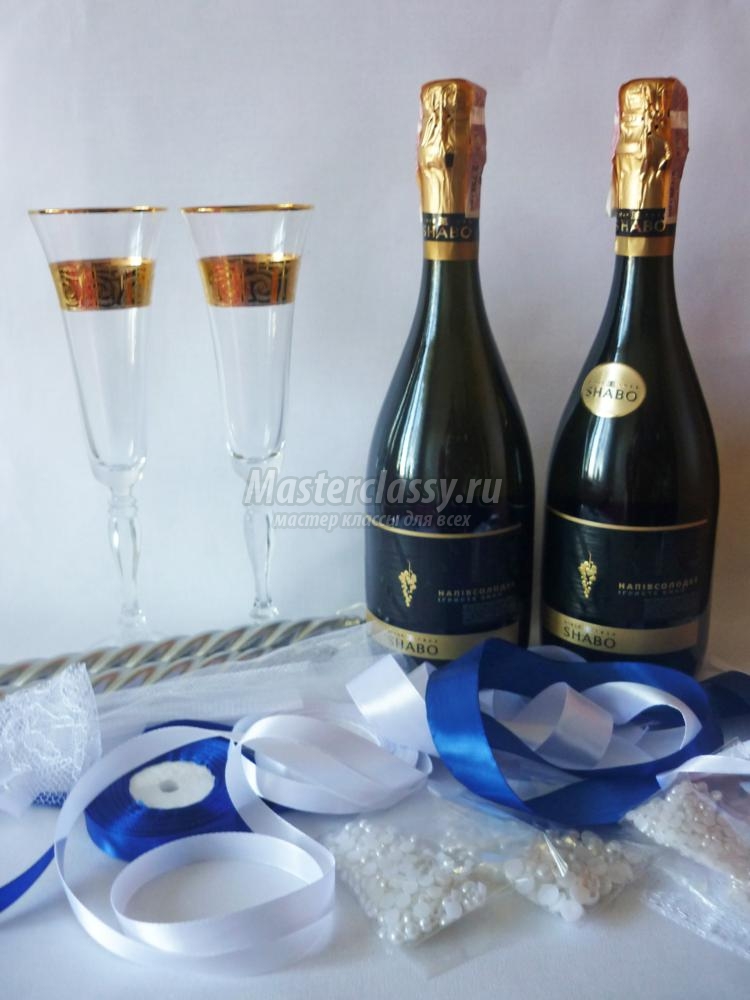
For the manufacture of wedding champagne we need:
- satin ribbon of different widths of blue and white;
- half beads of different diameter and white color;
- glue gun;
- lace;
- organza tape;
- flower for boutonniere;
- champagne bottles - 2 pcs.
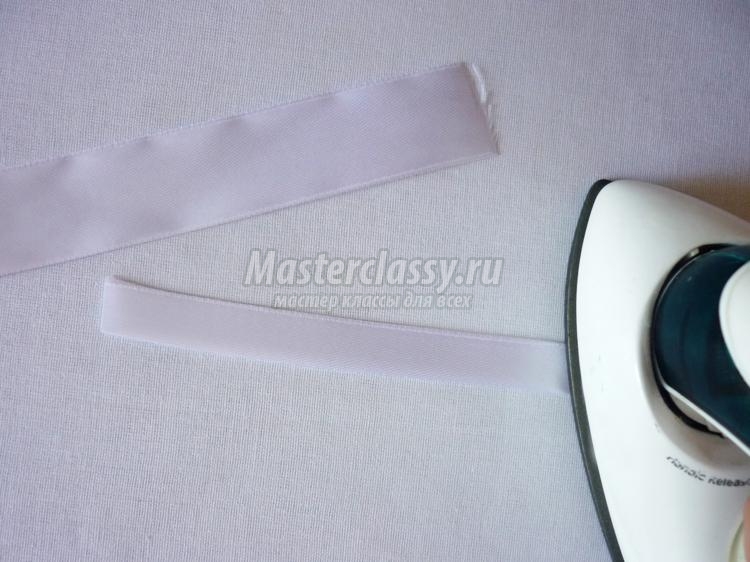
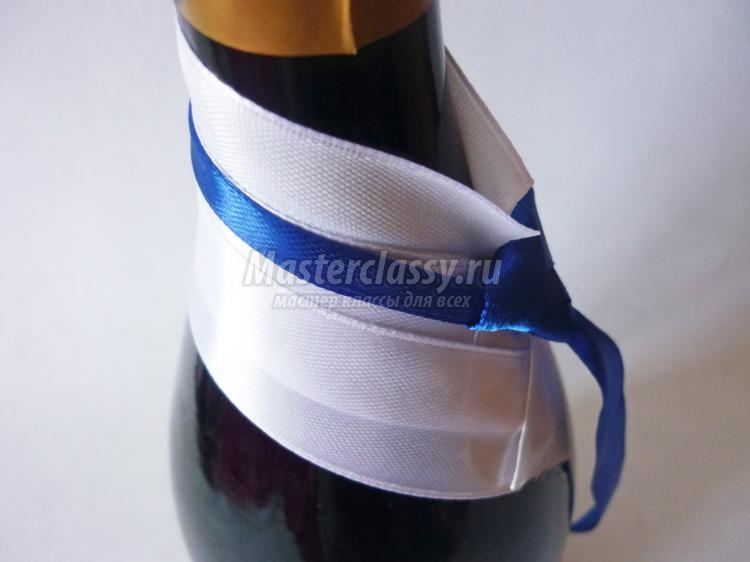
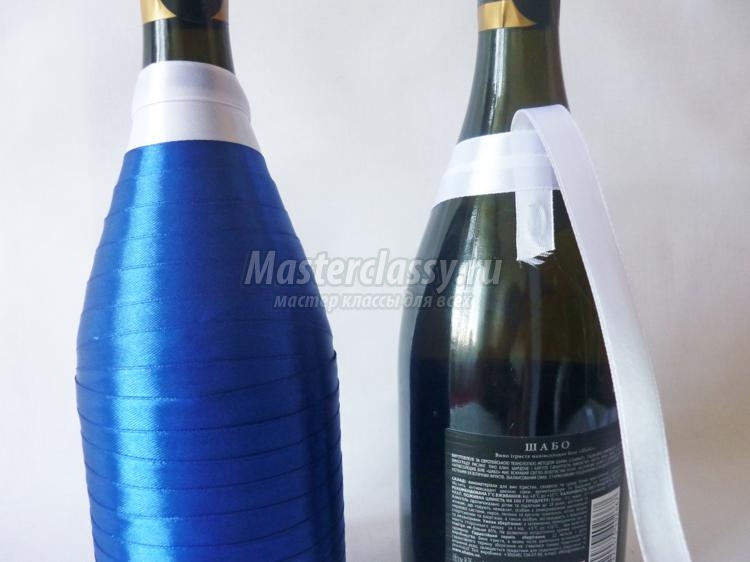
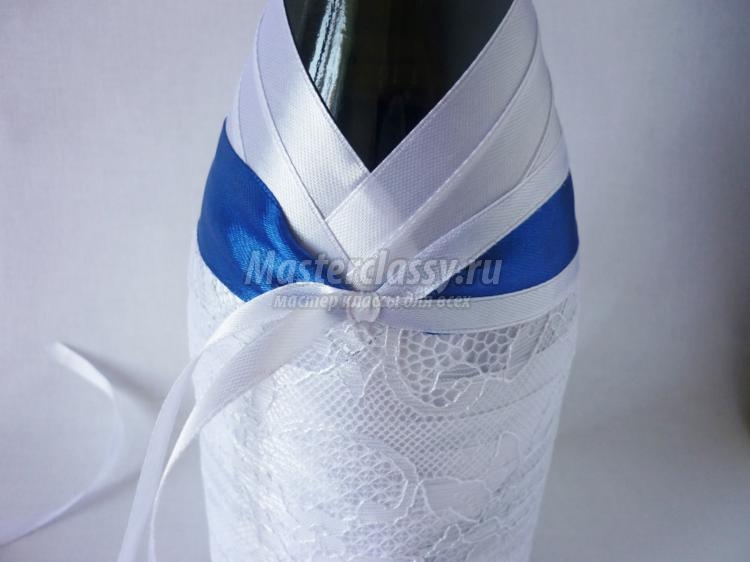
Let's start to decorate the wedding champagne. Let's start with the groom. We will tie the groom a beautiful tie, but before that you need to make a shirt collar. We take a white satin ribbon 2 cm wide and more. Bend it along in half and iron.
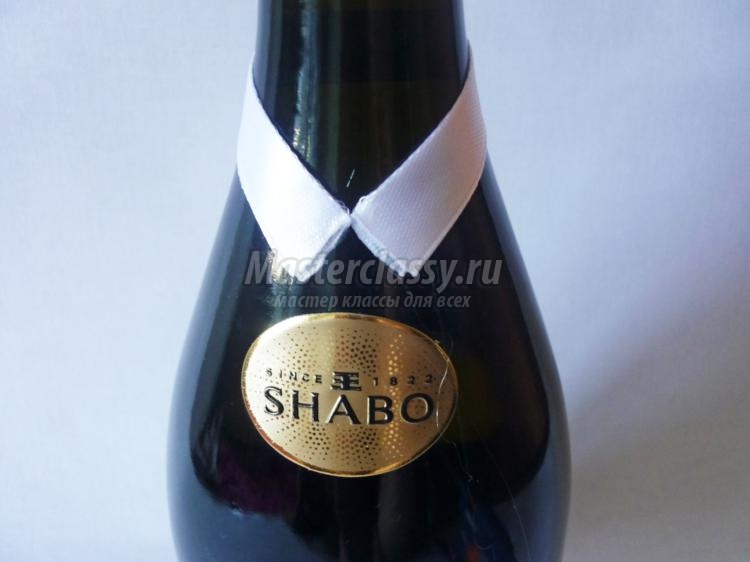
We measure how much tape is needed to braid the neck. Please note that we are already starting the process of braiding the bottle with ribbons, so place the ribbon behind it slightly higher than the front. You will understand how to be right, as the tape must lie perfectly flat and snug.
We scorch the edges of the tape with a match or a cigarette lighter. Apply glue to the surface of the bottle and glue first one end, then the second. It is important that the upper corners of the collar touch and not intertwine.
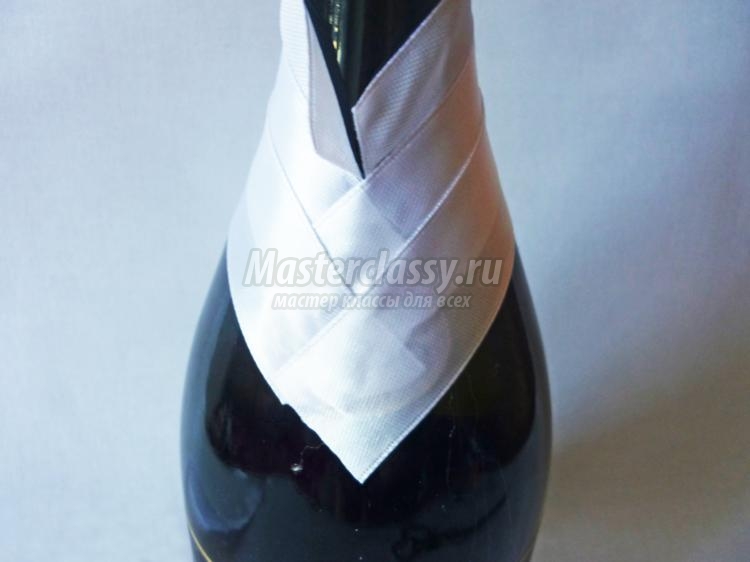
Next, raise the collar (just like in a shirt), take a white ribbon of the same thickness and we weave the bottle against the bend, repeating exactly the slope of the collar. First we glue one end, then glue the second overlap. Next, each layer of tape must be overlapped with the previous one 1-2 mm up.

Sticking another tape. With collar and shirt finished.
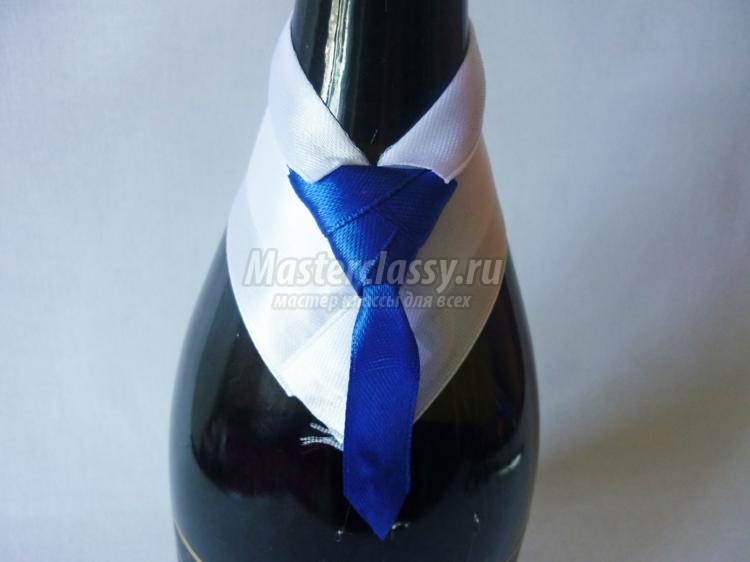
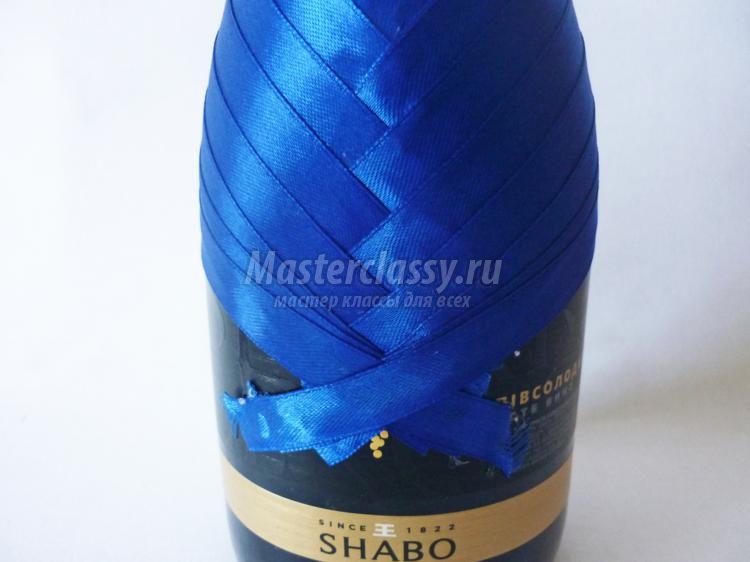
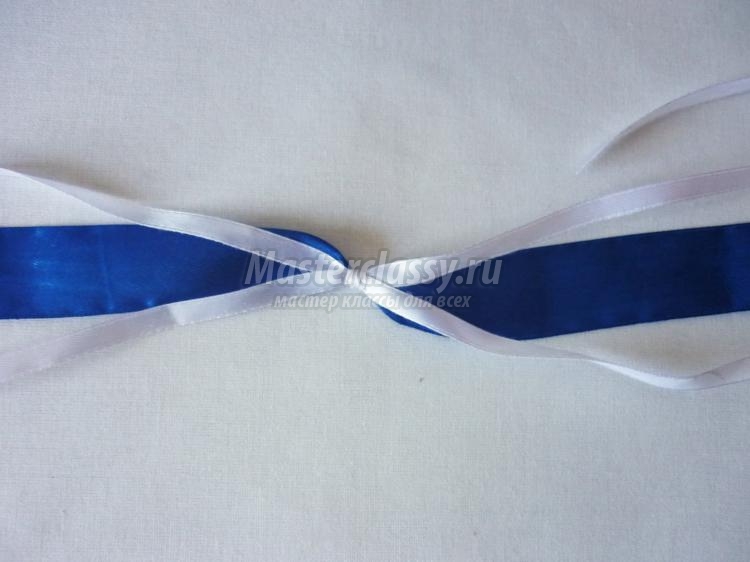
We will tie a fashionable tie "with Eldridge knot" of blue ribbon, which we will braid around the entire bottle. Below is a detailed scheme for setting such a knot. You may not like it and you can tie a different look. The only advice is that the end of the ribbon in your right hand should be long (about 30 cm) so that it is comfortable to weave, and the end in your left hand will remain unchanged (it will also be a tie).

Put on a tie close to the bend of the collar and tighten.
We lower the collar down and glue the end of the tie to the bottle.
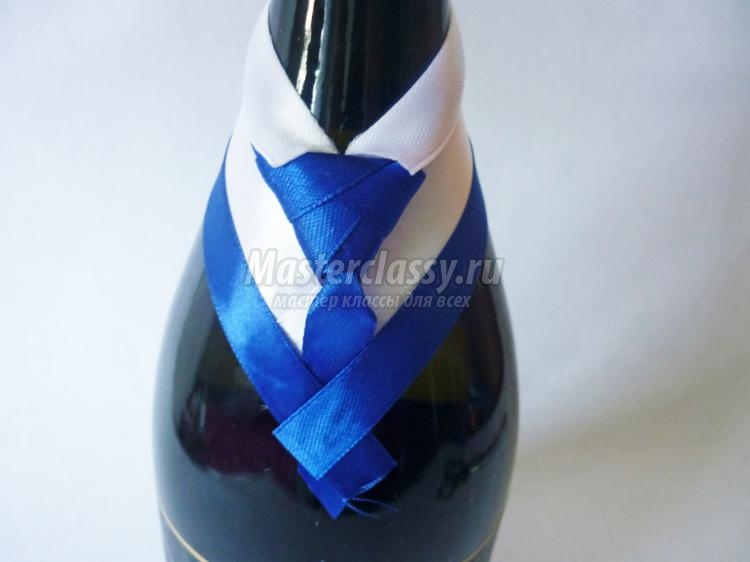
We twist it until the moment when the shape of the bottle starts to change dramatically and it will be necessary to glue several rows of tape in one place.
When the already smooth surface of the bottle begins, glue the end of the tape in front in the center. The tape should be level and slightly overlapping, where oblique rows end on the reverse side.
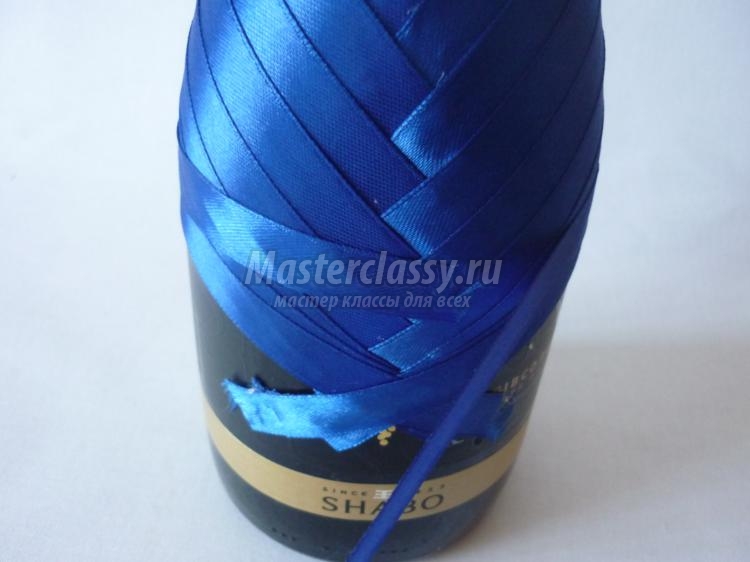
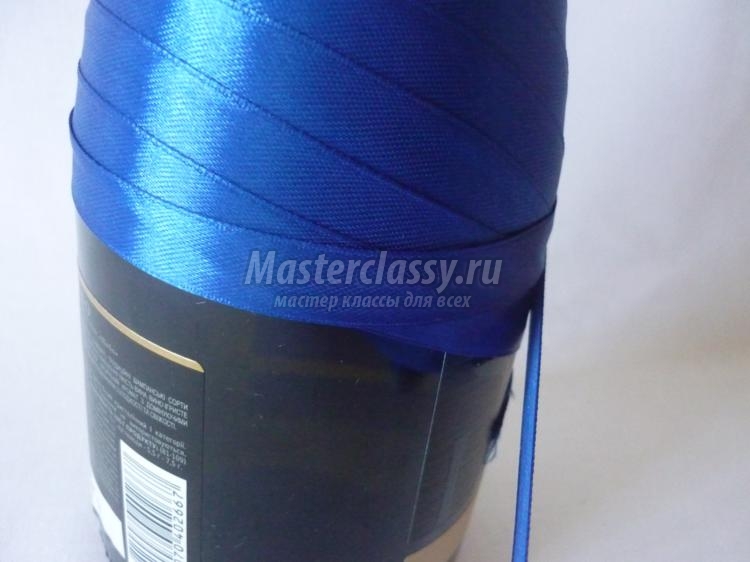
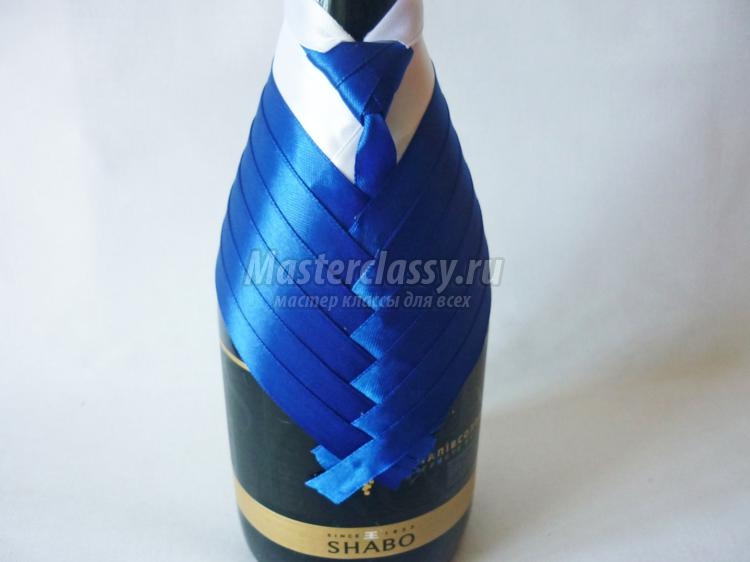
We wrap the bottle very tightly with tape, securing each row in front with a small drop of hot melt glue.

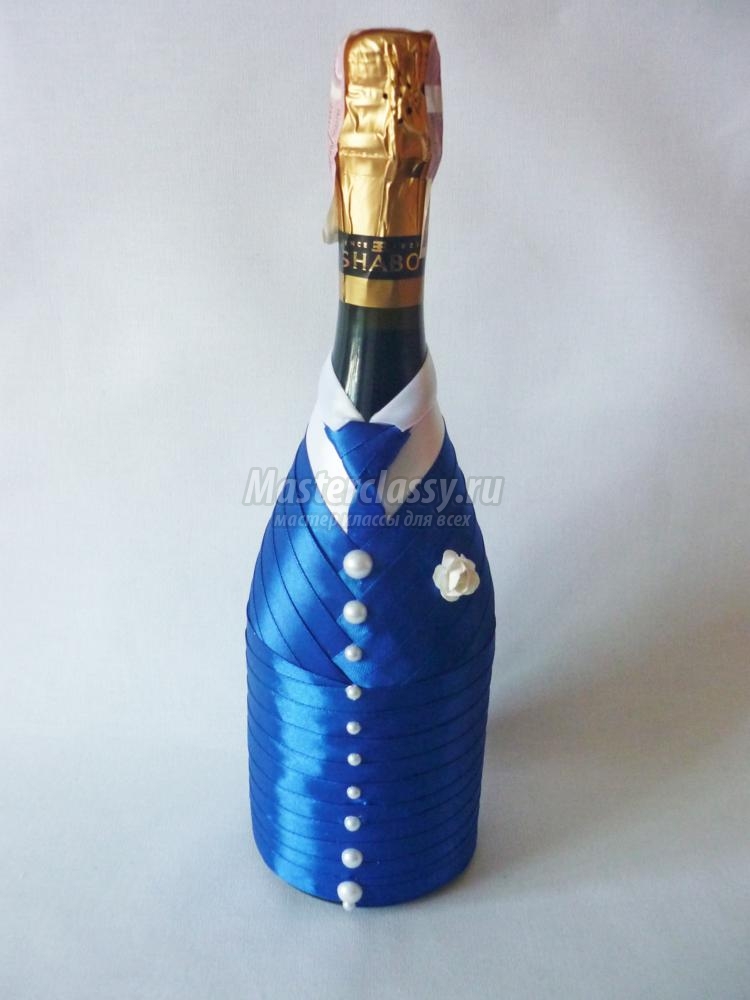
We cut the ribbon and fasten it in the front in the middle. Slice cover with beads and decorate them further, imitating buttons. Glue the buttonhole and the groom is ready!
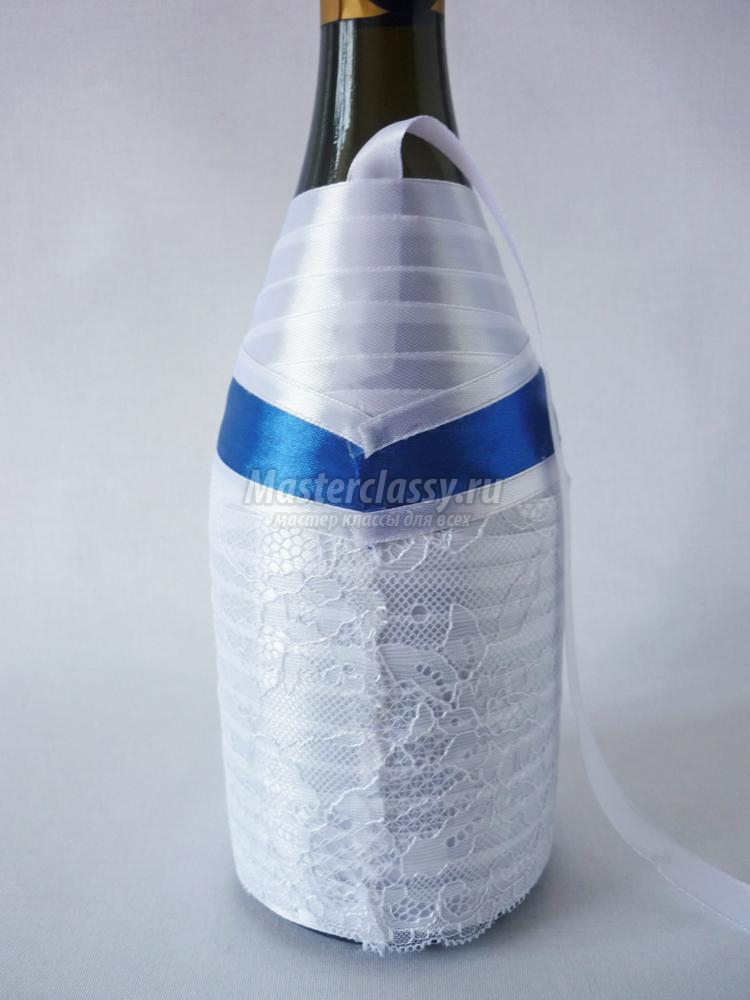
We take a white ribbon of the same width as for the groom's suit. To start braiding the bride is necessary from the level where the blue ribbon (jacket) starts for the groom. First, in the back center it is necessary to fix the face to the surface with a glue tape tape length in the bottle. It will cover the junction. We crush the bride as well as the groom, only part of the shirt and tie is missing.
The only difference is that when the flat surface of the bottle begins, we fasten the edge of the tape in the middle behind and attach the end there too. Ahead everything must be perfect.
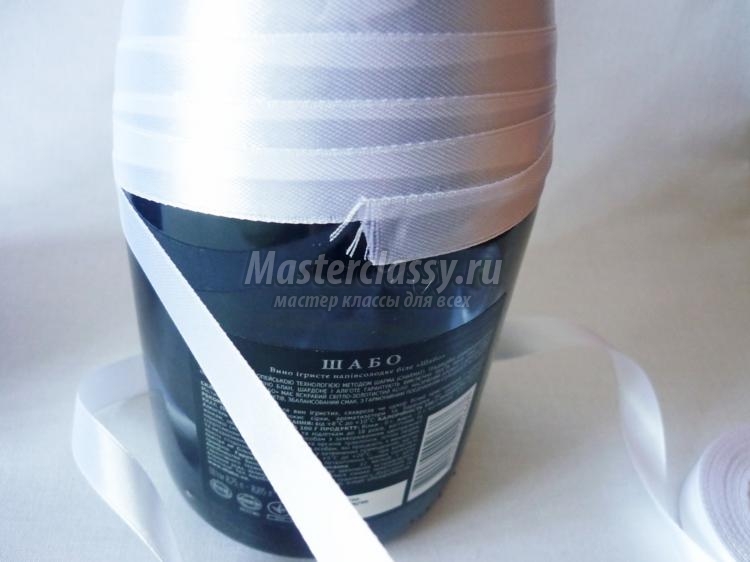
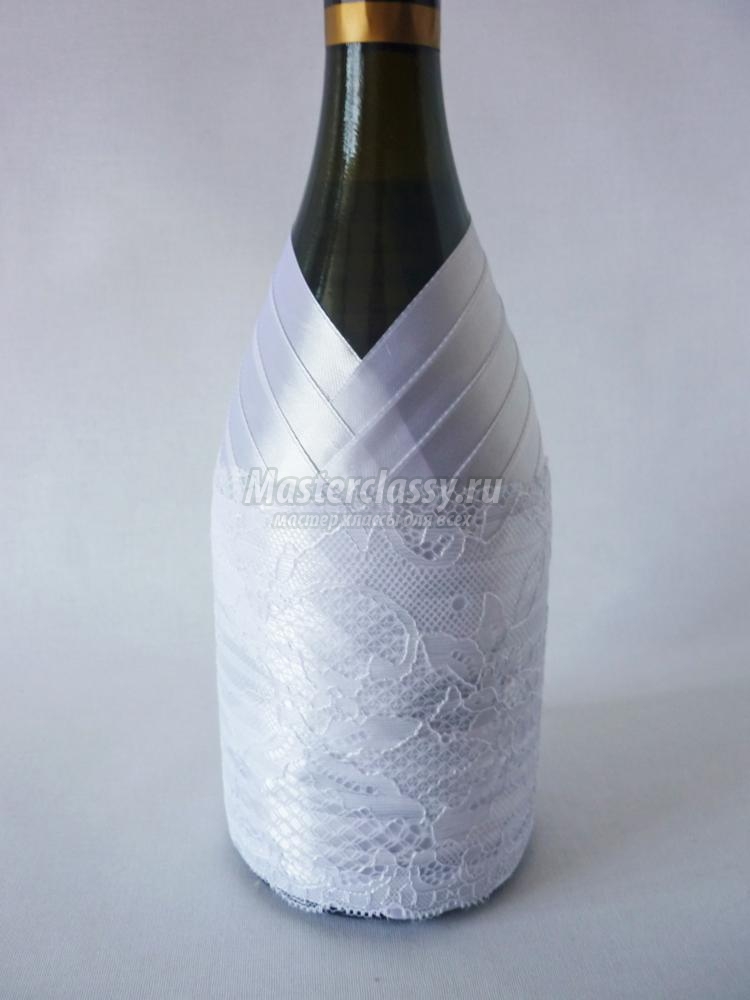
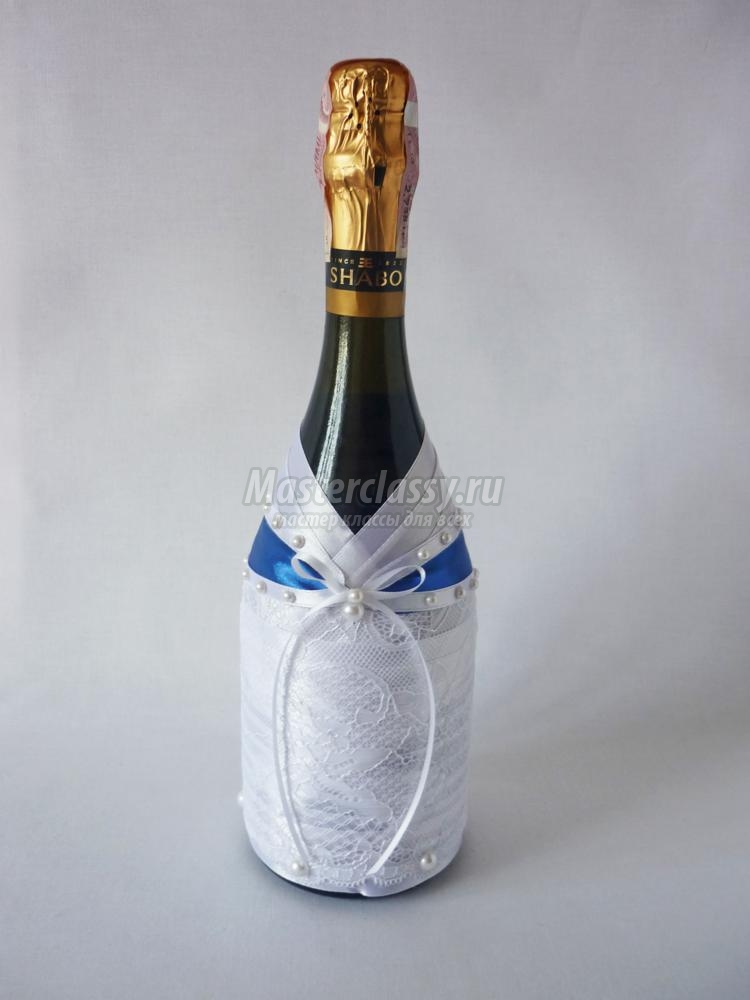
The basis of the dress made. Now we will wrap a flat part with lace. The joint must also be at the back. Apply glue to the place of the joint and a couple of drops on top so that the lace does not crawl.
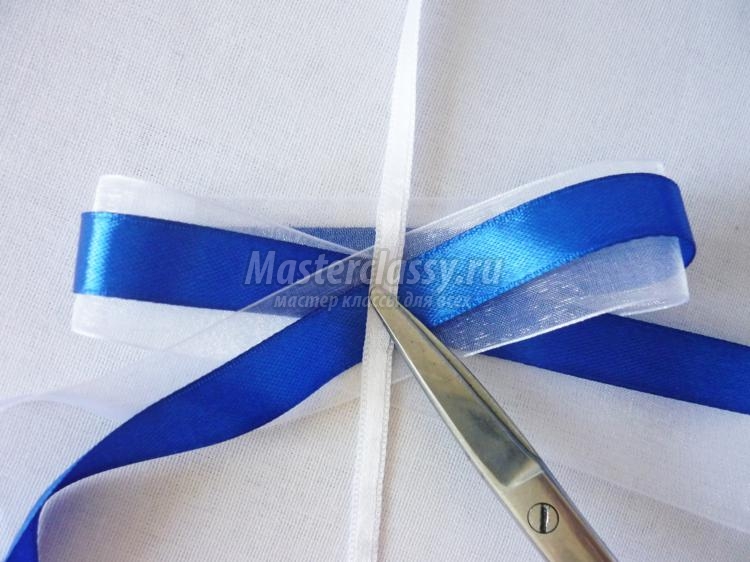
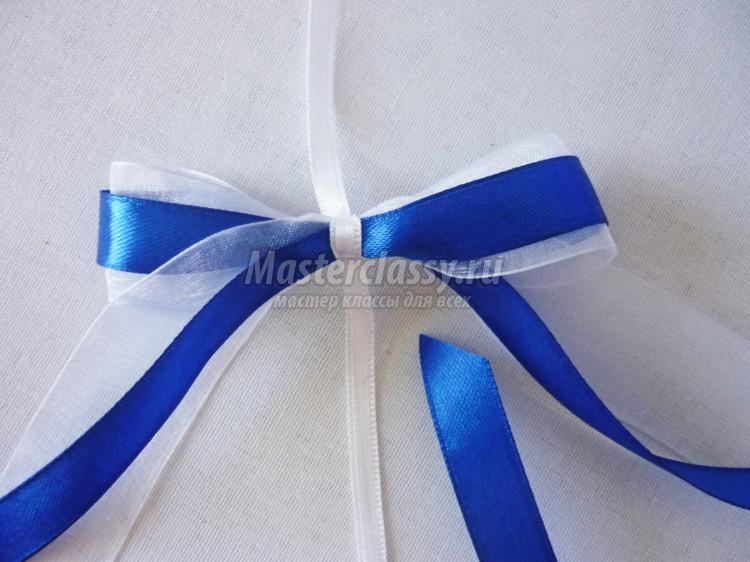
Prepare a bow for the top of the dress. For it you will need a blue ribbon 2.5 cm wide, a ribbon 0.7 cm wide. We place the blue ribbon in the center, and cut the white ribbon into two segments and place it at the edges of the blue one. Tie a bow with a white ribbon on two knots, hide them from behind, and cut off the ends.
Apply glue to the knots and glue the bow in the center of the front over the lace. First we weave the bottle with a blue tape on one side and the other, gluing it in the back at the joint, and then with white tapes, slightly covering the edges of the blue one. The main rule: the ribbon should lie flat and cover the edge of the lace. Point can be applied with hot melt glue when we bind with tape.
We lower the tape from the back and glue it, covering all the joints. Glue the end of the tape to the bottom of the bottle and decorate it with beads.
![]()
We glue an ordinary bow in front of a thinner white ribbon and decorate further with beads (at your discretion).

Bride dress ready!
Now you know how to make your own wedding champagne. In the same color you can decorate glasses. We will tie up the usual white organza bow (width 2 cm or more) and the blue ribbon from which the groom's dress was woven. Tie first with white thin tape, placing the nodules on the back side. The ends should be the same - with them we will tie a bow to the leg.
Then we tie up the same place with a blue tape, but we cut the ends right next to it. Sticking a bead in the middle.
Tie a white ribbon to the leg, tying a knot in front. The ends are left free. We scorch the ends of all tapes.

Wedding champagne in the form of the bride and groom ready to decorate the festive table!
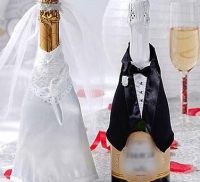
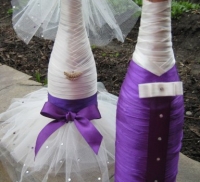
According to tradition, two beautifully decorated champagne bottles are put on the table of the bride and groom on their wedding day, which will be stored until a certain date. The first - until the anniversary of the wedding, the second - before the birth of the child. Also on this holiday, it is customary to play decorated bottles at contests and auctions. One of the decoration options is the decoration of the bottles for the wedding with ribbons.
Make such a decoration with your own hands is a snap. Just look at the master class on the Internet and read the relevant articles.
When you make bottles in the form of a bride and groom can adhere to the style and colors in their dresses.
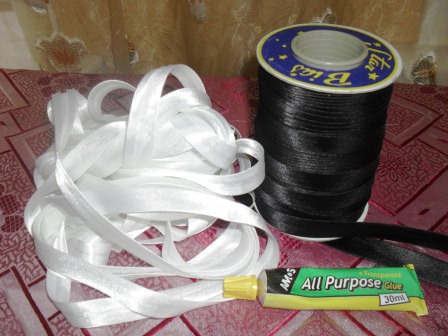
The following materials are necessary to decorate the bottle for the wedding with ribbons:
- white satin ribbon 0.6 cm wide (for the top of the bride's bottle and the collar of the groom's shirt);
- satin ribbon 4 cm wide white (for the bottom of the bride's bottle);
- black slanting inlay (for the groom's suit);
- scissors;
- moment-crystal glue (you can use double-sided tape to which you stick the tape);
- lace to decorate the bottom of the bride's dress and give it a volume;
- white beads, rhinestones, other decorative elements;
- two bottles of champagne (preferably smooth, without grooves, with gold foil without inscriptions on it).
All the necessary materials can be found in stores with sewing accessories or shops for creativity.
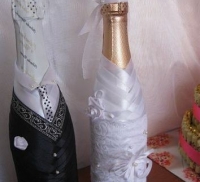
Registration of wedding bottles in the form of the bride and groom ribbons as follows:
- Clean the champagne bottle from labels (except gold foil on the neck) and excise stamps. To do this, you can soak the bottle in water for an hour, and then remove the labels with a sponge and knife.
- Take the tape, wrap the bottle with it, putting the right end on the left (overlap), measure and cut off the piece.
- Apply glue to the bottle and carefully glue a piece of tape. Do so until the bottle is completely sealed. On the neck of the tape is glued obliquely at about 45 degrees, then - on a horizontal line, after the bottle stops expanding downwards.
- Joints can be masked by gluing a vertical strip of tape.
- For a bottle in the form of a bride, a white ribbon is taken, or a ribbon that matches the color of the dress, say, ayvori. For the bottle of the groom you need a little white ribbon, which will play the role of a collar shirt, and a ribbon to match the suit of the groom.
- The bride's fluffy skirt is made of lace fabric, wrapped around the bottle several times and glued to the ends.
- To make the product sophistication, you can stick on the bottle jewelry (rhinestones, small buttons, bows, fabric flowers, feathers).
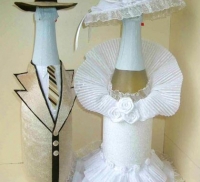
You can decorate the finished champagne bottles with self-made hats as follows:
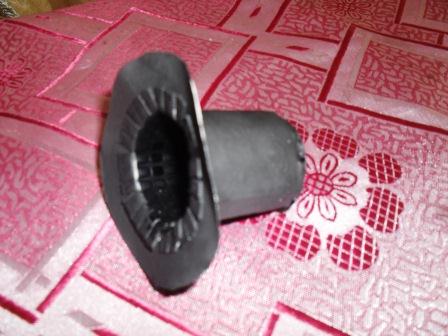
- Take the two halves of the kinder surprise egg. The larger half is for the groom's top hat and the smaller half is for the bride's cap.
- From the cardboard cut the fields of the bride's cap and the groom's cylinder. Inside there are slots with a diameter like a kinder surprise egg.
- Cardboard circles and egg halves are wrapped in narrow satin ribbons of white and black, respectively, so that there is no empty space.
- The halves of the kinder surprise are inserted inside the cardboard fields of the caps, and the caps are ready.
You can add decor when making hats. For example, glue a feather to the hat of the groom, and the bride a flower. Instead of a hat, the bride can make a veil by sticking light fabric to the cork.
You can also come up with an original way to tie a black satin ribbon or any other color on the groom's bottle. Also, the groom should be decorated with a buttonhole (preferably in the color of the present), you can glue small buttons to his jacket or replace them with rhinestones. From a ribbon of a different tone, you can make a jacket pocket into which a boutonniere will be inserted.
The bride's bottle can also be decorated with a satin ribbon belt to match the color of the wedding, if a certain color is chosen, and her neck is made of rhinestones or beads of white.
In order for the presidium of the bride and groom to look stylish and beautiful, you can also arrange the newlywed glasses with ribbons in the same style.
It is more convenient to drink from glasses, which expand upwards, although they cost a little more than classic narrowed glasses, from which they drink champagne.
For their decoration will also require narrow satin ribbons or inlay, glue, scissors and decorative elements. Satin ribbon is wound on glasses in the same way as on bottles of champagne. On the leg of the bride's glass, you can wind the same narrow white ribbon or make a lush bottom, winding the lace in several layers.
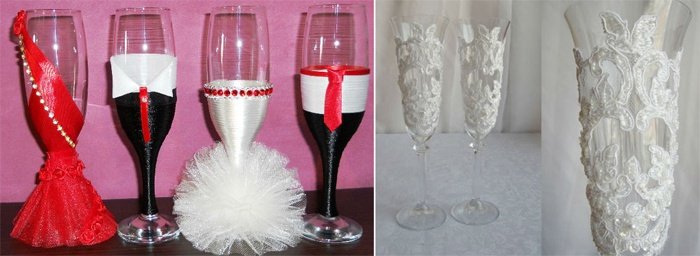
To make the groom's glass look more original, you can glue semicircles of thin black ribbon to the bottom of the glass, which will play the role of shoes, and tie the same ribbon in the form of a belt.
Decorating the bottles of the bride and groom, as well as glasses with ribbons or inlay, allows the master’s imagination to open up and make absolutely unique, unique products that will delight the eyes of the newlyweds and guests.