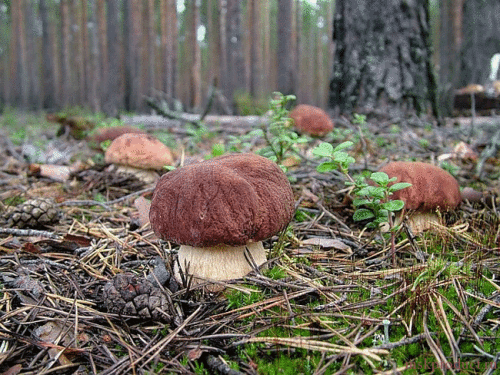
Cultivation of porcini mushrooms and features of caring for them
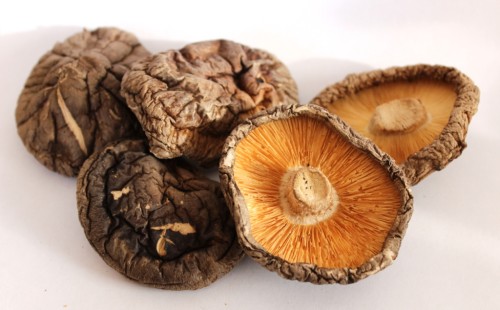
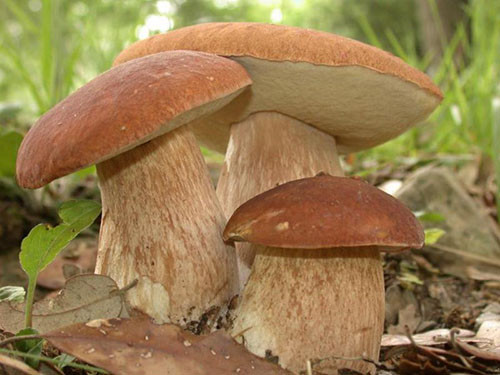
Which of us sometimes does not want to taste the fragrant and delicious porcini mushrooms. They turn any dish into a royal treat! But you can't find fresh porcini mushrooms in stores during the day with fire, and they are sold on the market only in the fall. By the way, the cost of this valuable product is impressive - it is one of the most expensive "domestic" mushrooms. For these reasons, many gardeners decide to grow porcini mushrooms at home or on a plot. If you want to start your own small mushroom business or just feast on aromatic dishes at any time of the year, this article will definitely come in handy. Today we will talk about how to grow porcini mushrooms.
Growing porcini mushrooms in large volumes often does not pay off, so small "mushroom farms" are mainly owned by private gardeners. The main difficulty lies in the close interaction of porcini mushrooms and certain tree species, and such conditions are rather difficult to recreate in the factory. Another thing is your own small plot or a separate room. Porcini mushrooms "are friends" with conifers, oaks and birches. They thrive in mixed young plantings or shady spruce stands. Not so long ago, Dutch breeders were able to breed special porcini mushrooms that can be grown in greenhouses, hotbeds and other buildings with an artificial environment. By purchasing such planting material, everyone can become a mushroom gardener. However, not everyone is able to cope with the specifics of the cultivation of the porcini mushroom. This job requires careful preparation and a lot of patience. There are two growing technologies:
Preparatory workToday, many methods of preparing planting material are practiced, but we will consider the simplest and most effective ones. According to the first method, porcini mushrooms can be propagated using mother caps. It is necessary to plant material from the caps under the species of trees near which they were collected. That is, if you plucked a mushroom under a pine tree, then you need to sow spores under a pine tree (special relationship with trees, which we mentioned). The hats are soaked in a weak solution of potassium permanganate and rainwater in a ratio of 1 g of manganese per bucket of water. One bucket will fit from 10 to 15 caps with a diameter of up to 20 cm. If you could not get large beautiful mushrooms, you can take dried and even wormy pieces.
When the caps are in the solution, knead them with your hands to mix the spores evenly in the water. Knead until a mushy, homogeneous mass is formed in the bucket. After that, you can leave the mash to infuse for several hours. The second way to prepare the mushroom mixture is a little more complicated. It should be cooked about a month before the spores are planted. This mixture should include leaves and rotted oak wood 5%, horse manure. Transfer the leaves with mushrooms and manure in a bucket in layers every 20 cm, then pour a solution of 1% ammonium nitrate and leave for a week. Then heat the contents of the bucket to 36-40C and crush everything into a homogeneous nutritious mass. Both methods can be used to grow porcini mushrooms at home. The main thing is to adhere to general principles. In second place in importance after the preparation of the mycelium is the preparation of the substrate in which it will need to be planted. There are also two methods here - xerothermal (dry steam treatment) and hydrothermal (wet boiling water treatment). The main task of both options is to saturate the substrate with the maximum amount of moisture, while maintaining air permeability.
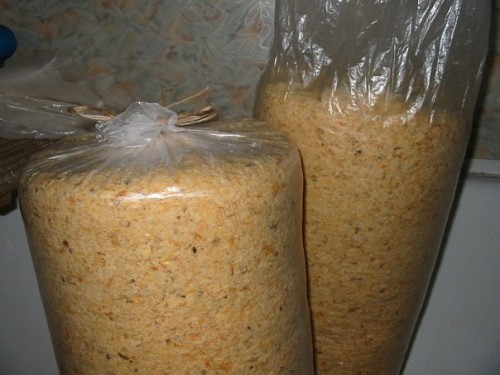
The air permeability of the substrate is extremely important - without this, the mycelium will not be able to fully develop and will be constantly at risk of mold infection. The substrate can consist of straw, sunflower husk, buckwheat, dry corn stalks, etc. Hardwood sawdust is very popular, but it is best to start with straw or husk.
After processing, the substrate should be crushed so that it can, like a sponge, retain moisture. A high-quality substrate is springy from pressing, but does not release moisture - then you can safely lay mycelium into it. As more and more hobby gardeners begin to grow mushrooms, unscrupulous sellers can play on the inexperience of their customers and give away low-quality goods.
To avoid getting screwed up, follow our tips:
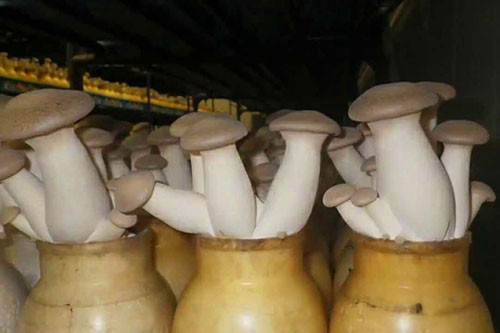
We offer you to watch a useful video about growing porcini mushrooms and all the intricacies of this process: Growing at homeTo begin with, consider how to grow porcini mushrooms in an artificial environment, that is, at home, in a shed or greenhouse. The whole process consists of several stages: preparation of planting material, processing of the substrate and preparation of the premises. The substrate material must be boiled for 60-80 minutes (you can not remove it from the plastic bags), then drain the water and place the substrate under oppression, where it will cool down to a temperature of 25C. If you boiled it in bags, you do not need to open them, but simply make several holes for the water to drain. When the substrate has cooled down, transfer it to a sterile room where the mycelium was prepared (for this, it is enough to treat the room with a 1% chlorine solution). Place the mycelium in the substrate with the ventilation system turned off (if any) to prevent spores from scattering. Doors and windows should also be closed.
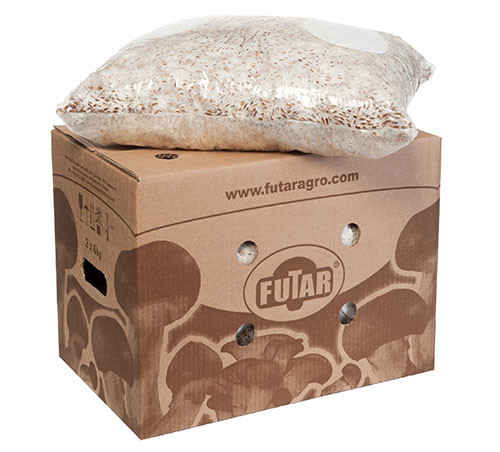
Pour the substrate and mycelium onto a disinfected table and mix. If you bought domestic planting material, it should be 3-5% of the total mass of the substrate, if imported - 1.5-2.5%. Transfer the grafted substrate to 5-15 kg bags, tamping down as tightly as possible. For home growing, it is better to take smaller bags so that it is easier to regulate the temperature exchange inside. All that remains is to flatten the bags from one side and make a few small holes on the sides to allow air to flow.
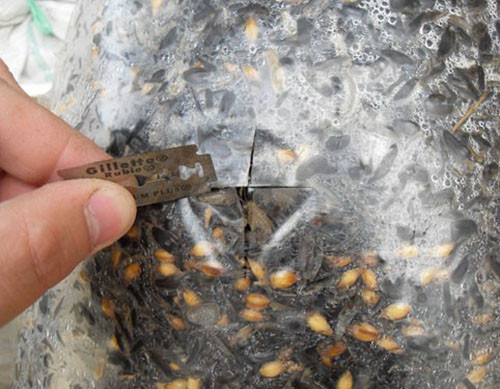
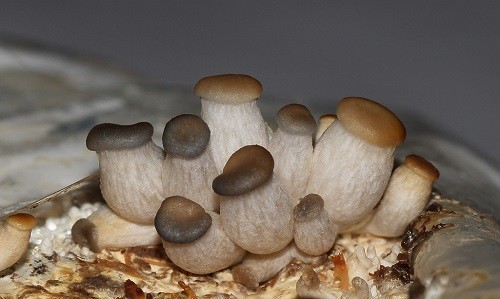
If you do everything according to the instructions, the mushrooms will grow in dense aggregates with an abundance of fruit bodies. To make smaller splices, cut “check” or “cross” cuts in the bags to a depth of a couple of millimeters.
It is very important to maintain a constant comfortable temperature for growing porcini mushrooms up to + 25C (inside the bag, the temperature will be slightly higher - up to + 30C). If it gets hotter + 30C, the mushrooms will get a heat shock and may not germinate. Ventilation during cultivation is very important, but during the incubation of the mycelium, the room should not be ventilated. And to prevent mold from forming due to high humidity, clean it every day with a chlorine solution. After 3 weeks, the incubation period will end, the mushrooms will germinate and begin to bear fruit.
The first wave of fruiting begins in about a month, and at this time it is necessary to constantly maintain a high humidity in the room of 85-95%. By adjusting the temperature in the range from + 10C to + 20C, you can "paint" the caps of the mushrooms. The hotter, the lighter the hat. At the same time, the taste remains unchanged. Lighting also affects the appearance - the lighter in the incubator, the darker the mushrooms.
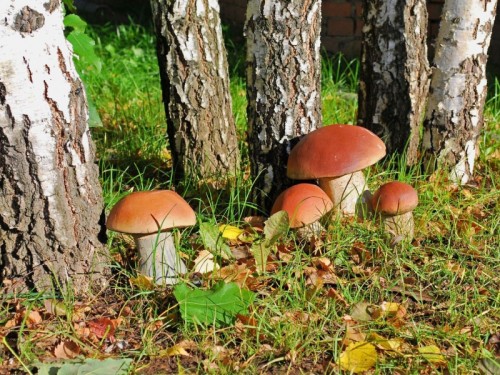
2-3 weeks after the first harvest, the second wave of fruiting occurs. Before that, remove the remaining legs and sort out the mushroom bags, taking out the moldy ones from the room (they will make an excellent organic fertilizer). With proper care, porcini mushrooms will bear fruit for up to 6 months without interruption, but if you grow them for sale, then focus on the first 2 waves. Outdoor cultivationIf you have your own plot with suitable trees (pine, birch or oak), you can grow porcini mushrooms outside. We described how to prepare the planting mixture above, and in order to prepare the site for planting, you need to remove the earthen layer 1 m from the selected tree to a depth of 15 cm. Make sure that the roots of the tree are not damaged! It is enough to slightly expose the roots and pour about 350 ml of seed per 25 cm² on them. Fill the hole with soil, pour water (5-6 buckets under one tree), but be careful not to wash out the soil with mycelium. It is best to slowly pour water down the trunk. Spores should be planted in this way at the end of summer or at the very beginning of autumn until mid-September.
The second method is a little more complicated, but no less effective. For it, a mixture of mycelium with oak leaves and horse manure is used, the recipe for which is described above. Select a shaded area and dig a small pit 30 cm deep and 1.5 m wide.Place the mixture in 10 cm layers, alternating with the ground so that you end up with a high bed (30 cm in the ground and 20 cm above the ground). It is better to make a bed in the form of a sloping mound so that the water can drain freely and not stagnate. The mycelium should be planted in a checkerboard pattern, placing it in small pits at a distance of at least 30 cm.To prepare the fragments, carefully cut off a part of the soil around the mushroom with an area of 30x15 cm with a shovel, divide it into 5-10 pieces and put it into the pits to a depth of 7 cm. After watering the garden bed, cover it with foliage. If you prefer this method, keep in mind that the harvest will appear only next year. All summer, you need to water the garden once a week with 5-6 buckets of water, and by the end of August, fruiting bodies will appear. The yield of mushrooms grown using this method is up to 250 kg per season. This is about one full bucket from a tree. An alternative way to plant porcini mushrooms on video: Porcini mushrooms: photo
|