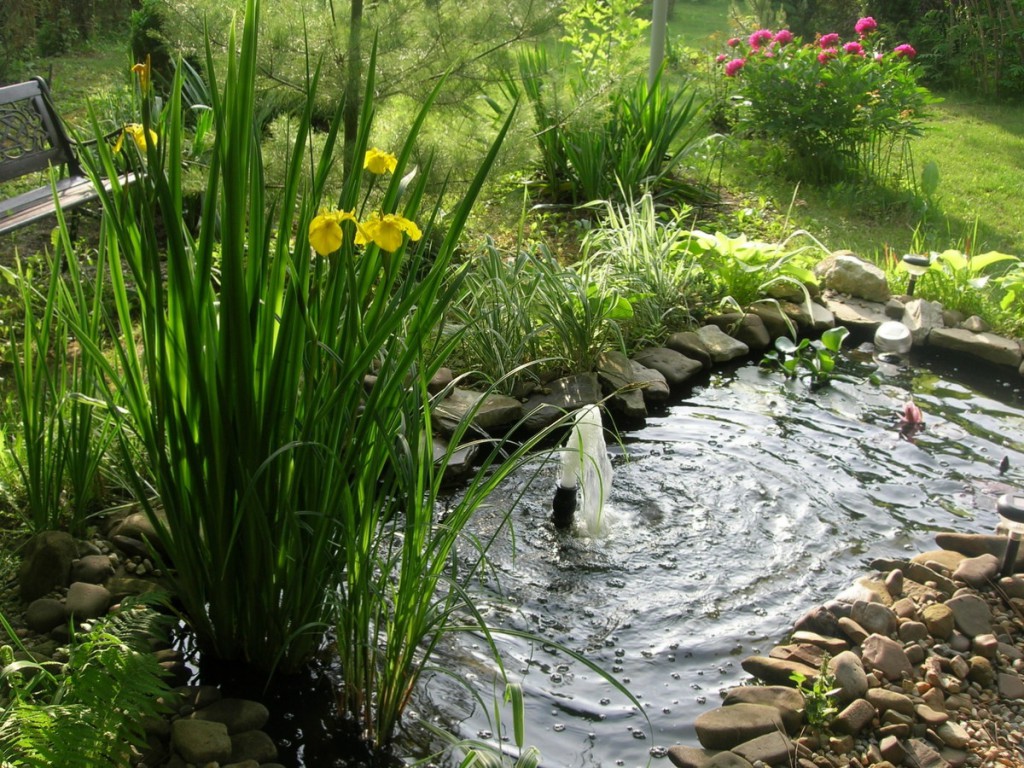
Pond from an old bath - photo
It is widely believed that resting near the water promotes relaxation and has a beneficial effect on the body. To do this, it is not at all necessary to purchase a site near a natural reservoir. If you have a desire, it is not difficult to independently arrange a decorative pond in your summer cottage from improvised materials. To build a pond from a used bath is quite within the power of everyone.
With the advent of new high-tech materials, many residents of private and apartment buildings are replacing old metal bathtubs with new, more modern acrylic or shower stalls. In this case, the problem arises of disposing of a used bath. As a rule, this product of the old school is made to last, so it can be used for many years - for example, in a summer cottage in the form of a mini-reservoir. If you or your neighbors do not know where to put a used bath, try this idea and "breathe" new life into it. To do this, you will need to transport such “construction debris” in the form of an old bathtub to a summer cottage in order to try to turn it into a mini-pond.
How to make your own bath pond
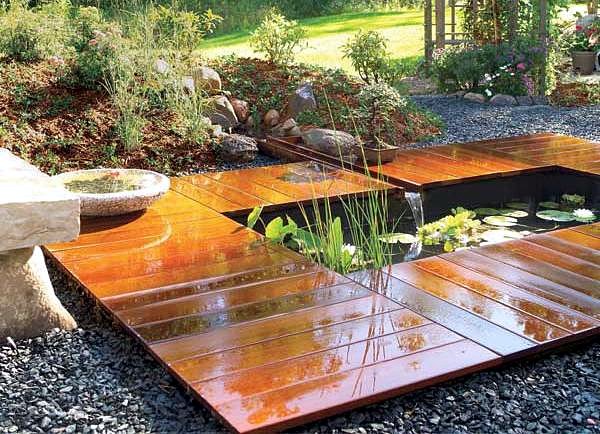
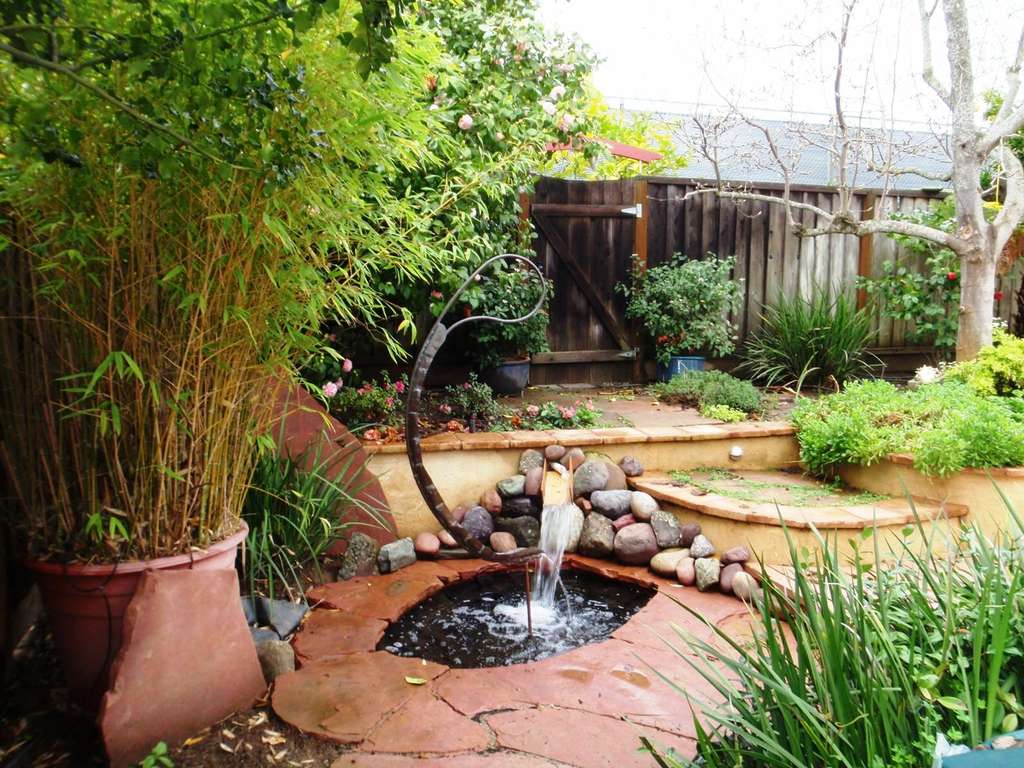
With the help of the equipment of the reservoir, you can create a new recreation area in the country for the family. A small decorative pond from an old bathtub will perfectly fit into the overall picture of the garden plot, decorating the landscape composition of the adjacent territory. It is not difficult to realize such a dream - for this, you first need to familiarize yourself in more detail with how to make a pond from a bath. Various workshops for making a pond from an old bathroom can be viewed on the Internet. A self-equipped mini-pond will decorate the landscape of a summer cottage, and watching a picture of lush greenery at the water's edge, aquatic plants and, possibly, even small swimming fish will undoubtedly please you and your household.
Choosing a site for a pond
First of all, you need to choose the most suitable place for a mini-reservoir. It is not necessary to arrange a pond in a lowland, a damp place where melted and closely spaced groundwater can accumulate.
According to Feng Shui, it is recommended to use the southern or eastern part of the site to place the reservoir. A flat, well-drained, dry place, with dense soil, including clay and sand, is optimal. It is worth using the shaded area of the garden area, you can also place a mini-pond on the sunny side of the site - in this case, after equipping the reservoir, it is advisable to plant plants and shrubs near it that will form a shadow. The following should also be taken into account - if a layer of snow lies in the chosen place in winter, the inhabitants of the pond in the form of fish will have a chance of surviving in winter frosts.
Tools and materials
To make a pond from a bath with your own hands, you will need the following fixtures, tools and materials:
- crushed stone (1-2 buckets);
- pebbles, bricks, stones of various sizes;
- cement and sand;
- clay (for planting plants on the bottom of the reservoir);
- wheelbarrow;
- bucket;
- capacity for cement mortar;
- Master OK;
- metal grid;
- shovel;
- a sheet of tin or an old leaky pan (for drainage equipment at the bottom of the pit);
- cement-based tile adhesive;
- dye or color film;
- roulette;
- building level.
Sequence of work
To convert a used bath into an element of a garden landscape in the form of a mini-pond, you will need to do the following sequence of work:
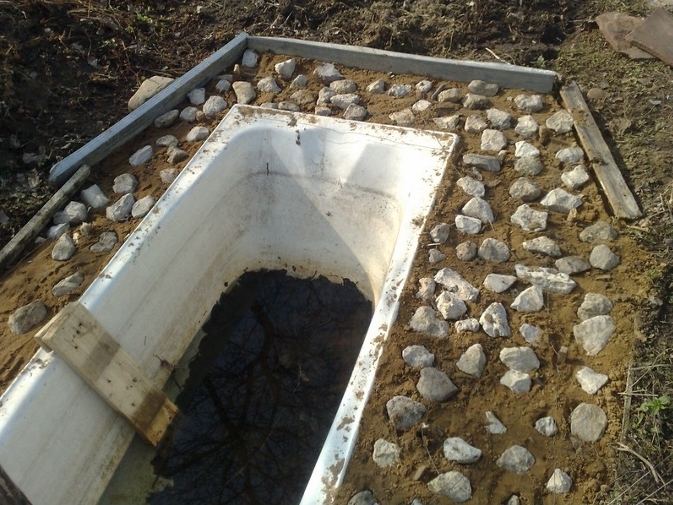
- First you need to prepare a bath as a suitable container for a pond. For this:
- it is necessary to cement the side drain hole in the bath. After the cement has dried, it will be possible to proceed to the next step;
- then you need to give the surface of this container a more natural look - for this you can cover it with a colored film or paint it in natural colors (beige, gray, black or brown). Or you can treat the surface of the bath with a special adhesive to give it a natural look. To do this, put on protective gloves, mix the adhesive for ceramic tiles diluted with water according to the instructions with a coloring pigment of a suitable tone - you will get a quickly hardening pasty mass. Immediately after preparing the mixture, sparsely coat the surface of the bath from the inside. An uneven rough layer of such glue will imitate the natural bottom of a reservoir. The bath treated in this way should be covered with a rain film on top and left to dry for a day.
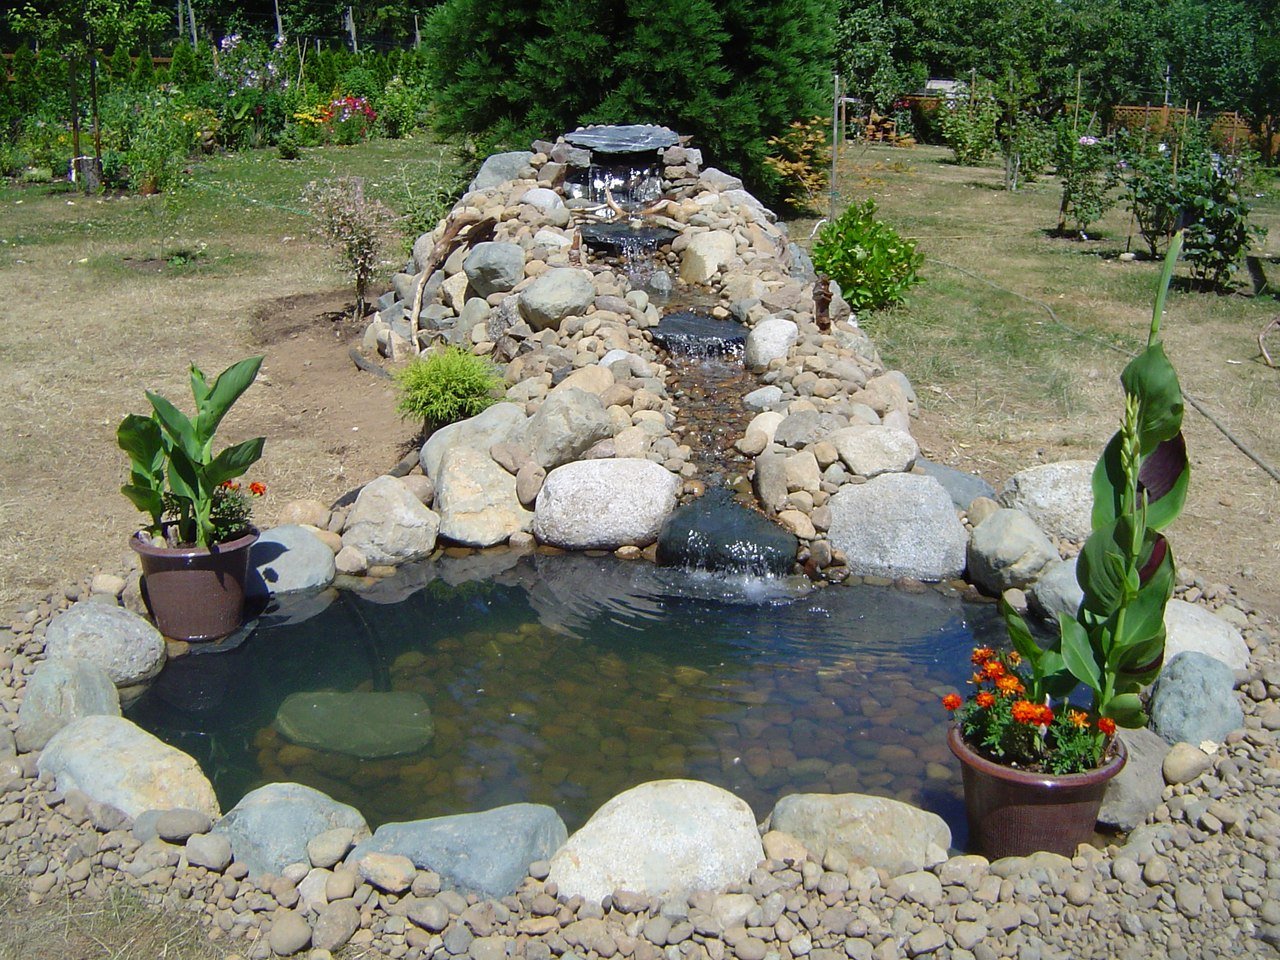
- While the dyed bath dries, you can dig a hole according to its shape. Place the tub at the location of the planned location of the reservoir to mark the location of the pond. To do this, surround the container with small pegs and pull a rope between them. According to its location, it is necessary to mark the boundaries of the reservoir on the ground, remove the corresponding layer of turf and dig a hole under the pond. It is required to choose such a depth that the side of the bathtub placed inside is approximately 25 cm below the main ground level.
- At the drain site, you need to dig an additional recess for arranging drainage. The excavated earth can be taken away - it will not be needed for further arrangement of the reservoir.
- Next, build a funnel for drainage. A tin sheet rolled up in the form of a cylinder or a pan with a hole in the bottom must be placed in a prepared recess and filled with gravel or gravel - 20 cm above the bottom of the main pit. Such drainage will allow you to drain the water from the bath in the winter.
- At the bottom of the pit, it is necessary to lay a small layer of rubble and cover it with a layer of sand - in general, such a coating will be about 20 cm. After that, you need to tamp these materials and carefully remove the tin funnel or pan.
- Install bricks at the corners of the pit and lower the bath into the prepared recess (so that its bottom drain hole coincides with the crushed stone drainage). For such transportation, you will need several strong hands or a winch. Align with the help of the building level the symmetry of the horizontal arrangement of the upper edges of the container. Pour sand on the sides of the installed bath, moisten it with water and tamp it as tightly as possible.
- Place a metal mesh in the bath on the sides - in a continuous strip or in the form of four pieces along the sides of the bath. Lubricate the mesh with a solution to stiffen the structure, inserting pebbles into it in some places. With the help of wire on the grid, you can form rings for further equipment of horizontal shelves in the bath - in the future, plants can be placed on them. In this way, it is possible to form asymmetrical, more natural outlines of the future reservoir. Wait for the concrete to dry.
- Lay clay on the bottom of the tank of the future reservoir, add a little water and coat the bottom. For high-quality fixing of the root system of aquatic plants, a layer 6-7 cm thick will suffice.
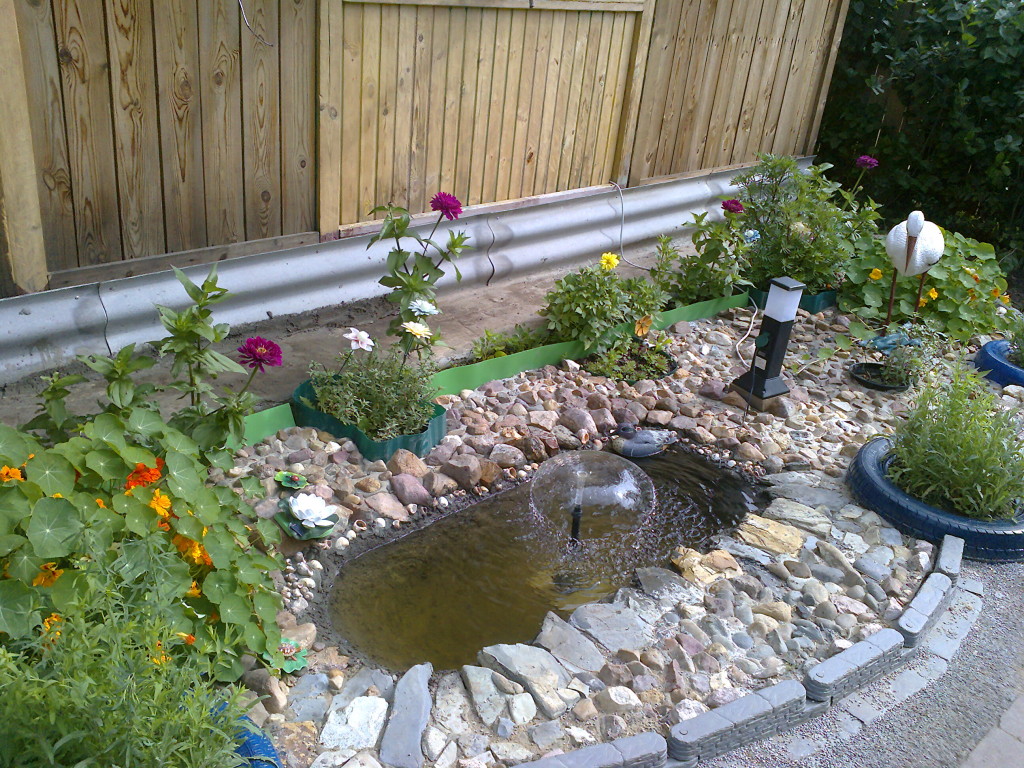
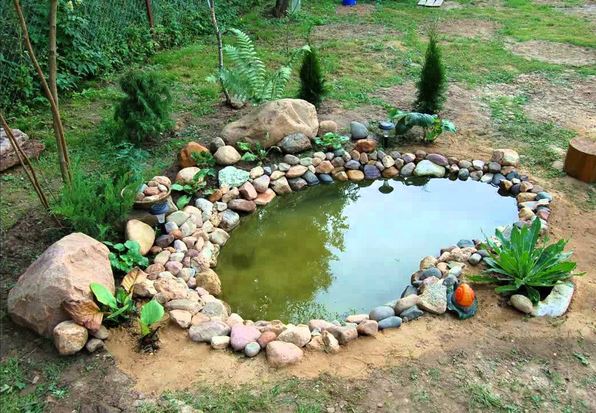
- Along the perimeter of the pond, carefully remove the top layer of turf, lay the reinforcing mesh. Cover this trench with a thick cement-sand mixture, leaving a small groove 30-40 cm deep for planting coastal plants. To decorate the pond, rounded stones, pebbles or flagstone can be laid around the bath in any order (so that the edges of the bath are covered) and fixed with concrete mortar.
- In the process of filling the mini-pond with water, make sure that there is no erosion of the soil at the bottom. You will need to place the end of the garden hose at the bottom of the tub and turn on the water so that it flows in a thin stream (to do this, it is advisable to cover the end of the hose with a spray nozzle).
Having equipped such a mini-pond from the bath on your own, you can proceed to further planting aquatic plants in it and populating it with residents of your choice.
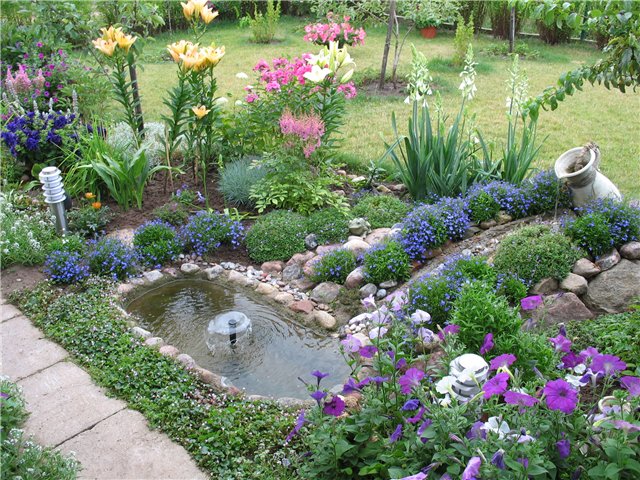
Decorating a pond with plants from an old bath
- in the earthen groove left along the perimeter of the reservoir, various perennials, coastal moisture-loving and marsh plants can be planted, and several large stones can be placed there to form the relief of the banks;
- after picking up groups of aquatic plants to your liking, plant them in an impromptu pond. To do this, you need to fix the roots of plants in a layer of bottom clay and stones, place them in flowerpots at the bottom of the bath or among small pebbles on horizontal shelves.
For decorative design of the surface of the reservoir, small or dwarf water lilies, water lilies, duckweed are suitable. You can get hold of aquatic plants with roots and a formed basal clod of silt in the nearest natural reservoir. Launch fry of small fish from a reservoir (for example, tops) into the water.
It is not difficult to give a reservoir a natural asymmetry by changing the width and height of its banks. You can implement this in the following ways:
- to form a mini-beach from gravel on one side on the shore;
- place an alpine slide or a mixborder nearby.
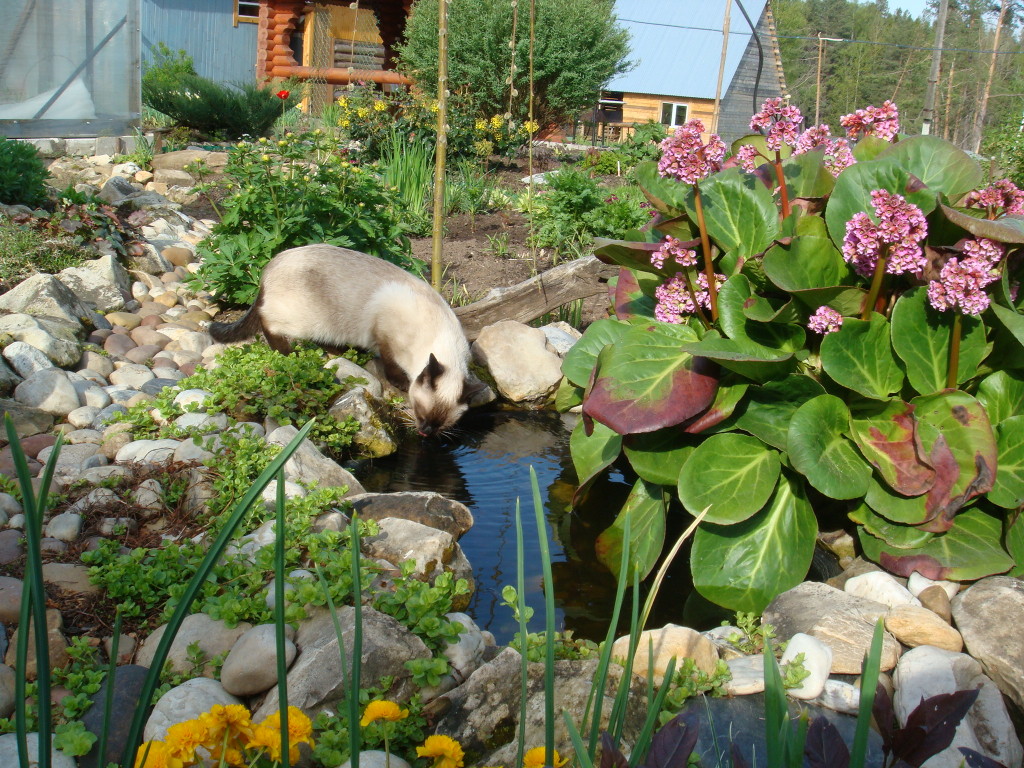
The introduced microorganisms, fish and planted plants will gradually multiply and form the microclimate of the pond on the site. Gradually, the water will lose its transparency, a natural plaque will appear on the walls of the reservoir. Thus, the artificiality of the man-made pond will not be evident; thanks to decorative landscaping, it will acquire a completely natural look.

With the help of a mini-pond from the bath, it is really possible to create a fantastically beautiful corner with your own hands in a summer cottage. When designing it, you can fully apply your creative abilities and imagination. Taking care of a small pond in an open area is easy. However, while doing this, try to take into account some practical tips for the design and operation of the pond:
- it is not recommended to populate snails in a country mini-pond from a bath, as they are able to multiply in significant quantities and clean the surface of the bath walls;
- no need to try to transform a mini-pond into a country aquarium in the fresh air with goldfish and crystal clear water. In addition, crucian carp launched into the pond will make the water extremely cloudy, as they prefer to dig in the bottom soil;
- to populate an artificial reservoir, top fish are suitable, actively cleaning the water surface;
- in a mini-pond from the bath it is not required to change the water, you only need to periodically (once or twice a month) top it up. The water overflowing over the sides of the pond is absorbed into the soil;
- cleaning the mini-pond will be required in case of uncontrolled reproduction of any microorganism or plant in it.
In the presence of fish in a mini-pond, water from the bath can not be drained in the cold season - the freezing layer of ice on the surface, the warmth of the deep soil layer, and the layer of snow covering it from frost will contribute to the preservation of the microclimate in it.
If you want to leave the water in the pond for the winter, put a few plastic bottles on its bottom - they will protect the bathtub from cracking if a significant amount of ice freezes. In frosty winters with little snow, you will also need to take care of raking a layer of snow at least half a meter thick covering the surface of the pond.
Pond from an old bath - photo
![]()