How to make a full-fledged artificial pond from an old bath with your own hands
A spectacular and desirable building in a summer cottage for many owners is a personal reservoir. Don't let difficulties or costs stop you. Today we will talk about how easy it is to make a pond from an old bathtub with your own hands.
Choosing a place and the nuances of preparation
The initial stage of work includes choosing a place for the future structure, creating a project, as well as purchasing the necessary materials and tools.
In this type of work, the drawing is not at all necessary, the structure can be erected, as they say, by eye. But if you are planning a more massive building with several levels or want to implement an original design move, then it is better to draw up at least a minimal project in advance. This will help you better understand what exactly you want to see on your site, as well as avoid errors during construction work.
For a pond, it is recommended to find a flat, drained, dry surface without defects. It is desirable to place the reservoir in the shade. If it will be located in the sun, it is better to plant several green spaces nearby, shading the structure. If you are studying the art of feng shui, then it is recommended to locate the pond in the east or south of the site.
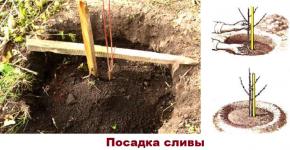
You can make a similar pond yourself
Before construction, you need to take the following materials:
- old bath;
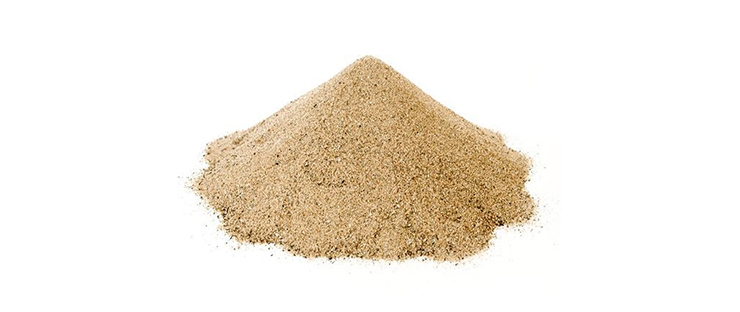
- gravel;
- pebbles;
- brick;
- natural or artificial stone;
- clay;
- cement;
- glue;
- dye or color film.
Do not forget about the material that we need
Also in your arsenal should be the following tools:
- hammer;
- container for solution;
- shovel;
- sheet of tin or pan;
- metal mesh;
- level;
- gloves.
Video "How to make a pond in a summer cottage"
The video shows the sequence of work on the manufacture of the pond:
Sequence of work
To build a pond yourself from an old bathtub, you must follow a series of sequential steps:
- You need to prepare a bath. To do this, cement the drain and wait for the solution to dry.
- We give the surface of the bathtub the look of a natural bottom: cover the inside with a colored film, treat with an adhesive or paint in soft colors. Suitable beige, black, gray. You can also take soft blue or green - they will give the water a special shade. To prepare the adhesive, mix ceramic tile adhesive with water and coloring matter in the proportions indicated in the instructions, until a paste-like mass that will harden quickly. During these works, it is necessary to work with gloves.
- After treatment, let the bath dry for several days, before covering it with a film that protects against precipitation.
- During drying, you can start digging a hole. Place the container on the intended site and mark the boundaries - drive around the stakes and tie. After marking, start digging a hole the size of the tub. At the same time, fix the sides of the bathtub 20-25 cm below the ground level when immersed in the pit.
- Dig another hole in the main hole to secure the drainage.
- We do drainage. Roll up a sheet of tin or take a pan with a hole in the bottom and place it in the recess. After that, fill it with rubble so that the layer protrudes 15–20 cm above the level of the bottom of the main recess.
- Cover the bottom with gravel and make a sand cushion. In total, the laid out coating should be 15–20 cm.
- Tamp the raw materials and remove the container placed in a small recess, while working carefully and without haste.
- Fix bricks at the corners of the pit.
- Grasp the immersion of the container in the pit. It is recommended to take the winch and work together with a partner in order to avoid injury and damage to materials.
- When immersed, the drain of the bath must coincide with the location of the drain.
- Level check the correct installation of the upper edges of the future pond and their symmetry.
- Pour sand along the edges of the upper side, moisten with water and tamp more tightly.
- Along the edges of the future pond, place the net in a continuous layer or in four parts. Lubricate with cement mortar and place small stones to stiffen. After completion, wait for the solution to dry.
- Cover the bottom with clay, dilute with water and coat the surface tightly with a layer of 5-7 cm. So the root system of plants will take root well.
- Dig a trench around the pond, lay a net in it and grease with a solution so that a small ditch of 30-40 cm remains for green spaces.
- For decoration purposes, lay stones, pebbles or other material around the reservoir so that the edges of the bath are covered and secure with mortar.
- Start pouring water. It is better to do this with a garden hose - the stream should flow in a thin stream. At the same time, look after the soil - it should not be eroded. It is allowed not to change the water completely, only to top it up periodically, and the water that goes beyond the banks will simply soak into the ground. Drainage and cleaning of the reservoir will be required only with uncontrolled reproduction of organisms or the development of viruses.
- After that, you can begin the landscaping phase.
landscaping
To green a pond, it is necessary to plant perennials, swamp plantings, as well as plants that love moisture in a prepared earthen ditch. It is also recommended to arrange several large stones to form the relief of the banks.
After picking up groups of plants, plant them in a pond. To do this, you can place the roots in clay, in flowerpots at the bottom of the container, or on horizontal shelves among small stones.
Other decorations
Decorative additions will favorably emphasize the pond and give it more aesthetics. To decorate the pond and give it more naturalness, you can place small or dwarf water lilies, lilies, or even duckweeds on the surface of the water.
Plus, you can effortlessly create a natural asymmetry of the reservoir by changing the width and height of the banks. This is done in several ways:
- the formation of a mini-beach from rubble on one side of the pond;
- placement of an alpine mound or mixborder.
In addition, you can install a small crock fountain, place a few figurines, or make a hard floor around the pond so that children can sit or play comfortably. Later, put small fish into the water. Tops are well suited for an impromptu pond.
It is not recommended to populate snails and crucians in the reservoir, since the former breed in excessive quantities and clean the bottom, and the latter will make the water cloudy due to the fact that they prefer to stir in the ground.
Features of the construction of a multi-level pond
The construction of a pond with several levels implies the presence of several water tanks, one bath will not be enough. You can create a cascading pond by placing one tub a level above the other and running a gutter between them. This gutter can be a simple shape, such as a straight stream or waterfall, or a winding one, but such a design will be more difficult to implement.
When building a tiered pond, you will need all the same materials as with a conventional construction, however, their number will differ. As we have already said, you will need another container and material for the gutter, you can take a plastic pipe.