Planting daylilies in the spring. Secrets of growing daylilies
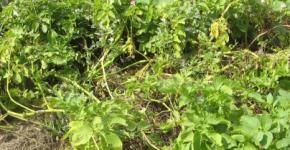
The daylily is a unique flower that, when releasing luxurious buds, does not require regular maintenance. That is why some people call the lily a plant of “intelligent lazy people” - the summer resident invests a minimum of effort and time, and as a result he gets a luxurious flower bed.
One of the prerequisites for the care of a plant is the periodic thinning of the shrub by transplanting to another location. Of course, green space can be cut off, but it should be done according to a special scheme. Otherwise, the bush will lose its fluffiness and beautiful shape.
But why prune the daylily stems, if you can just plant it? This method of reproduction is acceptable in any garden area, the main thing is that the root system should take root in a new place.
The best time to transplant
Daylily can be transplanted at any time convenient for the gardener, even here the flower shows its unpretentiousness. As for the best period, the opinion of experts comes down to the fact that it is desirable to transplant a plant when it is at the vegetation stage, so take up a transfer to a new place in spring and summer, up to mid-September, no later.
Transplantation for a plant is stress, so next season you can hardly expect abundant flowering from a planted shrub: the flowers will become small, and the flower stalks will lose in length. But within a year, a daylily sapling will bloom with new, unprecedented power. The best result after transplanting the plant will show in the third year after the procedure.
Separate planting varieties can do without transplanting for up to 15 years, but a gardener needs to consider a gradual deterioration in the quality of flowering. Do not hope that the overgrown shrub can be planted at any time - planting with a strong rhizome that looks more like a dense nest is difficult to split into parts without damaging the roots, and this is fraught with the destruction of the shrub. Therefore, the optimal time for transplantation is from 3 to 5 years of cultivation in open ground.
Step-by-step instructions for daylily transplantation in summer
Daylily transplantation involves a series of sequential actions that will minimize the shock of the plant from the procedure:
- Using a garden tool, dig a hole, considering the diameter of the root system of the green planting. The bottom of the pit is preliminarily prepared - a mass made of garden soil and compost is placed in an even layer, the mixture can be replaced with rotted manure. As a top dressing it is better to use manure, if not, use a universal fertilizer.
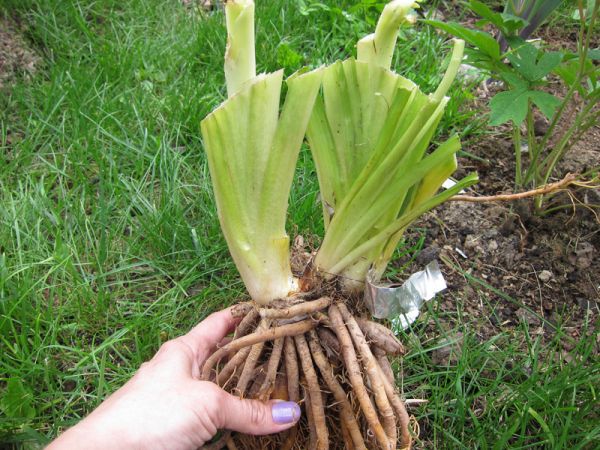
- Scoop the soil with a spade on the outside of the rhizome of the daylily, so as not to damage the roots. So that you do not have to forcefully tear apart the rhizome, bring the hose to the plant and turn on the strong pressure, direct the jet directly to the root and wait for it to soften. Carefully pull the bush in different directions. Too old shrubs cannot be divided in this way, so only a knife will come to the rescue. Areas of slices are processed with a fungicide before being landed.
- Holding the flower by the main stem, transfer it to a new hole, put a small cone-shaped soil on its bottom and place it inside the root. Make sure that when the hole is covered with earth, the shrub is directed vertically, does not deviate to the side, does not fall, otherwise it will develop.
- When the surface of the hole equals the level of the rest of the soil, compact the area well and fill the flower bed with water. The first weeks of the transplanted daylily bushes must be watered regularly, otherwise the ground will dry out and the plant will not have enough nutrition. Fertilizing the plantation is not necessary, let the plant come to its senses and take root well in the new square meters.
If you still have questions on how to properly transplant the daylily in the summer, we suggest that you watch the visual video instruction: https: //www.youtube.com/watch? V = vIzeapr13e8.
How else can you breed daylily
 Most often, gardeners first planted a daylily, not hoping for abundant flowering, as an experiment. However, when the flowerbed blooms and decorates the garden, the summer residents do not have doubts - I want to plant the entire garden plot with flowers. But how to do it in the most economical way, multiply without additional financial investments?
There are several methods for successful daylily breeding in summer:
- Cut the main stem of the shrub to the ground, leaving a couple of cm up from the root collar. This simple manipulation provokes the growth of young shoots; to allow them to grow and develop, it is necessary to slightly pry the earth away from the rhizome. The stem is cut not along an inclined, but strictly in the horizontal direction. Gardeners who multiply the plant for the first time in this way make a mistake - too high a section is left on top, and therefore new buds are formed much later, which means that the general development of the daylily will be disturbed. The infection will be protected from infection by ashes. As practice shows, in just one month actually get 10 new daylily shoots, and after a couple of years the bush can be divided into several and transplanted.
- Proliferation. In order to propagate the daylily in this way, it is necessary to have a rosette of leaves on the plant, which forms in the leaf's axil. Cut the socket as close to the stalk as possible. Transplantation of the outlet does not take more than 10 minutes, the soil is fertilized as described above. Grown shrubs obtained identical to the parent, which allows the gardener to keep the variety daylily.
Do I need to feed
In order for the plant to develop better and rejoice in the splendor of its buds, during the season it is desirable to fertilize the flower up to 3 times:
- immediately after winter - potassium, phosphorus and nitrogen are mixed together;
- when buds are laid - top dressing will improve the quality of flowering and prolong its period by adding superphosphate;
- in early September - potassium is introduced into the ground, which will protect the planting from the influence of severe frosts.
Daylily tolerates frosts up to -25 degrees, so there is no need to cover shrubs for wintering, you can only worry about maintaining the temperature of the soil in the first year after transplantation.
Flowers - a living decoration of any garden. As you know, all flowers bloom in different ways and at different times of the day. Therefore, it will depend on the successful selection of plants whether your garden will bloom around the clock and from spring to autumn. But not only this is guided by experienced growers. Much depends on personal predilections. Someone loves, someone, and someone breathes unevenly to daylilies. Here we will talk about them.
Daylilies in the garden
This beautiful flower can truly be the pearl of your garden. Their rather large beautiful flowers will delight you throughout the summer. And this is a rare occurrence when the flower blooms for about 2-2.5 months. Daylilies just like that. In addition, these plants also have decorative leaves that fit perfectly into the bouquet composition. Well and, perhaps, one of the most important features of these colors can be considered their unpretentiousness. They are able to grow in almost any conditions, and endure the winter. But, naturally, the better you take care of them, the more abundant and more magnificent they will bloom.
Choosing a place
The choice of planting site will depend on which varieties of daylilies you decide to plant. Daylilies of light varieties prefer sunny places, where, basking in the sun, will look very impressive. But the dark varieties in the bright sun suffer. Petals of their flowers fade and quickly fade. For these daylilies it is better to choose a shaded place. However, for those and others, the absence of near shrubs and large trees is preferable.
The soil should be well drained, loose and rich in organic compounds. Like most flowers, daylilies do not feel well in acidic soil. In principle, no special efforts are needed to prepare the soil for planting daylilies. Good garden soil will suit them.
Planting daylilies
Planting daylilies can begin in the spring and continue in the summer. Purchased flowers can be planted immediately in the place designated for them. Before planting, it is recommended to inspect and remove all dead parts. If the roots of the plant look sluggish and dry, then they can be soaked in water for a while with the addition of a small amount of fertilizer. If the roots are slightly damaged, it is advisable to treat them with a fungicide. This is especially true when landing in the summer.
The process of planting itself is quite simple. Dig a spacious hole. In its center it is necessary to leave a small tubercle, on which the daylily is placed. It is necessary to carefully straighten its roots. The root collar should not be too deep (not more than 2-3 cm). Watering the water, dripping the plant in soil, slightly thickening it. After finishing the landing, we carry out abundant watering.
When can I substitute daylilies?
Replace daylilies can be at almost any time. They are fairly easy to tolerate transplant and take root well in the new place. But most gardeners recommend transplanting in August after daylilies fade.
Dressing daylilies
Timely and proper fertilization of daylilies will be the key to abundant flowering. It should be noted that there is no universal fertilizer suitable for all soils. Therefore, choose a fertilizer based on the characteristics of your site. With a lack of soil, for example, potassium, the daylily leaves turn yellow. In this case, preference should be given to potash fertilizers. And the use of phosphate fertilizers has a beneficial effect on the root system and seed development.
The first dressing should be carried out immediately after the snow melted by complex fertilizers. The second time should be fed in late April, early May. This will be beneficially reflected in the growth and development of plants. The third time to feed the daylilies is recommended during the active formation of buds somewhere in June. The final dressing is carried out in August. It aims to increase the number of flowers next year.
Daylily Diseases
Despite the fact that daylilies are quite hardy, they are also subject to some diseases. Most often, gardeners have a lack of flowering in the plant. Why does not the daylily bloom? There may be several reasons. The main ones are: strong root penetration during planting, overdose with nitrogen fertilizers, excessive soil moisture. In all these cases, the plant will continue to grow, but, alas, you will not see flowers. If this happened to your beauties, then the best way out would be to transfer the daylilies to a new place, subject to all the necessary conditions.
As you can see, there is no difficulty in growing and caring for daylilies. Compliance with these simple rules will help you achieve good results, and the bright flowers of the daylily will delight you all summer.
Such a topic as daylily transplantation interests many beginning flower growers. This beautiful flower won the sympathy of people due to its appearance and unpretentious nature. which hit the imagination with a variety of shapes and shades, became regular guests at the sites of our compatriots. To such flowers adorned and you have on a bed, it is enough to study simple information about planting and caring for them.
general description
The homeland of this flower is East Asia, and it is known from the 18th century. It is a large bud in the form of a funnel. The color of the bud differs depending on the variety. At the same time can grow about three buds, and the whole period when you can enjoy the flowering plants, is almost a month.
The root system has a fleshy structure, there are also multiple appendages, which allows the plant to tolerate dry periods well. Peduncles capable of reaching a meter in height. After the buds ottsvetayut, in their place there are boxes with seeds. It is not difficult to grow in the open ground under the force of even a novice gardener.
Site selection
Before you plant a daylily flower, you need to choose a place for its growth. It is worth remembering that the plant loves the sun, and therefore, choose the appropriate area. But here you need to take into account the variety of the flower, since varieties with red, purple, violet and other dark buds should be planted in darker places.
In general, so that you do not have problems with the development of a flower, follow the following recommendations when choosing a place:
- do not plant flowers close to large trees or bushes;
- make sure that the area where the flowers grow, was not in the valley;
- the soil in the flower bed must be rich in organic matter and be neutral or slightly acidic;
- provide the site with a good drainage layer to keep the water from stagnating.
Transplant rules
Daylily transplants, as well as their planting, occur as follows:
- in the spring, pits for the plant are dug in the selected area, and the size of the pits should be two times larger than the size of the flower root;
- in the center of the fossa is piled a hill of earth, on which the plant root is placed;
- need to carefully straighten all the roots;
- the root neck of a flower must not be buried deep in the ground; it must be two centimeters above the surface;
- sprinkle the root with the ground, flatten the hole, slightly tamping, and pour plenty of planting area;
- irrigate land every day for two weeks;
- 30 days after the daylily has been planted or transplanted, it is necessary to feed them with the help of the mineral complex of fertilizers.
Flower care
The purpose of each grower in this process is to bloom a large plant. One of the indicators of a successful result are beautiful lush daylilies. Planting and care in the open field for these flowers are quite simple. We have already talked about planting, and now we will tell you what recommendations should be followed when caring for the plant.
- Moisten the ground where the flower grows.
- It is necessary to water only in the evening and do it carefully, so that the water gets to the very root.
- If a dry summer has fallen, then once a week you need to irrigate the land.
- If you planted a flower in sandy soil, then watering should be carried out more often.
- Mulch to prevent water flow from becoming too large.
- When conducting additional feeding, irrigate the land as well.
- You need to feed the flower monthly, as the plant is very sensitive to this process.
- To achieve maximum results, it is recommended to use the mineral complex in spring and summer, and in the autumn period - fertilizers based on phosphorus and potassium.
- It is necessary to carefully monitor the condition of the flower in order to respond in time to the appearance of various pests or diseases.
Important points
When carrying out a transplant, some problems may arise, which lead to the fact that the day-lily does not bloom or dies at all. Here are some of them:
- Planting a plant, you need to carefully examine the roots for damage and remove those parts that have dried or died.
- Before disembarking, trim all foliage above the root collar at a height of fifteen centimeters.
- Before planting in the ground, it is better to soak the roots in a solution with the addition of a growth stimulator, as well as a preparation that does not allow the roots to rot.
- Do not use fresh manure for top dressing, because in this case the plant will have a lot of leaf cover, but will not bloom.
- It is recommended to replant the flower at any time, except for the flowering period. The best time is the beginning of May or the last days of August.
- It is necessary to divide a bush and replant it every five years, but a flower can grow in one place up to ten years.
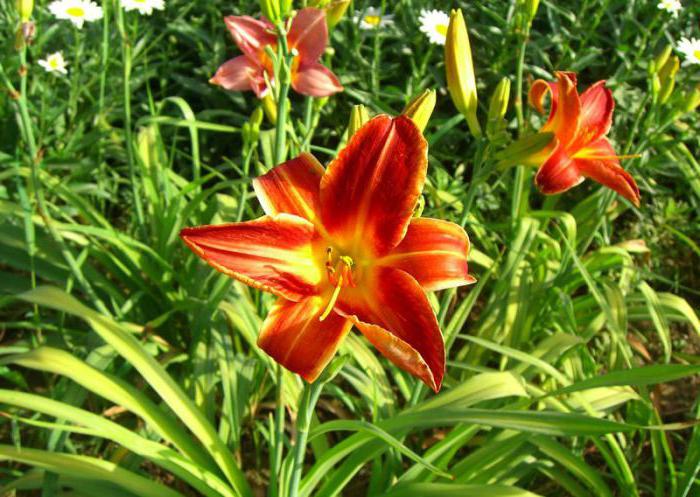
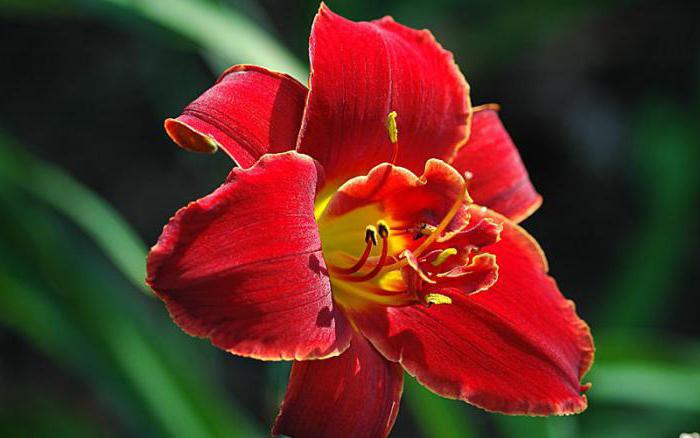
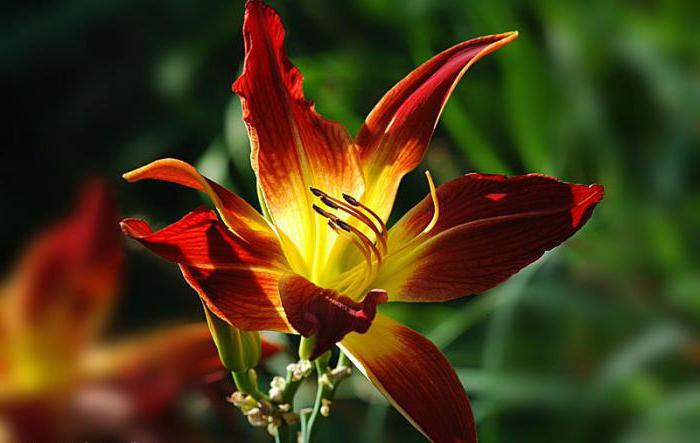
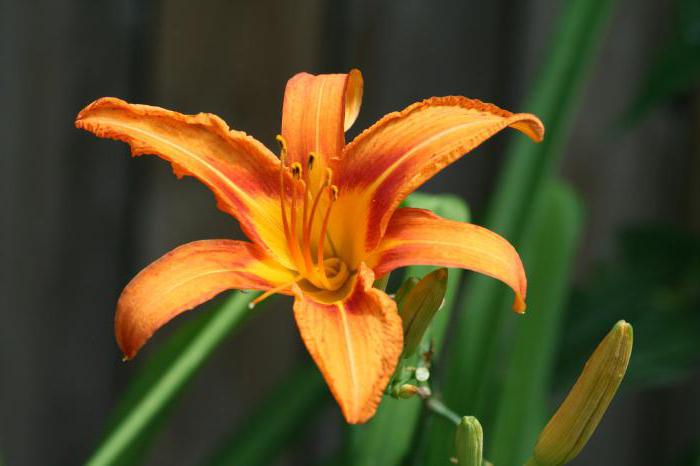
Plant varieties
Discussing daylilies, varieties and species of this flower, it is worth knowing that there are both wild and breeding options. In this case, growers use one and the other. But the advantage of wild flowers is their special resistance to diseases of various kinds and attacks of insect pests. These varieties include:
- Chimerokalis Aurantika - large, odorless buds of orange-brown color.
- Chimerokalis Citrine - buds of yellow color, very similar to a white lily with a pleasant smell.
- Chimerokalis Dumortieri - odorless average size orange flowers.
By the same hybrid varieties over which the breeders have worked, include:
- Double Cuty.
- Double Dream.
- Double Red Royal.
- Spider
- Helix.
- Amz to Havn.
- Free Hilin.
- Apple Sprin.
- Oud that faith.
- Stella Doro
- Apple Blossomwhite.
- Granny Smith.
- Rafl Patchmant and others.
Each variety differs from each other in size and shape of buds, as well as in color gamut. But the main thing is that all varieties, without exception, are beautiful and worth it to decorate their plot with them.
Pest control
The daylily described in this article may be attacked by pests or be a victim of the disease. In order to produce the necessary activities in time, you should carefully monitor how the plant looks. If we talk about pests, then most often the flower is affected by aphids, lily mosquitoes, or slugs. To avoid the attack of such representatives of the world of insects, you need to cultivate the land with a solution of insecticides. And finding one of them, you need to act in accordance with the instructions for combating this pest.
Speaking of diseases, you need to mention rust, root rot and fungus. It is they who most often attack the flower. In order to prevent the need to:
- sterilize garden tools;
- water the flowers with the addition of phytosporine;
- flush the ground after watering;
- remove weed plants;
- do not disturb the watering mode.
Flowerbed partners
The daylily flower looks great on any flowerbed, either alone or in company with other flowers. Landscape designers are increasingly using it in their work. Transplanting daylilies is a simple process, so people often decorate borders with them, flower beds and slides. Very beautiful is the combination of this flower with tulips. Often, you can see the booklet and jerk on the same lawn. But in general, the plant is combined with different representatives of the flora - it all depends on the imagination of the owner.
The question of when to replant daylilies, for beginner gardeners does not arise by chance. From this depends on the appearance, and the main characteristics of planting material. At the same time, it is necessary to choose the time for transplantation not only by the seasons of the year. Most experienced flower growers are guided by external indicators and the general condition of the flower.
Daylilies are very similar to lilies, but unlike them, this species is more unpretentious. After transplantation, the flower can grow in 1 place up to 15 years. Daylily is not picky about fertilizers and soil composition, it grows well in the sun and in the shade. True, the growing conditions impose a large imprint on the appearance of the bush, the intensity of flowering and the size of flowers.
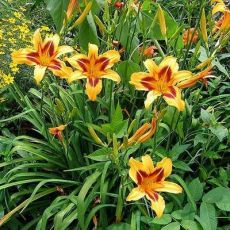
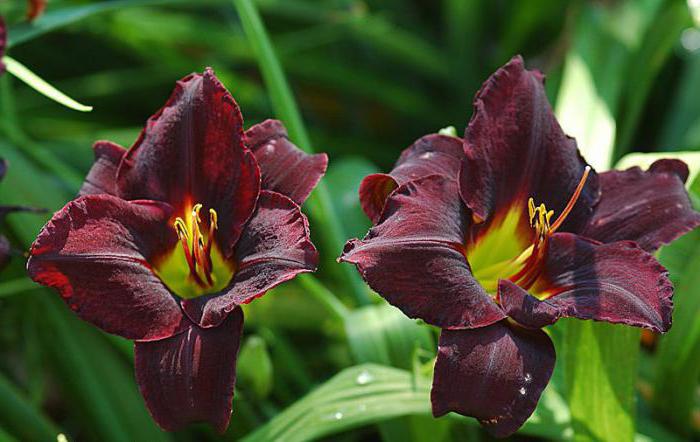
For example, varieties with bright-colored inflorescences will feel much better in fully open flower beds in direct sunlight. But daylilies with flowers of all shades of red are best planted in shaded ridges - rectangular flowerbeds (from him. Rabatte - bed). In the open, inflorescences may appear faded spots.
Fully shady side or planting a flower under the dense crowns of trees will lead to the formation of unnecessarily long and thin stems. Therefore, if the gardener wants his daylily turned into a well-groomed plant with abundant ovary of luxurious flowers, you will have to work a little.
How to understand that the daylily is time to replant?
This plant does not require frequent transplants. It is enough to change the place of cultivation every 5-6 years. Except when you need to cure the soil or the bushes themselves. For professional breeding of daylilies, when every new root is important, more frequent transplanting is also acceptable. However, it is not worth much to dig in with daylily digging. Any transplant (even the most accurate) is a serious load for the plant. From the annual division of the rhizome, the flower can quickly lose its varietal and decorative qualities.
The rest of the time you just need to monitor the condition of the plant. As soon as 3-4 flowering shoots appear around the adult bush, the daylily is ready for planting. If you skip the transplant, then over time the bush begins to grow, the young growth drowns out the mother plant, whips and buds are reduced in size. Further cultivation of the bush in the same place will provoke an even greater degradation of varietal qualities, turning an elegant decorative flower into a wild plant.
Replanting a daylily every few years can be remarkably combined with the reproduction of a flower by dividing rhizomes. But this rule applies only to spring transplant. At the same time, it is difficult to isolate a certain period for digging up bushes. Daylily tolerates transplant at any time of the year. But some seasonal features of transplantation is better to observe.
Agrotehnika (care and landing) LILENE
Daylilies (Hemerocallis) - herbaceous rhizomatous perennials. It is unlikely that there will be such a long-flowering herbaceous perennial in the garden as a daylily that blooms continuously from June to August-September). When the daylily bush reaches the age of 3-5 years, then 20-30 flower stalks alternately grow on it during the season, bearing 10-20 flowers each! On each of the peduncles, one beautiful flower is blooming every day, which flaunts no more than one day - hence the popular name of the daylily “daylight”.
Day-lily can be planted in large groups or single specimens on the lawn. Daylilies are perfectly combined with any garden plants, and their elegant flowers are a real decoration of the garden throughout the summer. Very naturally they look on the bank of the pond or along the river.
Day-lily- very plastic plant; it can grow in shade, partial shade, but only on a well-lit area bloom will be massive and abundant. Only under the bright sun the daylily flower opens completely and only in dry sunny weather the flower color is fully manifested. In the shade, as on an overcast day, the daylily flower may not open at all. In the light shade, you can plant only varieties with a very dark color, which belong to the groups "dark" and "purple" - so that their flowers do not fade in the sun.
Daylilies good winter under the snow, spring frosts after the snow melts, when the plants start to grow, damage young leaves. But this does not affect the general condition of the plants. As the temperature rises, new leaves come out of the middle of the outlet.
Soils - for the cultivation of daylilies are quite suitable ordinary garden soil. On heavy clay soils moisture stagnates and in cold weather root decay may begin. Sandy soils do not retain moisture and therefore do not provide plants with sufficient water and the daylilies will survive on them, but they will be weak and oppressed. In terms of texture, medium soils are preferable: if you have sand, then you need to add some clay or loam to it. The soil must be very fertile. Poor soil needs to be enriched with compost, rotted.Heavy, clayey soils facilitate by adding coarse sand.
The optimum value of soil acidity is 6.5 pH. If the soil is excessively acidic, add dolomitic or limestone flour. On light soils, it is recommended to add deoxidizing compounds annually, because they are quickly washed out with rain and melt waters.
Landing
The best time to plant a daylily in the middle lane is May or August. If necessary, the lily can be transplanted between these periods, but it is better to choose cool weather. Late planting dates do not always give good results, as it takes about a month for rooting to take root.
Considering that daylilies grow with age (especially the first 5-7 years), they are planted at a distance of 60-70 cm, and tall varieties - even at a distance of 1 m from each other. Other perennials or annuals can be planted temporarily between daylilies.
On good garden soils, the depth of the planting pit is 40 cm for medium-grown varieties, and 50 cm for tall ones. If the soil is poor or heavy, then the landing pit must be made deeper. The pit is filled with a fertile substrate of a mixture of compost, rotted manure, sand and peat.
Fill the fertile soil with a mound. Drop the plant in the hole. With proper planting of the daylily branch, the boundary between the stems and the rhizome should be at ground level - this is an indispensable condition for the normal development of the plant. We distribute the roots on the surface of the hillock so that there are no voids under the roots. The densest rhizome of the delenka should be vertical. Top pouring nutrient mixture, but do not fill the hole completely. Use your hands or the toe of a shoe to compress the soil at the roots, but not very hard. At the same time, it is necessary to hold the plant so that it does not drag in deep. Now pour plenty of water, filling the hole to the brim. If the water leaves quickly, it means that the soil is poorly compacted. Sprinkle dry soil, crimp the roots again and pour again. After that, finally fill the hole with the remaining nutrient mixture. The root neck should be 1.5-2 cm mulched dry humus or peat. If the planting was carried out correctly, then the moisture should be enough to root the young plant. For the planting of larger bushes and delenok, the holes are needed larger, the planting method remains the same.
Care
Young, recently planted plants should be watered often enough so that the roots are constantly in a slightly damp state. This is especially true for light, sandy soils that dry quickly and easily.Adults plants do not like frequent, especially superficial watering. Daylilies are plants that love water, but can stay for a long time without it due to the special structure of the roots. The daylily roots are large, strongly branched, deep in the ground. Pronounced thickenings on the roots are designed for water storage. Therefore, we need abundant, but rare watering in the driest summer time. Watering is necessary so that the water reaches the suction roots, located on the periphery of the root system.
It is important to observe the mode of watering during flowering, then the flowers will be particularly decorative. During flowering can not be a drop of water fell on a flower. This causes damage to the delicate petals.
Top dressing
T a small bush of a daylily just planted in the fertile heavy land can be left alone until next year. An adult, overgrown bush at the beginning of the growing season on sandy soil must be fed.Daylilies love mineral fertilizer.
In May, daylilies, like those of plants that start early, start to grow wildly. At this time we feed with nitrogen fertilizers.Before flowering, during the period of budding, it is necessary to feed with a full complex fertilizer, for example, with azofoska, nitrophoska or fertilizers for flowering plants. After flowering in the daylily comes a short period of rest, then the plant starts to grow again. When this occurs, the bookmark flower buds for flowering next year. At this time, the main, main feeding is carried out, this time phosphorus-potassium (potassium phosphate, superphosphate, wood ash). You can use specialized autumn fertilizers.Top dressing at this time increases the size of the plant and gives the maximum number of flowers in the coming year.
It is necessary to deoxidize it or to alkalify it in time. By the way, dolomite flour is not only an excellent deoxidizer - it contains magnesium, which is so necessary for the normal life of plants - many, not only daylilies. When growing daylilies, fresh manure and excess ash should not be used, since ash gives an alkaline reaction, and manure is a breeding ground for pathogenic fungal diseases.
Mulching
Daylilies respond very well to mulching. This reduces the growth of weeds, less heating of the soil on hot days, and better moisture retention. For mulching, they use cedar nut shells, pine bark or rotted humus.
Transfer
In principle, daylilies can be replanted at any warm season. The best time: early spring (the very beginning of the growing season) and the beginning of autumn - September. Valid transplantation at another time.
It is necessary to dig up the bush and put it in a shady place so that the roots are weathered. After that, the roots need to inspect, remove the rotted, damaged, cuts sprinkle with ash. The leaves are shortened, dry and broken off.
If the transplant has coincided with the end of the growing season, it is possible to cut the leaves at a height of 10-12 centimeters, anyway, the plant will soon go to winter rest. We also prune the leaves if the daylily moves somewhere outside the “home”. Well, if we are engaged in transplanting within the garden area, in the middle of summer, when you do not want to cut such beautiful leaves at all, then you can not do that. Just shade the transplanted specimen well, and water it abundantly. And after a few days, the drooping leaves will rise again, and the plant will transfer this procedure without loss to itself.
Breeding
For breeding varieties and hybrids using a vegetative method, which preserves all the signs of the parent plant. The best time to divide the daylily is spring and the end of summer. With later terms, the daylily may not bloom in this year. For reproduction using young bushes no older than 5-6 years.
Delenka from the peripheral part of the rapidly rooted and gaining strength. Delenki from the middle part of the bush, without young roots, require rearing for 1-2 years in the beds, and only after that they are planted in a permanent place.
Loose shallow varieties can be propagated without digging up the main bush, but only by separating the daughter rosettes that were formed on long stolons. Child rosettes are separated no earlier than the 3-4th year, when they form their own roots.
There is another way to breed daylily without digging. It is easier to apply on loose sprouts, but with certain skills it can be used on tight cousins. This operation is carried out either in spring, when the leaves are just beginning to grow, or in August, when the leaves are cut, so that each outlet is visible. A well-ground shovel is placed vertically on a conventionally planned dividing line and with a sharp pressure the legs cut off a part of the bush. Then cut off the cut part of the bottom and removed. Do not be afraid to injure the roots going down. According to the rules, they should be shortened before landing. But with the lateral, young, the roots must be handled carefully. Place the cut to sprinkle with crushed coal or ash. The formed hole is covered with dry earth and compresses it well. In order not to begin decay, the first time the mother plant is not watered.
Preparing for the winter
There is no special preparation for winter for daylilies. It is quite resistant perennials easily tolerate even very low temperatures. In extreme winters, they may suffer, but still more often these winter lesions do not lead to the death of the plant. The question often arises: when to cut the leaves - in the fall or spring. Both options have their pros and cons. Naturally, the longer the leaves are not cut, the better - the process of photosynthesis goes, the plant receives additional nutrients, you can leave everything as it is until spring. But if the spring does not hurry with the cleaning, then the old leaves will begin to shed and not give the young leaves to break through a fairly dense layer of plant debris.
For new landings, and especially for autumn plantings of the current year, it is worth making a light cover of fir paws for better snow retention. In subsequent years, the plant adapts to the new conditions of life and goes out of wintering without loss.
Diseases and pests
Daylilies damaged thrips. Adult insects are small, 1-1.5 mm long. Larvae are even smaller, about 1 mm, light yellow. Hibernate in the roots. The larvae suck the juice from the leaves and flowers. Mass reproduction of thrips is observed during the flowering period; penetrating inside the buds, the insect damages the flowers. The buds and flowers shrivel up, acquire an ugly shape, an unclearly pronounced color, the surface of the petals as if the whole are torn with needles. In the fall, with a decrease in temperature, thrips come down to the lower parts of the stems. Optimal conditions for the development of thrips - dry hot weather.
In the conditions of our climate in the open ground, thrips do not cause significant harm to the daylily, but significantly reduce the decorative effect. With minor damage, you can do agrotechnical methods. First of all, it is necessary to cut flower stalks under the root after flowering is completed, until the pest has moved from escape to the rhizome. The same applies to the leaves - all damaged and sick need to be cut and destroyed. In early spring, all dry dead leaves are removed, where thrips and any other pests could winter. Good results are obtained by digging the soil before winter. Calendula, Tagetes, as well as onions and garlic are suitable for repelling thrips. Damage to thrips is not observed in all daylilies to the same extent, they are especially noticeable on dark colored varieties.
To pests can still be attributed mosquito daylilies. The buds in which he lays eggs, in the process of growth are deformed. Get rid of the pest easily, tearing off and burning damaged buds.
Daylilies in general, few are prone to disease.The most dangerous of them is the root collar rot, which usually occurs when the soil is wetted. The disease is manifested in the fact that young leaves stop growing, turn yellow, are easily pulled out of the ground, while there is an unpleasant smell.
When these symptoms appear, the plant must be dug out, washed off from the ground, all the damaged parts should be removed with a knife, placed for 30 minutes in a solution of “Maxim” or “Vitaros”, then dried in the sun and planted in 2-3 days, better in another place. If the place remains the same, the land in the landing pit must be completely replaced. If time does not take action, the death of the plant is possible.
Another daylily disease that has recently appeared is rust. This disease is not common in all countries and is still poorly understood.
Among the diseases can also be called strick, or striation. If yellow or brown stripes appear on the leaves, especially along the midline, it is most likely a banding caused by the fungus Aureobasidium microstrictum. Many flower growers use fungicides, but more often they will rather confine themselves to sanitary cleaning and destruction of the affected leaves. In general, this disease does not cause serious harm to the plant.