Print stencils for wall decor with your own hands. Stencils for Wall Decor - how to do it yourself
Today's selection contains stencils and wall decor ideas. Textured painting is a very modern way of transforming your home. The monotony of the coating inspires despondency, but the multidimensional layers are very creative. The whole question is how to apply them. Let's talk about this today!

By the way, it is not at all necessary to buy some exquisite rollers and stamps. On a simple paint roller, you can screw the fabric and get the original texture.
Handy stencils for wall decor

However, even without a roller, you can create a very interesting structure on your walls.

Use a large sponge or washcloth as a stencil for wall decor.

You can use rollers with pimpled film, some kind of nets or twine.

An old dust fan will help create a light, airy pattern on the wall.

Painting through tulle or mesh will make your walls look spectacular.

Tulle as a stencil for wall decor
By the way, you can create vertical stripes on fresh paint with brushes or brushes. The depth of the stripes can be changed by pressing the brush. The pattern will depend on the thickness of the pile and on its rigidity.


You can make both vertical and horizontal stripes. And you can combine them.

The usual plastic film when painting the walls will help to give a very curious texture.

Film as a stencil for wall decor
Using thin transparent paper, you can decorate the walls like this.

Additionally, you can apply a patina over the paper.

In addition to abstract backgrounds, you can also experiment with normal wall decor stencils.

Stencil for wall decor - scales

You can cut out stencils from thick cardboard or from floral wrapping film.

Stencils for wall decor made of cardboard

Stencil for wall decor - polka dots

Stencil for wall decor - monogram
You can even use some items from the kitchen as stencils.
Related article: Chess for two online at LuckForFree.com

By the way, the functional idea of a reusable stencil is made of canvas stretched over a stretcher. You can cut both simple and complex patterns.

Wall decor stencils

Stencil with astel pattern

Stencil for wall decor - ornament

Stencil for decorating columns

Ornament for wall decor
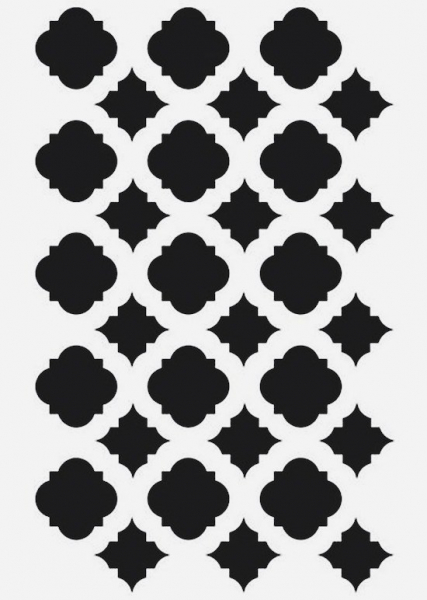
Stencil for wall decor - quadrangular ornament

Stencils for wall decor - diamond pentagons
If you use several colors when painting through a stencil, you can get spectacular transitions along the walls.
Multicolor Wall Decor Stencils


In the end, I propose another original idea - a mountain landscape on the wall. Gradient with a transition from dark to almost transparent.

Stencil for wall decor with a landscape
For wall decor with two-tone painting, you can use ready-made stencils. You can print the stencils below by scaling them. If you know how to draw, then you can redraw the stencil on very large paper and then you will be able to decorate a large area of \u200b\u200bthe wall.
Now you can also print large format stencils in print shops. For the money it will come out quite budget. By the way, you can also order a slot, so that later you can simply peel off the excess, leaving the right one. Explained chaotically, but I think it's clear ...
Below you see stencils for wall decor "Africa". There are two of them, they differ in the width and size of the elephant. As well as a stencil for the walls "Giraffes".
How to make stencils
You can use stencils by cutting them out of paper with a breadboard knife, attaching them to the wall with tape and stamping them with an acrylic paint sponge.
It is much more interesting to create your own stencils than to download ready-made ones. That way you don't show your personality. But, of course, in a circle of friends, if no one has seen them before, even common patterns will be like the original ones.
Related article: DIY organizer from boxes for needlework: a master class with a photo
Video - how to make a single-layer stencil from a photo
Another option - you can order a vinyl stencil from any outdoor advertising company - they have special plotters and they will cut you a stencil from a self-adhesive vinyl film. You can decorate the wall with a vinyl decal, or again, use this as a stencil by stenciling with acrylic paint and a foam sponge. In a word, there are a lot of options for drawing a picture on the wall.
Video - do-it-yourself stencil for wall decor
Pavel Perederiy tells more intelligibly, watch his master class and your knowledge will increase significantly.
By the way, on my website you can also see corner stencils or butterfly stencils.
Even our ancient ancestors decorated the rock walls with paintings and drawings, expressing their individuality in this way and outlining the history of their life. It is not surprising that today a person still strives to decorate the house in an original and elegant way. To realize this goal, there are many variations, the main of which is stencil wall decoration. When choosing a pattern or pattern, there is no limit to your imagination, and do-it-yourself stencils for wall decor will make the design of an apartment or house 100 percent unique.
The growing popularity of stencil decoration is explained by the fact that with it you can hide any design flaws or, on the contrary, emphasize the merits.
Popular types
Wall stencils can be anything from a repeating pattern that can create a wallpaper effect to a work of art in the form of an author's drawing. But this is not the only classification of stencils. Depending on various factors, there are several types of them:
1) Monochromatic coloring. For the most part, this method is used, since it is the simplest, but at the same time it looks no less masterpiece.
2) The use of several shades when drawing a picture. This technique is much more difficult and requires more attention and skill. Each element, which differs in color from the other, has a separate stencil. First, the first element is displayed and only after the paint has dried completely, the next one is displayed. This is done because this view provides for the imposition of one element on the previous one.


3) Volumetric or relief patterns. In this case, the stencil is applied not with paint, but with putty to create a bulge in the pattern. However, do not overdo it with this. A drawing that is more than 3 millimeters convex will look awkward. If desired, then the pattern is painted.
Decorating the house with the help of various accessories, decor elements today is the prerogative not of those who do not have enough money for expensive accessories, but of craftsmen who have a craving for needlework. Made templates for decorating walls, windows, furniture today are the most popular. You can make stencils for decor with your own hands, draw, download from various needlework sites. Stencils have been in demand over the past few years, because they are quite simple, convenient, concise. Problems with manufacturing will not arise even for novice craftsmen. You can use this decoration to decorate almost any surface: windows, mirrors, ceilings, walls, fittings.
Many still in kindergarten, primary school cut out snowflakes to decorate the premises before the New Year. This will also be a kind of example of how stencils are used to decorate a room. A nice bonus is the inability to overdo it with the amount of decor if you pick up stencils of the same theme. Even a repeating pattern will play into the hands, decorating the design, adding a unique charm to it.
Do-it-yourself stencils for interesting decor, templates and photos of products
This issue must be approached with all seriousness: the future appearance of the ornament, its interestingness, and originality depend on the choice of base. You should not blindly copy the finished drawing, because you want to make the house original, and not mediocre. To achieve maximum effect, you should follow simple rules:
Carefully approach the combination of stylistic elements containing the image of flowers, geometric shapes and stencils of different styles. When decorating walls using stencils, experts call conciseness the main condition. If you combine completely opposite images, the result will look ridiculous. The same applies to the pattern used in the design. The type of ornament should be the same. The main thing is not to combine stencils of colors and geometric shapes with each other. It looks primitive and not pretty.
Stencils containing the image of various figures should be large, bright, and clear. A small pattern of flowers, stars, small details looks like a dirty spot on the surface. It is important to observe the principle of linear filling of the figure. More strokes, contours, lines - a brighter and clearer picture.
Templates containing a ready-made compositionally completed image may look completely different. Often, beginners use monochromatic stencils of abstractions, ornaments that look simple, but attractive enough. A pattern in one color is suitable for decorating rooms whose interior looks complete. A simple drawing will not spoil it, but will add an interesting zest. A multi-color pattern is best used on plain surfaces, adding color, color, and liveliness to the design. The drawing should not be single, but combine different shapes, figures, ornaments, combined in a holistic composition. Volumetric drawing is especially popular today: putty is used in the manufacture. The finished drawing in volume reaches 4 mm. Sometimes reverse stencils are used: use involves painting not the inside of the stencil, but the outside. Do not forget that the stencil does not have to be used separately, because it can become part of a beautiful, logically completed composition, making stencils unique. So, the image of butterflies goes well with drawings of flowers, dragonflies, small birds.
As for how to choose high-quality materials from which the drawing is made, craftsmen prefer to use different forms of paper. It is cheap, simple, widespread. You can make any stencils by drawing them yourself, printing ready-made samples. Some techniques involve using cardboard to make stencils on which the design is placed. It is quite simply attached to the surface of the walls, being a solid foundation.
There are several problems with the application of the material: in the work that such patterns imply, it will be difficult to cut stencils of the round parts that the pattern contains, especially if they are small. But you can apply cardboard templates several times without fear that the stencils will tear. Recently, self-adhesive has begun to be used quite often. It is made of polyethylene, vinyl. The sticky side of the paper makes the image perfect for painting exteriors and interiors containing stencils.
Do-it-yourself stencils for room decor templates and types
Templates mean ready-made materials: drawn, printed on paper, film, metal. The patterns evenly fill the surface where the working materials are placed, after which the desired part is cut out, which contains the image. The mentioned parts will be painted in bright colors.
Similar patterns using paint can be performed in one or more layers. A single layer image does not cause problems. What are multi-layer stencils? The templates of the named images are used in the street art technique. Acrylic paints, water-based emulsions, alkyd enamels are used. At the stage of applying the paint, it must be taken into account that not all colors blend well with each other. For a high-quality result, it is advised to use a flower circle stencil, where one shade smoothly flows into another. This will help you see which colors are contrasting and which should not be paired when using a technique called stylistic patterns. When applying the dye, it is recommended to use rollers and sponges. They absorb excess paint, preventing it from spreading over the surface of paper, glass, walls. The use of brushes on the vertical part of the walls will lead to the fact that by moving the materials, you will smear the pattern over the area of the walls: it will spread, forming ugly stripes.
The paint application technology is as follows: you create a specific pattern using a stencil made of vinyl, paper or plastic. In order for the work to go as accurately as possible, it is necessary to use lavsan film when drawing. It is placed on the glass, under which lies the lamp. Then a stencil for the walls is made from this film.
Never cut from the edges to the center if the main and largest compositional spot is in the middle. Start cutting out large parts, smoothly moving on to smaller parts. In the event that stencil patterns occupy a very large area in width or height, try to break them into small structural parts, which will greatly facilitate not only drawing the stencil, but also applying it to the wall.
If you are just getting started with stenciling and applying paint, try to work exclusively with self-adhesive film. This will greatly facilitate your work by eliminating possible ink shifts in the drawing. When you fill your hand, you can make masterpieces even on a glue-free basis.
You need to apply stencils according to this scheme:
Prepare templates for creating an ornament with your own hands by cutting out all the necessary parts of the design. Using adhesive tape or the sticky side if film is used, secure the stencils to the work surface. Proceed to the stage of applying paint with your own hands to open areas that have not been covered by the templates, without pouring it onto the surface in large quantities, because the pattern may spread ugly. It is better to apply the dye layer by layer if necessary to add brightness to the pattern. When the work is dry, remove the templates without damaging the picture.
There is a list of certain tips when working at the stage of applying paint with a brush / sponge to create an ornament with your own hands:
- If you still decide to use a paint brush to create decor with your own hands, which is highly discouraged for beginners, hold it perpendicular to the area of \u200b\u200bthe walls or other surface.
- Try to make sure that the small fibers from the brush do not stick to the already painted part of the picture. To do this, paint over the stencils in a circular motion.
- As for large areas of decor, they must be worked out with a paint roller.
- Do not collect a large amount of paint on the working tool, it is better to remove the excess with a sponge or a clean rag.
- If you have used reusable stencils, wash them in room temperature water.
- Once the drawing is dry, varnish it.
If you want to use ready-made printed templates from the Internet that take up a large area, you just need to scale the drawing to the required size. And one more good advice: if you want to highlight the picture, and not make it part of the wall design, then paste it with special borders for decoration.
DIY stencils for decorating various surfaces and pattern templates
If you want to create a stylish interior for your room, while radically changing the design of the room, but leaving the whole situation in its original form, use flower stencils for decoration. They are ideal for creating a beautiful Provence-style interior and do-it-yourself decor. Light and unobtrusive patterns in the form of flowers of roses, daisies, tulips and poppies will help to make the interior original and individual.
The decor stencils you choose are entirely dependent on the pattern technology. For beginners, a simple option is suitable, which depicts floral motifs. It is worth noting that they can be both abstract and natural composition, which makes them versatile when used in any style of room.
If you are a fan of everything non-traditional and original, you should not even think about using the usual geometric or floral patterns. The best option would be stencils on which various animals are drawn, including cats. Funny faces will be a wonderful decoration not only for walls, but also for fittings. With the help of such stencils, you can decorate not only the bedroom or nursery, but even your own refrigerator. In addition to animal motifs, you can use applications with butterflies. If you do not know how to draw these insects yourself, use a ready-made template from the Internet. All that remains is to print it, although today designers even offer ready-made vinyl stickers that do not have to be cut or painted in the future.
If your soul wants creativity, then use unusual applications to decorate the room with them. Patterns in the form of geometric ornaments will help to personalize the situation.
Part of the walls, fully or partially decorated with geometric shapes, looks very interesting in the design of the room. At the same time, stencils can be repeated, which will be similar to the oriental style of Samarkand, or you can create an abstract composition from randomly scattered and non-repeating parts of the picture. Geometric ornaments look especially good when decorating a room made in art deco design with paint.
If you are a fan of more calm and classical motifs, turn to Byzantine and Greek ornaments. In them, small straight lines are intertwined with each other, creating complex compositional patterns with the help of patterns. This technology is best suited for beginners, because it does not require significant effort when cutting.
Video: Stencil Drawing Workshops
Photo gallery: Stencils on various subjects


To decorate your home, you can make drawings on the walls or ceiling. It doesn't require you to be an artist or have any special talent. Images are applied through stencils, the patterns of which can be of any shape and complexity. However, for more detailed images, you need to select the material more densely so that small parts do not deform when the paint is applied.
Using a stencil, you can create a pattern anywhere, not only on the walls, ceiling or floor. In this way it is easy to decorate furniture, clothes, various accessories. Naturally, the smaller the object on which the drawing is applied, the more difficult it is to make a stencil. However, if you have never done this before, you should start with larger and simpler images. Walls are perfect for this. You can practice not only cutting out stencil templates, but also applying paint carefully.
Where to get a ready-made stencil
If you are not sure that it will turn out well and accurately cut out the necessary pattern, you can buy a ready-made one. There are a lot of stencils of various shapes and complexity in stores now. You can also order it from an outdoor advertising company. For a small additional fee, experts will make an excellent stencil from a self-adhesive film. At home, you will only need to stick it on the wall and paint it over.
What materials to make your exclusive stencil
For those who still want to create drawings on their own, we will analyze how to make a stencil with our own hands, and what we need for this. First of all, you need to choose a material that does not lose shape when wet. If the stencil is planned to be used only once, then a simple sheet of whatman paper will do. It is quite dense, so it will be convenient to work. If you plan to use the stencil repeatedly, then you should choose a special cardboard or laminated, tracing paper or waxed paper is also perfect. More reliable options are obtained from the film, only it should be dense. Also a good material is rolled textolite, it can be used repeatedly, the main thing is to carefully wipe the paint off it after work.
How to make a stencil with your own hands. Tools needed for drawing
Necessary materials:
- Sharp cutter. It can be purchased at a specialized store or made from an old piece of hacksaw blade.
- Roller for painting walls.
- Cuvette (it is convenient to dilute the paint in it).
- Several brushes of different thicknesses.
- Masking tape.
- Paper napkins.
- Pieces of foam.

Now let's deal with the question of how to make a stencil for painting. We find a suitable picture and transfer it to the prepared material. This can be done in many ways. If the sheet is transparent, then an image is fixed under it, after which the drawing is carefully cut out with a knife.
If the future stencil is opaque, then we also apply an image under it, after which we shine through both sheets, for example, on a window or glass under which a lamp is laid. Looking at the base drawing, carefully outline all the contours. If the stencil is made of cardboard, which cannot be enlightened in any way, you will have to draw it by hand or transfer it through carbon paper.
Cut out the image

The knife must be very sharp, because making a stencil with your own hands with a blunt tool will not work because it will not cut, but tear the material. And in the process of further work, it must be sharpened regularly. It is better to start cutting from large areas of the drawing, it is important for the inexperienced to feel the material and the tool in action. After that, it will be possible to create parts of a smaller size. If the image is large and consists of several stencils, then they need to be cut out separately, and then connected, after which, where the sheets overlap, make holes with an awl. When working, when the stencils will be glued to the wall, these marks will help to easily connect the parts correctly, eliminating the risk of beveling.
Variants for multi-color drawings
If you plan a picture of two or more colors, then you need to think in advance how to make a stencil for the walls in such a way that everything works out perfectly. In this case, it is worth printing as many images as there should be colors in it. That is, each printout will be responsible for a certain color when applied to the surface.
For convenience, it is worth painting over those areas that need to be cut. Then we make stencils on the blanks. When they are cut out, you need to fold them into a pattern and pierce through with an awl. Then we apply them to the surface on which the image will be applied, and mark these holes on the wall. In the future, you only need to connect the labels and paint over each layer in turn.
The choice of paint for drawing a picture on the surface
We figured out how to make a stencil for painting. As you can see, it's not very difficult. Now it remains to choose the right paint. For each surface there is a certain type of it. Acrylic dyes are great for home use. They dry quickly, in 4-8 hours, in addition, their color is always saturated and does not fade. For surfaces with a matte and smooth finish, as well as for wallpapers, acrylic is ideal.
If you need to make a drawing from the side of the street, then for this you need to choose facade paints. Aerosols for metal or plastic are also well suited for such work. In rooms that are poorly ventilated, such dyes are not recommended because they are toxic. For the same reason, enamels and car paints should not be used inside the house.
Applying a drawing

The easiest way to apply images is using one-color stencils, the patterns of which are easily painted over. Having practiced on them, it will be easier to understand how the paint lays down before making more complex paintings. First you need to glue the stencil to the surface. This can be done with masking tape or special spray adhesive.
Paint consistency when creating an image
We dip the roller into a cuvette with paint, distributing it evenly over the entire foam cylinder and blotting the excess with paper towels. Only after that you can begin to paint over the image on the surface of the stencil. The paint is applied in layers so that it is evenly distributed over the surface, without forming streaks. After completing this process, you need to immediately remove the stencil, without waiting for drying.
Simple and effective wall decoration

It is very easy to create reusable butterfly stencils of different shapes, sizes and sizes. This can be done even by a beginner who does not have artistic skills. Then you should paint the drawings on the walls of the room in a certain order or randomly - as it will look better. All technical implementation is quite simple, but the visual effect of such a solution is striking in its beauty and eccentricity.

In the same way, you can create stencils of flowers. They will look just as impressive, but cutting them out is a little more difficult. The way out is to find simple shapes that are easy to make, like butterflies. These images can be combined to make a whole meadow on the walls. This solution is also suitable for children. Everything is created so simply that you can decorate the room with the kids. Having made many different stencils in advance, they are easy to apply to walls or other surfaces, and then cover with paint using a roller or a simple piece of foam rubber.
Making a children's room

If your children have just started school, create a visual alphabet in their room. To do this, you can make a stencil of letters with your own hands and display them in different colors. This will contribute to the speedy development of the alphabet in a playful way. Especially if the children will participate in its creation.
It remains to discuss how to make a stencil of letters so that everything looks great. The easiest way is to find the required font on the web. After that, everything can be printed to create stencils even from plain cardboard. After all, for the alphabet, one use of each letter is enough. Having created everything together with the child, you will know for sure that no one else in the world has such a room.
Working on a large image
When creating a large drawing that uses more than one stencil, it is very important to carefully fix everything on the surface so that nothing moves out during work. To do this, the hole marks on all stencils must match. You can secure them with masking tape. If any part of the pattern is thin and does not adhere to the surface, it must be glued separately, because when applying paint, this element may bend, and then everything will have to be corrected. To prevent this from happening, you need to carefully fix not only the stencil itself, but also its small parts. Such elements can be fixed with special glue or double-sided tape.
Creating a multicolor picture
For a multi-color image, you also need several stencils, which must be attached to the marks. Before work, you need to decide which color is closer and which is further. Since shadows are always farther than light, we first apply paint to the background of the composition, then to the shadow parts, and finish with highlights and the most illuminated elements. This order is necessary because the topmost layer will stand out more than the others. An image created in this sequence will be much more lively and believable. Artists, when painting a picture, first create a distant background, and then objects that are closer, and at the very end draw the main element of the composition so that it looks like a living thing.
Having considered the sequence, you need to number what comes after what. This is done so that there are no errors during operation. We glue the first stencil, after which we immediately mark the hole marks on the wall with a pencil. All other parts of the image will be applied over them. Then we start painting. When absolutely the entire surface is covered evenly, you can remove the stencil. We are waiting for this part to dry. Then you can continue to create a picture. After each applied layer, the paint must be dry. Only then proceed to the next step.
In the smallest and hard-to-reach places for the roller, it is better to work with a brush or a piece of foam rubber. Stencils must be removed immediately after painting, without waiting for the layer to dry.
Here, in principle, everything you need to know about how to make a stencil with your own hands, as well as how to use it to apply a pattern to walls, ceilings, furniture and fabric. The considered technology is suitable for creating an image on any object or surface.
This practice of decorating the interior is simple, which allows anyone to take advantage of it. The result is amazing, you just have to use your imagination. This decor will not hit your wallet hard, because for this you need to buy only paint and a roller. And everything else is easy to make from what anyone can find at home. The main thing is to try and experiment.
Wall stencils for painting are the best opportunity to decorate the interior with your own hands.
Wall decor with stencils
You need to choose a painter's suit, a roller, a brush, several colors of different paints and buy a stencil for wall decor you like in Olstik. Next, clean the wall of old paint, putty cracks and cracks, level the surface. After that, open with a layer of screed.
For fine work, water-based paint is suitable. If it is decided to leave the walls pure white, then it is necessary to repeat the procedure for applying the water-based emulsion a second time. And if you plan to paint in a certain color, then you need to let the walls dry. You can also add color to water-based paint and make a coating of a certain color. Keep in mind that the more color you add, the darker the color will be.
After the base dries, beautiful stencils for wall decor should be applied to the surface. Fix the stencil with small pieces of adhesive tape at the top and bottom so that the picture does not “move out”. Step back and analyze whether the drawing is evenly placed, whether the stencil is correctly fixed. Next, apply paint to the places where the details are cut out. If the drawing is large, then use a paint roller to apply paint, and for small parts, a brush is fine.
The choice of stencils for various rooms
The unique selection of patterns presented by Olstick allows you to act in any direction and decorate the surface of the walls in the following types of interiors:
- Entertainment facilities: children's creativity centers, youth clubs, exhibition pavilions, theater foyers, cinema halls, sports complexes, dance floor.
- Business complexes: trading houses, bars, mobile phone shops, restaurants, spa-centers, massage rooms, work offices.
- Living spaces: living rooms, hallways, corridors, bedrooms, kitchens and dining areas, loggias and balconies, bathrooms and toilets.
Almost any room can be decorated in an original way, using stencils of flowers, ornaments, patterns, etc., if you buy wall stencils from Olstik. We work throughout Russia, including remote regions.
Benefits of buying stencils for decorating
The online store site offers to buy stencils for independent wall decor. Products are made in accordance with five basic rules and requirements for compositions.
- Possibilities. With these convenient elements, the client will be able to independently decorate their home, workplace, business center.
- Uniqueness. Wall decor stencils are made from the original material, which allows you to draw a clear line between the pattern and the wall without blurring the image.
- Exclusivity. Design for many models developed in our design office.
- Convenience. Wall stencils for painting have a unique structure, which makes them comfortable to use. Even a non-professional designer will cope.
- Quality. The peculiarity of stencils for painting walls allows you to successfully combine several types of drawings, paintings, panels in one room.
Contact us, the quality of interior decor is guaranteed by the Olstik manufacturer!

