Is it possible to transplant a blooming azalea after purchase. Azalea: home care after purchase: pruning, watering and replanting
Azalea is a very special flower for home gardening. Ever since you chose it in a flower shop, it will strongly demand close and almost constant attention to itself, as well as especially careful care.

But there is no reason to worry. Thoughtful home care for azalea will prevent this beautiful plant from dying. On the contrary, it will actively grow and delight its owner with a beautiful and lush flowering. The main thing is to know what to do and not to make fatal mistakes.
One of the features of the azalea is the rather unusual microflora around the roots. If its integrity is violated, the flower may die. We can say that the delicate root system is the weak point of the azalea. Therefore, in this regard, you should be very careful with the plant. Especially when moving from one pot to another.
But there is no doubt that this article will describe in detail how to take care of azalea at home after purchase.
How azalea is kept in stores

In large and small shops that sell flowers, any plants are always brought from the so-called nurseries. Most of the flower growers - both amateurs and professionals - know that this flower itself is quite capricious in terms of care. Manufacturers artificially prepare azaleas for flowering and subsequent sale.
In these nurseries, flowers are treated with special synthetic agents that put the plant into a kind of sleep. The flower looks quite presentable for sale, and can bloom for several months, thanks to the fact that it received special fertilizers in the nursery. Often the soil is even overfed with them.
However, the azalea root system, which we have already mentioned, does not develop in any way, because, in fact, it is asleep. Therefore, the plant, in the end, often gets sick - the roots of the flower die from the fungus. This is considered one of the main reasons why new owners do not even have time to really start caring for the azalea at home after purchase.

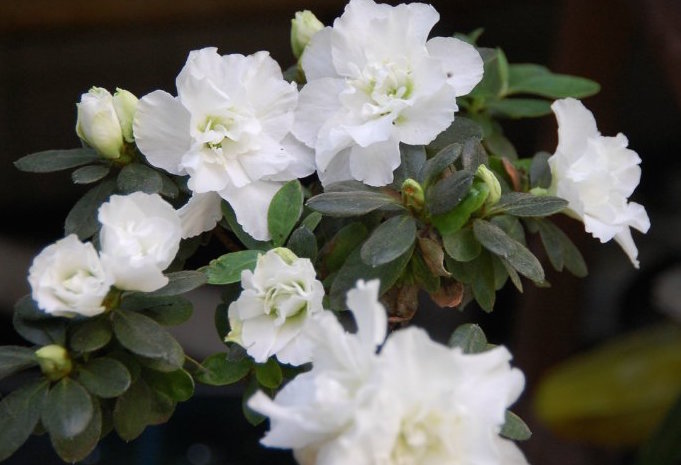
The most popular variety for indoor floriculture is considered to be the evergreen Indian azalea. The buds boast a variety of shapes and colors.
There are some details that can affect the cost of a flower:
- Its variety is a garden or indoor azalea;
- The size of the plant itself and the roots - accordingly, the larger, the more expensive;
- How many buds a flower has.
In most of the shops on the Internet there are consultants who will not only help you choose the right flower or decide on a variety, but will also be able to tell you everything that interests you about caring for an azalea at home.
How to keep a flower from dying

When you've made the long-awaited purchase and brought the azalea to her new home, don't rush to get it out of the store's packaging. It is better to leave the plant alone for about half an hour so that the flower gets used to the microclimate of the apartment.
It is important to determine the permanent location of the plant. Here are some guidelines:
- A space with good illumination, but without direct sunlight;
- Coolness - approximately + 16-18;
- Humidified air.
It is very important to examine the soil of the azalea - to do this, you need to pull it out of the flowerpot. In stores, it is not uncommon to fill the flower with water to make it look fresher.
What to do if the soil is too wet:
- Remove the flower from its pot and wrap the roots with earth with paper that absorbs moisture well;
- Repeat this action until the earth is sufficiently dry, but this must be done extremely carefully due to the fragility of the roots.
If the plant is dry:
- It needs to be put in a container of water right in the pot, for about sixty minutes. The water should reach the edges of the pot;
- Then you need to take out the flower and let the excess moisture go away - for this, the pot must be placed in a saucer or a special pallet lined with expanded clay so that the soil and liquid do not combine anymore;
- Do not repot the flower right away, especially if the flowering period has begun.
Adapting to the new room
You can be sure that the azalea has fully adapted only when, after moving from the flower shop to the home windowsill, the plant will bloom and sprout further. In such a rather exciting period, you should take care of the flower with the utmost care. And carefully observe how he behaves.
Azalea does not like heat very much, therefore it is better to remove the pot away from heating systems. In addition, they are very badly affected by low humidity levels. The more coolness he gets during habituation, the more chances that the flower will remain alive.
You shouldn't rush with fertilizers either. During their stay in the nursery, the azalea is arranged in already overfed soil, so that the flower can live peacefully until it hits the store counter.
If you follow all these rules, you just have to wait.
A special spraying called "Epin" is capable of helping to get used to it. This substance is a special biostimulant for indoor plants.

Its action helps the plant to reveal its own protective functions, raises the level of immunity and resistance to stress. The instructions for use can be read on the packaging, and spray about once every ten days.
What kind of care to provide for the purchased plant

First of all, azaleas need to get used to the new environment where they found themselves after the store. Taking care of your azalea at home after purchase is actually quite troublesome. Due to its very capricious nature, even yesterday a flowering and fragrant plant may lose buds and leaves in two or three days.
If the leaves began to fall off and the plant is rapidly losing its luxurious appearance, this can be called a messenger of the death of a flower. That is why, before buying an azalea, you need to be ready for something like this and remember exactly how to act in such a case.
In order for the newly acquired azalea to delight your eyes for a long time with its beauty and lush flowering, it is extremely important to strictly follow the basic rules for care.
Please note that it is advised to reload the azalea after purchase. But it is not worth replanting immediately.
The transfer is not difficult at all:
- You need to carefully remove the plant from the store pot along with a lump of earth;
- Move it along with the soil to a new spacious flowerpot;
- Close the empty space with a special mixture;
- Try not to overmoisten the soil.
How to preserve a newly acquired flower? In what conditions will the azalea be able to more easily adapt to the new environment?
Behind the roots, a special inspection is also needed. On its roots, symbiont mushrooms live, which provide the azalea with food. In soil with a high alkali index, these symbionts die. And, as you can easily understand, the plant too. That is why it is forbidden to rinse the flower roots.
The substrate mixture must be acidic, let in water and air. It is better to buy the soil already prepared for this flower. And it is advised to replant young flowers every year. And when the plant has matured, then every two or three years. The top layers of the soil are replaced, taking care not to touch the fragile roots.
Temperature regime

The most favorable temperature for the growth and development of azalea flowers will be from +10 to +15. It's okay if the temperature is slightly higher. The main thing is that it does not exceed the +20 mark. But during the summer heat it is rather difficult to provide the plant with such a regime. At the same time, during the summer season, azaleas hibernate.
To maintain the plant's vitality, outdoor shade is also perfect. If possible, a great solution would be to bury the flower in the ground right along with the pot. But first, it will be useful to pull a nylon pantyhose or stocking over the pot. This is necessary so that pests do not attack the plant. Experienced growers say that pests really like the earthen mixture for this color.
As the autumn season approaches, buds begin to form. it will be useful to lower the temperature level for the flower to +6 degrees. And when the flowers appear and begin to bloom, you can raise the degrees to +15. Remember - the cooler the azaleas are, the longer they will bloom.
Azalea does not tolerate hot weather. But in any case, do not pour cold water on it! This risks becoming the reason for the occurrence of fungus. In summer, the pot can be covered with ice cubes. This not only protects the plant from the heat, but also adds moisture to the air.
Humidity level
This is one of the most important factors. Dry air can simply kill a flower.

Here's what you can do to keep the humidity at the proper level:
- Choose a deep tray for the pot;
- Cover the pallet with pebbles and moss;
- Observe that there is moisture in the pan;
- Spray the leaves during flowering;
When spraying with a spray bottle, try to keep the droplets small.
Lighting
Azalea really just loves bright light. At the same time, she should not be exposed to direct sunlight - this can cause her to wither. For azaleas, a room located in the northern or western part of the apartment is perfect.
You can also place the flower in the southern room, but then it is better not to put it on the windowsill. A good solution would be to buy a special stand and place it by the window.
How to water properly

As with any plant, water is a very important detail that saves them from wilting.
For home flowers, the following are of great importance:
- Water quality;
- Temperature level;
- Frequency and abundance of watering.
Never water your azalea with cold or even ice water! An unexpected change in temperature can be a real stress for a flower.
Up to the point that this can serve as a kind of signal for the plant that autumn has already come. And then the azalea will drop both flowers and leaves. Ideal for azaleas will be water at the same temperature as the flower itself.
Only soft water is needed. It will be better to boil the water first, then let it cool. It is also important to water only the upper layers of water in the container, trying to prevent sediment from getting into the ground.
If you water the soil with plain water, the acidic soil will become alkaline, because it contains a lot of mineral salts. After boiling, they become the aforementioned sediment. To acidify the soil a little more, you can add three drops of juice to a liter of water.
If you bury the azalea in the street soil for the summer period, the rain will only benefit it.
This plant will not be able to withstand drought. If you notice that the leaves or flowers have begun to drop, this is the first signal that the flower must be watered immediately. Nothing like this should be allowed. It is better to keep the moisture content of the earthen mixture normal. Excessive fluid can also damage fragile roots, and they can start to rot.
This plant loves water, so it’s a good idea if watering is plentiful. It should usually be watered every other day. But if the air in the room where you placed it is dry (this often happens especially in winter), then it will be better to water every day.
Water the plant from above, and it is better to drain the excess water from the pan. As you probably already understood, you need to monitor the soil moisture so that the leaves do not begin to fall off.
"First aid" for azaleas

What should not be allowed under any circumstances:
- Droughts;
- Heat;
- Excess moisture;
- Direct sunlight.
- A sharp change in temperature;
What to do if the plant starts to wilt:
- Examine the soil in the flowerpot;
- Moisten if necessary;
- Track humidity;
- Perhaps the location is not the most suitable - move the plant to a cooler place, away from the sun's rays.

If the azalea begins to throw off the leaves, this is most likely the first signal that the plant is beginning to die. What to do:
Azalea is a very demanding and capricious plant. It requires not only care in accordance with all the rules, but also a lot of attention. It often happens that even as a result of all rescue operations, the azalea cannot be brought back to life. Therefore, it is better to watch the flower every day than to bring it to such a state, and then frantically try to save it.
If you care for your flower correctly and carefully, it will delight you with its luxurious flowering for many years.
An inexperienced florist will probably think that azalea takes a lot of time and brings a lot of trouble. But in practice, all these rules are gradually becoming a habit that will only bring pleasant emotions.
Azalea requires special attention from the very first minutes of being in the house. A bush that is often brought from the store begins to wither and die in a few days. The thing is that after the purchase you need an azalea transplant. If everything is done correctly, the flower will begin to actively bloom, grow and even multiply.
After bringing a flower from the store, examine it carefully. Nursery producers hardly care about the strengthening and development of the root system and the further growth of the flower. Shrubs, artificially prepared for flowering and planted in shipping pots, are treated with synthetic substances that make the culture drowsy. Fertilizers are added to the bud to maintain freshness and flowering for several months. The roots do not develop at this time, and the flower can easily pick up fungal infections. All these factors are the cause of the death of the plant when it moves from the store to the windowsill.
Azalea requires special attention from the very first minutes of being in the house.
A thorough inspection of the azalea immediately after purchase is essential to identify existing problems.
The peculiarity of the flower is that a special microflora is formed around the root system, interference with which can lead to unpleasant consequences.
Waterlogging of the soil is no less dangerous, since it causes rotting of small roots. If you have identified problems with the root system or soil, found traces of mold, it is better for the plant to move to another container, while removing poor-quality soil and damaged tissues. If you don't know what to do, watch the video on how to transplant an azalea correctly. From it it will become clear to you that you cannot transplant a flower covered with flowers or buds. It is dangerous to carry out any manipulations in winter, when the plant is at rest and all vital processes are inhibited. It is better to wait for the growing season and only then transfer the bush to fresh soil.
How to plant an azalea
A full transplant at home and according to all the rules is carried out once - after purchase. In the future, planted and old flowers are only transferred using a larger pot. If you do not have experience in growing flowers, it is better to choose one azalea and provide it with proper care. Over time, you will get a well-developed plant. If several bushes grow in the flowerpot, after the end of flowering during transplantation, they need to be divided and planted. Otherwise, one bush can negatively affect the neighbors. For example, one will begin to rot the roots, after which the infection is picked up by other flowers. At the end of flowering, young plants are transplanted every year, older ones - every two to three years.


Root processing
Transplanting an azalea at home involves handling the roots carefully. An azalea lump is like a sponge - it is impossible to shake it off or clean it. The roots of the flower are very thin, so you need to carefully separate them using a sharp knife. Purchased azalea most often grows in transport peat soil, which is pressed and firmly adheres to the roots. In addition, there are no nutrients in it. When transplanting, it is important to preserve the natural microflora of the root system, which the flower maintains throughout its life.
If you carry out a flower transplant correctly, it will have a beneficial effect on growth and flowering. To do this, you need to follow the recommendations of experienced gardeners and follow simple rules that apply not only to azaleas, but also.  If you carry out a flower transplant correctly, it will have a beneficial effect on growth and flowering.
To transplant azaleas after purchase, you will need wide plastic or clay pots, flowerpots or containers larger than the previous ones. Drainage is laid at the bottom, on top of it is pine bark - it is needed to increase the acidity of the soil. The soil should be slightly acidic, specially designed for azaleas. The best option is to buy nutritious soil in the store with the appropriate mark, add baking powder.
 To transplant azaleas after purchase, you will need wide plastic or clay pots, flowerpots or containers larger than the previous ones.
 You can also use heather soil, which is highly acidic, light and friable, or a mixture of high peat and pine needles. Whenever transplanting azaleas, it is advisable to add trichodermin to the soil mixture - it will protect the plant from fungi and rot. To soak the roots, you will need zircon, epin, and other materials.
Transplanting azaleas should be carried out in the spring at the same time as pruning, when the plant begins to grow actively.
Bushes can be trimmed at the end of flowering, or simply remove faded inflorescences. Remove the flower carefully from the pot. An earthen ball is usually dense and riddled with many roots. Some fragments show traces of dead tissue. Therefore, at the time of transplanting a room azalea, processing is mandatory. It includes:
- removal of the old substrate;
- pruning roots;
- treatment with a growth stimulant and zircon.


Due to the high density of the root system inside the pot, the azalea does not receive enough nutrients. To remedy the situation, the earthen lump is cut from the bottom by about a centimeter - along the lateral surface and at the root collar, while removing the rest of the soil.
At the next stage of transplanting an azalea after purchase, it is dipped into a container filled with clean warm water. During the preparation of the potting mixture, the roots of the azalea are well saturated with moisture. The soil for the plant should be loose and airy, the container is not deep, the main thing is that there is enough space for an impressive drainage layer.
 The soil for the plant should be loose and airy, the container is not deep, the main thing is that there is enough space for an impressive drainage layer.
 A processed and moisture-soaked bush is placed in the prepared soil. After transplanting, it should be sent to a well-lit place where there are no direct sunlight, drafts, etc. In the first three to four days, the soil is not moistened, then watering is gradually resumed using settled or filtered water at room temperature. Within one to two months, the plant undergoes acclimatization and replaces the loss of the root system. If the flower does not need to be divided into several bushes, it is transplanted by the transshipment method.
Transhipment of azaleas after purchase
Since the flower is very capricious and weak, after purchase it is advised not to transplant it, but to transfer it. For this, the earthen lump in which the plants grew is removed and placed in a new, more spacious container. This process will help preserve fragile roots and therefore preserve the azalea. Due to the fact that the old substrate remains in place, and new soil is poured over it, the flower almost does not get sick during transshipment and is better accepted. However, unpleasant consequences are still possible. After transshipment, inexperienced gardeners try to water the plant well, which is fundamentally wrong. The soil with such a transplant dries out much faster than the roots. As a result, they are in increased moisture, and the azalea dies.
In order for the azalea to delight you with its beauty for a long time, follow the recommendations of the professionals when transplanting:
- Do not handle or transplant the azalea in winter. It is better to do this when new shoots are growing. Refuse to transplant on unfavorable days.
- Before manipulating the plant, cut off all faded buds. If they remain on the plant, seed setting will begin, which can lead to depletion of the flower.
- By the time of transplanting, the aerial part of the azalea should be trimmed, cut off dead branches, remove dry leaves, etc.
If you did everything correctly, over time, dormant buds will begin to hatch on the trunk of the plant. This is a sign that the plant is alive and well. Transplanting a flower requires some effort and patience. But all the hassle will pay off, and your collection will be replenished with a beautiful plant. If you still have questions, you can always watch a video about an azalea transplant, which will dispel your doubts.
After the purchase, which pot is better to choose, to water immediately or later - all these questions arise immediately, as soon as you become the owner of this luxurious flower.
Let's take a close look at the plant - an azalea is planted in a small shipping pot. Usually it is plastic, without a pallet and does not have the slightest gap to the top edge, that is, ordinary watering from above becomes impossible. Therefore, you need to transplant the azalea.
How to transplant an azalea into a pot
In which pot to transplant the plant - plastic or ceramic?
From the point of view of aesthetics, ceramics are more attractive, and for practical reasons, it is better to choose plastic.
In plastic pots, moisture is more evenly distributed, it is more convenient to make good drainage holes, in extreme heat the pot does not heat up so quickly and does not cool so much in winter. In addition, it is more convenient to water azaleas by dipping the pot, using the so-called bottom watering. This assumes the pot is submerged in water for about 20 minutes. Plastic will not suffer from such a procedure, and glaze may begin to lag behind beautiful ceramics.
You can transplant the azalea immediately after purchase or do it after flowering. As you prefer.
In which land to transplant the azalea.
It should be transplanted into an acidic or slightly acidic soil - light, loose, nutritious. Coniferous-leaf land will be ideal for planting. As a last resort, you can use ready-made peat soils suitable for azaleas, gardenia, camellia, begonias. If you see that the quality is not very good - the soil for planting is dense, monolithic, then you need to add some kind of loosening element to it - vermiculite or perlite.
How to transplant azalea by transshipment
You need to transplant the plant into a larger bowl. For example, from a shipping pot with a diameter of 12 cm, it will need to be transplanted into a container with a diameter of no more than 18 cm, which is about 1.5 liters in volume.
We take out the azalea from the pot, we see that 3 or 4 cuttings are planted together, the roots are very well developed.

Divide? In no case!!! You need to transplant without dividing the lump into parts!
If we make three out of one, then we will lose everything, tk. when dividing, there will inevitably be root injuries, and she reacts extremely painfully to this - she can begin to shed leaves and flowers.
You need to transplant the azalea by transshipment. At the same time, the roots are not disturbed, because we practically rearrange it from one pot to another. We make drainage holes, usually 2 or 4 of them are outlined.
You can slightly separate the roots with a sharpened stick, as in these photos.


At the bottom we put a small layer of drainage, about 1 cm, pour earth on it and try on the azalea.
We align it in the center and place it so that on top, on which it was possible to pour 1-1.5 cm of earth, and at the same time about a centimeter of free space remained for convenient watering to the upper edge of the new pot.
 Now we fill the free space with earth and carefully compact it.
Transplanting the plant turned out to be easy and simple!
Water well, abundantly, so that the water reaches the pan. After 20 minutes, we remove the excess water! If we neglect this, then the water, remaining in the pan for a long time, will block the access of air to the roots. Deprived of oxygen, they will gradually begin to rot, and the plant may die from this.
In order for the azalea after transplantation to better take root in a new place, after transplantation it can be spilled with Kornevin's solution or sprayed and watered with Zircon.
Azalea is a capricious plant, so beginners often face many difficulties in growing it. One of the prerequisites for annual flowering is regular transplanting of azaleas at home. This must be done correctly so as not to harm the plant.
If possible, transplant the azalea immediately after purchase.
In flower shops, plants are sold in transport pots with scanty soil. There is no way to be sure that the plant has received proper care and has a healthy root system. Ideally, the first transplant of not only azaleas, but also another flower, is best done immediately after purchase.
However, if the azalea is in bloom or in its budding period, transplanting can lead to the dropping of the inflorescences. In this case, the transplant can be postponed until it fades. Of course, when the condition of the soil is not suspicious. If the soil in the pot is too flooded, there are traces of salinity and mold, it is better to transplant the azalea into fresh soil. Before this, most of the blossoming buds should be removed.
Healthy azaleas that are grown at home are then transplanted regularly. Young - every year, adults - every 2-3 years. When transplanting, it must be borne in mind that a special microflora is formed around the root system of the azalea. Its violation can lead to the death of the flower. Azaleas are not transplanted in winter and during flowering. The best time to change soil is spring.
Soil selection

Special primer for rhododendrons and azaleas.
Azalea requires soil with an acidity level of 4-5 pH. You can buy a special primer for azalea or rhododendrons. If you are going to cook it yourself, then mix pine needles and high peat in a 2: 3 ratio, add a little river sand and the same amount of leafy earth. You can use heather soil.
To make the soil looser and more moisture-permeable, vermiculite or perlite, charcoal or sphagnum moss are added to the mixture. To prevent the occurrence of rot and fungal diseases, you can add Trichodermina to the soil.
Pot selection
Capacity for azaleas is selected based on the size of the root system. The drainage layer is also taken into account, which should be 3-5 cm. Drainage holes are required at the bottom of the pot. It should be wide and slightly larger than last year's.

The azalea pot should be wide enough.
Transplant features
Azalea transplant is accompanied by the following actions:
- Removing the plant along with the earthy clod from the pot.
- Partial removal of old soil.
- Renewal root pruning.
- Treatment of the root system with a growth stimulator.
Root pruning
Azalea has very fragile and thin roots that entangle an earthen ball. After removing from the pot, the root system is trimmed with disinfected scissors about 1 cm from the bottom, at the root collar and on the sides. This is done to improve the access of oxygen and moisture to the roots.
You should also make several longitudinal cuts in the earthen coma. To minimize trauma to the roots, after pruning, the plant with an earthy clod is soaked in clean water with the addition of a growth stimulator and zircon. When the soil is wet, it will be easier to remove it from the roots.

Prune thin roots.
Splitting the azalea
If the flower has grown and several bushes coexist in one pot, they must be separated. Plants growing in the same pot will interfere with each other. Division is carried out after pruning the root system. Each bush is planted in a separate container. If necessary, prune the crown - pinch young shoots, leaving 2-3 pairs of leaves.
Planting process
A drainage layer is placed on the bottom of the pot. It can be pebbles, expanded clay, fragments of broken bricks. Pine bark is optionally placed on this layer - it will increase the acidity of the soil, and the azalea loves it. Next, the plant is carefully placed in a pot and sprinkled with prepared soil.
The root collar is not buried. It should be flush with the ground. The soil is tamped and watered with a solution in which it was soaked.

When planting, the root collar should not be buried.
Azalea care after transplant
When the plant is transplanted, it is best to place it in a well-lit place without direct sunlight. The first 3-4 days you do not need to water the azalea, and then you should gradually return to the usual conditions of care, adding zircon to the water for irrigation. Azalea usually adapts in 1 to 2 months. Then you can resume feeding.
By observing the simple transplant rules, you will ensure the normal development of the azalea. The flower will thank you with lush flowering.
Transplanting an azalea at home is a necessary measure for the successful growth of a flower. Changing the substrate and renewing the pot after flowering will help renew the plant, give it strength and lay the foundation for further bud formation. Since azalea is known for its capricious disposition, you need to know how to transplant it correctly - the slightest mistake will entail disastrous consequences.
Some growers advise replanting the azalea as soon as it gets home after purchase. However, such an event is a rather risky undertaking, since the plant may die. It is better to wait a little while waiting for the azalea in the transport pot to get used to and adapt to its new habitat.
In no case should the azalea be transplanted during budding and flowering, as the bush can shed flower buds. Exceptions to the rule: suspected disease, flooded soil, mold and traces of salinity on the ground. So that the plant does not die, it is better to change the substrate in the pot as soon as possible, while removing all the buds or most of them.
It is better to refuse a transplant in winter, since during this period all life processes are inhibited, and the azalea itself is in a dormant stage. Better to wait for spring - with the onset of warmth, the flower is about to grow and will respond well to the change of "place of residence".
Preparatory stage
For a successful transplant of azaleas at home, you need to worry about a suitable pot in advance, as well as prepare the substrate.
Choosing a container for transplant
For azaleas, small containers are preferable, in which the root system will feel as comfortable as possible. It is best to choose a pot with a diameter larger than the previous one by only a couple of centimeters. In it, the roots will not only settle faster, but the risk of an earthen coma will be minimal.
It is better to pick up a pot with low edges, but at the same time wide. Since the azalea root system develops horizontally, there will be suitable conditions in such a container for root growth.
The material of the pot can be anything: both plastic and ceramics will do. However, it is best to give preference to naturalness - azalea will be able to "breathe" in a ceramic container. Drainage holes at the bottom are required, which will provide quick drainage of excess moisture.
Substrate preparation
Azalea is a lover of soil with high acidity, therefore, sufficient attention should be paid to the preparation of a soil mixture with the desired characteristics. The resulting substrate must be loose enough and let air pass well to the roots.
It is best to prepare the ground for planting azaleas at home on your own using the following ingredients:
- Special soil for azaleas or rhododendrons;
- Chopped bark, pre-steamed;
- Fresh (you need to dry a little) or dry sphagnum moss;
- Fine sand and perlite;
- Small amounts of charcoal and vermiculite.
You can also get a high-quality substrate according to other schemes by mixing:
- 2 parts of coniferous land, 1 part of peat and 1 part of sand.
- 2 parts of pine needles, 3 parts of high-moor peat, 1 part of leaf land and 1 part of sand.
The prepared substrate must be disinfected by spilling it with a special preparation (Fitosporin and its analogues) or by frying the mixture in the oven. You can also steam the earth over boiling water - for this you need to place it in a colander, fix it over a saucepan and after boiling for half an hour, stirring occasionally. Non-disinfected soil can be infected with various pests, fungi, which, after planting azaleas, will quickly pass to the plant. That is why it is better to worry about the purity of the substrate in advance, so as not to treat the bush later.
How to transplant azalea at home

Before the direct transplant, it is necessary to process the azalea root system in several stages:
- After the earthen lump is pulled out of the pot, the remnants of the old substrate must be carefully removed, taking care not to damage the roots. The plant is then placed in standing water at room temperature to remove all soil from the root system.
- After cleansing, the root system must be carefully examined - all suspicious processes are removed, and all healthy ones are slightly trimmed for renewal.
- After pruning, the bush is immersed in a solution of root growth stimulant with "Zircon" (increases plant immunity and reduces transplant stress), prepared according to the instructions on the package.
All tools that will be used to trim the roots of the azalea must be sterilized. To do this, the blades are wiped with alcohol or pierced over a fire.
Azalea transplant at home is carried out in this way:
- A drainage layer approximately 3 cm thick is laid at the bottom of the new pot;
- From above, the drainage is covered with pine bark, which will help increase the acidity of the soil;
- The bark should be covered with a thin layer of prepared soil, sprinkled with Trichodermin (to prevent fungal diseases and rot);
- The azalea must be removed from the stimulant solution and allowed to drain off excess moisture;
- Then the plant is placed in the center of the pot, and its roots are evenly sprinkled with fresh soil;
- All the voids in the pot must be filled, then lightly tamp the earth;
- It is necessary to ensure that the root collar of the azalea is not buried in the ground;
- The substrate is lightly watered with a solution in which the azalea was soaked before transplanting.
Azalea care after transplant
For successful acclimatization after transplanting an azalea, you need to provide quality and consistent care. Immediately after the procedure itself, it is recommended to place the bush in a place with sufficient light. However, direct sunlight should not fall on the plant, so a south window is not the best option.
It is undesirable to put the azalea near radiators, convectors and other heating devices, as well as leave the bush in drafts. It is better to refuse watering in the first days after transplanting - it is recommended to moisten the soil after 3-4 days. It is better to use settled, melt or rainwater, filtered water is also suitable.
Since the azalea is unstable during acclimatization (lasts up to 2 months), you can help it cope with stress with the help of Zircon. It must be periodically added to the water for irrigation, diluting according to the instructions on the package.

