How the plinth is attached. Fixing a plastic plinth to the floor: video instruction
Mounting the skirting board around the perimeter of the floor is the final step in working with any floor covering. The advantages of the skirting board are not only in its decorative appearance, but also in the ability to close the gaps near the walls, hide the wires and give the floor a finished look.
About how to fix the floor plinth, what types of plinths are, and what to look for when buying, we will describe in detail in our material.
Varieties of plastic floor plinths
For carpet, a special curved skirting board is used, which serves not only for decorative purposes, but also tightly presses the coating to the floor so that it does not roll down.

Depending on the material from which they are made, the following types of skirting boards are distinguished:
- increased rigidity from foamed PVC - such a plinth is one-piece, quite elastic, however, quite brittle;
- hollow inside made of rigid PVC - somewhat stronger than solid, but lower quality skirting boards. They are suitable for simple finishing of the room, without representing any artistic value;
- from semi-rigid plastic - the composition of the material does not differ from foam structures. However, such skirting boards have considerable flexibility, therefore they are sold in the form of rolls. Among the advantages of such skirting boards are a variety of colors, imitation of various materials, visual appeal. See also: "".
Which is better - plastic or wooden plinth
Skirting boards made of wood are more environmentally friendly, however, their service life is somewhat shorter. But products made from synthetic plastic, although not natural, can stand up to 100 years.
Plastic skirting boards successfully compete with wooden and other varieties of these products.
The following advantages of plastic baseboards can be called:
- They can be used in a wide variety of rooms - kitchens, bedrooms, children's and living rooms, bathrooms. A wide range of colors of plastic skirting boards allows you to choose a harmonious combination with the coating and the overall interior.
- Plastic skirting boards are easy to install because they are stronger, more flexible and easier to cut.
- They differ in fire safety, that is, non-combustible.
- Well give in to damp cleaning, are not afraid of water.
- Affordable for every customer.

In addition, often, plastic skirting boards are equipped with special gutters through which wiring or other communication cables can be laid.
Classics among plastic skirting boards are considered to be products with a cable chute and holes for fixing. A special overlay on the gutter allows you to mask the fixation points, wiring, and make the structure look solid. In addition, such a plinth is very easy to mount. There is another type of skirting board fastening - on clips, which is applied to solid hard plastic skirting boards.
Which option to choose depends only on the individual desires and financial capabilities of the buyer.
Additional components
Additional accessories for plastic skirting boards include plugs, connections, as well as internal and external corners. Each of the elements is selected depending on the color of the plinth.

Spheres of application of components are as follows:
- Corners serve to give the structure integrity at the junctions in the corners of the room.
- To combine two adjacent pieces of plinth along one wall, inter-plinth joints are used. They look like a small piece of plastic with grooves on both sides.
- The edges of the skirting boards are closed with plugs so that the cut is not visible along the edges and at the doorways. Two types of plugs are made - right and left, which are often included with skirting boards.
Fasteners for fixing the skirting board to the wall are also additional materials.
Do-it-yourself method of fixing the floor plinth
Builders practice three ways to fix plastic baseboards to the floor. Each of them is applicable in different cases and conditions. However, they all provide a secure fixation of plastic skirting boards. This takes into account the width of the plinth for the floor, its thickness and shape.
Fixing the plinth to the floor with glue is possible only in such rooms where the walls do not have irregularities, and the angles are strictly 90º. Otherwise, the installed plinth may soon peel off the wall, which does not look aesthetically pleasing at all.

Fastening the floor plinth to special latches allows for quick installation. The convenience of this method of fixation is that it is suitable for work in any conditions and on any surfaces. However, the latches are suitable for one-time fastening, and after dismantling the skirting boards, they will have to be replaced with new ones.
The easiest way to fix skirting boards is to mount them directly to the wall. Since it is necessary to install skirting boards on the floor in this way with the help of screws, hats can stand out from the general background. This problem can be solved by gluing plugs to match the color of the skirting boards, or by using a special product model with cable troughs. In this case, all attachment points will be hidden under the decorative plinth covers. Note that this method is the most budgetary in terms of costs.
List of tools for work
When carrying out work on the installation of skirting boards to the floor, you will need:
- perforator (if work with concrete or brick walls is expected);
- drill with the necessary nozzles;
- screwdriver with a list of nozzles;
- hacksaw for cutting metal;
- corner;
- awl;
- roulette;
- marker.
Calculation of consumption of materials
Before installing plastic skirting boards on the floor, it is worth calculating exactly how many materials you need to purchase.

The number of end caps is calculated based on the total number of openings in the room, with each opening having two versatile elements. Fasteners for baseboards are installed every 0.5 m, so the total number of such elements will be equal to the length divided by 0.5.
You need as many self-tapping screws with dowels as fasteners, and it is better to have 10 more pieces in reserve. The corners of internal and external must be purchased according to the number of corners available in the room.
In calculations, it is important not to forget about the gaps when joining skirting boards on the plane and at angles equal to 2-3 mm.
Fastening with liquid nails
This will require a hacksaw for cutting plastic, corners, plugs, liquid nails and a baseboard.
Since installing floor skirting boards with liquid nails should only be done on a perfectly flat surface, care should be taken to prepare the wall in advance. It is optimal if professional puttying or plasterboard sheathing is carried out.
Starting from the corner on a flat surface of the wall, drops of liquid nails should be applied every 3-5 cm. From the side of the free end, an inter-plinth connection should be glued to the plinth, which ensures ease of further installation.

Note that it will be easier to work if you apply the adhesive not on the wall, but on the baseboard.
Next, the canvas is firmly pressed against the wall, controlling a good fit along the entire length of the plinth. In order for the glue to grab, the plinth should be pressed for about 1 minute, after which it will no longer fall off and further solidification will occur without intervention. Similarly, all other skirting boards are fastened around the perimeter of the room.
It is advisable not to save on liquid nails, since high-quality glue will provide a longer and more reliable fixation.
Clip mounting
Since attaching skirting boards to the floor with special clips is a rather laborious and lengthy process, not everyone will decide on this method. However, its advantage is that such fasteners are optimal for skirting boards of any configuration, and the quality of the walls does not play a decisive role. If the walls are uneven, just shorten the pitch between the fasteners to get a secure fit.
Sequence of work
First of all, markup should be applied to the wall to place the fasteners. According to the markings, holes are drilled in the wall for the size of the dowels, after which they are installed. The clip is screwed to the wall with a screw.
All subsequent fasteners are screwed in the same way. This method is optimal when working with brick and concrete walls. If the wall is wooden, then self-tapping screws are suitable for fixing the clips.
The distance between the fasteners can be 50 cm, if the surfaces are even, or 20-40 cm if the walls are uneven.
In the installed fasteners, you can mount the plinth itself, cutting it first to the length of the wall.

In this case, no special knowledge is required on how to install a floor plinth on clips. All you need to do is lean the skirting board against the latches and press until it clicks. Between adjacent segments, joints are put on the ends of the plinth for ease of docking. Each subsequent panel is put on clips in the same way.
At the end of the work, the open ends must be closed with plugs, and the joints in the corners with special corners. To keep them more secure, you can put these elements on liquid nails.
For carpet, skirting boards of a special shape are produced with recesses under the edges of the coatings. Such skirting boards can not be removed if you decide to replace the flooring.
Plinth fixing method
Another way to fix floor plastic skirting boards is to drill through holes in them for screws.
To do this, take a hacksaw, drill and screws. This method is relevant in utility rooms, where no one will pay attention to aesthetic beauty.

First of all, the wall is marked and a piece of plinth of the required size is measured. Holes are made in it, sufficient to insert a self-tapping screw, but already its caps. Next, the plinth is applied to the wall and all screws are screwed.
If the product is solid, without a cable trough, then you can mask the hats with decorative plugs. In brick walls, before attaching the plinth to the floor, you should drill holes for the dowels. Fixing the plinth in this case will be on the screws.
Installation of cables under the plinth
Any communication wires, whether for a telephone, TV or Internet, can be hidden under the baseboards.
This operation is performed in one of the following ways:
- Inserting wires under the clamps before attaching them. When doing this, be careful not to damage the cables with self-tapping screws.
- The screws of the already attached skirting boards are slightly unscrewed (by 5-7 mm) so that the cable can be passed under them. After that, the screws are tightened again, as it was.
- Cables can be laid along the gutter provided in the plinth, which, upon completion of work, is closed with a decorative cover. Thus, the attachment points and cables become invisible.

It is worth remembering that when working with power wires, turn off the current supply on the shield.
The price of plastic skirting boards and accessories
Although plastic skirting boards are much more comfortable and durable than wooden skirting boards, the price of them has increased due to increased demand. As a rule, the price includes colors, types of skirting boards, as well as advertising costs.
The cheapest type is a simple baseboard without a gutter. Its price ranges from 30-50 rubles per 2.5 m.
Skirting boards with cable channels are somewhat more expensive - they will cost 40-70 rubles per 2.5 m.
The most expensive are universal skirting boards. The cost of 1 piece 2.5 m in length is about 60-90 rubles.
Fasteners (clips) go on sale in packs of 50 pieces, the price of which is 200-500 rubles, depending on the brand.
Plastic plugs are the cheapest. Their cost reaches 20-30 rubles per pack.
Plinth is a small element, but very significant. It is necessary to complete the overall picture during the repair of the premises, since it is thanks to the plinth that you can beautifully arrange the joint between the wall and the floor. Also in this small element you can hide various wires, both electrical and telephony and Internet cables. However, not everyone knows how to fix the plinth.

Depending on the material of manufacture, there are several types of skirting boards:
- wooden;
- plastic;
- made from MDF;
- metal.

In apartments, as a rule, skirting boards are either made of wood or plastic. From MDF are used much less frequently. Metal skirting boards are usually purchased for installation in industrial or office premises. Depending on the type of skirting board, there are different ways to install this element.
It can be made from wood of any species, but it is quite expensive - after all, it is a natural and environmentally friendly material. Usually, alder, oak, larch wood is used for manufacturing. It is most often used for edging floors made of parquet boards, parquet, natural wood floors. It can have both a triangular simple shape and a figured one. Such material has its own difficulties in work. For example, to cut a piece of a certain size, you will have to use a sawing tool.

Plinth from MDF are made of wood fibers, and on top they have a decorative layer of veneer. Such material looks quite presentable and from the outside it is indistinguishable from a plinth made of natural wood. But it costs much less than attracts many. However, MDF requires special work skills - it is quite fragile.

- the best option for modern apartment renovation. It is not afraid of moisture or sunlight, has a lot of color variations and fits any floor covering. And the presence of plugs and corners will help to arrange the plinth beautifully and neatly.

On a note! Plastic skirting boards often have special grooves for fixing carpet or linoleum, which will facilitate the task of laying the finish coating for this type of floor.

Skirting board fixing methods
There are three main ways to attach skirting boards. The task of each of them is to securely fix this element in the place intended for it.
Table. What are the ways to fasten skirting boards to the floor.
| Way | Description |
|---|---|
| The technique is not suitable for all premises. It is used only if the walls are perfectly even. Otherwise, there is a risk that the plinth will eventually lag behind the wall or fall off altogether. It is also recommended to use this method only in rooms with 90 degree angles between walls. The method is simple and allows you to work very quickly. You can use liquid nails to fix the skirting board. The method is irrational, as it will not allow the plinth to be reused, and there will also be problems with dismantling in the future. It is recommended to apply the method in relation to MDF products. |
| In this case, any type of plinth is simply screwed or nailed to the walls with self-tapping screws or nails. The recesses that have appeared due to this type of work can be closed with special decorative plugs or chopsticks - just match them by color. This is not the fastest, but the cheapest way to fix the baseboard. And plastic products have a special gutter, which is then closed with a plug - it is in the gutter that the procedure for fastening the product with self-tapping screws is carried out. |
| It is used for mounting MDF or plastic skirting boards and is suitable for use in any room, even with uneven walls. However, despite the statements of the manufacturers, such fasteners are rather fragile and, most likely, it is unlikely that it will be possible to re-fix the plinth on it. However, in themselves, such brackets are reliable. |


Features of fixing skirting boards of various types
In general, all existing methods of attaching skirting boards can be divided into two categories - installation by attaching to the floor and mounting to walls. You will have to choose depending on the type of skirting board and the design features of the living space.
Features of installing skirting boards made of MDF and wood
The installation of a plinth made of wood begins with the treatment of the products themselves with varnish or other means that will protect them from decay as a result of moisture getting on them. Skirting boards can also be painted after installation. Due to the fact that such a plinth practically does not bend, it is recommended that the bases, that is, both floors and walls, be well leveled with putty before installing it. Wooden plinth is usually fastened with self-tapping screws or nails and can be mounted both to the wall and to the floor. If necessary, it will be quite difficult to dismantle them without damaging them.

MDF plinth is usually mounted using special brackets (brackets) that are fixed to the walls. And if wooden skirting boards for joining in the corners are simply sawn, then special plugs are sold for MDF material. If dismantling is necessary, such skirting boards can be easily removed and then put on their place.
On a note! Installation of plinth made of wood or MDF is recommended to start from the doorway, moving into the back of the room from left to right.

For such skirting boards, when forming corners, all saw cuts must be carefully sanded and treated with an agent that prevents rotting and mold formation. Without certain skills, working with this type of material is quite difficult.
Features of plastic skirting boards
Plastic skirting boards can have a cable channel, or they can be made without it. If the product has a place for laying wires, then it will be covered with a plug. Thanks to this, all communications, if necessary, can be easily removed and repaired - just remove this very plug. As soon as the work is completed, the bar is simply put in place and snaps into place.
On a note! The one-piece plastic baseboard also has special grooves on the back where you can lay wires, but work in this case will be somewhat difficult. There will be no direct access to communications.

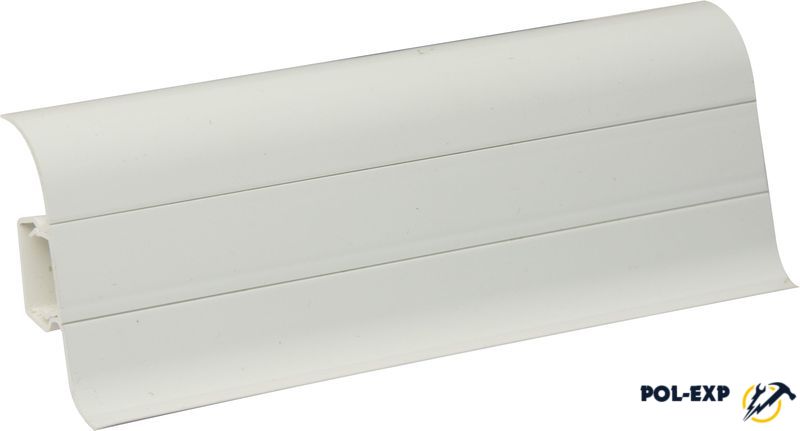
The standard length of the plastic skirting board is 2.5 m, which ensures ease of transportation and installation. The cross section of the plinth varies from 15 to 25 mm, and it can have a different height - from 30 to 150 mm. Most often, products with a profile height of about 50-60 mm are used for installation in an apartment - they are called universal.
Advice! If the ceilings in the room are quite low, then you should not buy a high baseboard. It will look ugly.

Types of plastic plinth
If you come to a good hardware store, you might be surprised at the variety of plastic skirting boards manufacturers offer. They differ not only in size, but also in shape, texture, etc.

For example, skirting boards can be divided into those that are used for joint installation with carpet, and universal ones. The latter can be used with any floor covering, while the former have special grooves. Another such plinth usually has the shape of the letter "G".
Also, plastic skirting boards can be divided into categories according to the material of manufacture:
- PVC foam- hard, elastic, but rather fragile option, has no voids inside;
- PVC rigid- hollow, durable, but rather simple, rarely used in luxury rooms;
- semi-rigid PVC- resembles a foam skirting board, very flexible, sold in rolls. Looks nice, pretty narrow.

Advantages of plastic skirting boards
It is not for nothing that plastic skirting boards occupy a leading position in the building materials market. They have a lot of advantages:
- light and quite flexible;
- can be installed by almost any method;
- do not require pre-treatment before installation;
- have a long service life;
- not afraid of water and ultraviolet;
- do not rot;
- easy to install;
- do not need special care;
- can have any color and a lot of variations in size.

Mounting accessories
Plastic plinth is convenient because manufacturers sell a large number of components for it. These are internal and external corners, as well as connectors and plugs. Depending on the color and size of the skirting board, they are easy to match.

The corners allow you to make beautiful joints between the skirting boards in the corners, and the connectors allow you to harmoniously dock two separate planks. Plugs cover the edges of the plinth at the end of installation. Corners are internal and external, and plugs are left and right. This is important to consider when buying material.

Attention! All accessories for products are purchased separately.
Calculation of the required amount of material
Before proceeding with the installation, it is necessary to carry out a series of calculations to find out how much plinth is needed to decorate the room. But it is quite easy to calculate its amount. The perimeter of the room being repaired is measured without taking into account the width of the doors. Further, the resulting value is divided by the length of one plinth. Thus, we get the required number of parts. However, it is important to remember that you need to purchase a plinth with a margin of at least 0.5 meters. This is necessary to compensate for possible errors.

The number of external and internal corners, as well as plugs, is also easy to count. External and internal corners in the room are considered, and materials are purchased in accordance with the values obtained. Plugs will be enough at the rate of 2 pieces per doorway.
Fasteners are calculated as follows - the perimeter of the room is divided by 50 cm. And the same number of dowels or screws will be needed, but it is better to purchase 10 more pieces in stock.

Advice! In order not to be mistaken during the calculation of the amount of materials, it is recommended to carry out them (calculations) 2-3 times.
Required Tools
To install a plastic skirting board, you will need a small set of tools:
- puncher or drill - to create holes in the walls for fasteners;
- screwdriver - for fast tightening of self-tapping screws (you can get by with a screwdriver);
- tape measure - for taking measurements from the walls and measuring the plinth cuts;
- marker - for marking;
- hacksaw for metal - for cutting skirting boards;
- awl - for forming holes in the plinth for self-tapping screws;
- miter box - convenient for forming corners when cutting;
- sandpaper - for grinding cuts.

Installation of plastic plinth
Step 1. Installation begins with the necessary measurements and marking the plinth for future cutting. The plinth is cut in accordance with the measurements taken.


Step 2 To be able to mount the plinth, the protective strip is removed, under which a place for screwing screws and a cable channel opens.

Step 3 A piece of plinth is applied to the place where it will be attached.

Step 4 The installation of the inner corners of the plinth. An inner corner is put on one of the segments of the bar.

Step 5 A piece of plinth with a fitted corner is applied to the wall at the attachment point.

Step 6 Drilling holes for dowels. You can drill directly through the plinth.

Step 7 Dowels are inserted into the resulting holes. Next, the plinth is fastened with self-tapping screws.


Step 8 The next part of the plinth is inserted into the previously installed inner corner. The procedure for drilling holes and fixing the plinth with self-tapping screws is repeated.

Step 9 The cable, if any, will be laid inside the plinth, can be laid in stages already at this step.

Step 10 An outer corner is fixed on the edge of the plinth segment, the next segment of the plinth is inserted. It is being fixed.

Step 11 After installing skirting boards and laying wires, the cable channels are closed with a decorative plug.

Step 12 Individual products are connected to each other using special connectors. Plugs are put on the edges of the plinth in the necessary places.

Video - Installing a plastic baseboard
Video - Installing a plinth from an array
Prices for floor plastic skirting boards
plinth floor plastic
Technology for fixing skirting boards on liquid nails
Installing a skirting board on liquid nails is quite simple - this is one of the easiest methods for installing this type of product. It is enough just to align the walls, and you can get to work. This installation method is best suited for plasterboard walls. The installation of the plinth is carried out, starting from one corner. Liquid nails are dripped onto the wall at a distance of about 3-5 cm from each other. It is desirable that the step be the same. Further, the plinth simply takes root to the walls. Also, glue can be applied to the product itself. The skirting board is pressed against the wall very tightly and is kept pressed for about 60 seconds.

Installing a skirting board is a job that even a novice in the field of repairs and construction can do. The main thing is to understand the principles of working with these products, and there will be no problems. And it is also important to choose high-quality material - both fasteners and the main one.
The installation of a floor plastic plinth greatly simplifies the production of components by manufacturers, the use of which allows you to do without cutting the profile at an angle, and the ease with which a plastic plinth can be sawn off with a fine-toothed hacksaw.
Accessories are sold separately. You will need side end caps (left and right end caps are sold as a pair), connectors, and inside and outside corners. With the help of a connecting element, the length of the profile is increased in cases where the wall is longer than the standard length of the plinth. Plugs are installed in places where, for some reason, the profile cannot be laid, and at the junction with doorways.
Advice. Calculate the number of accessories you will need to install the skirting board in the room, and buy with a small margin. Without installation experience, you can damage several elements, and the stock will come in handy. They are inexpensive, you need to choose the color of the profile.

Tool for the job
You do not need a professional tool to install a plastic floor plinth. The process is quite simple, and you will be fine with the tool that you have at home:
- You will need a puncher, you will have to drill concrete or brick walls for dowels. For plasterboard walls, a drill will suffice.
- Screwdriver or screwdriver. Even a small number of dowel screws that need to be screwed in to fix the profile are better to tighten with a screwdriver than with a conventional screwdriver.
- Hacksaw with fine teeth for profile sawing.
- Awl. In the plinth, you will need to make a through hole for the dowel-screw.
- Small hammer.
- Roulette and pencil.
- Building level. It is needed to check the horizontal position of the mounting clips.
- Depending on the chosen method of installing the plinth, you will still need glue or liquid nails, mounting clips, and dowel screws.
Checking the slats
The floor plastic plinth does not need to be kept indoors for 48 hours so that it adapts to humidity and temperature. And laying out all the planks before laying and checking the shade of each is a must. It happens that in one package the profiles have a different shade of the same color. Choose planks of a darker shade and plan to lay them opposite the light source. The difference in shade in this case will not be visible.
Installation Features
Work is recommended to start from the far corner of the longest wall. An inner corner is put on the profile, and the bar is applied to the wall. The bar goes into the corners, plugs and connecting element by 3-5 mm on each side. This must be taken into account during installation.
You can install the profile on glue, provided that the walls in the room are even. Otherwise, there will be problems with the fit of the slats in some places. Glue that is suitable for plastic or liquid nails is applied to the back of the profile, after which it is pressed against the wall. Then you need to follow the manufacturer's instructions - do you need to take a break for a few minutes to let the glue dry a little. Press the profile against the wall with force. Excess glue is removed immediately with a rag or sponge. Remember that this method means it is impossible to further dismantle the profile without damage.
For mounting on mounting clips or dowel-screws on the wall with an indent from the corner of 40-50 mm, a mark is made for the first dowel.
Important! Remember that it is recommended to install the product on clips with flat walls. When installing the clips, you must constantly control that they are in the same line.

A hole is drilled in the wall with a puncher and a plastic dowel is inserted. If necessary, it is slightly knocked out with a hammer. For mounting on clips, the first clip is attached to the wall with a self-tapping screw. For installation on dowel-screws, a hole for a self-tapping screw is made with an awl at the location of the dowel in the plinth. The self-tapping screw is twisted, but in such a way that its cap does not damage the profile.
If the wall is longer than the profile, before tightening the last self-tapping screw, a connecting element is put on the bar, which is cut to size on the opposite side.
In a profile with a cable channel, the self-tapping screw is screwed through the channel and will be covered with a decorative strip.


In a solid plinth, the head of the self-tapping screw is closed with a decorative cap.
Depending on the condition of the walls, holes for dowels are drilled at intervals of 300-500 mm. If the walls are uneven, it is better to reduce the step. Having drilled all the holes on one wall, immediately remove the dust with a vacuum cleaner, it will be easier and more pleasant for you to work.

The wires are laid in the cable channel. You can do this at any time by simply removing the decorative bar. But if you install a skirting board without a cable channel, and you need to run the wires, they are laid either before the screws are screwed in (in this case they will be under the screws), or after you screw them into the dowels. Leave the distance between the wall and the profile within 10 mm, lay the wires and tighten the screws until they stop. The wires will lie on them. To access the wires, you will need to loosen the screws again. Of course, a plinth with a cable channel is much more convenient.


In the form of a conclusion
The work of laying floor plastic plinths is not a problem for any person who has ever held a drill and a screwdriver in his hands. This is one of the reasons for their popularity. When performing the installation, be careful and careful, and you will make the final beautiful touch in the design of the flooring.
At the final stage of the repair of the premises, the owners have to perform several finishing works that give the finish a finished look. One of the final touches is the installation of skirting boards. This process cannot be called complicated, but if mistakes are made during installation, the work can be significantly delayed. We suggest that you familiarize yourself with how to attach skirting boards to the floor so that your repair is completed as soon as possible.
Varieties of floor plinth
Today, several types of decorative panels are available to us. PVC options are the most popular. They are characterized by lightness, resistance to changes in air temperature and humidity levels. Plastic panels can be cleaned with chemicals, which makes them hygienic. Use them in tandem with flooring made of laminate, linoleum and carpet.
But with natural parquet, a wooden plinth looks more harmonious. It emphasizes the nobility and sophistication of expensive finishes. Such elements are made from pine and spruce wood. Products are characterized by a variety of shades, which allows you to successfully combine it with different types of natural cladding.
For those who cannot afford wood materials, MDF products are an excellent alternative. They are made from wood shavings, and their front part is covered with paper imitating natural wood. Such products have an extensive range of colors, are easy to clean and are characterized by an affordable price tag.
Due to the variety listed above, it is impossible to describe one method of how to attach skirting boards to the floor. Therefore, we will consider all the methods available for each option.
What to fix: to the floor or to the wall?
When choosing a base for fixing decorative strips, one should be guided by a reduction in labor costs. To do this, pay attention to the base of the floor. If the flooring is laid on top of a concrete screed, and the wall is made of wooden materials, then it is better to fix the plinth to it. And vice versa: if the floor is made of a board, then it is more expedient to fix the plinth on it.
If your space has drywall constructions, learn how to attach prefabricated skirting boards to the wall. In such situations, special self-tapping screws and zinc-coated nails should be used.

In cases where both the floor and the wall are made of solid material, to install the skirting boards, you will need to drill holes for the dowels, and only then screw in the screws. The same method is used in cases where the wall and floor are sufficiently loose.
When working with all of the listed varieties, use the following rules, which indicate how to properly attach the baseboard to the floor:
- The minimum distance between fasteners is 25 cm.
- The maximum distance between fasteners is 50 cm.
- The plinth is fixed to the base, which guarantees sufficient fastening strength.
In the course of work, ordinary self-tapping screws, anchor plates, special clips, and adhesives can be used. The choice depends on the type of floor plinth used.
Fixing PVC products with screws
First, let's look at how to attach plastic skirting boards to the floor. During the installation process, several methods can be used. The simplest of them is for screws. The order of work is as follows:
- Mark the wall or floor for dowels. Determine the optimal distance between the fasteners and put the appropriate points. Start marking from the longest wall, while stepping back 6 cm from the corner.
- Using a drill or puncher, drill holes in the marked places. Drive plastic dowels into them.
- Measure the length of the walls and cut the skirting boards to size. In the course of work, you can use a grinder, an electric jigsaw and a hacksaw for metal.
- Attach the plinth to the wall, mark on it the places for the holes for the self-tapping screws.
- Assemble the planks using the end, connecting and corner elements.
- Drill the required number of holes in the skirting boards. Try to hit the dowel installation site as accurately as possible.
- Through the resulting holes in the slats, fix the screws in the plastic dowels.
To attach to the floor as neatly as possible, do not tighten the screws too tight, this may cause the thin elements to warp. At the end of the work, close the caps of the self-tapping screws with a decorative strip or caps in color.
Fixing a plastic plinth with glue
Another simple method of attaching a floor plinth is glue. It is suitable for inexperienced craftsmen and those who are looking for a way to attach the baseboard to the floor without a drill.
For this purpose, the Liquid Nails composition or any other adhesive recommended by the manufacturer of plastic strips is used. In the course of the work, you need to cut the skirting boards to the desired length, expand the resulting segments under the corresponding walls. Then, in a zigzag motion, apply glue to the back of the plank and press it against the wall. Thus, install the skirting board around the entire perimeter of the room.

This technology is very simple. It resembles instructions on how to attach a ceiling plinth. If you have such work ahead, use this method.
When choosing an installation with glue, please note that it will be quite difficult for you to replace the skirting board. Give preference to such installation only in cases where you are sure that in the near future you will not have to work on replacing the flooring.
How to attach a skirting board with clamps
It is possible to carry out the highest quality installation by using special fasteners - clips (kleimers). Their use allows you to quickly install decorative strips and easily dismantle them.

Consider how to properly attach a plastic plinth to the floor with clips. The work is carried out in the following sequence:
- Step back from the corner of the wall 5-6 cm. Place the clip at the obtained point, press it against the wall and make a mark for the hole for the dowel.
- Mark all fasteners in 50 cm increments.
- Drill holes for dowels. Choose the diameter of the drill according to the dimensions of the plastic fasteners included in the kit.
- Secure all clips with self-tapping screws.
- If necessary, stretch the cable, then install the skirting board on the clips.
If the wall is uneven, reduce the distance between the clips. This will ensure the tightest fit of the slats and reduce gaps.
Installation of floor wooden plinth
The question of how to attach a wooden baseboard to the floor also cannot be answered unambiguously. Fixation can be done in various ways.
The easiest way is with glue. This type of installation is suitable for both solid wood products and MDF options. It can be used if the walls and floor in the room are relatively even.

Skirting boards are glued as follows:
- The composition "Liquid nails" is applied to the inside of the board.
- The bar is pressed tightly against the wall, after which the second element is installed. The seam between adjacent boards is also carefully smeared. In this case, the glue should not fall on the front of the bar.
- For the arrangement of internal and external corners, the edge of the board is sawn at an angle of 45 ° C.
First, make the inner left corner, and then the right. It is desirable that there are no knots and resinous patterns in the seam area.

To make the cut on the panel look as neat as possible, use a pre-prepared template or miter box to cut corners. Make sure that the thickness of the profiles at the docking point is the same.
When using this method, remember that you will be able to achieve a perfect fit only when the walls and floor are as smooth as possible. In other cases, there is a possibility of large gaps.
You can eliminate such a defect with putty. Take a narrow spatula and carefully fill in the gaps between the wall and the board. Sand the surfaces treated with putty with fine-grained sandpaper.
Installation of wooden plinth on anchor plates
It is possible to attach skirting boards to the floor (both on wooden and laminated flooring) using special anchor plates. Their advantage is that such fixation can be used even in cases where the walls are not too even.

Step-by-step instructions (how to attach skirting boards to the floor using plates) are as follows:
- Determine the places where the plates will be located. The maximum distance between such fasteners is 0.5 meters. Mark up on the wall or floor.
- Using a perforator, make holes for fixing the plates.
- Carefully drive the dowels into the prepared places.
- Attach the anchor plates to the wall using self-tapping screws.
- Install the wood panels so that the fibers of the product are strictly perpendicular to the teeth of the plates.
- Install the planks tightly so that there are no gaps between the wall and the baseboard.
This method of mounting wooden panels allows you to securely fasten the planks around the perimeter of the room, while the appearance of the expensive finish does not change at all. If necessary, the plinth can be easily removed and reinstalled.
Mounting on nails and screws
If you need to fix a wooden baseboard over a wooden floor or parquet, you can use self-tapping screws or small nails as fasteners. How to attach skirting boards to the floor in this way? Follow the instructions below:
- Measure the desired length of the plinth with a tape measure. Transfer the obtained dimensions to a wooden plank. Make a cut.
- Docking will be carried out at an angle of 45 degrees. Saw down the boards for arranging the corners in advance.
- If the baseboard is fixed on a wooden base, use small nails in the work. Just press the planks firmly against the wall and hammer nails into them. In order not to spoil the front side of the tree, perform the final driving of the fasteners with a chisel.
If you are installing skirting boards on concrete surfaces, hammer nails into the wood plank first. Attach the product to the wall and hit each nail once with a hammer. Thus, you will receive marks, in place of which you will need to drill holes for fasteners.

Using a perforator, make the desired number of recesses in the wall. Drive special plugs into them. Install planks and drive nails into the plug holes. If you use dowels, do the installation in the same way, but use self-tapping screws instead of nails.
As already mentioned, the choice of plane depends on the condition and strength of the base. However, when determining the installation method, professional craftsmen recommend taking into account the type of flooring used.
So, if you are installing a skirting board over a laminate or parquet, you should fix the products only to the wall. Otherwise, the flooring itself may fail prematurely.

Before installing the skirting board over the laminate, make sure that there is a technical gap of a few millimeters between the paneling and the wall. If it is absent, there is a risk of deformation of the coating, swelling of the seams.
Products made of veneer or wood are most often installed on top of a solid floor or on parquet. If there are a large number of defects or irregularities on the wall, in addition to standard plates, it is recommended to additionally use parquet studs.

Over floors made of porcelain stoneware or other types of tiles, it is better to install skirting boards from a similar material, but plastic varieties can also be used. In this case, you need to fix them to the wall.
To fix the plinth on top of the self-leveling floors, a special glue is used, which is matched to the color of the coating itself. The joining points of the plinth are covered with connecting fittings or covered with putty.
As for comfort, it is better to install plinths made of wood or MDF in children's rooms, but PVC products are optimal for the kitchen, corridor, loggia and bathroom.
Summing up
Having considered all the options on how to attach a floor plinth to the floor, you can understand that the work of installing it is quite simple. A variety of fixing methods allows you to install it even for novice craftsmen who do not have a professional tool.
However, it should be remembered that it is important not so much to comply with all the rules for installing decorative panels, but to choose the best way to securely fix them. If the planks are laid over laminate or parquet, their reliability is of particular importance, since it is the skirting boards that press this coating to the floor.
Otherwise, the choice of the method of fastening products depends on your preferences, capabilities and skills.
Installing a skirting board is the traditional completion of a floor installation or repair. Shaped strips made of plastic, MDF, wood hide technological gaps, unattractive elements, communications if they are laid in special plinth niches. Skirting boards are fastened in different ways to one of two surfaces: either to the floor or to the walls. The choice of the optimal option depends on the type of flooring, on the material from which the plinth is made, on the preferred technology.
Types of skirting boards and features of their fasteners
To complete the flooring, you can now purchase both traditional wood planks and more economical, easy-to-install products made of plastic or MDF.
Plinth made of natural solid wood
Wood goes well with any type of coating, but due to the high cost it is used mainly for finishing parquet, parquet flooring. There are on the market the usual triangular wooden slats of oak, alder, larch, etc. skirting boards. There are products manufactured according to European standards with devices for installing cable wiring. Wooden slats should not be mounted if the walls are poorly aligned.
Important. Before fixing the plinths from the array, their surface must be treated with a decorative and protective composition: varnish, oil, etc.
Wooden plinth with cable channels - European standard
The fastening of the wooden plinth is preceded by sawing the elements according to the dimensions accurately taken on the object:
Skirting boards with MDF base
These are laths covered with laminated film, foil or veneer. In terms of decorative indicators, they are not inferior to products made from valuable wood species, but they are significantly cheaper. MDF is a fragile material, it is not surprising to spoil it with inept hands. Therefore, basically, the MDF floor plinth is fixed to the walls with the help of special hook-shaped brackets, on which the planks are then put on.
For the design of end sections and corners, "corners" and end caps are supplied with the skirting boards. This constructive solution attracts with the ability to easily remove skirting boards and mount them again after repairing the floor.
Plinth made of practical plastic
Durable PVC planks are not afraid of temperature fluctuations, intense wet processing, and the sun's rays. The polymer profile created on the prototype of a wooden plinth is perfect for laying a floor with laminate, carpet, linoleum, but it looks bad in combination with parquet.

To fix the skirting board, the package includes corner pieces and plugs.

Plastic plinth is usually attached to liquid nails, but then it will be very difficult to dismantle it.
PVC slats designed to work with carpet or linoleum are equipped with grooves for fixing the edge of the floor covering. Light strips provide an opportunity to perform a simple and labor-saving fixing of the skirting board on liquid nails. But it will be problematic to dismantle the profile firmly fixed around the perimeter before the next repair.
Among the priorities of plastic strips include the presence of channels for cable wiring, plugs and devices for forming a neat corner. It does not need to be cut and the flexible profile can be pressed tightly against an insufficiently leveled wall.
Where is it better to mount - to the floor or to the wall?
The presence of two perpendicular planes determines two options for fixing the floor plinth. The natural preference would be the simplest and easiest way. The easiest way is to attach this trim element to the surface, which will include fasteners with less labor:
- In houses made of timber with concrete floors and cement screed, it is recommended to prefer fixing the plinth to the wall;
- In houses made of foam concrete and brick with a wooden floor, it is more reasonable to “drive” dowels or nails into it.
In order to fasten the plinth to the floor with a concrete screed, to the foam concrete walls, you will first have to drill holes for plastic dowels with a puncher. The spacing of points for installing fasteners determines the type and degree of unevenness of the base, the geometric parameters of the rails. The most common distance between the fixation points, both the baseboard itself and the strips or clips for mounting plastic rails, is at least 30, maximum 40 cm.

The choice of the plane for fastening depends on the technical characteristics of the base
Attention. On walls finished or just leveled with plaster, on partitions built using drywall, on structures lined with soft finishing stone, on chipboard plates, the plinth will not hold firmly. In such cases, it is recommended to choose the floor as the basis for fixing.
If, for some reason, fixing the skirting board to drywall or chipboard is the only possible option, for fixing you need to purchase special screws designed to work in this material, or zinc-coated finish nails.
In general, it is desirable to locate the attachment points on the metal elements of the frame, if it was used as a structural support.
Overview of ways to fix the skirting board
Liquid Nails
The simplest, most efficient, but irrational from the point of view of subsequent alterations, is the use of the “liquid nails” binder. True, for the installation of a veneered fragile baseboard, this is one of the rational methods. The whole technology includes two processes: treated with glue from the rear, fixed on the floor or wall.

Mounting the plinth on "liquid nails" - the method "for centuries"
Clips and straps for fixation
Plinth made of MDF or plastic with internal fixtures for fixing to a carrier bar or to a clip, does not have holes for screws on the surface. The hidden installation method involves attaching only the supporting element to the base, on which the slats are then hung.
To mount the inside of the structure:
- put the first fastening element on the floor 5 cm from the corner, starting from which the installation will be carried out clockwise, press the clip tightly against the wall, mark a place through the hole for drilling holes for the dowels;
- with a step of 50 cm, holes in the wall are marked and then drilled, the diameter of the drill determines the size of the dowels supplied with the rails;
- using the supplied fasteners, devices of a hidden mounting system are mounted;

Clip-on plinth - convenient and practical
Note. For arranging a room with poorly aligned walls, the step of the location of the fastener points must be reduced.
The final installation of skirting boards on clips or strips is done with a simple click.
Mounting method with dowels and screws
Begin installation with markup. The starting point is the corner of the length of the wall. Before marking, the plastic plinth is equipped with a corner accessory. The edge of the wooden lath is sawn off at an angle of 45º.
- To mark the position of the first point from the corner, you need to retreat 5 or 6 cm.
- The skirting board must be firmly pressed against both mating surfaces. Further, a hole is drilled through the marked first point so that a mark from the drill remains on the wall. The thin walls of the plastic skirting board can be pierced with a simple awl for marking.
- The rail is moved away from the wall.
- Holes are formed in the walls or in the floor with a perforator for subsequent hammering of dowels into them.
- Then dowels are mounted, a plinth is applied according to the markings, self-tapping screws are inserted and screwed into the holes on top of the rail attached to the wall.

Fastening with dowels and screws - marking features
Advice. You can not screw a screw into a flexible plastic plinth until the end if a concave segment is obtained as a result of twisting. Loosen the self-tapping screw half a turn. In general, it is not necessary to overly diligently tighten the screws over the plastic rails, cracks may appear from an excess of diligence.

After fastening, the caps of the self-tapping screws and the flaws are masked with primer and a wax pencil
The next steps are the same as the beginning. After installing the elements around the entire perimeter, the caps of the self-tapping screws can be masked with a wax pencil, matched to the color of the baseboard. The defects resulting from sawing off wooden planks can be hidden with a primer.