File knife, exotic or practical tool? Making a knife from a file with your own hands at home Make a dagger from a file.
One of the main tools not only in construction, but in any business is a knife. Buying a good Swiss knife is expensive, and buying cheap analogues leads to the fact that when performing work as intended, they fail. There is a way out - make a knife from a file with your own hands. To make it, you will need a minimum of effort and expense, and to do everything correctly, you will need to learn the basic recommendations and instructions for constructing a homemade cutting tool.
Why is it better to make a knife from a file?
At home, a homemade knife can be made from different materials, such as a spring, an engine valve, a pipe, etc. It all depends on what is available. Almost everyone has flat files collecting dust on a shelf in the garage. This tool can serve as a good material for making a knife. Let us find out in detail why it is better to use flat files for manufacturing.
During the Soviet Union, high-quality instruments were produced that continue to be actively used to this day. If you ask any specialist, he will answer that modern instruments are not as high quality and reliable as those produced in the USSR. The reason for this was the standards that were adhered to in the manufacture of tools, including files.
During the production of files during the USSR, they did not know what savings in production meant, so they adhered to all standards and regulations, which served to obtain high-quality tools. Even if you cannot find an old flat file in the garage, you can purchase it used. It is necessary to use old-style files made in the USSR, otherwise you will not be able to obtain a high-quality cutting tool.
This is interesting!All USSR files were made from alloy steel, so a homemade knife made will be distinguished by its reliability and durability. Alloy steel contains a high percentage of carbon, which makes it possible not only to harden it, but also to obtain a reliable, durable tool that will not become dull.

Why is it necessary to forge a knife from a file?
If you are wondering how to make a knife from a file, then you need to know that there are two ways to make it:
- With forging
- Without forging
The method of making a knife without forging from a file is to sharpen one part of it. If you prefer the forging method when making a knife from a file, then you need to understand the following advantages of the final cutting tool:
- Increasing the technical properties of the metal, which when hardened becomes even more durable and elastic
- Heat treatment means that to make a knife you will not need to sharpen a file, since the forging method will help reduce the thickness
- After the forging procedure, you will need to spend less time sharpening the blade on the tool
To carry out heat treatment, you will need special blacksmith equipment. If there is no such equipment, then for this you will need to use the tools available on the farm. This is a piece of rail, a set of hammers, as well as coal and a homemade furnace in which hardening will be carried out.

This is interesting! To understand how high quality the file is, which is planned to be used as a donor for making a knife, you should hit it with a hammer, having first secured it in a vice. A good tool will not break, but only bend, which means the use of alloy steel in the production of files. It should also be noted that Soviet instruments are not subject to wear, which is why they are still used today.
Tools and materials for manufacturing
Before you make a good knife from a file, you need to understand that the manufacturing process is labor-intensive, even if the option without heat treatment is chosen. However, by taking the time, the end result is a high-quality tool that will not only last forever, but will rarely need to be sharpened. Before you get started, you will need to take the following tools and materials:
- File. Its length can be any. If it is too long, then you can cut it and make two knives, and if it is short, then this will be the size of the final tool. Throwing knives are made from short files
- for sawing a file. It is not recommended to use a power tool, for example, a grinder, since the process of cutting a file deteriorates the properties of the metal
- File with handle for final finishing of the manufactured tool
- Drill, emery, grinder, jigsaw
- Vise
- Crafting table
- Wooden materials for making the handle
- Sandpaper for rubbing the handle
- Hardening tools - gas stove

It is not necessary to use all the tools, since a jigsaw can be replaced, and a grinding machine can be replaced with sandpaper, emery or a file. When all the necessary tools and materials are ready for work, you can begin.
Instructions on how to make a knife from a file with your own hands
Let's take a step-by-step look at the process of making a homemade knife from start to finish. Based on the instructions, it will not be difficult to make a knife at home yourself.
- Temper the metal. This is done to make the work easier. To do this, you need to warm up the surface of the file by placing it in a gas oven for 1 hour. The exposure temperature should be no less than 200 degrees and no more than 300 degrees. Cooling must be natural, otherwise the workpiece may crack
- The next step is to make the profile of the knife. Here you can’t do without diagrams and drawings. You can come up with your own profile or take it from analogues. On a piece of cardboard, draw the corresponding profile of the blade with the handle, and then cut it out. The resulting drawing will allow you to make the tool strictly according to the template, increasing the quality of appearance. The finished template must be attached to a file and traced along the contour using a marker

- Cut out the workpiece according to the marks. To do this, it is better to use a hacksaw for metal, which will eliminate the need to release the material. If you use a grinder, it is recommended to water the file during the cutting process. It will be faster with a grinder, but the slightest overheating will lead to a loss of metal strength, so it is better to use a hacksaw. Any irregularities should be sanded down

- The bevel grind is the part of the blade that will gradually decrease in thickness to end up with a sharpened base. To sew a bevel, you first need to draw it. To do this, use a marker to draw bevel lines. To ensure uniform grinding on both sides, it is necessary to take a metal drill of the same diameter as the thickness of the workpiece. After this, place the workpiece on a workbench (flat surface) and place a drill next to it. Run the drill along the end of the blade where the sharpening point will be. You can use the resulting line as a guide when grinding metal

- Preparing pins for handle linings. The easiest way to make a handle is to cut it out of sheet wood and attach it to the resulting workpiece on both sides. You can also make a round handle by turning it on a lathe. If sheet wood is used, then cylindrical aluminum sleeves will need to be used to secure it to the base of the tool. These sleeves should be of small diameter

- Cuts a handle from chipboard or other woodworking materials. It is better to use high-quality wood, since in a knife the main role is played not only by the blade, but also by the handle, which affects the quality of use of the tool. The shape of the handle is drawn out with a marker, and then cut out using a jigsaw or hacksaw for metal

- To attach the handles to the tool, you will need to drill holes in the metal base of the knife. Sleeves are installed in these holes, and then wooden blanks are placed on both sides

- Cleaning metal using vinegar or citric acid. This procedure is performed in order to prevent the occurrence of corrosion processes. To clean metal, the main thing is not to leave the workpiece longer than necessary.
Place the workpiece in vinegar or citric acid for 1.5-2 hours. After this, the metal will turn black, so sandpaper of minimal roughness is used to remove the blackness. We grind the metal to a shine on the blade, but it is not necessary to process the handle, since it will be covered with wooden handles

- Assemble the handle by gluing wooden pieces. To do this, it is recommended to use epoxy glue, which is also called cold welding. It is important to choose liquid glue. Metal and the inside of wooden pieces must be thoroughly cleaned and degreased before applying glue.

As a result, we get a finished tool that is distinguished by high levels of strength, reliability and efficiency. Finally, the handle should be treated with paints and varnishes, which will prevent moisture from getting inside. Under such a knife, you can sew a sheath on your belt, which will allow you to always keep it with you while performing construction, repair and other types of work.
If you plan to make a round handle for a knife, then the back of the workpiece should look like this, as shown in the photo below.

Pros and cons of file knives
Why might you need to make a homemade knife when you can buy a tool of any shape, length, quality and appearance on the market? A homemade knife is made in order not only to save money, but also to obtain a high-quality tool that is durable and reliable. First, you need to highlight the disadvantages of making a knife with your own hands from a file:
- The complexity of the process. At almost every step, the relevant parameters must be observed. When hardening, maintain the temperature and time, and when grinding the edge, you need to show skill. If you devote enough time and effort, you end up with an indispensable tool, the scope of which is simply limitless.
- The blade of such a tool will not be flexible, like on a kitchen knife, but this cannot be considered a disadvantage, since the homemade product is mainly intended for use in repair and construction work. However, this means that it cannot be used for cutting meat and other products.
- Tendency to corrosive effects due to improper care and storage of the instrument
As you can see, this tool has practically no disadvantages. The advantages include the following factors:
- Durability
- Strength
- Hardness up to 60-62 HRC
- Availability of the material, since files from the USSR era are not difficult to find
- Thickness

This homemade product has enough advantages, so if you don’t yet have a construction knife, then it’s time to make one yourself. If you follow the instructions and all the recommendations, you will eventually be able to get a cool knife made yourself from a file. Reviews show that such a homemade file made from a file is more reliable and durable compared to factory-made knives.
For hunters, mushroom pickers, and hiking enthusiasts, a durable and reliable knife is not just a decorative element, but a necessity. You can buy it in specialized stores, but it is also possible to make a knife from a file with your own hands. From the article you will learn how to do this in order to appreciate all the intricacies of the process of forging and hardening metal.
Preparatory work
To make a workpiece, you will need to pick up an old file with ground teeth. In this case, you will not need to put a lot of effort into turning.

The advantage of a file as a workpiece is that it uses high-carbon steel. It is perfectly hardened, and the product will be durable and retain its sharpness for a long time. The width of the base should be 30-40 mm with a rectangular cross-section, which will give increased strength.

A grinding machine will be used to make the bevels. However, it is often replaced with a hand file and a grinder.

Along with a sharpening machine, you will also need different-grain sandpaper and a vice. A magnet will help check the degree of hardening, and ferric chloride is necessary to etch the blade against corrosion.


To make the handle, you should prepare different materials, from which the best option is selected - wood, deer antler, bone, leather belt or a set of plastic plates.

The metal base may require drilling holes for mounting. Therefore, you need a drill or drilling machine. The handle is fixed using brass rivets and epoxy resin. The choice of materials depends on the planned technology for arranging the handle.

Possibility of forging the product
Having a forge and blacksmithing skills will help you make a knife at a professional level. In this case, the knife is forged and hardened from a file, which has a number of advantages:
- greater strength and elasticity of the material obtained after forging;
- the thickness of the workpiece is reduced by a hammer, and this speeds up the technological process;
- final processing is easier;
- all notches will be eliminated.

However, not everyone can use this method, so it is advisable to study a simpler method of making a knife from a file.

Heat treatment stage
Our instructions on how to make a knife from a file will help you quickly realize your dream of a quality tool. Homogeneous steel in the workpiece is excessively saturated with carbon, and this makes it brittle when subjected to severe mechanical damage.

Therefore, the main stage of knife manufacturing is the heat treatment of the file. It is calcined at a temperature of 600-700°C, followed by slow cooling. This is done in a regular burning stove, although you can also use a gas stove.

Under standard conditions, the specified temperature is not always achieved, so a thermal screen is constructed. It uses a metal plate, the dimensions of which allow it to cover the workpiece. The screen should rise more than 1 cm above the file being processed - bolts or nuts can be placed under it.

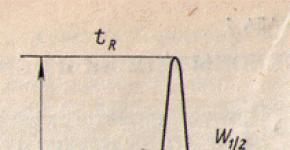
Only the section of the workpiece that is intended for the blade is annealed. It is sprinkled with table salt to control the process. If the coarse salt melts, then the desired temperature has been reached. The metal becomes cherry and retains the shade for more than 4 hours.

After warming up, the workpiece must cool down. This process is slow - the metal cools along with the furnace. It is necessary to gradually reduce the heat over the course of an hour. If this requirement is not met, the file will crumble.


Quenching and tempering
The next stage of recommendations on how to make a knife from a file is the hardening process. After complete tempering, the workpiece is clamped in a vice. Using a hacksaw or grinder, begin to cut off all unnecessary elements along the marked contour of the blade.


The future product is turned on a sharpening machine with a coarse-grained wheel. At this stage you also need to know what the handle will be like. If you plan to use overlays in the form of wooden plates, then it is advisable to drill holes for rivets. You can use a grinder and cut a groove.

Now you can begin hardening - the steel is heated until it turns bright red. The blade is given uniform heating over the entire surface with the exception of its base. At this point it is heated until white.

To monitor the degree of heat of the blade, a magnet is used. If there is no reaction to the metal, cooling begins. To do this, use pliers and lower the workpiece into a container of water. Then you can test the blade and run it across the glass, where characteristic scratches will appear.

Tempering the blade will help eliminate high internal stress in the metal and prevent coloring during the sharpening process. The workpiece is placed in the oven at +200°C for 2 hours, then the fire is extinguished. The cooled metal is removed.


Finishing
Step-by-step manufacturing also involves sharpening the knife. Make the blade smooth using a metal brush, sandpaper and a felt wheel. These tools sequentially process metal.

Note! 
It is necessary to protect against rust by etching - the knife is lowered into ferric chloride. A matte film appears on the surface. You can also pickle with vinegar or raw potatoes, previously grated.

The fixation of the handle depends on its type and shape. The deer antler is put on the tail part in a longitudinal hole. The inner surface of the horn is treated with epoxy resin.

If the handle is set, then it should simply be assembled and clamped onto the thread. A belt made of leather material is coated with leather glue and then wrapped around the metal.

Wooden overlays are also coated with epoxy and then fastened through the holes with rivets. If necessary, it is advisable to sharpen the fixed wooden handle, sand it and rub it with a solution of wax and turpentine.

To get a quality product, it should be sharpened, as can be seen in the photo of knives made from a file. This process is best done manually using an abrasive stone. Editing is done with musat. The resulting product will cut various materials and will be an excellent helper in everyday life.

Note! 
Photos of knives made from a file


Some people want to make a knife from a file with their own hands. However, today there are many different ready-made products on sale, so not everyone understands why waste time hewing and grinding a homemade knife. Those people who still want to build such a product with their own hands will learn many nuances of processing and hardening during the manufacturing process.
Knives made from files have fairly high strength and wear resistance.
To make a knife from a file, you will need to prepare the following elements:
- material for making the handle (you can use wood, leather or metal);
- staples;
- ferric chloride;
- epoxy resin;
- ordinary magnet;
- saw;
- a grinding device that is available at home;
- vice for clamping workpieces;
- sharpening device.
Forging a knife from a file: preparatory work

The process of constructing a knife from a file is extremely educational, since the file itself is an ordinary piece of steel, which is suitable specifically for such tasks. If it is possible to find Soviet instruments that are made of U10 carbon steel, then the result of the work may greatly surprise the master.
The first step is to fire the device from which the blade will be made.
It is best to keep the part for about 5-6 hours in a burning stove or stove, and then let it cool with it. However, you can also use an ordinary gas stove. The point of firing is to allow the steel to warm up under the influence of a temperature of 650-700 ° C, and then slowly cool.
It should be noted that only the element that will be used as a cutting element will need to be burned. Therefore, if you plan to use a gas stove, then this point must be taken into account.
The stove can produce a low temperature, so certain tricks will be needed. In this case, you cannot do without making a heat shield.
You can do this with your own hands very simply: above the file you need to prepare a small hill of screws and nuts on which you can install an iron plate. In this case, the temperature from the combustion of the gas will practically not enter the air, and the file will be able to heat up more.

If the salt does not melt, then the heat shield is not at sufficient temperature.
Be sure to sprinkle the area that is being heated with kitchen salt. This will serve as an indicator: if the salt melts during the heating process, this means that all actions were performed correctly. If the salt does not melt, then the temperature was not sufficient.
In the latter case, you need to repeat the same steps again. During heating under the strip, the part should have the color of heated metal. The device must be kept for at least 2-3 hours.
After the main firing, the temperature should be reduced slowly. First you need to reduce the burning force by ¼, and after 30 minutes you will need to tighten it up a little more. Such actions must be performed until the device has completely cooled down. This nuance cannot be ignored, because all this is done for a specific purpose. It is important to know that steel that cools sharply will quickly crumble.
Creating a mold, hardening and tempering of the manufactured device
At this stage, you will need to clear some space in the workshop and prepare the vice. First of all, the workpiece is clamped in a vice. Then you need to cut off or cut off unnecessary elements. There is another option - you can grind the workpiece on an abrasive disc with large grains. In this case, the file can be given the desired knife shape. If you plan to decorate the device with wooden elements or overhead parts, then you should remember that you will need to prepare recesses for staples or make a groove in the handle.
The next stage after formation is hardening. Most craftsmen make a significant mistake when they base their level of hardening on the glow of the hot metal. The real picture can only be seen using a magnet. If the red-hot workpiece does not react in any way to its presence, this means that the hardening has been brought to the required level.

When firing a workpiece, you need to calcinate the metal to 650-700° C.
The device being manufactured must be heated evenly. The only exception is the handle section. In this case, it will be necessary to warm up a small area of 6-7 cm at the base of the cutting element. To accomplish this, you will need to use a burner that can produce a suitable temperature.
You will also need to prepare a tank with ordinary water in which the metal will be cooled. When the same glow of the metal is obtained, and the magnet does not react to the workpiece, the part should be heated for another 3-4 minutes.
After this, it will need to be quickly dipped into a reservoir of liquid. If you follow the entire process, then using this metal device you can leave scratches on the glass. This is how good hardening is determined.
Due to the increased pressure, the metal that is being hardened may break or crumble when sharpened. Therefore, it will be necessary to perform tempering - a process that will relieve stress with a slight decrease in the hardness of the steel.
Metal drills are made using the same method. The process is not complicated - you just need to place the part in the oven and bake it for approximately 1.5-2 hours at a temperature of 200 ° C. The workpiece must cool together with the oven.
How to process the cutting element and handle yourself?

After sufficient calcination, the workpiece must be cooled.
In this case, you can use any available elements that are suitable for grinding. This could be a metal brush, vulcanite wheels, felt, a special grinding machine, and so on. However, you should not be overzealous - after this you will still need to perform the etching process. At this stage you need to make the cutting element smooth.
Before etching, it is recommended to attach the handle pads from the material that has been selected. In this case, you can simply wrap a strip of leather around the metal blank; here everything will depend on the preferences of the master. In the first case, processing should be done after etching. However, wrapping under the skin can be done at this stage. If you want to do this, you will need to prepare a solid piece 0.5 m or more long. First of all, you need to wrap it to check how a throwing knife or any other knife in this design will look, whether the piece of leather is the right length, and how the product will feel in your hand. If the craftsman is satisfied with everything, you will need to unwind the handle and apply an adhesive solution, which is designed to work with this material, on the back side of the leather strip. Next, you will need to carefully wrap the handle, applying considerable effort.
A wooden handle will take longer to process. The recesses for the staples will need to be filled with resin. After this, you will need to clamp the handle with staples and secure it in a vice until the resin has completely cooled. You will need about 2-3 rivets. Once the resin has hardened, it will be possible to shape the handle.

However, you should not rush into final processing. Before this you will need to perform etching. If there are stores selling radio equipment nearby, it is recommended to buy ferric chloride, in which you will need to etch the cutting element until the workpiece receives a gray tint. It should be noted that at this stage the part should not shine.
The film that ultimately forms on the cutting element can protect it from corrosion. Therefore, you need to try to preserve it. If it is not possible to buy such iron, etching can be done using the following means: lemon juice, potatoes or vinegar. It is imperative to clean the cutting elements from dirt, since during etching fingerprints may appear on them, as a result of which you will have to remove the film and repeat all the steps again.
Forging a knife: how to sharpen the cutting element?
Once the etching process is complete, the epoxy resin will harden. After this, you will need to process the handle and sharpen the cutting element. If the handle is made from wood, it needs to be given its final shape, sanded and waxed. When the pen is ready, you can proceed to the most important stage - sharpening. This process is best done with a regular hand-held sharpening stone, since using an electric sharpening tool may overheat the metal workpiece.
It is worth noting that some craftsmen like to perform the process of making a knife over and over again. If making a knife with your own hands is done correctly, the device will be able to cut well.
It will be possible to sharpen a high-quality product even on an ordinary stone. Such a device can also be used in a workshop and can be used to perform all the work that would quickly wear down and dull knives sold in stores.
It’s not difficult to make a knife from a file yourself; to do this, you just need to prepare all the necessary elements.
If you strictly follow the instructions and do not violate the order of actions, you can get a high-quality product that will serve for many years.
A good knife has always been an attribute of real men. And if it was also made with your own hands, then this is already a reason to brag to your friends.
The main condition is to have high-quality materials for manufacturing. Of course, you can take any steel and harden it. But the highest quality products are obtained when using carbon alloyed steel.
Workpiece selection
For a homemade knife you can use the following blanks:
- Large metal drill bit. But we must take into account that the alloyed metal there is only on the working surface, and the shank is of ordinary “hardening”.
- Connecting rod of the piston group of engines.
- Socket wrench.
- Spring - most often acts as a blank.
- File.
 As a rule, edged weapons are produced between a hammer and an anvil - for almost all workpieces this is a mandatory step, allowing them to be given a different shape. Exception - file knife.
At first glance, such material may seem unusual. There is nothing strange, it is just high quality steel. Good products are those that were made 30-50 years ago. The fact is that Soviet metallurgists adhered to steel alloying standards. If you can find a similar blank (even a rusty one), you can safely get to work.
Forging metal before work
When you know blacksmithing and have the appropriate equipment, you can make a professional product. But why is forging needed if the workpiece already has a suitable shape:
- The metal gains higher strength and elasticity.
- The file is a little thick for the blade; when forming slopes, some of the metal will have to be removed. When forging, the metal will remain in the product; the thickness will simply be reduced.
- It will take less time for final processing.
 In addition, you can remove the notches. Although this is not necessary, because they give the products originality.
If you don’t have special equipment, you can make a knife without forging. When using high-quality blanks, you will get an excellent blade. Since domestic market filled with cheap Chinese instruments, it is very difficult to find real Soviet instruments. For inexpensive tools, use ordinary, highly hardened steel.
You can check the metal by placing a file on the edge of a table and then hitting it with a hammer. The hardened end will break, but the alloyed end will bend a little. You can also bring the tool to the sharpening machine. If the sparks are long, the steel is ordinary; if they are short and fluffy, you have a high-alloy metal. But heat treatment is necessary in any case: at a minimum, the workpieces are “tempered” and “hardened” again.
You can’t do your work without:
- A good, large, Soviet-made file.
- Hacksaws for metal (several spare blades).
- Working file with a comfortable handle.
- Sandpaper and block.
- Workbench and vice.
- Clamps (2 pcs.).
- Wood (kebab) charcoal for the forge.
- Processing (of old motor oil) for hardening.
 Good products are obtained from files with ground teeth - in this case, you do not have to waste time removing them.
At the initial stage, the metal is annealed. But before this, you should make a “camping” forge: pour a hearth of earth, insert a two-inch pipe (to allow air to flow in) and light the coal. When the steel turns red, stop supplying air and leave the workpiece to cool slowly. The metal will be pliable and can be easily processed.
All excess is cut off with a hacksaw according to pre-prepared patterns. Try to repeat the future shape as accurately as possible in order to use less file work. Cut a shank as long as your fingers.
Then process the workpiece using a file or emery, shaping it according to the pattern. Press the future knife against the workbench and use a clamp to sharpen the slopes. This part of the work is responsible and should not be done by eye. The two sides should be symmetrical, the metal removal angle should be the same along the entire length of the trigger, including the bend of the tip. For convenience, you can build an auxiliary device in the form of a metal pipe with a guide, and attach a long file to it.
Since the workpiece is annealed, it does not require much effort to process it. After rough shaping is completed, final processing is carried out sandpaper. For maximum effectiveness, it can be wound on a small wooden block.
The blade is ready, but the softness of the annealed steel will not allow you to use it to your fullest, so hardening will be required.
Hardening procedure
During this procedure, the structure of the metal changes, it becomes hard and slightly brittle. Quenching is carried out in processing oil. The finished product should be heated until it acquires a dark cherry hue.
When it's sunny outside and It's hard to tell the temperature by color, readiness can be checked using a magnet: if the steel is well heated, it will not be magnetized. Then quickly lower the blade into the container with oil. To cool it faster, place a bowl of cold water under the container - this way you can achieve a more effective result.
Glassware will help check the hardness: if it is well tempered, grooves will remain on it. The main disadvantage is the labor-intensive manufacturing process. Another feature is that a file cannot be used to make a thin and flexible blade.
Among the indisputable advantages are the strength and durability of such products. The material for manufacturing is freely available, practically free, with a butt thickness of 6 mm, which does not allow knives made from files to be classified as edged weapons.
A knife from a file is made at home with a minimal set of tools. It is important to follow a step-by-step process so that the “output” is a high-quality product. It is better to choose a manufacturing method without forging, but if you have blacksmith tools, then you should give preference to metal forging.
Only Soviet-made files are used, since they meet all metal requirements and are available. The only drawback of a finished knife is the need for constant treatment of the blade to prevent the development of a corrosion process.
Read in this article
Features of a file knife
Even a novice craftsman can make a knife from a file; he just needs to have the starting material and some tools - not the most expensive or rare ones.
But before you start the process, it’s worth familiarizing yourself with some of its features:
- A truly high-quality knife can only be made from good material, so you should not use cheap Chinese files as a donor. It is worth giving preference to those intended for working with metals.
- There is no need to study the basics of forging and purchase a specific tool - there are options for making cutting tools without this step. But in this case, you need to prepare for monotonous, long-term work with a hammer.
- If you make a knife without forging, then the “output” will be a tool with a “soft”, fragile blade. And this happens even if the master performs the metal hardening procedure according to all the rules.
- There is no need to choose an overly complex design or an elaborate blade shape. The simpler the idea, the faster the work will go.
- An alloy steel file is absolutely not suitable as a “starting material”. To grind such material, you will need expensive specific equipment.
Advantages and disadvantages
A homemade knife made from a file has its pros and cons. And if we talk about the advantages of such a tool, the following stand out in particular:
- durability of operation;
- metal thickness;
- the strength of the resulting blade;
- high hardness parameters - up to 60-62 HRC.
 Types of files
 The advantages of the process include the availability of the source material - you can still easily find Soviet-made files in which the metal meets the highest requirements.
There are few disadvantages to such a homemade knife:
- The manufacturing process is quite labor-intensive. It will be necessary to strictly observe the stages of production and adhere to precise parameters - for example, maintain a certain temperature during forging and hardening.
- The knife blade will not be flexible like regular kitchen knives. This means that the tool is unlikely to be used for cutting meat or bread.
- The metal on the knife will be susceptible to corrosion. The formation of rust can only be avoided by regular maintenance of the metal and proper storage of the tool.
If you carry out all the work in strict accordance with the recommended algorithm, then the “output” will be a strong, practical and durable tool, the scope of which will be almost unlimited.
What steel are files made from?
Modern files are made of soft, pliable metal - they are absolutely not suitable for making a knife, because its blade will be fragile and have a minimum service life.
Experts recommend using files from the times of the Soviet Union as the starting material - they were all manufactured strictly in accordance with GOST standards and are of high quality. Even if such a tool is not available, you can always purchase it “at a flea market”, second-hand.
 Files from the times of the Soviet Union
 The steel from which Soviet files were made contains a large amount of carbon. This makes it possible to harden the metal and, as a result of the work, obtain a blade that will dull very slowly/rarely.
How to make a knife from a file with your own hands
Before you start making a knife from a file with your own hands, you need to prepare the following tool:
- metal hacksaw with coarse/fine abrasive surface;
- standard iron vice (stationary);
- “active” file, which has a wide handle;
- Workbench;
- sandpaper with a fine abrasive surface and a small wooden block to fix it;
- wooden blanks for the handle.
The starting material is an old Soviet-made file. It is better to choose a donor whose teeth have already been ground down - this will make metal processing as easy as possible. Instead of wood, you can use a brass plate for the handle, but if the first option is preferred, then you additionally need to prepare epoxy glue and a special impregnation to preserve the quality characteristics of wooden products.
Watch the video on how to make a knife from a Soviet file:
There are two methods for making a knife from a file - without forging/heat treatment and with hardening and heating the metal at high temperatures. At home, it is better to use the first option, since in this case the process is easier and does not require the purchase of a specific expensive tool.
Dagger without forging, heat treatment
In general, it is possible to make a dagger without forging or heat treatment using several options, but experienced craftsmen suggest using the simplest method, which involves annealing the metal and grinding it.
Preparation
As a preparatory stage, we consider choosing a file and sanding it with sandpaper - literally a few movements to remove dirt, dust, and traces of corrosion.
Preparation also involves processing the metal on a professional sharpening machine or using a grinder and a thick grinding wheel. In the absence of such a tool, you will have to perform a number of actions using “improvised” means.
 Cleaning the file
 Metal processing
First, you should make a portable forge, which consists of a fire on the ground and a two-inch pipe through which air flows artificially. You can use a compressor as an air blower, but it is quite possible to get by with a regular pump or even an air mattress.
- Develop a model of a knife, for which you can use self-made or ready-made drawings. This takes into account the size of the “source material”. Next, the drawing is transferred to cardboard, the layout is cut out and “tried on” to the hand - it should fit perfectly in the palm and be the right size.
- Place a file, clamped in a vice, into the forge and blow air onto the fire until the donor metal turns distinctly red. It is important not to overheat the metal, and you can control this moment with an ordinary magnet - as soon as the red-hot steel stops attracting it to itself, the stage can be considered complete.
- As soon as the workpiece has cooled, but remains “soft” and pliable, you need to sharpen the metal with a hacksaw according to the pattern. It is recommended to use a tool with a high-grain surface for this and perform the work as close as possible to the dimensions of the layout - then during final grinding it will be possible to shorten the work process.
- The blade is clamped in a vice, then the edge is trimmed off. This step must be performed on both sides simultaneously and the stitching angle must be maintained at the same angle. This approach will ensure a durable blade that stays sharp for a long time. To solve the problem, you can use any metal guide (pipe with a cross section or a metal profile) or a wooden beam with rigid fixation.
- Sand the blade with sandpaper.
Watch the video on how to make a knife from a file using a forge:
Grinding without heat
If the craftsman has a grinder with a grinding disc of maximum thickness in his arsenal, then the file can be processed as follows:
- Transfer the drawing of the future knife from the cardboard pattern to the metal of the source material. To do this, it is convenient to use a construction marker, which is especially durable.
- Grind the file, but avoid overheating the metal so that the internal layers of the metal do not deform. To do this, it is recommended to periodically immerse the workpiece in a container of cold water.
- Sharpening should be carried out not only on the future blade, but also on the tail part of the future knife.
- Form the bevels of the blade after applying the preliminary markings - they must be absolutely symmetrical. This step can be carried out using ordinary sandpaper, but such a process will be long and labor-intensive.
The final stage is sanding the blade with sandpaper until the metal surface becomes shiny. It is advisable to do this after fixing the handle, which will reduce the likelihood of injury.
Making a wooden handle
The wooden handle can be made from a single piece or from two parts. In the first case, a hole is made in the workpiece for the tail part of the future knife, a part of the handle is inserted there and “poured” with epoxy glue, left to harden completely.
If the handle is made from two blanks/plates, then they are fastened together with glue and hidden bolts.
Finca
Making a Finnish knife is no different from the above algorithm, but the following features must be taken into account:
- blade length is 125 mm;
- blade width – 20 mm;
- the handle is made only from wood and by mounting;
- the length of the handle of the finca can vary between 100-125 mm;
- The finca is worn in a sheath, so they are made separately from genuine leather with a wooden insert.
 Finnish knife dimensions
 The descents on the knife-fin are carried out “to zero”, and ordinary sandpaper will not work for this; you will have to use an emery machine. The shape of the slopes must be strictly the same. At the final stage, the finnish must be polished with a soft felt cloth.
Tanto
In Japan, combat weapons have been popular for more than a century, mostly the sword. If you make a knife from a file with a blade similar to a Japanese sword, then you will have a very convenient tool on the farm, indispensable if you need to cut or plan something.
This knife is made in the usual way, but it may be difficult to sharpen it and make cuts. They can only be done correctly using a grinding machine.
And one more important point: you need to choose really high-quality steel, so only a Soviet-made file with well-ground teeth is suitable as a starting material.
 Tanto knife drawing
 Stylet
A knife intended for inflicting stabbing wounds is called a stiletto. The length of the blade itself should be 230 mm, the shape of the blade is triangular, the handle must be equipped with a guard - it prevents the knife from falling out of the palm.
At home, the manufacture of a stiletto knife must be carried out in accordance with the requirements of the law, because this knife belongs to the category, and if you carry it or use it without the appropriate permission/license, you may fall under the criminal or administrative code of offenses.
What you need to consider to avoid this situation:
- the blade should not be sharpened on three sides, but it can have three non-sharp edges to completely imitate an ancient weapon;
- it is worth doing without a guard or making it minimal, which will be regarded as a stylization element;
- the stiletto should always be in a sheath - it will have to be made at the same time as the instrument.
 Switch stiletto
 Pig splitter
Farms often need a pig splitter, a special tool used to slaughter pigs in villages. Such a knife must be made of high-quality steel, be durable and as sharp as possible - cutting pigs is not easy, everything needs to be done quickly. Features of making such a tool with your own hands:
- the metal must be well calcined;
- the blade is formed on one side only;
- the handle is made exclusively of wood;
- the handle of the pig splitter must be attached with rivets, no glue is used;
- the length of the knife blade should be 180-200 mm;
- blade thickness – 2 mm;
- the handle is 100 mm in length.
Kitchen
Kitchen knives from files are made according to the classic algorithm, but experts warn that such a tool will be inconvenient to use for cutting meat, bread, and soft vegetables. The fact is that the metal used is high quality, it will not bend, so it is very difficult to work with it. But using a homemade knife for chopping cabbage, cutting onions/carrots/beets and other “hard” vegetables in large quantities will be very convenient.
There are no nuances in making a kitchen knife; you can experiment with blade length and width, adapting to individual wishes.
Watch the video on how to make a kitchen knife from an old file:
Propelling
Files will keep throwing knives sharp for a long time, and this is an important quality for this type of tool. The difference between throwing knives lies in their shape and the absence of a handle - the blade and its tail are a single whole.
To obtain an excellent weapon, you need to properly harden the metal and it is advisable to use forging so that the metal is rigid, durable and light at the same time. Since there is always a risk of shifting the center of gravity, it is worth turning to specialists to make a throwing knife.
How to properly harden a knife
You need to harden knives in order to improve the quality characteristics of the metal, and you can do this at home as follows:
- a ready-made blade from a file is heated until red;
- immediately lower it into a container with mineral oil (working off);
- repeat the manipulation, increasing the time the metal is in mining.
Some craftsmen use the shock hardening method - keep the blade on fire and then in mineral oil for no more than 2 seconds, repeating the manipulation 10-15 times. If the process was performed correctly, then with such a knife it will be possible to leave pronounced scratches on the surface of the glass.
How to release a file at home
The file can be released at home using the following algorithm:
- Preheat a conventional oven to 200 degrees.
- Place a file - the source material - into it.
- Leave on heat for 60 minutes.
- Turn off the oven and let it cool along with the file.
This process is necessary to soften the metal, and if you need to make it as soft as possible, then the file is simply thrown into the fire for 60-90 minutes and then cooled in the open air.
Forging a knife from a file
If forging is used in the manufacture of a knife from a file, then the “output” will be the highest quality tool that does not require frequent sharpening. To perform this process, you will need a standard set of blacksmith tools - a forge, two hammers of 1.5 and 0.3-0.5 kg, an anvil, a metal brush and pliers. The algorithm for carrying out forging work is as follows:
- Burn the steel by heating the file in a kiln over an open fire. After 4-5 hours of being in it, the file should cool down naturally. To do this, the fire goes out on its own, and the metal cannot be touched for another day.
- The workpiece is placed in a furnace, the heating temperature is brought to 1000-1200 degrees. The metal should turn light yellow, almost white.
- After reaching the desired temperature, the workpiece is placed on the anvil with pliers and crimped. The entire surface is treated in a similar way in one heating session.
- The metal is heated again and a strip of the required length and thickness is formed on the anvil with hammers.
- Then the metal is heated again and the tail part of the knife is formed by squeezing and hammering.
- Leave the finished blade until it cools completely in the forge.
 Forged knives from a file
 The work is very difficult, and if blacksmithing is new, then it is worth practicing making ordinary horseshoes.
Descents on a file knife
The bevels on a file knife can be made with a grinding machine. The cutting quality of the finished product will directly depend on them - the thinner the bevels, the easier it will be to sharpen the finished knife, and the less often you will have to perform this manipulation. At the same time, you cannot make the blade too thin, because it will be fragile.
What needs to be done to form descents:
- use a marker to draw the future slope on the blade;
- designate two equal parts of the future knife with a vertical line;
- take a drill with a diameter equal to the thickness of the workpiece and draw a line along the marks with it;
- form slopes with a grinding tool, trying to do the work symmetrically on both sides.
If specific grinding tanks are not available, then the bevels can be made with a file, but it must be designed for working with metals. We must not forget about periodic cooling of the workpiece, because overheating may damage the metal structure and the knife will become fragile.
Rasp knife
A rasp is a file with large teeth, from which you can also make a knife, and the algorithm for doing the job is no different from the above:
- A drawing of the future knife is being made; you can take samples on the Internet as a basis or work as a designer yourself.
- Clean the rasp from rust, dirt and dust using a stiff metal brush.
- Using a grinding tool, remove any protruding teeth on the surface of the workpiece.
- Cut out the future knife with a hacksaw, maximally observing the dimensions of the blade and tail according to the patterns.
- Make bevels using a grinding tool or using a working metal file.
- The handle is made in a standard way - from wood, plastic, genuine leather and other materials.
 Rasp knife
 When processing a rasp with various grinding tools, the workpiece metal must not be allowed to overheat. To avoid this, it is recommended to regularly immerse the future knife in a container of cold water.
After completing all the steps, you will need to place the blade in a container with acetic acid for 20 minutes, then wipe the metal from the dirty coating and polish it with a soft rag.
Making a knife from a file is a simple process that does not require any specific knowledge or extensive experience. It is labor-intensive, but as a result, you will have a high-quality knife in your arsenal that remains sharp for a long time, does not break or bend.