Handmade money box. How to make a beautiful box for money for a wedding with your own hands: step-by-step master class Gift box for money
"When hearts beat excitedly"
Great idea to present monetary gift on your Wedding Day! How to give money for a wedding, but not just in an envelope, but in a beautiful, interesting, original way.
I offer you one of the options for a money box, very simple, but quite effective.
There is a small one on the lid postcard which is tied tape in a beautiful bow!
This MK will tell you how to make such a gift and decorate it beautifully. And may working on the gift bring you pleasure, and may the young people and guests admire it.
Materials:
· Paper blanks for drawing (Goznak) 12*12 cm and 14*14 cm.
· Blanks made of colored or white cardboard 11.2cm*28.5cm and 11.2cm*2cm;
· Blank for postcard 11cm*11cm
· Design paper blank 11cm*11cm
· PVA glue
· Glue “Moment-crystal”
· Foam-based double-sided tape
· Pearlescent design cardboard (majestic) or scrap paper
· Border hole punch or curly scissors (optional and available)
· Beads, braid, decorative flowers, satin ribbon, sequins, i.e. everything you want to decorate your box with
Tools:
· Breadboard knife (stationery knife)
· Ruler
· Mat for scrapbooking (or old newspapers, magazines)
· Pencil
· Creasing pen (or a ballpoint pen with writing on it)
Progress:
1. Lubricate the squares of drawing paper with PVA glue. Glue 12*12cm by 15*15cm, retreating 1cm from the edges
2. Cut the corners at an angle of 45 degrees, departing 2 mm from the corners of the smaller squares
3. Lubricate with glue and bend the edges. Place the resulting blanks - the lids of the boxes - under the press.
4. On a workpiece 11.2 cm * 28.5 cm, on the side 28.5 cm we apply a marking of 2.1 cm; 11.1cm; 2.1cm; 11.1cm; 2.1cm. Using these marks, we make creasing grooves (for convenience and neatness of the folds, we use a creasing tool or a covered ballpoint pen). We bend along the lines.
2,1 11,1 2,1 11,1 2,1
5. Apply glue to a small rectangle 11.2 cm * 2 cm and glue it into the indicated sector to give strength to the side wall of the box.
6. Glue the edges of the workpiece together.
7. Glue the lid blanks onto the resulting part of the box.
7. On each side of the workpiece 19*19cm we apply markings - 2cm; 2cm; 11cm; 2cm; 2cm
8. Making creasing grooves. We cut along the markings and cut off the excess.
9. Along the marked lines, bend and glue the box.
10. Using curly scissors or a hole punch from designer or other paper, cut out 2 squares of 11.5 cm * 11.5 cm. Glue with double-sided tape to the top and bottom lids of the box.
11. Cut out the base for the postcard 10cm * 20cm. We mark the middle with a crease and bend it.
| 10cm |
12. Measure out a ribbon of about 18 cm - 2 pieces. We process the edges over the flame. Using double-sided tape, attach the ribbon to the front of the card and to the back, then attach the card to the box.
13. Cut out a square from majestic cardboard with an embossed square, 0.3 cm smaller than the size of the postcard. Glue it to the postcard using double-sided foam tape.
14. Decorate with paper flowers, braid, semi-pearls, etc. We decorate the side walls and the inside of the box.
The text of the invitation can be written on a postcard, or you can print it out on office paper, carefully cut it out with curly scissors, and glue it to the base of the card.
You can make the inscription “Happy Wedding Day” on the box with a gold-colored gel pen or buy contour stickers with a ready-made inscription at a craft store.
To make leaves or twigs shine, you can cover them with acrylic varnish.
It is always very pleasant for all my friends and family, even for myself. So, as they say, if you do something nice for another person, it will somehow make you feel good and pleasant. It has long been no secret that, in order not to fool our heads for a long time, when we go to a birthday party, we most often give money. It’s not that a person is completely without imagination and can’t think of what to give, but sometimes it’s actually better to give money, because he will need it much more than some other little thing or trinket. And this way a person can collect the required amount and buy something really necessary that one person cannot give. But don’t forget a rather important thing: any gift should be given with a twist and taste. And for this you need to have good imagination and certain skills so that you can always make a beautiful box for money.
The master class will be useful for this and we will need to take:
Paper for watercolors, A2 format;
Mint-colored paper sheet size 30*30 cm;
The picture with the inscription is also mint color;
Box diagram;
Two inscriptions stamped “Happy Birthday”;
Curb hole punch;
Mint organza ribbon;
Metal flower pendant and plain metal brads;
Satin mint ribbon 25 mm wide;
Semi-pearl mint;
Ink green pad;
Rose mint latex;
Stamens and berries in sugar;
Green cut out leaves;
Mint lace and white ribbon with roses;
Double-sided tape, scissors, ruler, glue stick, simple pencil, heat gun, double-sided tape effect glue.

The first thing we start with is cutting out all the blanks from watercolor paper. In the diagram, the blanks are labeled cardboard. We cut out everyone one at a time, except for two 13*13 cm squares.


We take the longest workpiece and divide it into parts according to the diagram. We draw bending lines under the ruler.


Now we divide the 10.5*21 cm blank in half, fold it and we get the top blank, it will be decorated on top and this will be our postcard.


We divide the largest square according to the diagram, cut off the extra corners that are squared off in the diagram.


We fold the blank, this will be our drawer in the future. We glue the long piece at one edge.


This will be the outer part of our further box. We cut out the following shapes from scrap paper.


We glue one square to the bottom of the box with double-sided tape, and glue two squares onto simple watercolor squares. For greater solidity, we tint all the watercolor blanks along the edges.


We tint the picture. We make a lace strip under which we will put the money. We cut out two inscriptions, glue one onto the strip, and the second under the picture.


We sew everything glued on the machine. We glue our box at the corners.


We glue the square with the picture onto the postcard blank and sew it on the outside, then from the inside we sew it onto a 13*13 cm square. We cut out two strips of satin ribbon, glue it onto the large squares on top and bottom with tape.


We close the drawer.


We glue the sides of the box and insert a flower on the brads in front. This will be the handle with which the drawer will be pulled out.

It is best to give money for a wedding - a long-known fact. Gone are the days when newlyweds were given sets and crystal - now the spouses themselves decide what they need most. Some are planning a honeymoon, while others are planning to buy a car or apartment. And it’s easier for guests - they don’t need to run around the shops looking for the best gift. I put the money in the envelope, and that’s it, the problem is solved.
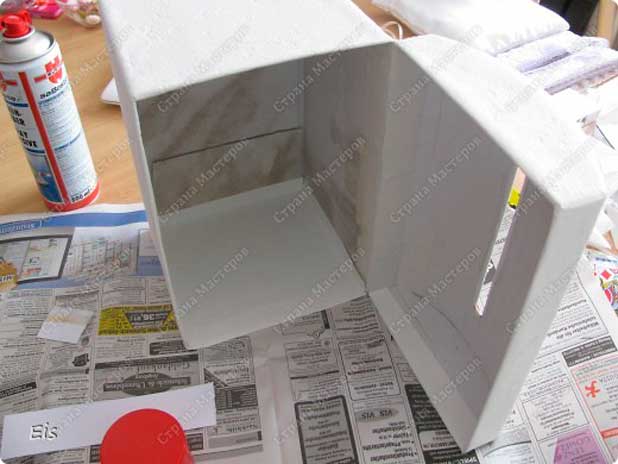
But recently there has been a fashion for handmade items. And this passion also extended to gift wrapping. They create boxes in the shape of a chest, cake, car, house, etc. Subsequently, you can store your family budget or documents in them. And creating a beautiful box with your own hands is not so difficult.
Magic Box
To create it you will need:
- thick paper - cardboard, Whatman paper, photographic paper;
- glue;
- scissors;
- ruler;
- pencil;
- scrap paper;
- a tool for creasing (creating lines for folding) - a non-writing pen, a crochet hook, a plastic card, the handle of a teaspoon are suitable for this purpose;
- decorative elements - lace, beads, beads, ribbons, artificial flowers, etc.
Step-by-step action plan:


Money box
You can make another version of the box. For it you will need:
- thick paper - cardboard, Whatman paper,
- glue,
- scissors,
- ruler, it can also serve as a scoring tool,
- narrow satin ribbon 30 cm long,
- openwork paper napkin,
- scrap paper (instead you can use any colored paper and even thin wallpaper),
- decorative elements - lace, string of pearls, small buds of artificial flowers.
Having prepared everything you need, let's get to work:


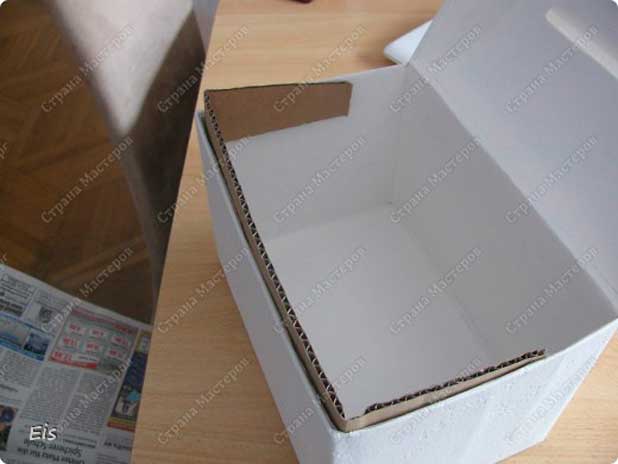
Money chest
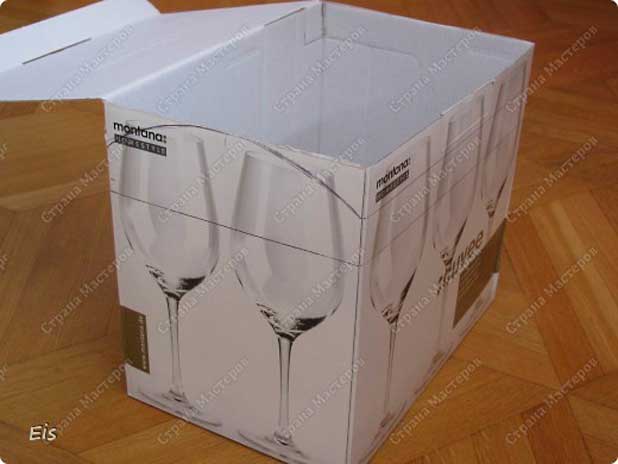
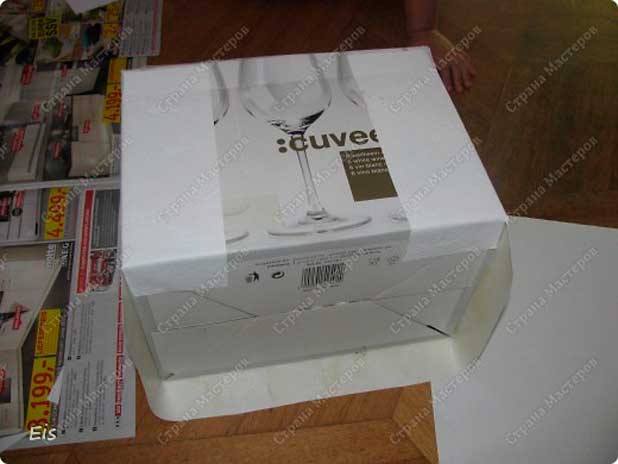
If you have the desire and time, you can create a wonderful wedding chest. For this you will need:
- cardboard box,
- glue,
- scissors,
- paper knife,
- scotch,
- creasing tool - it can be scissor rings, an ice cream stick, a plastic card, etc.
- paper or beautiful material for decoration (you can take beautiful wallpaper),
- decoration elements - lace, beads, etc.
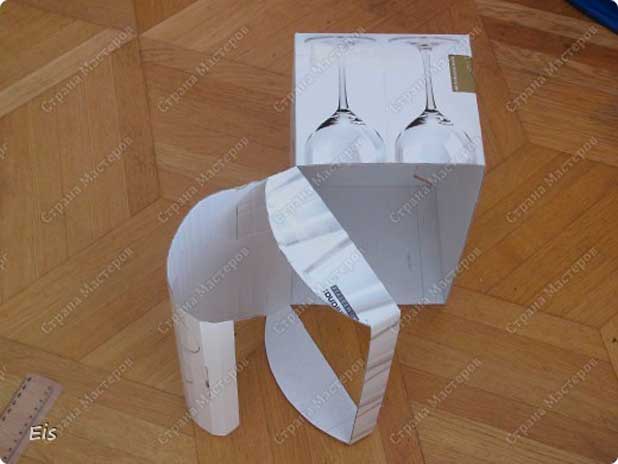
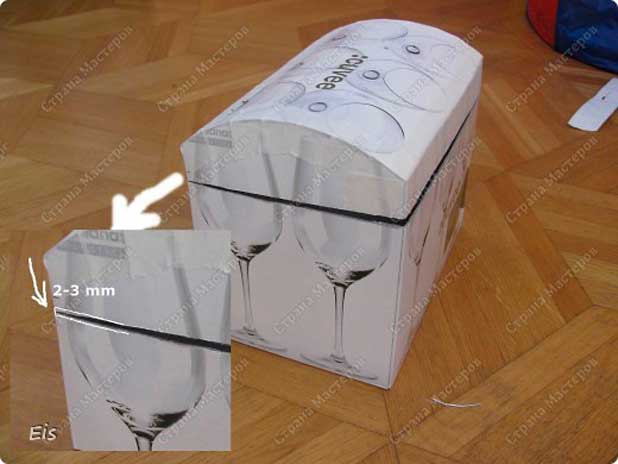
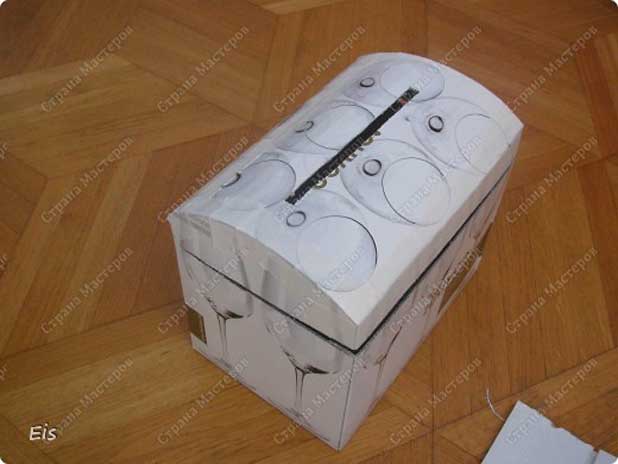
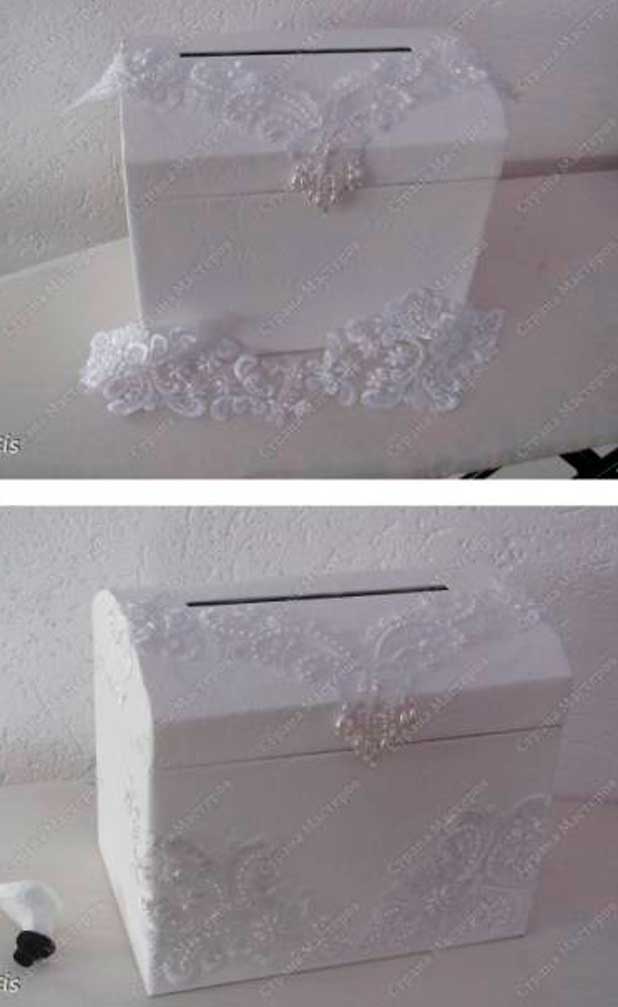
- An outline is drawn on the sides of the empty box, outlining the lid of the chest.
- Two lines are drawn on the front side of the box: one connects the lower points of the arcs on the sides, the second indicates the height of the lid of the product.
- By cutting off unnecessary elements, a lid format is created.
- There are strips running along the inside of the lid at a distance of approximately 1.5 cm from each other. This is necessary to create a beautiful bend.

- Using a sharp knife, cut off part of the box along the bottom drawn line on three sides - the back side remains intact.
- The lid can be trimmed a little - there should be a 2-3 mm gap between it and the bottom of the chest.
- The lid parts are secured together with tape. A stapler can be used for this purpose.
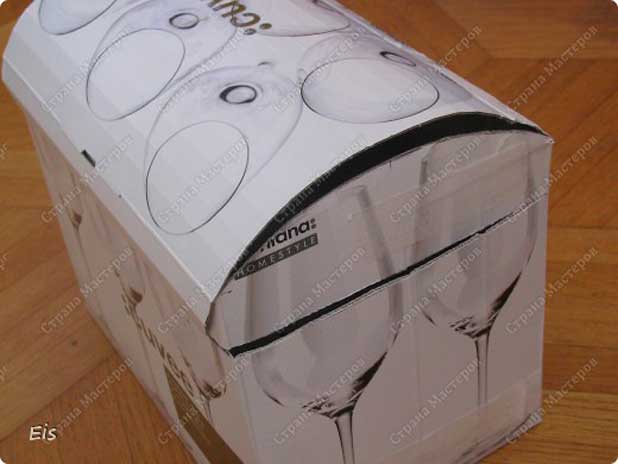
- The excess part of the lid is removed with scissors or a sharp knife.
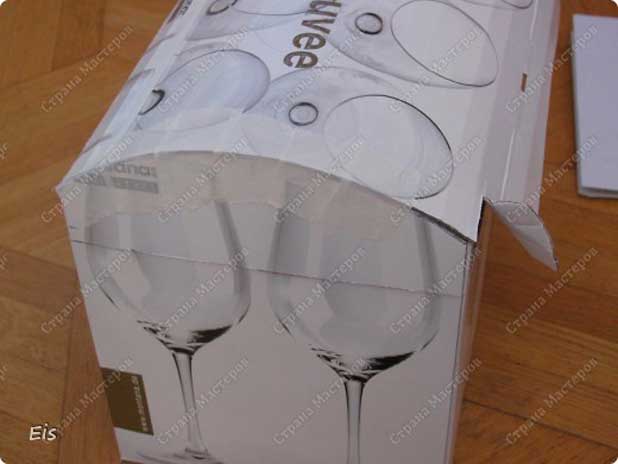

- On the inside of the upper part, draw the outline of a slot for envelopes with money, which is then carefully cut out with a knife or scissors. To make sure the gift gets into the storage, you should purchase a standard envelope and try to see if it will fit into the slot.
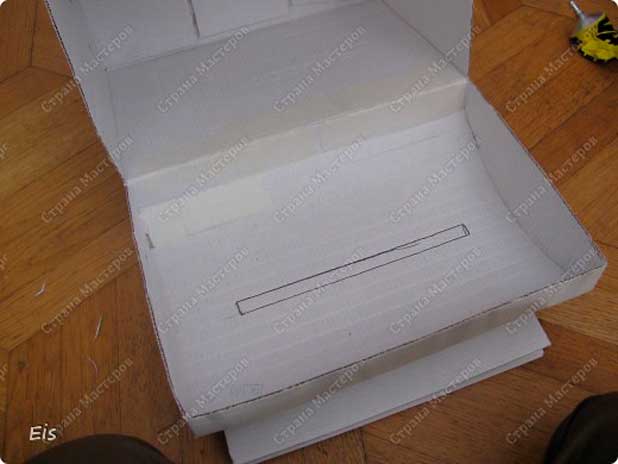
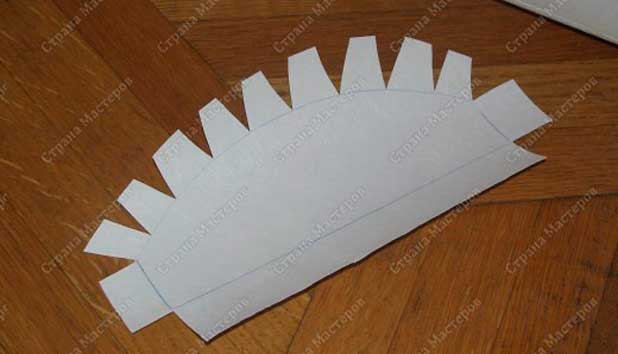
- Now you can start covering the chest. First, you need to cut out one large piece that will cover the front wall and two sidewalls. Don't forget to add allowances - about 5 cm on each side. The height will be equal to the height of the wall plus the same 5-6 cm for the gates.

- After applying glue to the cut out rectangle, paste over the front part and two side parts, after which the remainder is folded onto the back.
- Cut the corners, tuck and smooth to remove air bubbles.
- Cut out special blanks for the sides of the lid and glue them.
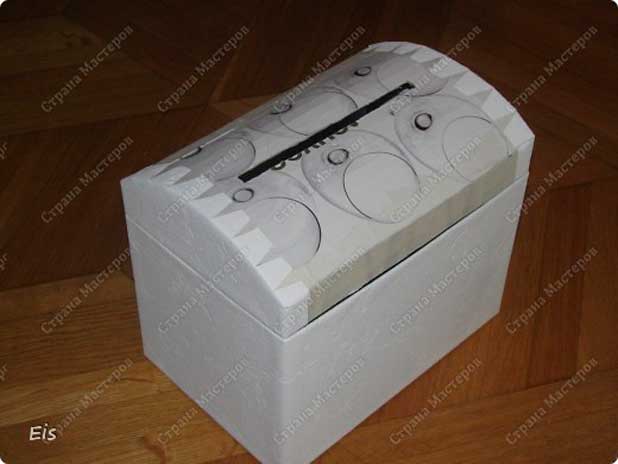
- Having taken measurements of the bottom, lid and back wall, cut out parts of the appropriate sizes and then glue them on.
- A slot is made in the pasted lid by bending the ends of the paper into the prepared slot for money.


- If the lid of the box turns out to be too heavy and constantly tries to lean back when opening, then you can glue a piece of tape from the inside to one of the sides. You need to measure it in such a way that it prevents the lid from falling.

- The next step is to glue the inside of the chest. This can be done either with the same decorative paper or with beautiful material. True, the last option will have to spend a fair amount of time.
- Take a strip of corrugated cardboard with the following dimensions: its width is 5 cm, and the length is the length of the front wall plus 2 times 2/3 of the length of the sidewall. This element is covered with the same paper as the entire craft.


- Having coated it with glue to the middle, glue the strip inside the chest.

- Use small scissors to carefully cut a hole for the envelopes.
- And now you can give room to your imagination - anyone can decorate the chest with whatever they can and want.

We all want to please our family and friends by giving them wonderful holiday gift. These could be balloons, decorations, or something that our loved one has dreamed of for so long. However, sometimes we don’t have enough time to buy a gift or we simply don’t know what to give. In such cases, we present the birthday person with money.
Classic version for packing money it is an envelope. It can be made with your own hands or bought in a store. This option is simple and well-known to everyone; they are unlikely to surprise the recipient. How can you replace the envelope and present it? money in original packaging?
Box with a surprise - this is a modern interpretation of an envelope for money. To create a box with a surprise you will not need much time and effort, and the result will certainly surprise and delight the recipient of the gift. Even a novice master can handle such a money box.
A clamshell box that fans out pages with banknotes or photographs can be made, for example, for your mother’s birthday. Or it could be a beautiful wedding box for money. Anyone who appreciates handmade items will be delighted with the original design of the money storage box. How to make a cute money box with your own hands - see our MK.
Scrapbooking technique continues to win hearts craftswomen all over the world. To make a scrapbooking surprise box with your own hands, you will need:

Gallery: box with a surprise for money (25 photos)


- If you don't have patterned paper at home, you can use old wallpaper or any pieces of kraft paper for scrapbooking. You can also use photocopier colored paper or old postcards. The main condition is the compatibility of materials. Master classes on color combinations can be found on the Internet.
- Choose a color scheme and use colors that go together. If you decide to make a box in pastel colors, use only muted and delicate shades. In this case, it is better to avoid bright colors.
- Do not forget to trim the edges of the paper with curly scissors to make the craft as individual as possible. . Your imagination is capable work wonders, so don't be afraid to experiment!
- Use shape punches to create holes in tags or create patterns along the edges of cardstock.
- Do not apply acrylic paint with a brush - too thick a layer can ruin the paper or cardboard. It is better to use a foam sponge, which will not leave dirty prints and distribute the paint evenly over the surface. You can take advantage of a step-by-step master class on using watercolors in scrapbooking.
- Before you begin, cover the surface with old newspaper to avoid staining your work area.
- Don't forget to be in a good mood! The recipient will be much more pleased to receive a gift made from the bottom of his heart.
Box with a surprise, master class
By following the step-by-step master class, you can make an extraordinary box with your own hands using the scrapbooking technique, which is sure to attract attention. The master class contains 13 steps, after completing which you will receive a beautiful box.

Designs for creating a surprise box
- Butterflies and flowers.
 Using the quilling technique or parchment paper, you can create a whole flower meadow with butterflies fluttering above it. This composition will certainly decorate gift wrapping. Money can be hidden in the wings of a butterfly, twisting them into a thin tube.
2. Hearts.
To your loved one you can present a beautiful packaging containing wishes, declarations of love and small gifts. To do this, just cut thin strips from a plastic bottle, attach hearts cut out of red colored paper to them, and place the heart bouquet on the bottom of the box. On four walls you can place shiny red postcard letters: L, O, V, E. By removing the cover, the recipient will discover a pleasant surprise that you hid inside the gift wrapping.
3. Pigeons.
Box with pigeons perfect for a wedding. It can be presented to newlyweds by hiding money in the package. You can write wishes in the box, add decorations made of polymer clay (master classes on making objects from this material can be found on the Internet) or glue a three-dimensional postcard. The design is limited only by the imagination of the master.
If you make crafts professionally, you can give them to your loved ones or relatives for the holidays. Now I will show you how to make a box for storing money and a detailed diagram. We have already created, but this one will be more universal. The master class is long and you will spend a lot of work, a lot of material, as well as time. This craft is for people who have at least an average level of skills. You definitely need to do everything step by step as I will tell you and not skip anything. In the future, when you learn, you can add something of your own.
In this box you can store small items, money, jewelry, photographs and so on. I advise you to buy only high-quality material, since the gift should look very rich.
We will present all the materials that we will need during the making of the craft. The most important thing is cardboard, paper, scissors and glue. The thickness of the cardboard is 1.73 millimeters.
How to make a money storage box:
Here is a diagram to get started; such parts need to be cut out of cardboard. First we make the markings.

Then we cut out these parts from cardboard.

First you need to glue all the existing pieces of cardboard together. Apply glue to the edges and assemble the boxes.

First, glue the elongated walls. I used PVA glue.

The short walls should fit clearly; if they don’t fit, then we sharpen them a little. And apply glue to three edges.

Now we need to cut out these parts from plain paper or craft paper. Using them we will glue each edge and it will be denser.

Using a brush, apply glue to the strips.

Now we glue the joints from the inside of the frame we made.

Now you can slightly straighten the joints of the cardboard, take a large woman’s nail file and use it.

Now we coat the outside with glue to cover the boxes with a leather substitute.

To do this, prepare a strip of substitute leather measuring 610x75 millimeters. You need to glue it so that there is a small but equal distance left and right.

When we pass a corner, the fabric needs to be slightly stretched.


This is how we finish, there must be an extra piece left.

We cut off the extra piece so that both joints lie beautifully at the top, but it doesn’t matter at all at the bottom.

Now let's work on the corners, they need to be trimmed. To do this, turn the boxes over.

Coat the protrusions with glue and bend them.

We bend each one separately.

Now the bent parts need to be pressed a little to make the gluing better.

This is the bottom we have, it’s ready.

Turn the box over and cut off the corners at the top. There you need to cut just a little bit.

We bend the protrusions again one at a time, having previously lubricated them with PVA glue.

The corner joints should also lie close to each other.

The joint in the middle also fits neatly.

And again we cut out the following details from cardboard as shown below.

Now we cut off a piece of leatherette that measures 375x200 millimeters. Gently spread glue over the entire surface with a brush and place cardboard there. Be sure to follow the order in which you cut it.

Now we trim the unnecessary corners like this so that when folded they also fit butt to butt.

Then apply a thin layer of glue to the edges of the leather substitute.

And we bend the edges, gluing them to the cardboard.

Be sure to go around the entire perimeter and seal the gluing.

These are the kind of depressions that must be there.

Again, I repeat, pay more attention to the corner joints.

They must be careful.

The lid for the box is ready, let it sit and dry.

Now you need to build magnets into the box. From the inside we cut out a place for them, just remove a small layer of cardboard.

We do this on both sides, the magnets will not be visible from the front side.

Let's drop some superglue for magnets.

We insert the magnets and wait a couple of minutes for the glue to dry.

Now we place opposite magnets on the outside, this is easy to do.
This is done in order to measure where the opposite magnets will be located on the side of the lid.

Use a marker to draw magnets.

We put the lid on the box and finally close it, the marker will be imprinted on the lid and you will see where these magnets need to be attached.

Don't forget to set the polarity of the magnets correctly so that they are pulled together and not repelled. On the lid we also remove one layer of cardboard and glue the magnets there.


Here are the parts that are used to cover the walls.

But this scheme is for saving paper correctly. From a sheet of 30x30 centimeters, you can cut out all the details economically.

Now we take each one to make paper for the insides.

We try it on and then glue it on.

Carefully coat each piece with glue.

If you will store photographs in a box, you can stick tape on the side, with its help this can be done without any problems.

But on the lid you should definitely glue a small loop from the same. It will be easier for you to open the box to store your personal items.

Next we glue the beautiful bottom into the box.

The lid can be stamped for decoration.

Now we put beautiful paper on the lid with which we paste over the insides. Marks joints and corners.

This is what the paper will look like.

Then we apply glue and connect the two parts, paper and lid.

This is what we should get.

At the end, we pour glue onto the bottom of the box and onto the lid and connect these two parts. There must be a small indentation.

Then we apply glue to the back side wall and glue these parts just as well.

So the box for storing money and other personal items is ready. At the top you can decorate it in the form of rhinestones or beautiful stones.

This is what the box looks like when opened.

Be sure to try to create this craft or others, for example, or.