Stencils for decoration how to use. Stencils for the walls do it yourself (50 photos): the subtleties and secrets of technology
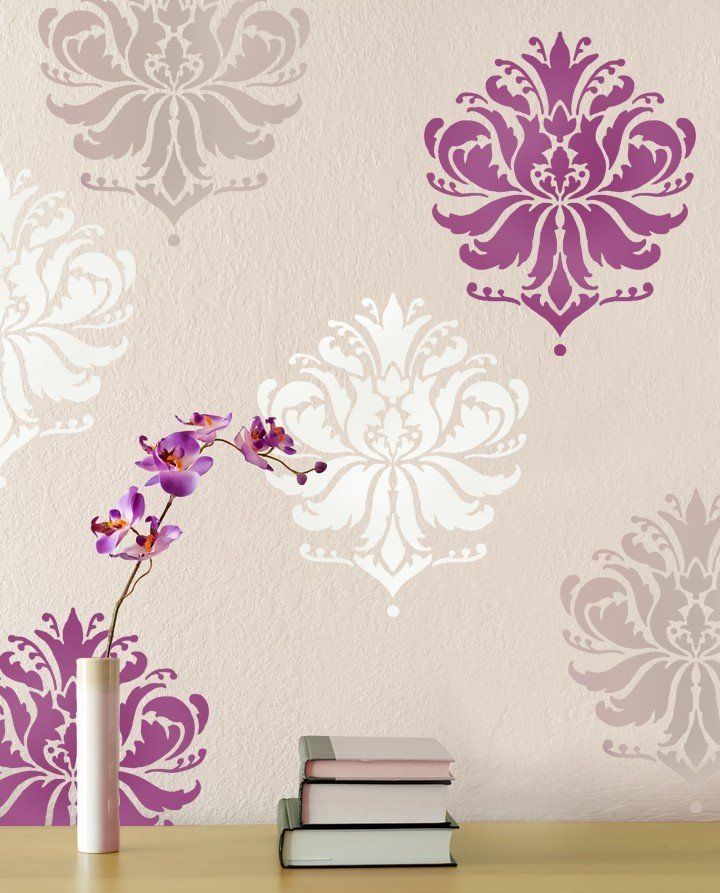
Using stencils to decorate a home is a great alternative to traditional traditional methods. wall decoration. If the idea of covering with wallpaper, paint or plaster does not inspire you, stencil patterns are exactly what you need.
This design option has a number of positive features, and the first of them is the opportunity to get an inimitable interior, which will not have analogues. After all, painting has always been considered a unique way to design walls.
Stencil drawings can decorate on walls only, which makes this type of decoration truly universal. The pattern can also be applied to furniture, doors or the ceiling. And let it not frighten those who do not feel in themselves the vocation to become an artist: in order to cover the surface with a stencil, no special artistic skills will be required!
Where to start: preparation of materials
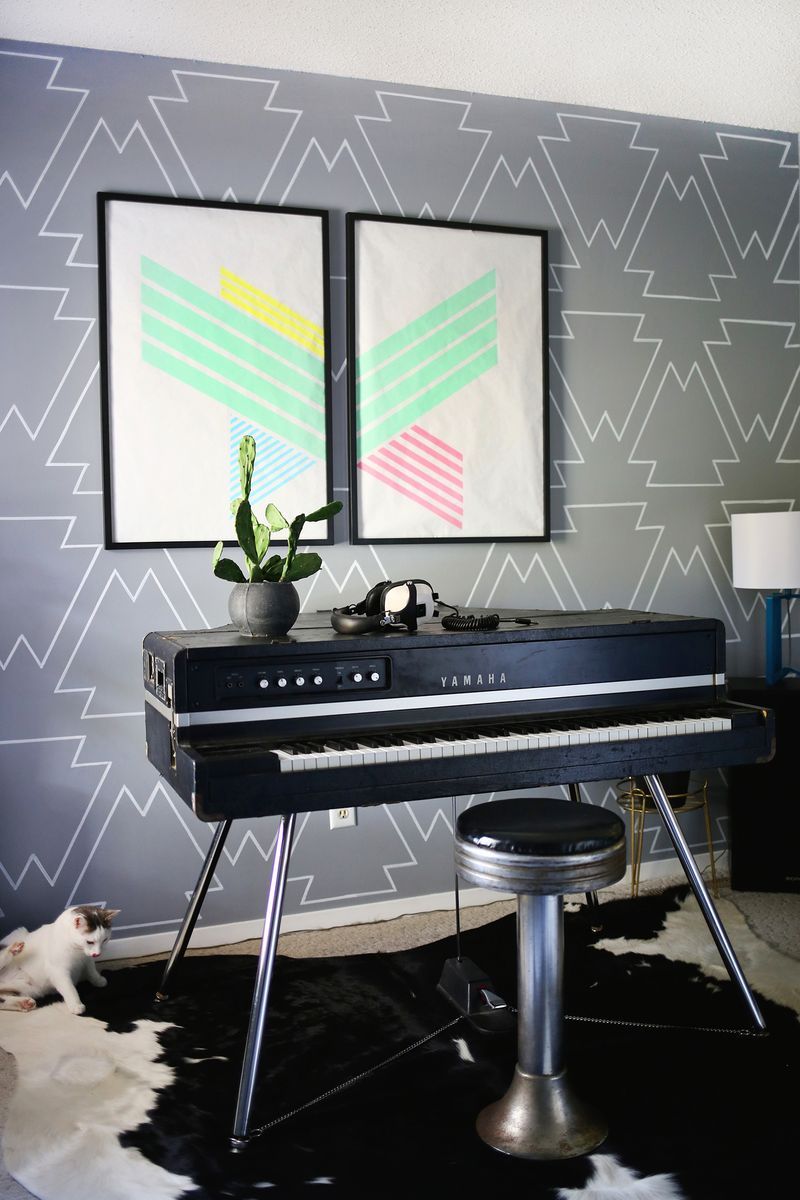
Decide on a picture that will act as a basis. The pattern should be selected on the basis of the overall style of the room. So, abstract or geometric images will look much better in a hi-tech living room than in a la rococo room.
If you are going to use a ready-made stencil, which you can buy in most hardware stores, your will. But much more interesting and unique will be the drawing, the stencil for which you created it yourself! Those of you who draw well can develop it personally. If you are familiar with the art of drawing only by hearsay, it is better to trust the patterns found on the Internet and printed on the printer.
Tip! Patterns for stencils can be any, but it is better to avoid drawings with too small details: it is likely that the paint will flow out of the border of an overly small element. In addition, it is possible that from a distance small details of the picture will look illegible and sloppy.
When the drawing is ready, you will need to decide on the stencil material. Most often use thick cardboard or plastic. These materials are dense enough to avoid accidental breaks of thin partitions between the details of the pattern. In addition, they do not get wet from the paint, do not get wet and do not wrap. You can also use paper, but in this case it is recommended to laminate the finished stencil - this will help protect the paint from being absorbed and allow it to be used more than once.
Selection of drawing technique
- Monophonic stencil. For drawing drawing only one color of paint is used.
- Multicolor (combined) stencil. It will require several colors of different colors, patience, time and a certain skill. Beginners should not start learning from it.
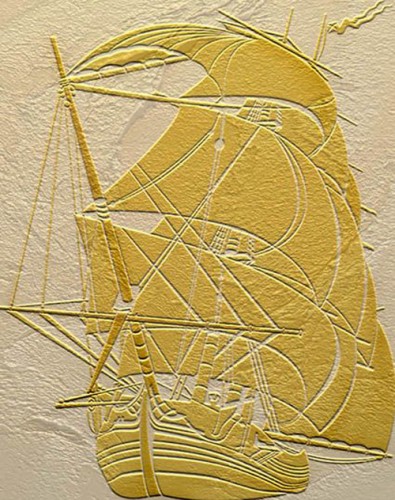
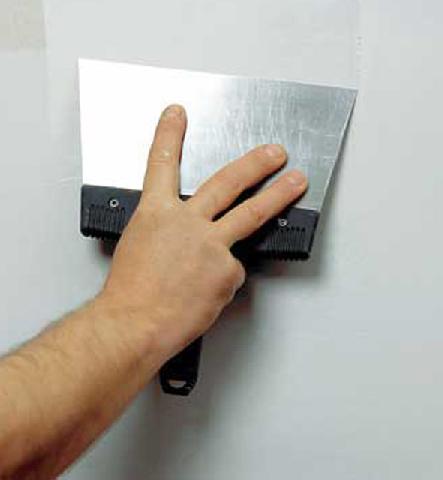
- Volume. The stencil is made with a putty, which is applied with a spatula. As a result, the drawing acquires a pleasant velvety. Typically, the thickness of the pattern is from 1 to 3 mm - this is quite enough to get a 3D effect.
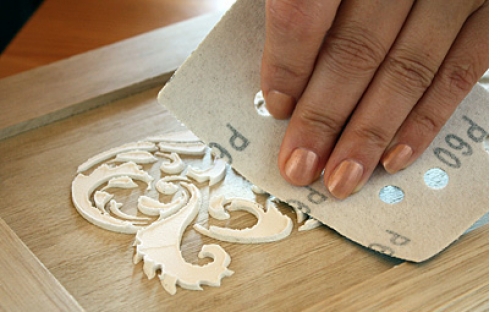
Tip! If when applying the putty did not lay down evenly enough, and inaccurate edges were formed, do not worry: all defects can be corrected with the help of a skin.
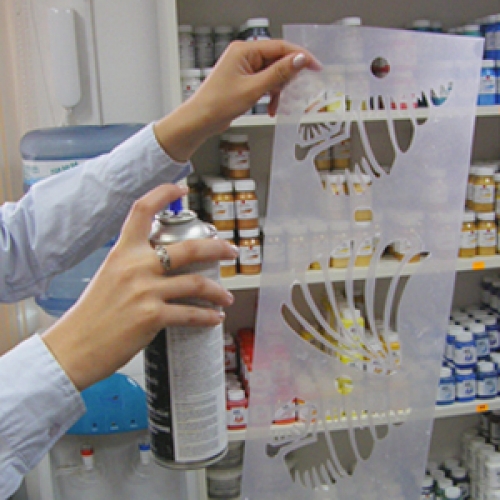
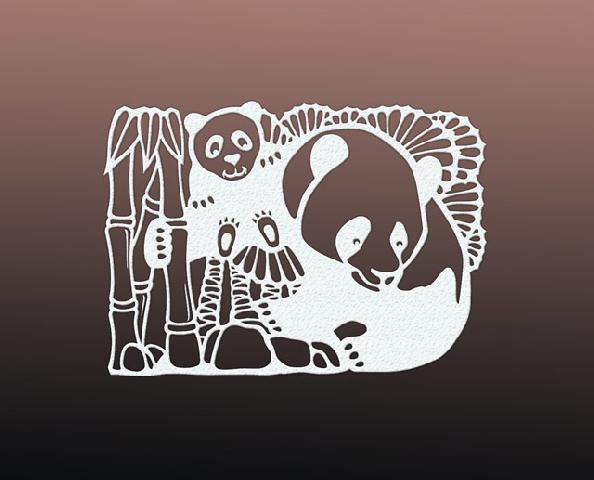
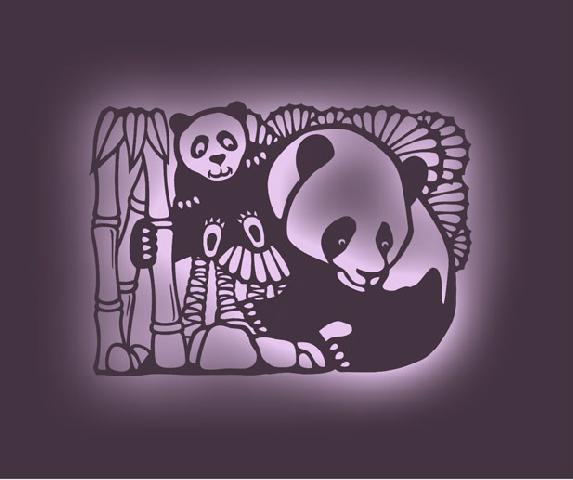
- Anti-stencil Unlike other types of stencils, during the creation of which the paint is applied inside the pattern, the anti-stencil requires that a small area be painted over and beyond its borders. This helps to achieve a glow effect. In this case, paint is usually used in a can. Please note: to create an anti-stencil, that part of the design that is usually ejected is used - it is called a cut. It is glued to the surface and spray paint is applied over it.


How to choose a place for the stencil?
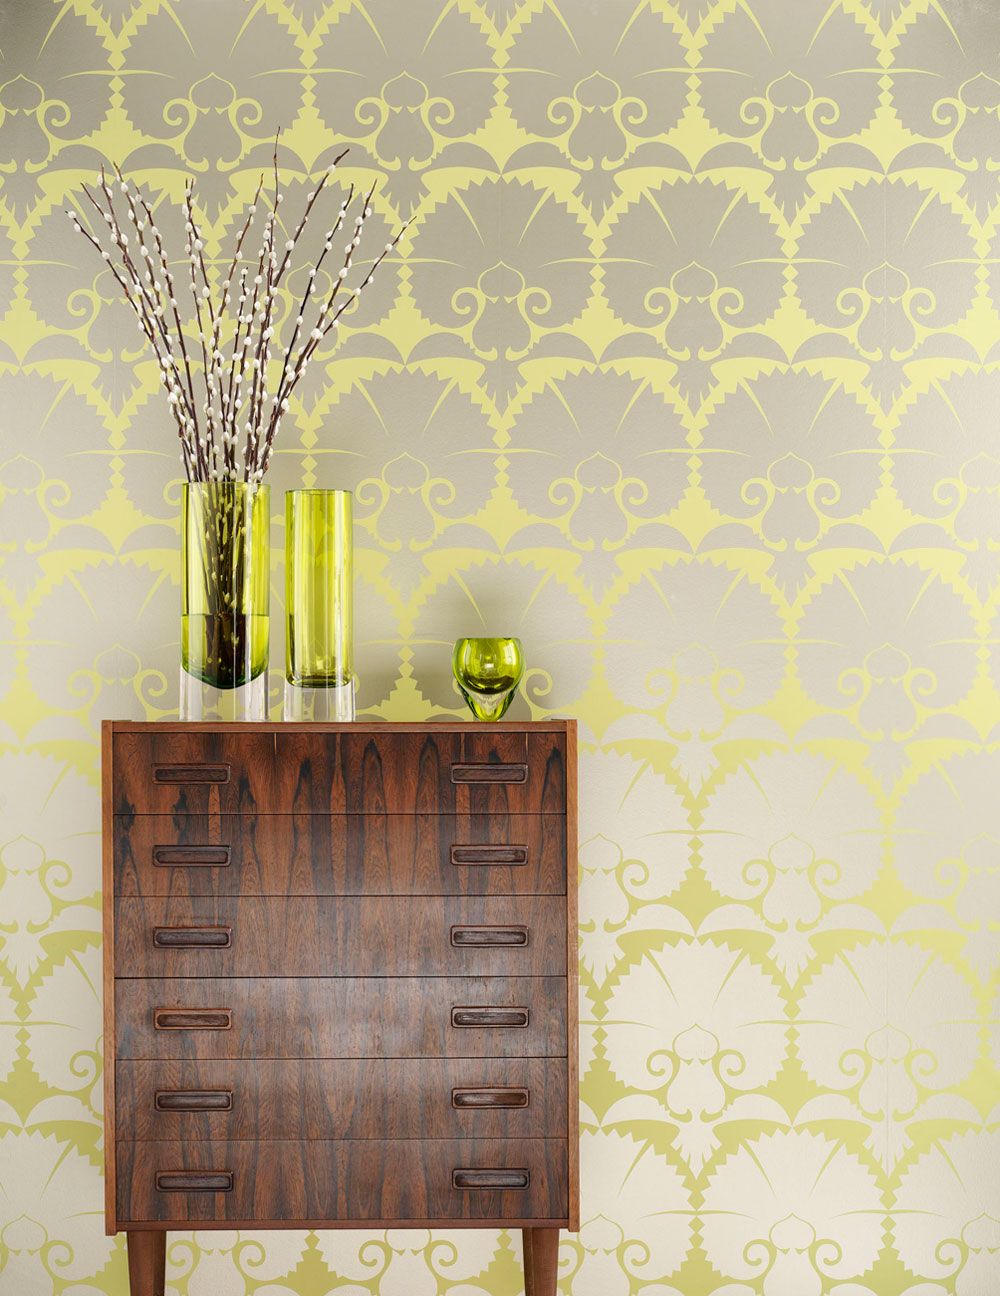
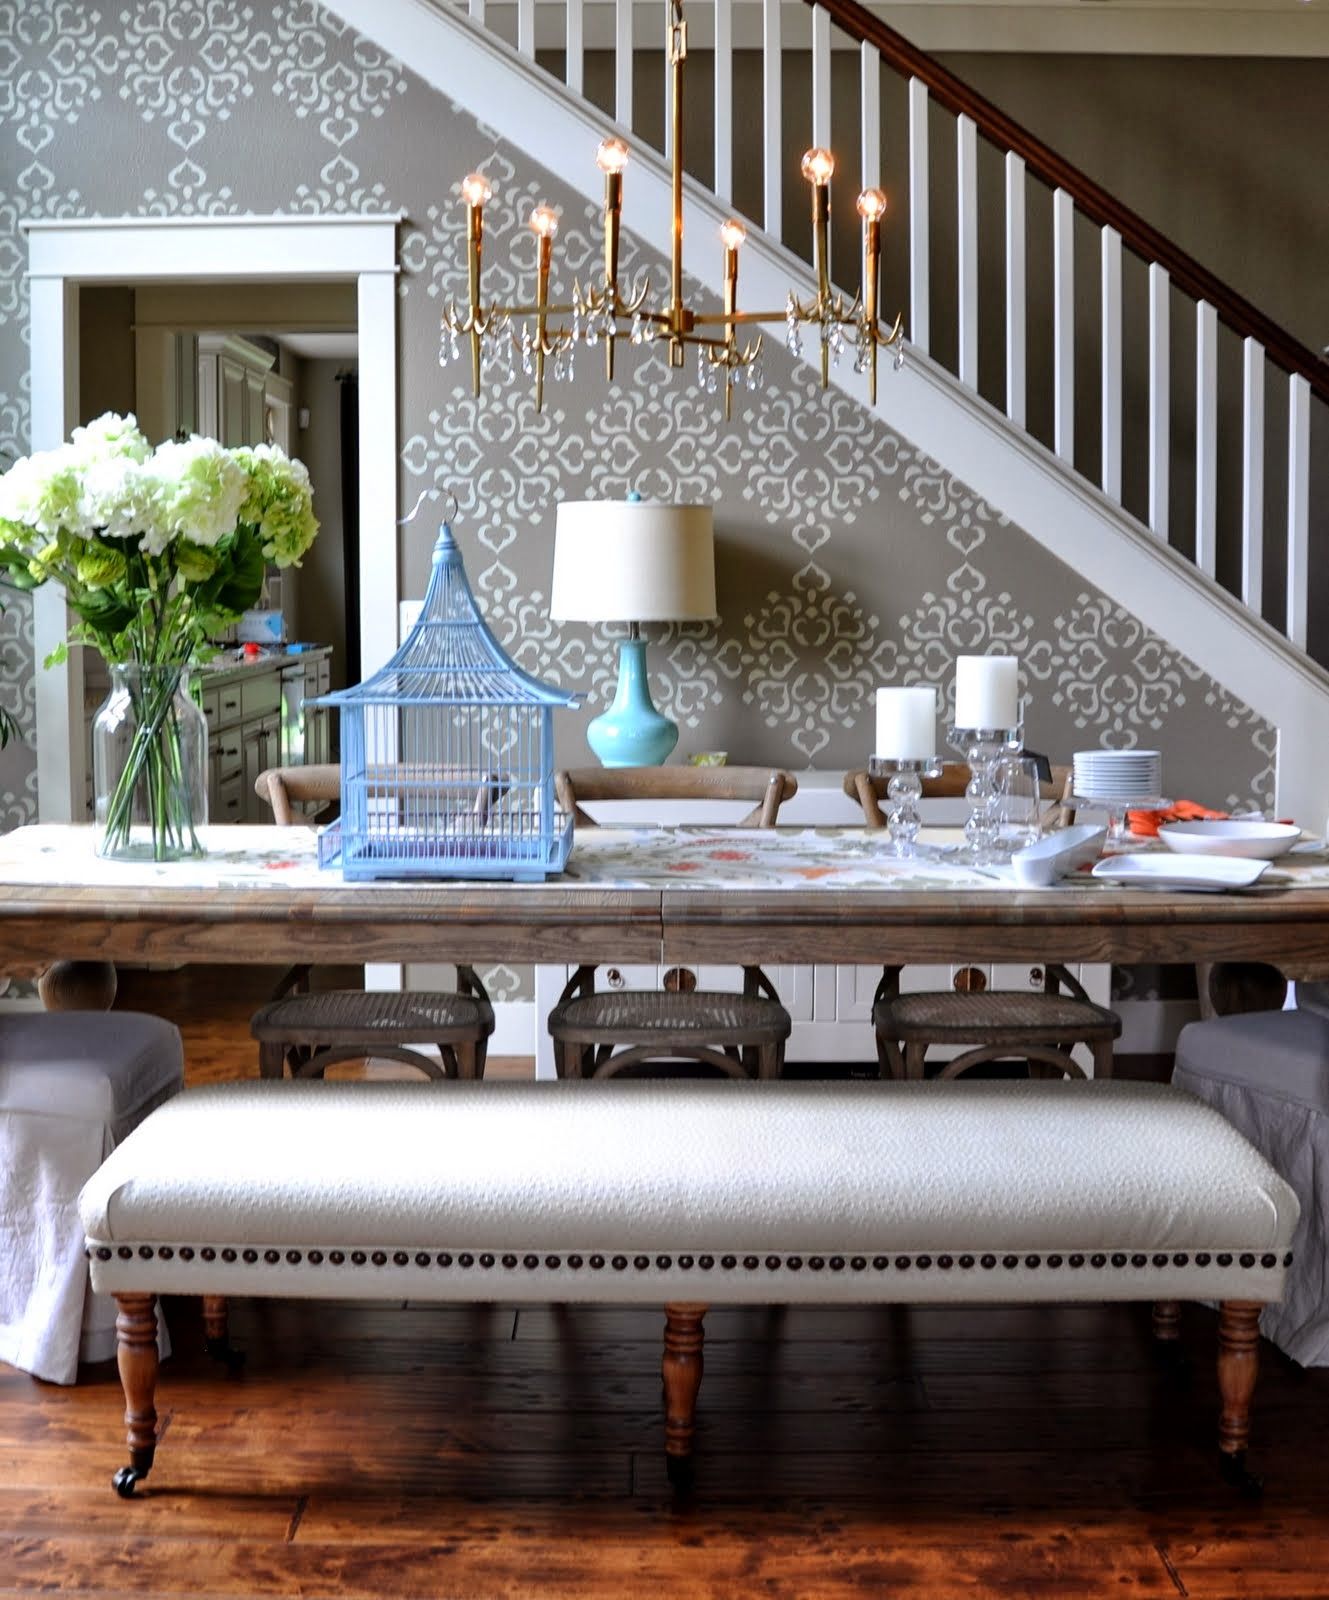
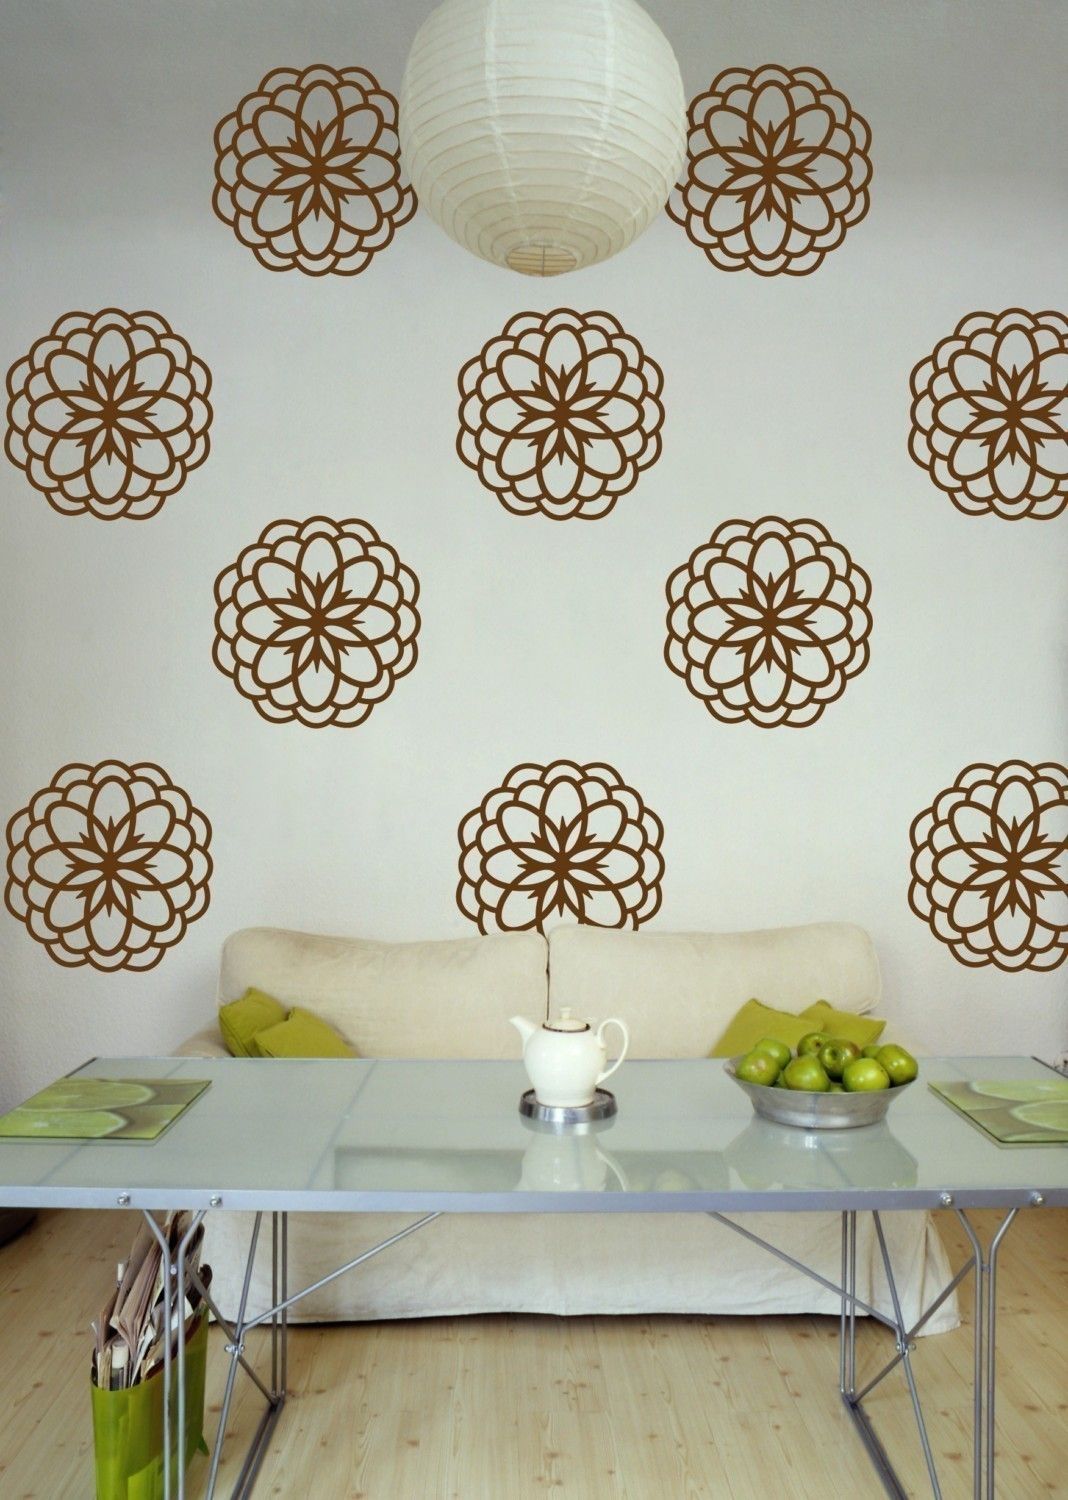
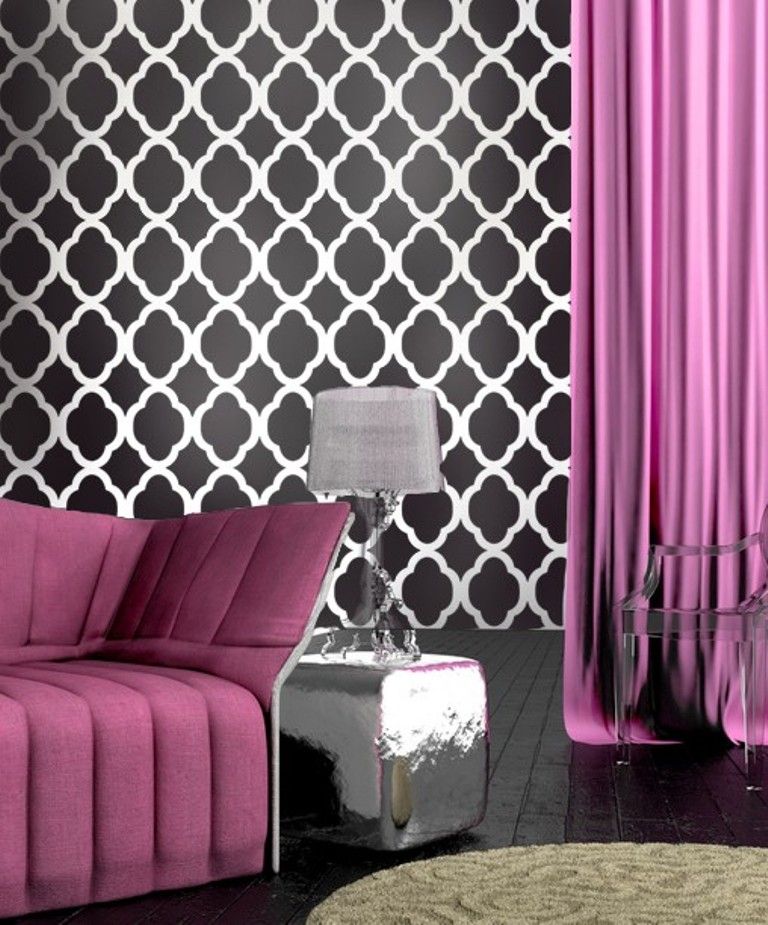
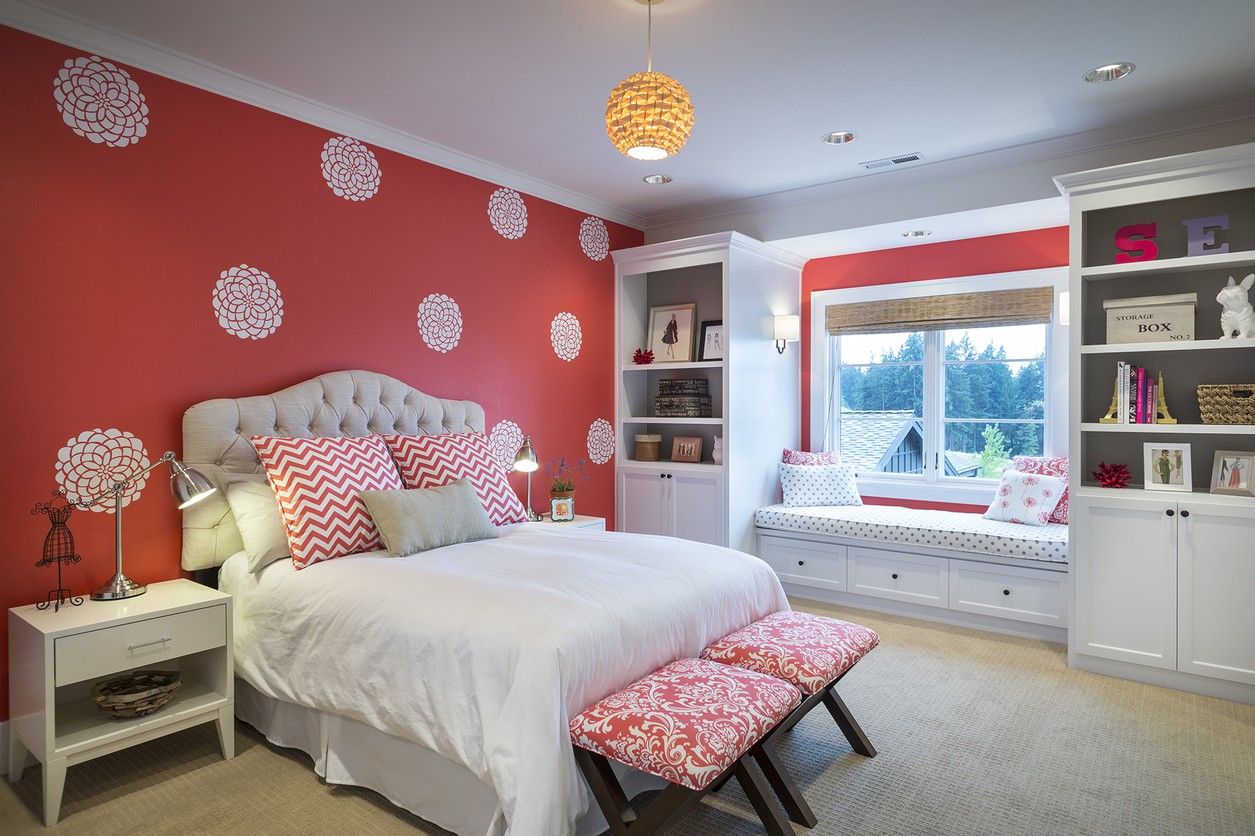
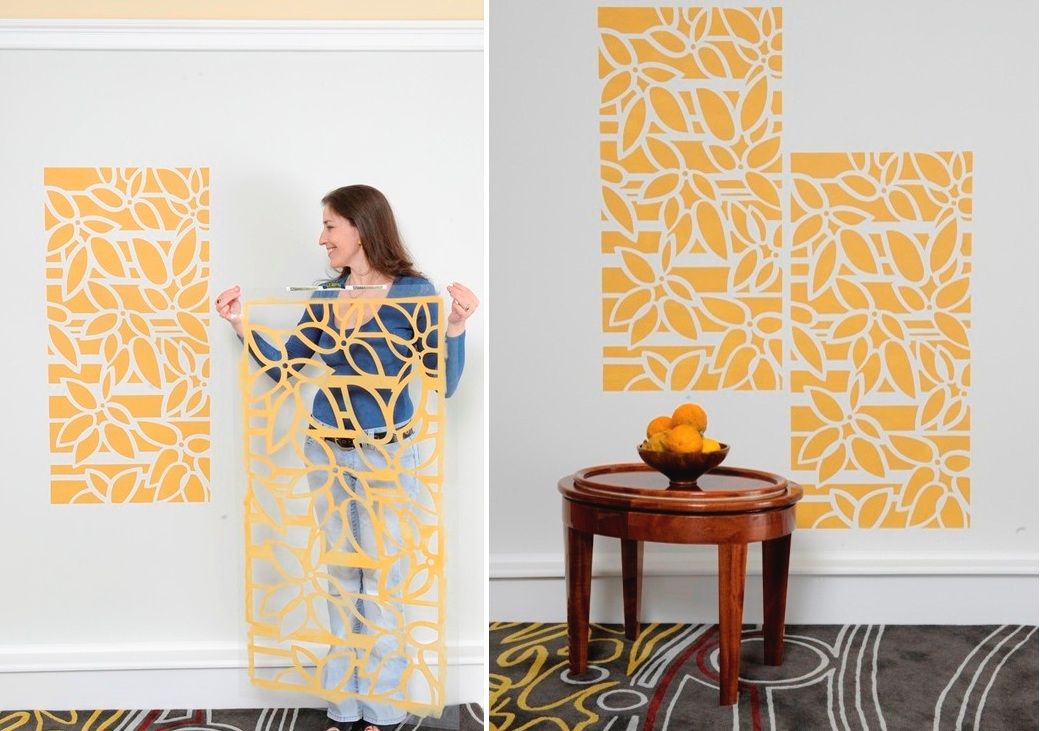
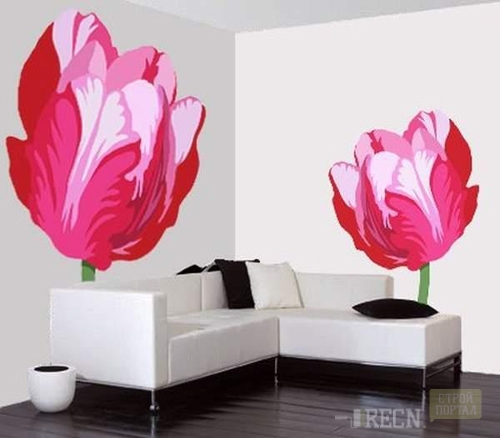
There are no universal tips on this issue, but the best stencil patterns look on large planes. Therefore, if in your room there is a spacious wall that is not used for furniture or decorative elements, you can start with it. The stencil in such a case should be large enough so that the drawing does not look lonely on the wall.
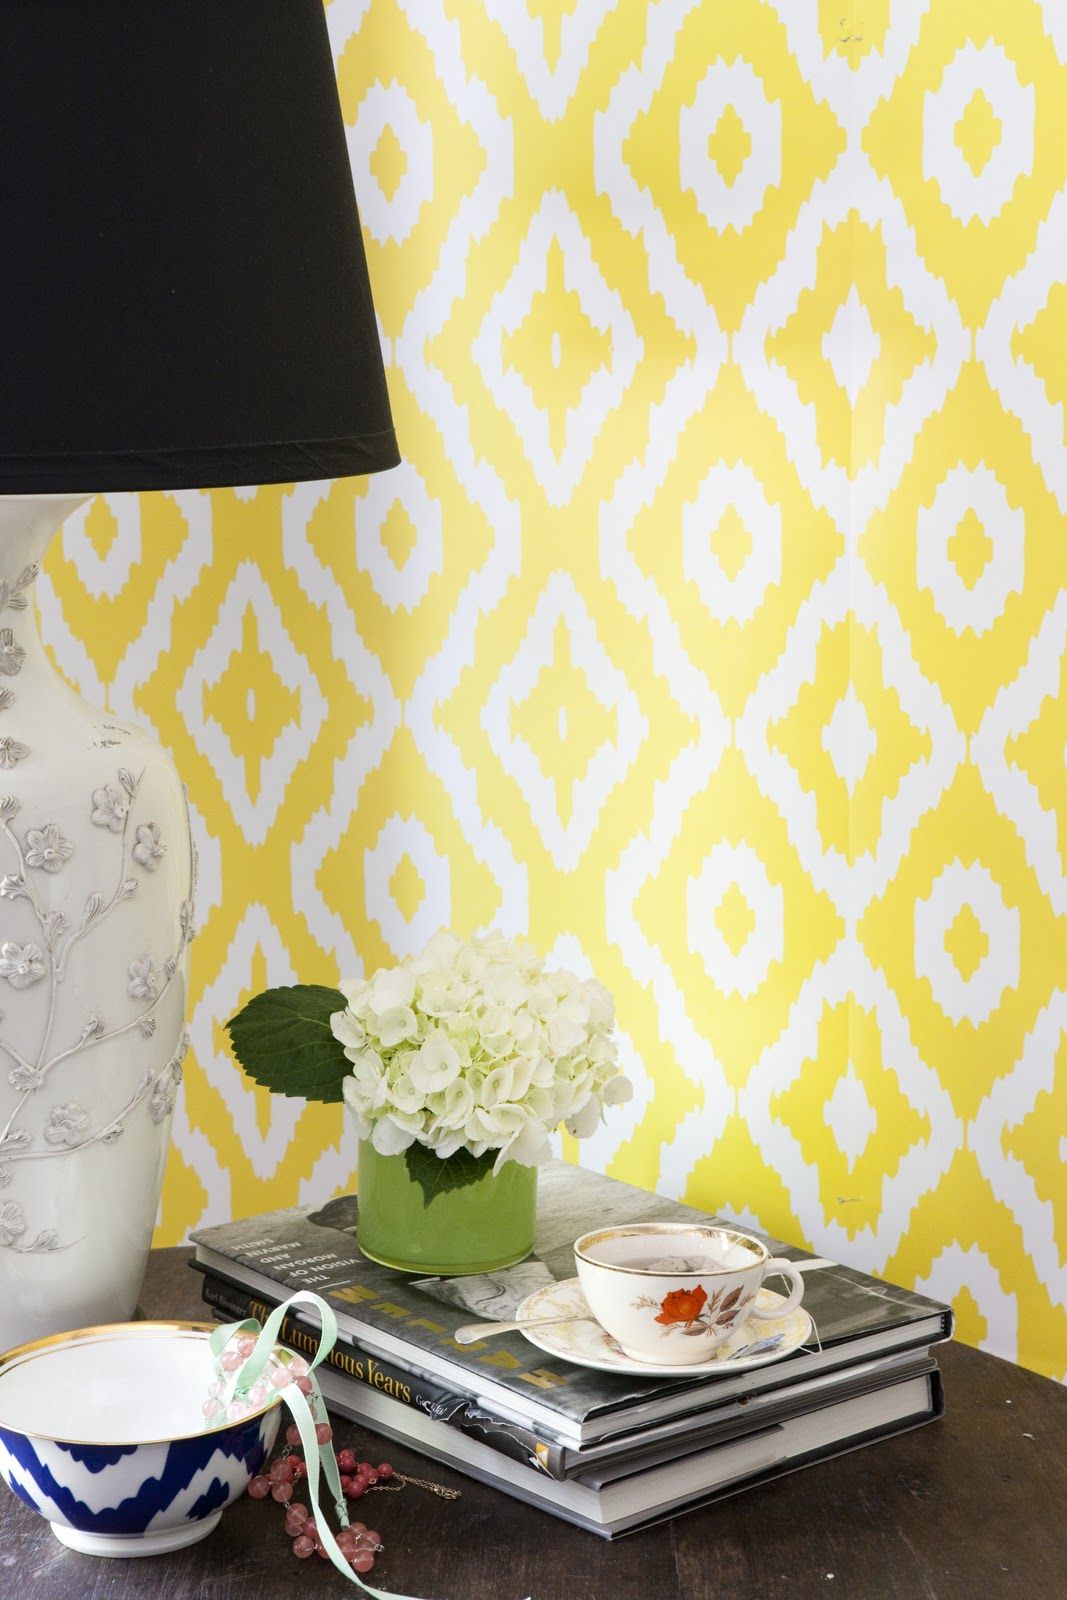
You can also beat with a stencil decor switches, sockets, shelves, bedside tables. As for the latter, the wall above them can be interestingly beaten, inflicting on it an image of those items that could stand on this furniture.
Making a stencil yourself
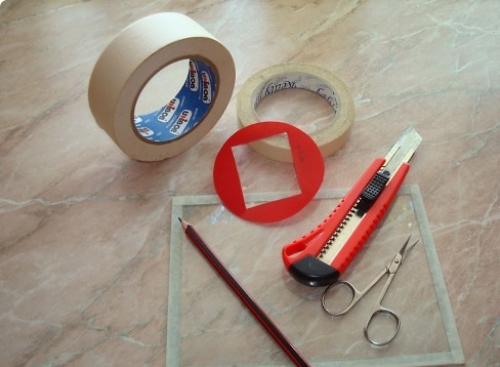
To create any type of stencil, you need the following:
- picture;
- material of the future stencil (plastic, cardboard);
- copy paper;
- a simple pencil or marker;
- stationery knife;
- scotch tape (ordinary or paint);
- a piece of wallpaper or drawing paper for training;
- durable smooth surface for cutting a stencil on it.
So, the drawing and material of the future stencil are chosen - then you need to decide on the transfer of the image to the base. If you use cardboard or heavy paper, transfer the pattern to them using copy paper. In the case of transparent plastic will be easier: just transfer the picture to it using a marker. To prevent the image from moving, attach it with scotch tape.
Using a clerical knife, cut and remove all areas inside the drawing. To do this, place the future stencil on a smooth, solid surface that will not be a pity to damage with a knife.
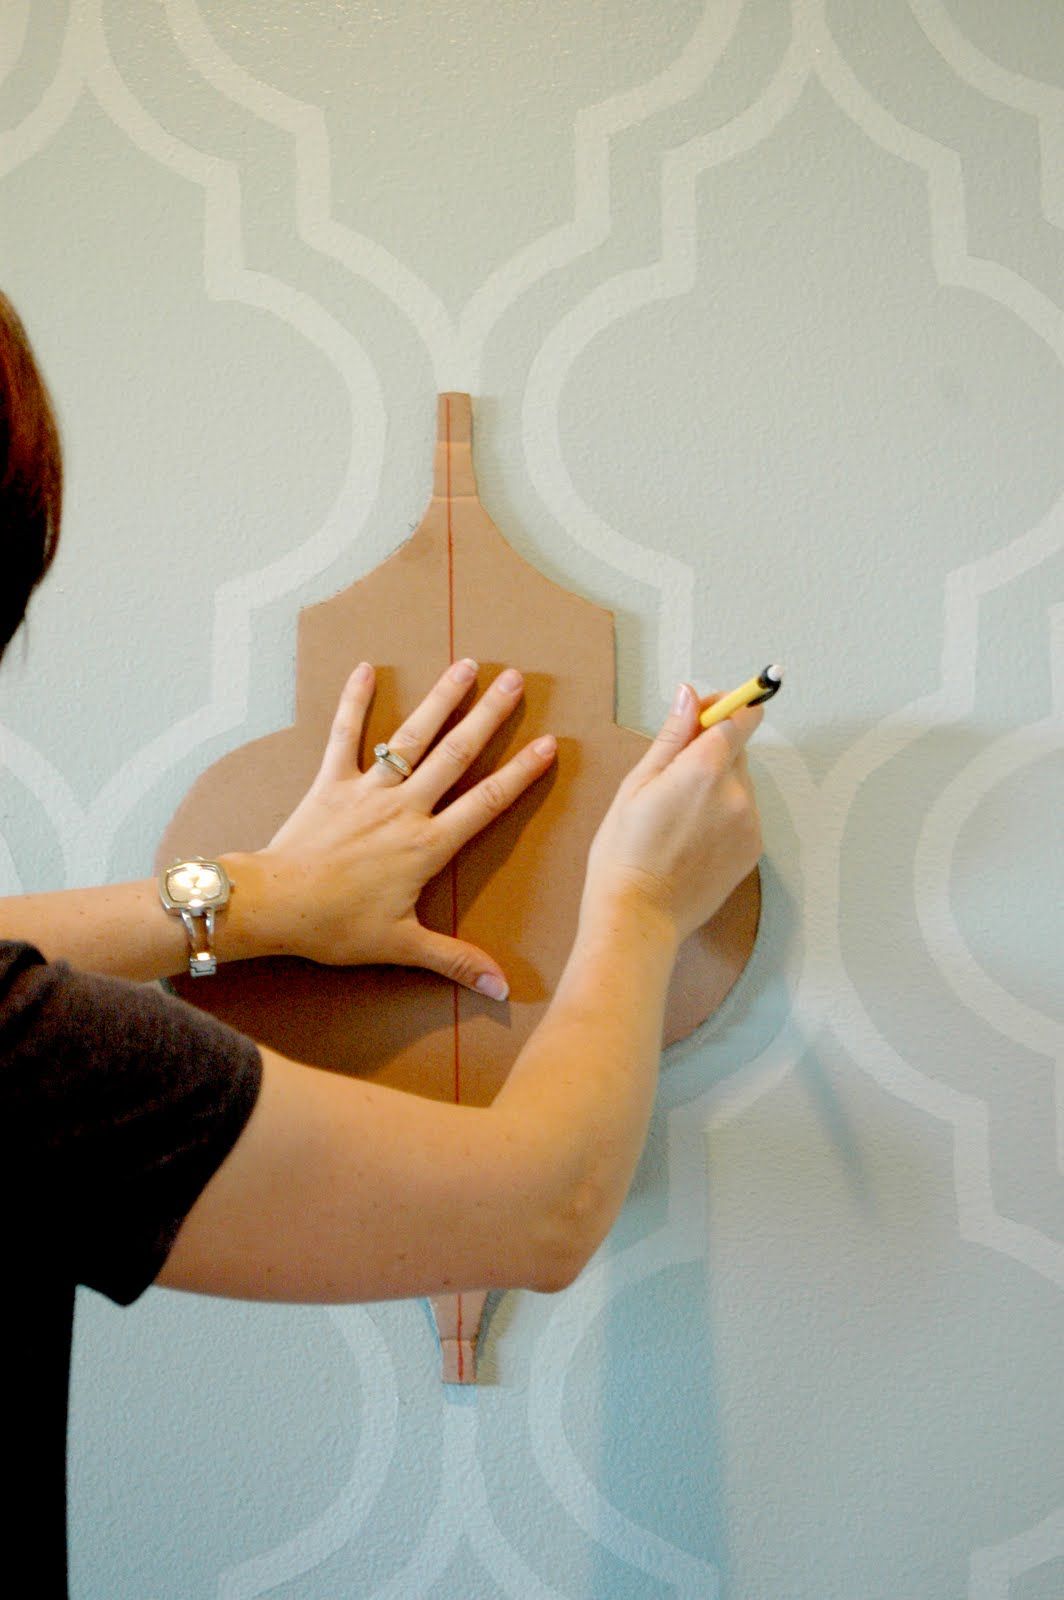
The process of drawing a pattern using a stencil Create a stencil template from thick paper
- Prepare the surface: it should be clean and dry.
- Next, in a simple pencil mark on the wall the place of the future drawing. For this purpose, you can use a level or a simple ruler.
- Then attach the stencil with adhesive tape or a special stencil aerosol adhesive. The second option is preferable, since when the processed stencil is torn off from the wall there is no danger of tearing off a piece of paint with it. In addition, after you remove the stencil, the glue will not leave the slightest trace on the surface.
- When the drawing is ready, carefully separate the stencil from the wall and enjoy your masterpiece.
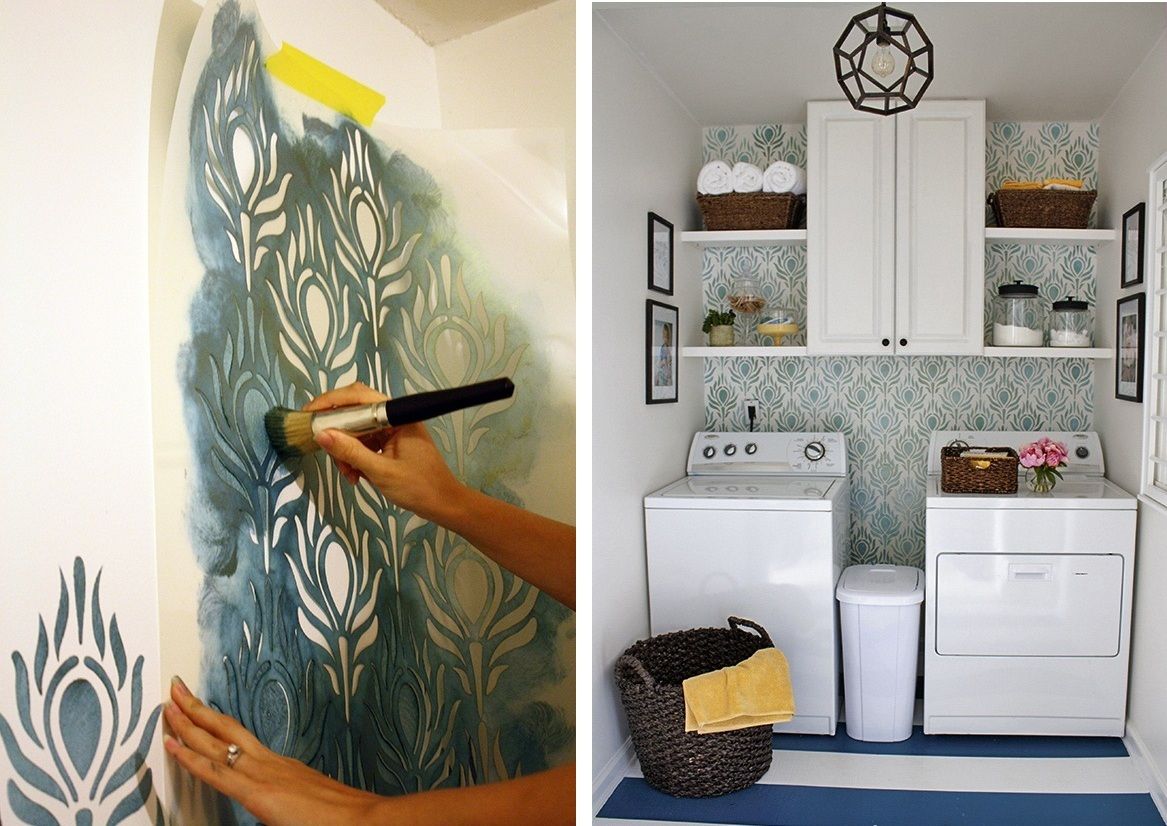
Draw on the wall drawing
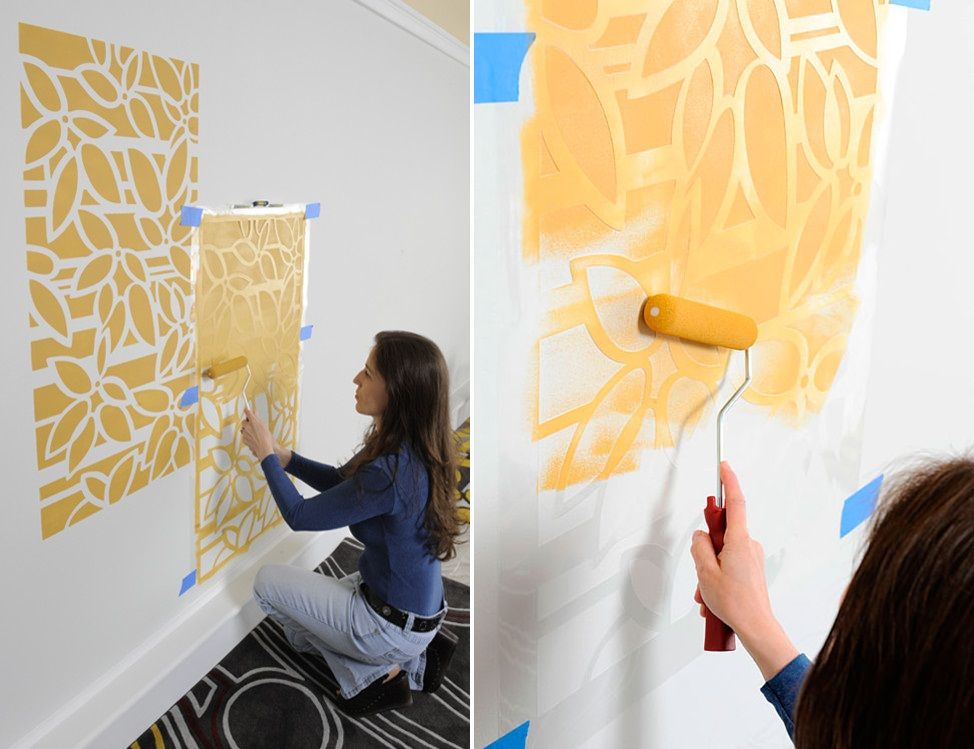
Tip! If you are using a thin brush and working on small details, do not use the method of stuffing, but painting the picture up and down. When applying the spray paint, place the can at a distance of at least 30 cm from the surface. When working with a sponge, the first two or three prints should be made on a “draft” - a piece of wallpaper or drawing paper to remove excess paint. When applying the painting with a paint roller, then draw separately painted angles and small details with a thin brush.
So…
Stencil drawings in the interior is a great opportunity to bring to the atmosphere of the room an original decor that you can do with your own hands.
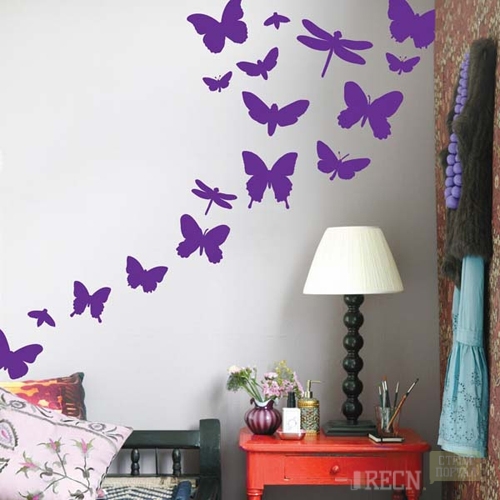
Are you planning to make a repair? How to make the walls unusual? Boring wallpaper with a repeating pattern is already tired and out of fashion!I present to you the option of decorating the wall - pattern. Elegant butterflies, luxurious trees, animals, full-color wall paintings or around the perimeter of the room are available. Even without the skills of an artist, you can create a picture using a stencil.

For drawing use acrylic paints for thin lines. For a large picture, use any cans of waterproof paint or spray paint. Apply paint with brushes, sponge or roller.Markup for large paintings, smooth lines make a plumb and level.
Types of stencils:
Monochrome. The easiest type of stencil made with only one color of paint.

Multicolor. When coloring several colors of paint are used. The result is a colored “appliqué” with a clear distinction of colors. The number of stencils used is equal to the number of colors.
Voluminous. Drawing is done using putty. The picture will "speak." 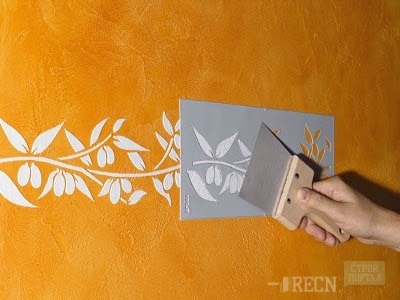
After drying, such a pattern can be painted, thereby highlighting it even more.
Anti-stencil Only the border behind the stencil is processed with paint. The result is a silhouette pattern.

How to make a stencil for the walls with your own hands?
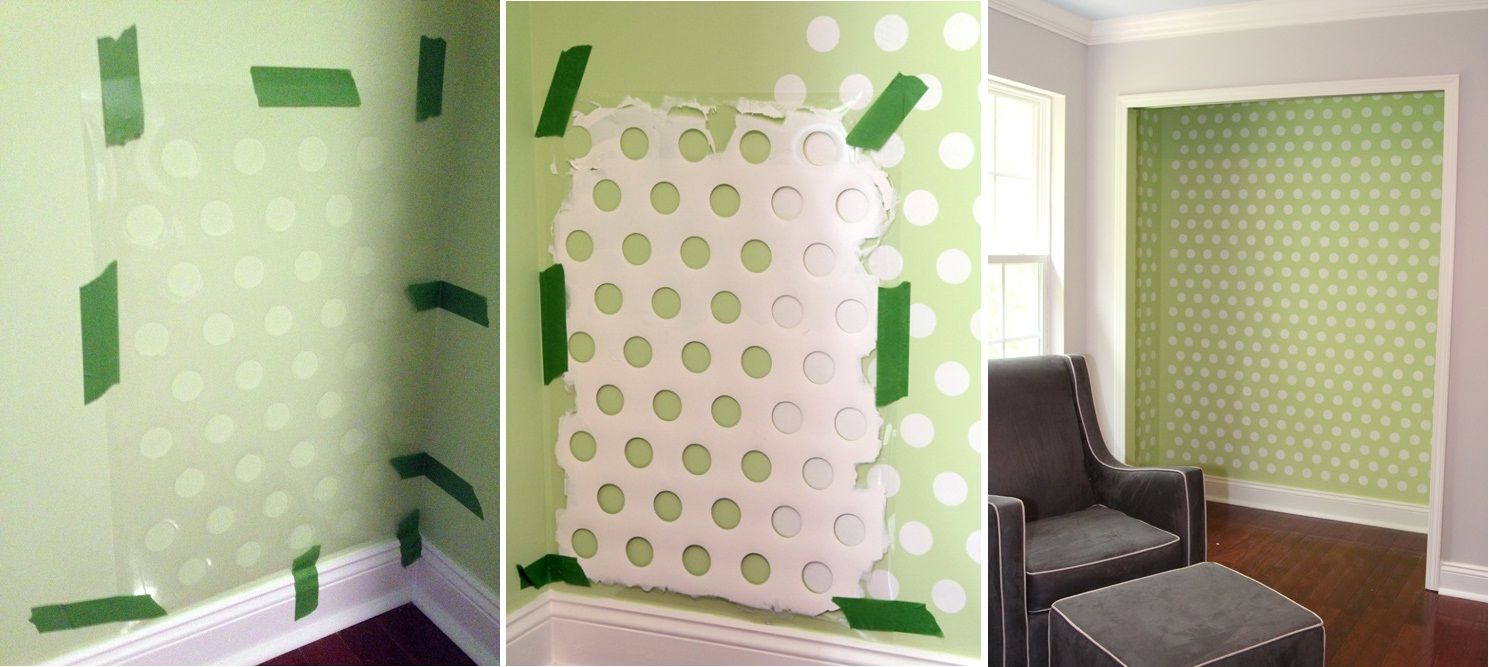
- Find a finished image - stencil on the Internet, print it on a printer. Prepare a dense transparent base, for example, take a plastic folder for papers and cut a rectangle. Next, attach the picture to the blank and cut it.
- We take a picture in the format eps., We send for cutting on the plotter. For cutting suitable film oracal or thin plastic. It remains only to remove unnecessary cut elements and the stencil is ready.
- Take a piece of paper, fold it in half, draw a picture and cut it. In this case, you need heavy paper or cardboard. The paint should not soak the edges of the stencil. If the edges of the paper stencil are smooth, use skoychem or tape to strengthen and protect them.
Fasten "homemade" stencils with special glue, skoychem or tape. The main thing is that the sticky substance does not damage the wall (removing the mount, you did not remove it with the wallpaper or primer).
After applying each pattern, wipe the stencil, so as not to “draw” extra strips by moving the stencil to another place.
How to make a stencil with your own hands
The market is replete with a huge number of ready-made stencils for wall decor, for every taste and budget. Virtually every construction store, especially large networks of retail building materials, offer a wide range of ornaments and patterns. But all the more valuable will be the hand-made picture.
For self-manufacturing stencil will need the following tools:
- original drawing;
- material for stencil (film, plastic, cardboard);
- stationery knife;
- marker, pencil;
- scotch;
- glass (or other) surface on which it is convenient to cut a stencil.
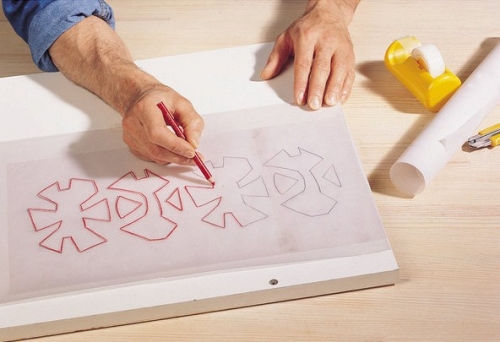
First of all, it is necessary to decide on the pattern according to which the stencil will be made. Those who have artistic abilities can design and draw it themselves. Those who are not lucky to have a talent for drawing, having thought up what style they would like to decorate the walls or ceiling, can search for a suitable image on the Internet and print it on a printer. If the design is chosen large, divide into parts, and then fasten parts together with scotch tape.
The next step is the choice of material for the stencil. This can be plain paper or cardboard, self-adhesive film or thin plastic, depending on the type and size of the ornament. To simplify the task, you can contact any advertising agency where you can create a stencil for the image and print it.
To transfer the ornament on the material, you need to use a copy paper, or, if transparent plastic is used for the stencil, simply circle the contour with a marker. In order for the drawing not to "leave", it is attached to the stencil with scotch tape or clips.
When the drawing is transferred, in some cases it is required to complete it, completing the lines and lintels along which it is cut. If the stencil is depicted on paper or cardboard, then it is better to glue it with adhesive tape on both sides or laminate so that the paint does not absorb, and the lintels do not curl. This will extend the life of the stencil.
![]()
It is important to cut the stencil in such a way that cuts and barbs are not formed, otherwise the final design will look untidy. Another subtlety - all small parts must be attached to larger ones, otherwise they will disappear when cut out. Only those areas that will be colored are cut. A stationery knife or blade is used for this, and glass is put under the stencil (or any other hard material that is not too stupid to cut), then the cut lines will be clearer and more even.
Stencil work
Required tools:
- stencil;
- screen glue;
- brush, roller or sponge for applying paint;
- acrylic or spray paint.
First of all, it is necessary to prepare the surface on which the stencil will be applied. Clean it from dust and dirt, if you can wash it, if not - wipe it with a clean, dry cloth or vacuum.
The second step is marking. If possible, it is better to use the level, with it there will be confidence that the drawing will not be skewed or crooked. Pencil marks the extreme points for the stencil to further attach it exactly.
It is recommended that before the responsible drawing of the picture on the wall to practice first. This can be done on a piece of wallpaper or a large drawing paper. A preliminary sample will allow you to practice applying technique and choose the color of the ornament. It is advisable to make several variations of different shades, and try on how each of them will look in the future, by attaching the resulting pattern to the wall.
Also, there are ready-made reusable stencils for wall decor. They are made of polymer film, which is easy to clean and does not tear, allowing you to train on paper the required number of times.
Aerosol glue
In order to fix the stencil on the wall, it is best to use a special spray glue. It leaves absolutely no traces, and when using it, one should not be afraid that wallpaper or paint will fall off the wall along with the stencil. The glue is sprayed evenly on the stencil, which is then carefully pressed against the surface, especially in places of thin bridges.
What is important to know about working with glue:
- on different surfaces it holds the stencil differently, the more even the surface, the better the adhesive properties of the adhesive;
- after removing the stencil, the glue does not remain on the wall;
- glue is applied to the stencil, and provides with it the maximum grip;
- after washing the stencil, the glue may retain its adhesive properties, so if you plan to reuse it, you can not completely wash off the glue;
- the bigger and heavier the stencil, the harder it is to hold it only on glue, in such cases you may need to “secure” in the form of masking tape;
- he does not save from the flow of paint under the stencil.
Coloring
Coloring is an activity that does not tolerate fuss.
For stencils, it is recommended to use acrylic paint, it dries quickly and is suitable for all types of surfaces. Paint is applied with a brush, sponge or roller. It is important, when working with a stencil, the paint should be the minimum amount to eliminate the possibility of leakage.
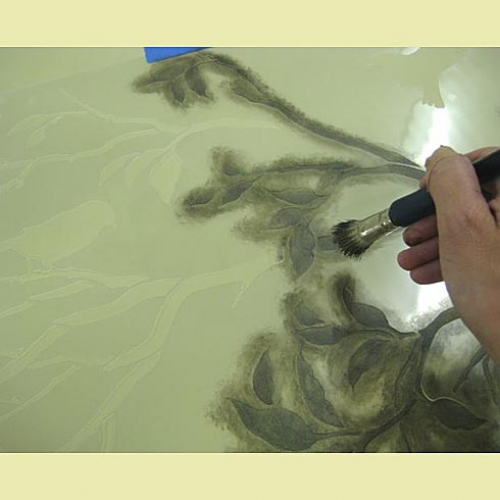
When working with a brush, it is held right perpendicular to the wall, the paint is applied by stuffing, to prevent lint or paint from getting into the stencil.
If staining is done with a sponge, then the first prints are best done on another sheet of paper, this will remove excess paint.
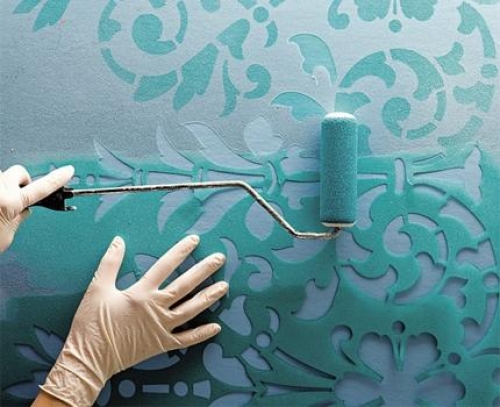
When working with a roller, it is necessary to ensure that the paint is distributed evenly, especially in the corners and small details of the stencil. It is more convenient for them to work with large stencils.
To spray spray paint, the can should be kept at a distance of about 30 cm from the wall. It may be necessary to additionally protect the surface from inadvertent ingress of paint beyond the stencil.
Saturation of the pattern with color occurs gradually, in several visits. If its borders are not clear enough, they are drawn with a thin brush after removing the stencil.
Creating a 3D pattern
For the application of three-dimensional pattern will require a special acrylic putty. It is applied with a spatula, gently, layer by layer, until it reaches the desired thickness. Volumetric pattern is usually achieved with a thickness of 1-3 mm. A couple of minutes after application, when the putty is already grabbed, but not fully frozen, the stencil must be carefully removed to avoid damaging the ornament. If the layer is not very smooth, it's okay, after the putty has completely dried, it can be easily leveled using a fine skin. Then the picture can be painted or toned.
When work is completed, the stencil should be washed and dried, if possible, for reuse.
We buy acrylic putty for walls in a bucket. Its consistency should be like soft ice cream or thick sour cream. However, usually the way it is. And put a putty layer by layer with a spatula, smearing the entire film surface until we reach the desired thickness. Too bulging picture will not look beautiful, it is enough to achieve 1-3 mm thickness. (If you want a more volumetric effect, you should resort to modeling.
![]()
Then wait exactly one minute. This is enough to putty put on, and with a careful movement remove the film!

4. Anti-screen
A very beautiful image is obtained, with a glow effect around the main pattern of the same color as the wall. This is a stencil opposite. An inversion is glued to the wall, that is, what is thrown from an ordinary stencil. Always use glue and spray paint. Perform a colorful layer of film as wide as the halo you want to get. Be sure to do a test job on paper of the same color as the wall to achieve the desired effect.
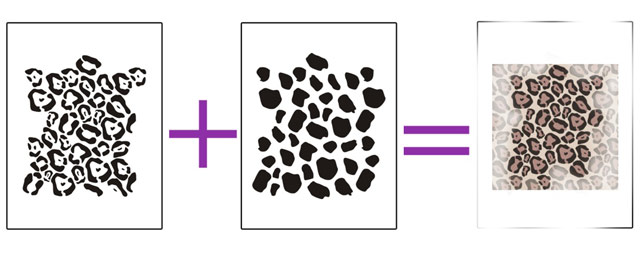
5. Multicolor multilayer stencil
For him, one film creates several films, each for its own color. We work with each in turn, waiting for the paint to dry completely in the previous layer. Stencils are combined by tags made in production. Therefore, the work is simple.

Errors that can be avoided
The most common mistakes that occur when working with a stencil are:
- stencil offset;
- paint leakage.
To avoid such troubles, you need to securely fix the stencil, spray adhesive is the perfect assistant. And also collect the minimum amount of paint. Accuracy and patience will certainly help to achieve the perfect result.
Practice shows that those who have studied stencil manufacturing technology and have carefully read the instructions for use and coloring are always satisfied with the result.
Stencils for wall decor photo

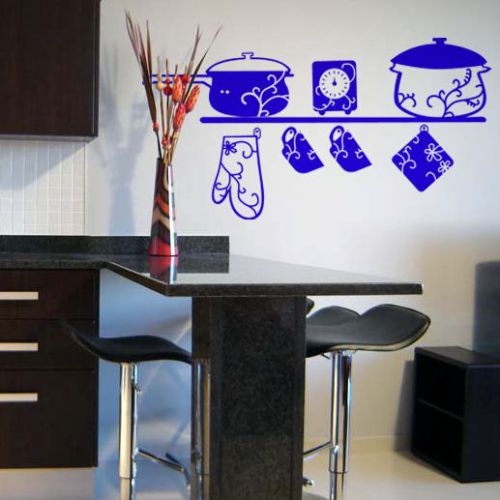
Stencils for kitchen wall decor
If you do not have time to make a stencil manually, go to a specialty store or to the Internet, where you can buy decor. You can buy ready-cut picture, or order your cut. Together with a large stencil, you get a small test instruction.
How to work with him? Schedule a place for sticking, remove the protective film from the back and attach it to the wall. In the process of gluing gently smooth the stencil, so that no air bubbles remain. In the end, remove the protective film from the front side and you can start painting.
On the wall you can draw not only drawings, but also numbers. It is enough to take a beautiful digital stencil and “write” the number of a house or apartment in an unusual way.
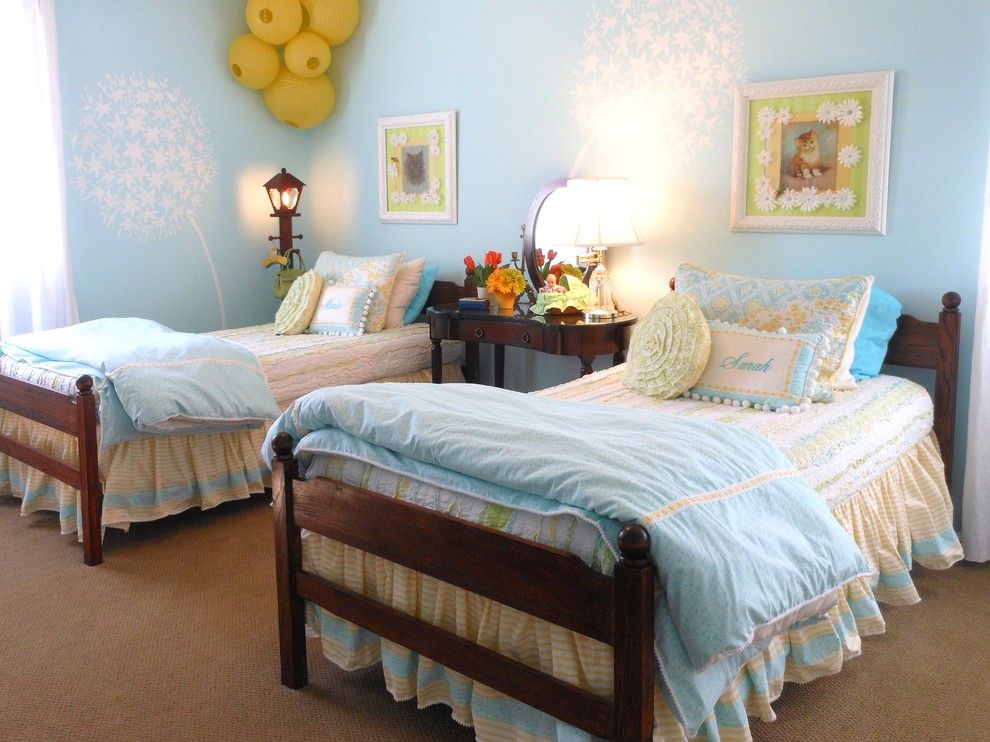
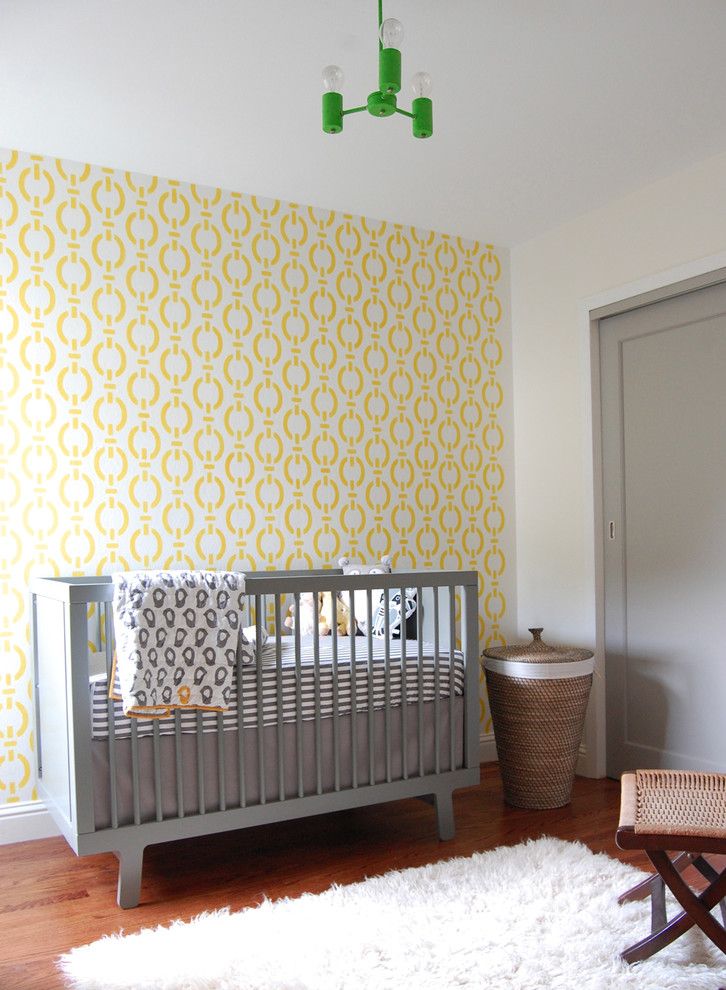
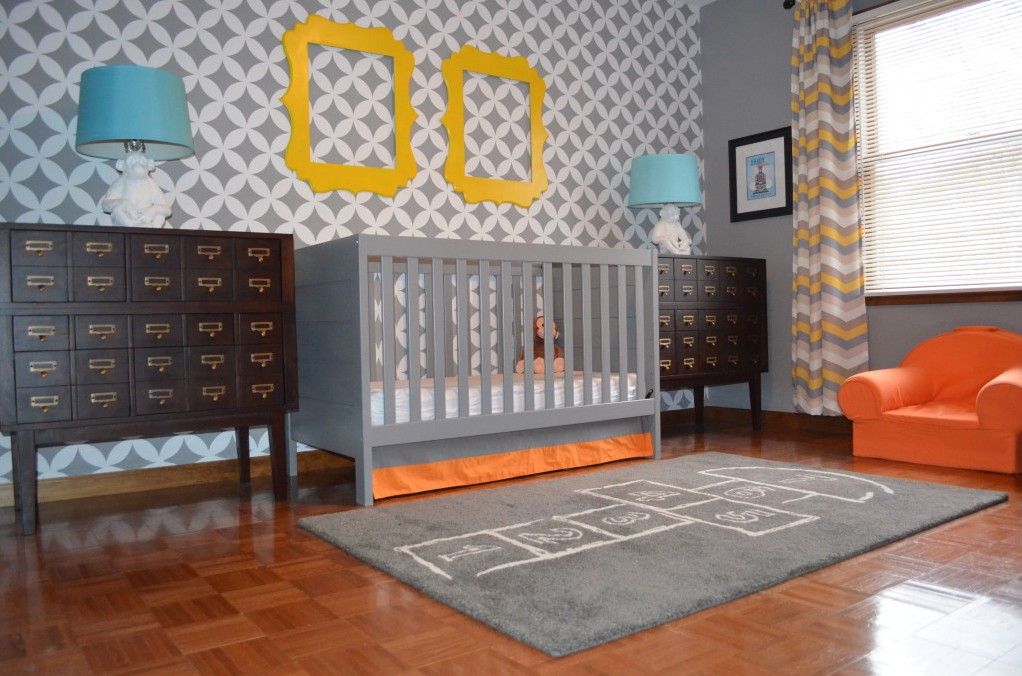
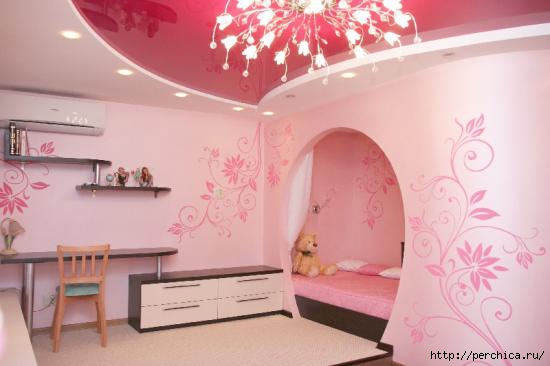
Making out a children's room, let go of the fantasy. Decorate the walls, ceiling or wardrobe with heroes from a fairy tale, favorite cartoons. The child himself can do "painting" the walls under your supervision. Be sure, he will love his room, because the decor in it was made by him!

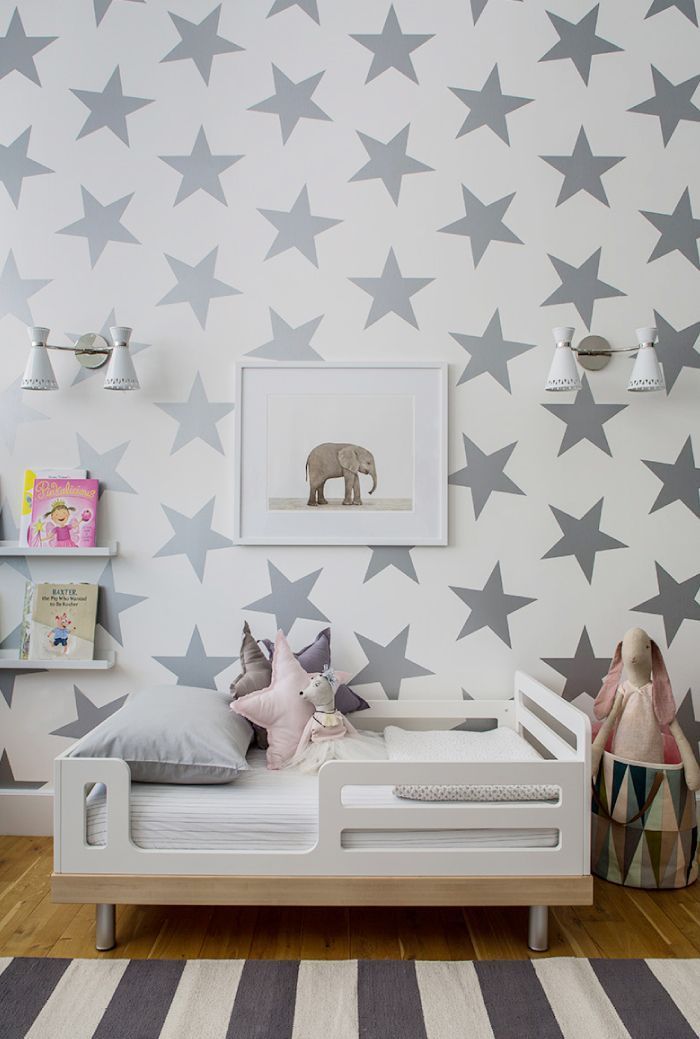
Everything magical attracts children. Create a starry sky on the ceiling. For this you need a stencil with stars of various sizes, constellations, moon, planets, comets. Paint them with phosphor paints. During the day, the drawing will “collect” the light, dissipate it at night, giving the impression of a glow.
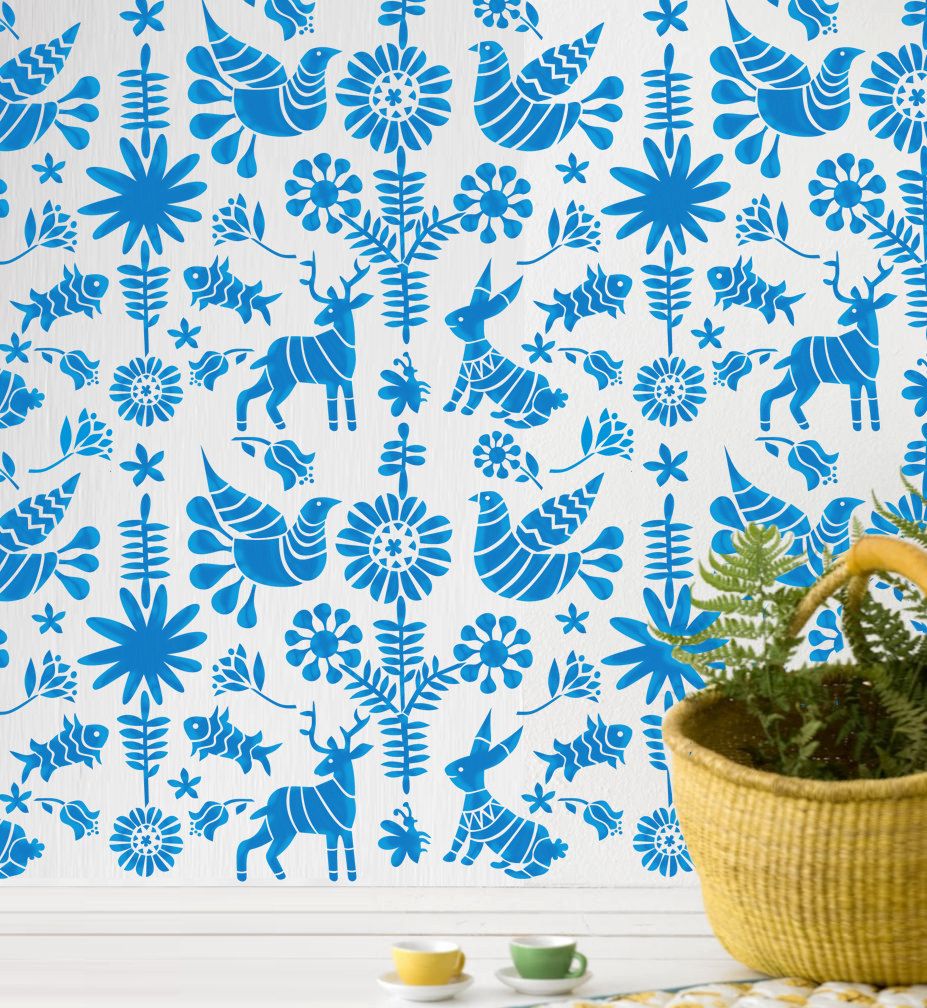
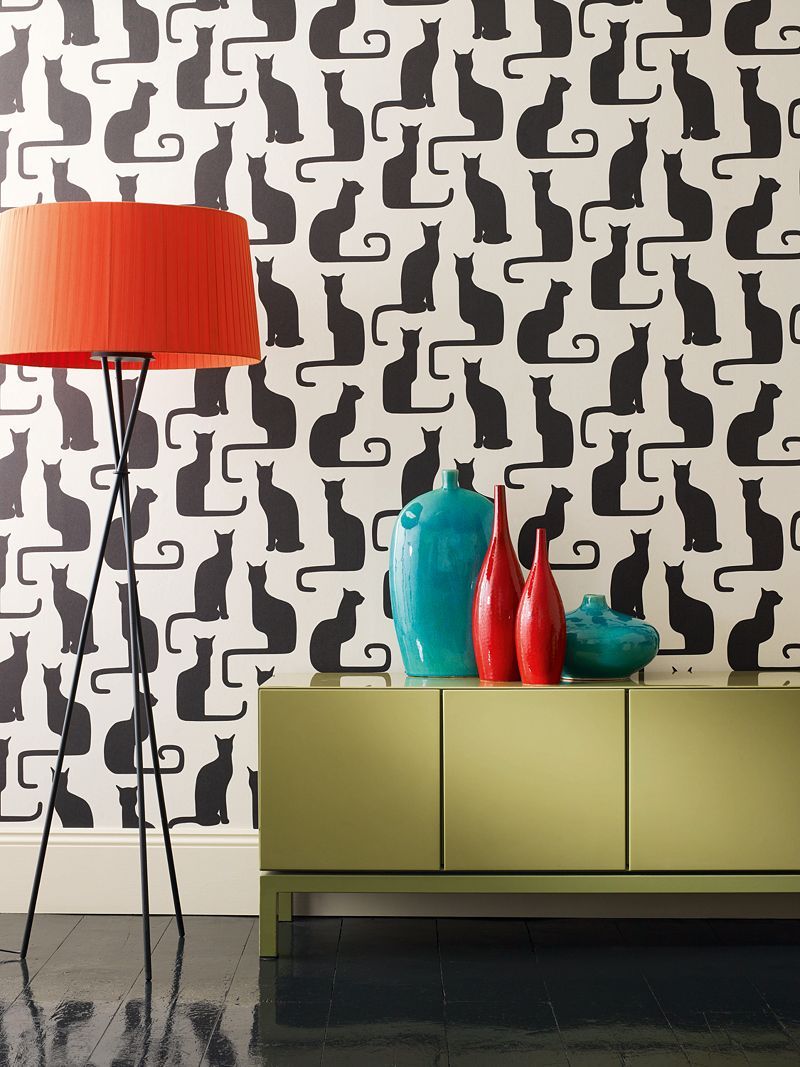
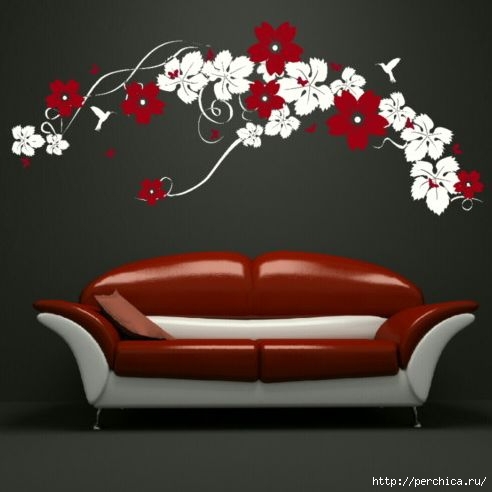
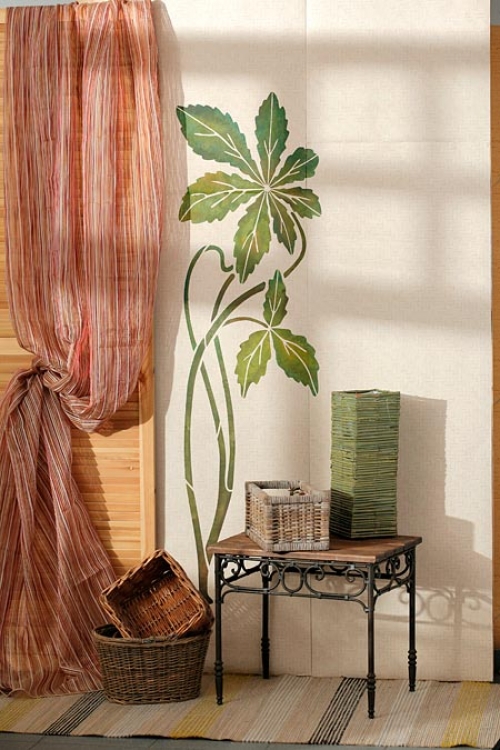
The living room will be decorated with birds, flowers, animals, trees ... The choice depends on the basic style of the room. The drawing must comply with it and complement, be sure to mix the colors used in the interior.
The drawn drawing of a tree looks like a stencil on the wall, smoothly flowing onto the embroidered similar pattern on cushions. Corner drawings will highlight the ceiling and make it voluminous, and the edging of the chandelier rosette will add chic.
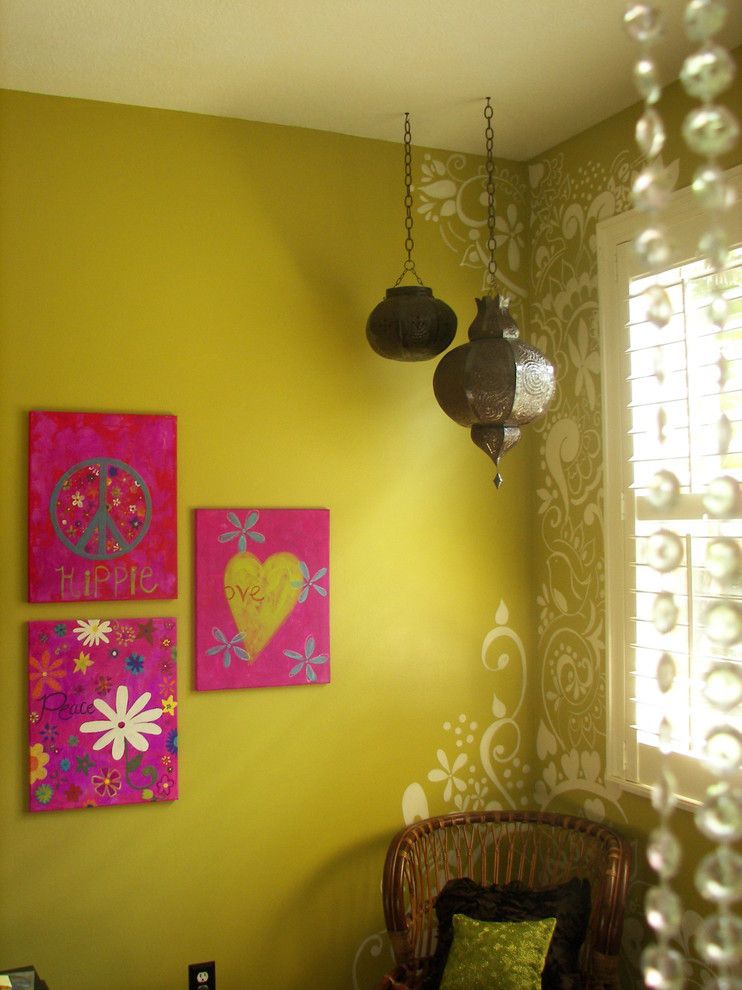
"Knocked out" on the walls of the spit of flowers, modest bouquets - kitchen decorations. Observe minimalism. In the kitchen there is always a lot of equipment, dishes, different cabinets, shelves, so the motley repetitive patterns are unnecessary.
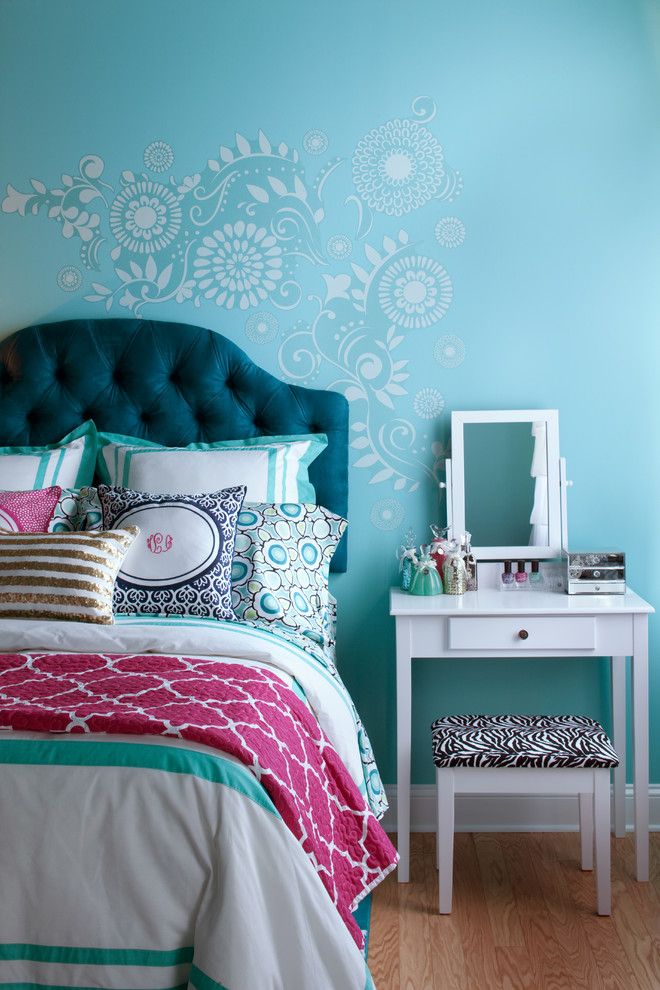
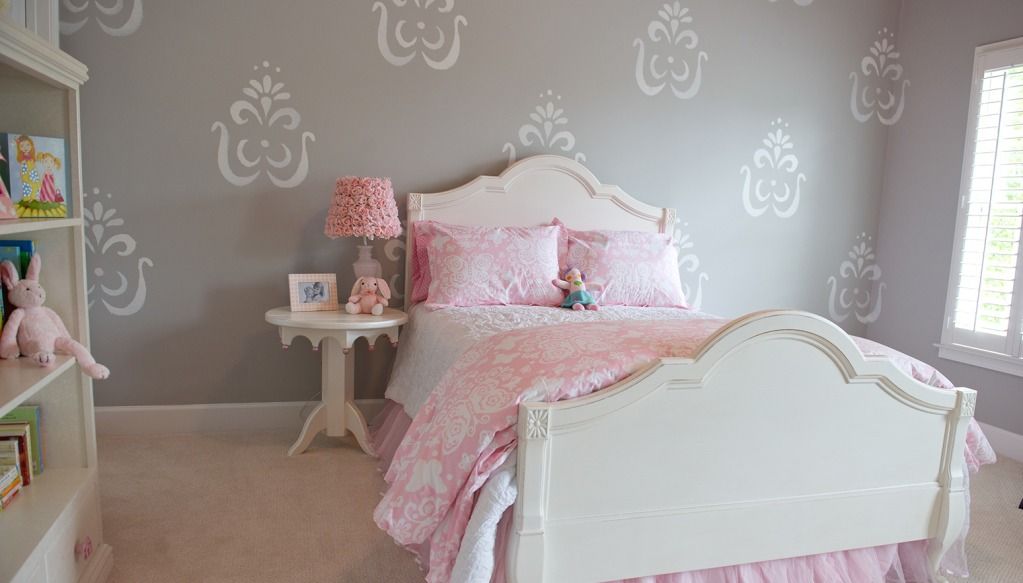
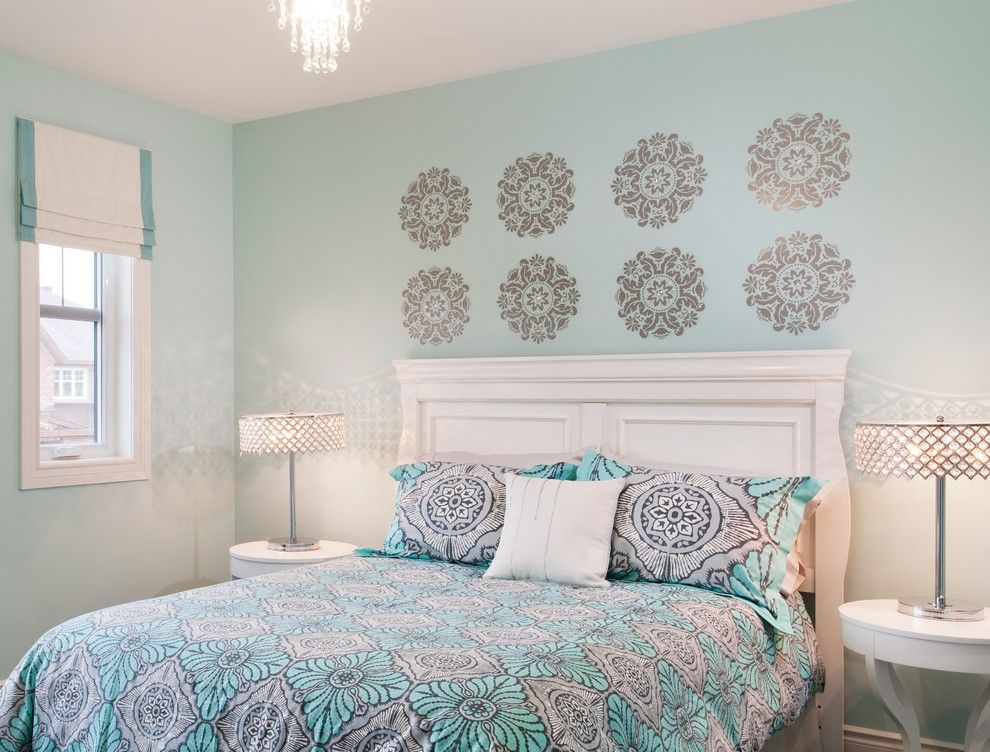
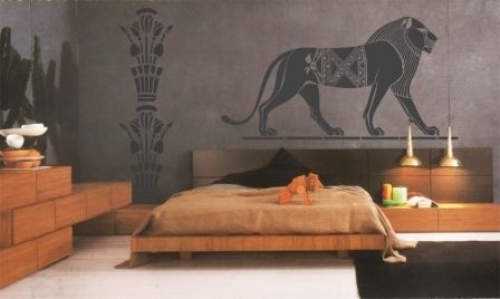
In the bedroom is appropriate dim monochromatic drawings of animals, angels, flowers, trees, fairies. Place the wood pattern at the head of the bed, preferably the same color. It will give the impression that the bed is in the branches. Angels will take you to the clouds.
When designing the bathrooms, they prefer drawings of sea animals (dolphins, fish), swans. Appropriate drawings, paintings in the whole wall. Paint all the walls and ceiling, so going into the bathroom, you'll get into the fabulous world of fantasy, where you will relax after a hard day's work.
Why not use letter stencils in Russian? Write a beautiful phrase, the name of the baby, an excerpt from a favorite fairy tale ... this will make the interior unusual. The letter stencil can be used to decorate the facade (writing the name of the street).
Today, hieroglyphs, inscriptions in foreign languages placed around the perimeter of the room near the ceiling remain popular. The letters are decorated in such a way that one gets the impression of a pattern, not an inscription. Only after looking you can see the letters and words.
From the first letters of the surname and the name carved intricate stamps are created, which can also be transferred to the wall with a stencil and make the interior truly exclusive, only yours.
Highlight one wall in the apartment for a flight of fancy. First draw a simple drawing on it. Then over time it can be improved by adding some elements. Thereby you will change the appearance of the room, without altering anything. Draw branches of the tree, then leaves, flowers, birds. Add lights, sky, people, bridge, etc.
See, the fantasy is limitless, and on your wall is no longer just a tree, but a picture created by your hands!
Making stencils with your own hands will allow you to decorate any kinds of surfaces with images that will emphasize your individuality. If you want to learn how to make stencils as a hobby or simply decide to create a design for a specific project once, the steps below will help you easily choose, make and cut the stencils you have made.
Steps
Stencil development
-
Decide on the design. Since you want to make your stencil personally, there is no limit to what you can create. Think about the size of the surface on which you plan to apply a stencil (t-shirt, wall, bookmark for a book) for whom the design is intended (child, girl's birthday, best friend) and where the stencil image will be (bathroom wall, kitchen work surface) board for skate) .br\u003e
- Stick to the basic elements. Letters, numbers, and basic shapes (circles, squares, and rhombuses) can be an easy but effective choice for design. Combine several of these elements to make the stencil look individual.
- Work with a specific theme. Pay attention to the motives associated with various topics. Shells, starfish, seahorses, boats and anchors create a marine theme. Aries, calves, scales, fish and crayfish - all these elements are inspired by the zodiac theme.
- Draw something that nature inspired you to do. Flowers, trees, butterflies, leaves and the sun are just some examples of ideas that can appear if you just look out the window.
- Stick to the classics. Choose a Greek key, fleur-de-lis, a Celtic cross, or other traditional and universally recognizable symbols.
- If you are new to stencil making, you can start with an image that is fairly simple in design: it doesn't contain too many individual parts or parts. If you are more experienced or just confident in your abilities, you can do something more complicated.
-
Create your drawing. After inspiration came to you, and you decided on a drawing, it was time to capture it as the next step in creating a stencil.
- Draw the image by hand. To express your idea, use a pencil. When you draw an image yourself, you thereby ensure maximum creativity and the ability to experiment and adjust your drawing.
- Draw with a pencil until you get a picture that you are happy with. After that, go over the lines with a permanent marker so that you can easily see the outline when you cut the stencil.
- Draw the image by hand. To express your idea, use a pencil. When you draw an image yourself, you thereby ensure maximum creativity and the ability to experiment and adjust your drawing.
-
Print a graphic or template from the Internet. There are a large number of Internet sites offering free stencils that you can download to your home computer and print.
- In some cases, you will need to make a photocopy of the printed image in order to reduce or enlarge it. Sometimes it is possible to resize an image when printing or change printer settings to get a larger or smaller image.
-
Use a stamp (seal) as a contour. If there is a stamp whose design you like, use it as a contour for the stencil. Press the stamp onto the stamp pad with black ink, then press it down hard on a piece of white paper. Make sure the lines are accurate and clear. By using Xerox, you can increase or decrease the size of the stamped sample according to the size that is required for the stencil.
- If the stamp imprint is too detailed, it may not be suitable for a stencil. But if you really like the image, try to remove some lines by painting them with a corrector to simplify the image.
The choice of the type of stencil: single layer or multilayer
-
A single-layer stencil is a single sheet of paper or plastic on which you draw and cut the finished image.
- Choose a single-layer stencil if you are working with a black and white image or you want your final image to look like a silhouette or a shadow of the image.
- If you want to use a color image, choose one that has high contrast and as few different colors as possible.
- The disadvantage of single-layer stencils is that some of the details may be lost. Their advantage is that you only need to cut and draw on one sheet.
-
Copy the image to a thin tracing paper. Outline the borders and divide the image into separate segments. Separate areas should have clear boundaries, so that bridges will appear around the holes to which the paint is applied.
- Make sure that the bridges are wide enough to prevent paint from leaking out and staining your image.
-
Multilayer stencil. For drawing more detailed or more multi-color image, you will need to create a multilayered stencil. In other words, you create several stencils, each of which contains a part of the image, and then apply them one by one to the surface, apply paint / ink and create a finished drawing.
- Transfer the image to tracing paper. Start working the same way as with a single layer stencil. Outline the image and separate its various segments. The areas should have clear boundaries, so that bridges will appear around the holes during the application of paint.
- Make sure the bridges are wide enough to prevent paint from leaking out and staining the image.
- Make registration marks. Draw a small triangle or other simple shape in each of the four corners of the picture. Copy them onto each layer of the stencil that you create so that you can accurately match the layers.
- Apply a new layer of tracing paper to the first stencil. Copy holes and bridges that match in color or design (shadows, highlights, etc.).
- Create as many layers as necessary, until you have transferred all the elements of the image.
- Transfer the image to tracing paper. Start working the same way as with a single layer stencil. Outline the image and separate its various segments. The areas should have clear boundaries, so that bridges will appear around the holes during the application of paint.
-
Select a material. To create a stencil does not need to buy expensive paper. It is likely that in your kitchen, in the office or in the workshop already have what you need.
- Greaseproof paper is a special type of paper that can be purchased at your local grocery store. It can usually be found next to foil, plastic wrap and waxed paper. Unlike wax paper, which has a wax coating on both sides, greaseproof paper is waxed on one side only.
- Greaseproof paper is a good choice if you plan to apply a stencil on a fabric (t-shirt, overalls, bag). Draw a drawing on the unwaxed side. After cutting the stencil, place it on the fabric with the wax side down. Iron a little to heat the paper so that it sticks to the surface of the fabric. This will simplify the application of paint.
- Tracing paper. Start working on tracing paper if you plan to copy the contours of your stencil from an existing design that you found in the book or downloaded from the Internet. Tracing paper is thin enough to easily see through it and accurately copy the picture.
- Paper. Printer paper and other types of medium density paper can be used to make a stencil. The big plus of this material is that you probably have it at hand.
- Thick paper. Thick paper and cardboard are used to make a durable stencil that is well preserved for repeated use. Since this paper is very thick, it is a little harder to cut. When working with this material, make sure your stationery knife has a sharp blade to make clear cuts.
- Copy paper. If you made a stencil on tracing paper, but you want to transfer it to thick paper, you can use copy paper.
- Place thick paper on the table. Place a sheet of copy paper on top of it. Make sure the matte side of the copy paper is facing up and the side with the ink layer is facing down.
- Overlay tracing paper with the image on top of copy paper. Transfer the pattern, repeating every line and detail. During work, do strong pressure to ensure that your drawing is copied clearly and completely.
- Remove tracing paper and a sheet of carbon paper. The design is now “printed” on thick paper.
- Greaseproof paper is a special type of paper that can be purchased at your local grocery store. It can usually be found next to foil, plastic wrap and waxed paper. Unlike wax paper, which has a wax coating on both sides, greaseproof paper is waxed on one side only.
-
Seal the stencil. It is important to make your stencil as durable as possible so that it can serve your project well and be reused in the future.
- Cover the stencil with contact copy paper. Transparent contact copy paper is widely available in the household goods department of a local store.
- Lay the stencil on a non-porous surface. You do not want to accidentally remove the paint from the table, from its contact with sticky paper.
- Cut a piece of contact copy paper the size of your stencil, remove the protective film and glue the paper to the stencil. Cut the excess.
- Use packing tape. Lay the stencil down on a non-porous surface. Apply strips of packing tape to the stencil. Put a new strip on the edge of the previous one, until you completely cover the surface of the stencil. Glue the edges of the paper and cut off the excess.
- Cover the stencil with contact copy paper. Transparent contact copy paper is widely available in the household goods department of a local store.
-
Draw or copy your stencil pattern. If you are drawing, you should start working with a pencil. When the drawing turned out the way you wanted, repeat the pencil lines with a marker with a thin or medium nose. If you are copying a design, you can use the marker right from the start.
- If, while making your original pencil drawing, you drew several lines, before applying ink, clearly define what the final pattern should be.
-
Cut out the stencil. Due to its delicacy, cutting paper requires the use of a sharp stationery knife and considerable patience. Trying to move too fast, you can allow cuts and breaks of the stencil, in consequence of which, you will have to redraw the drawing and start all over again.
- Fix the stencil. Use masking tape to firmly fix the edges of the paper with a stencil on the surface where you cut it. You can also use sticky squares for posters to glue the paper onto the work surface. To make the paper adhere to the surface, use only a small amount of masking tape and carefully level it.
- Using a stationery knife with a sharp, new blade, cut the stencil segments that you plan to apply paint or ink on.
- Do not cut bridges - these boundaries that separate one section of your stencil image from another.
- If the stencil is very large or you are using thick paper, you may have to replace the knife blade in the middle of the project. Do this as soon as you feel the blade dull to prevent the paper from moving and tearing.
- When moving around the stencil, rotate the paper, not your hand.
- When finished, remove the tape around the edges. If you can not peel the tape from the stencil, without tearing it, just wrap the edges of the tape on the reverse side. If you used sticky squares for posters, alternately peel them from each corner of the stencil.
- If you notice that you have not cut one of the segments to the end, immediately put the stencil back, reattach it to the surface and re-cut the desired segment.
- Be careful not to smudge the marker lines during operation. The sharper the lines, the easier you will be able to follow them when you cut the stencil.
-
Cut out the stencil. A sharp blade and hard surface is all that is needed to successfully cut a stencil. Move slowly and clearly along the lines of the pattern. Breaks, to relax and distract, will help you keep your hand firm.
- Fix the stencil. Apply a bit of aerosol glue to the back of the stencil, wait until it becomes sticky, and place the stencil on the surface to be cut. In addition, you can firmly fix the outer edges of the stencil with adhesive tape.
- Using a stationery knife with a sharp new blade, cut out the stencil segments that you plan to apply paint or ink.
- Do not cut bridges - these boundaries that separate one segment of the image of your stencil from another.
- When making long cuts, keep the knife at a lower angle and further away from the blade.
- When moving along the lines of the stencil, turn the paper, not the hand.
- To make sharp edges, start cutting from the corners, not towards them.
- Use tweezers and a sharp knife to remove the cut parts of the stencil.
- When you are done, remove the tape and / or carefully clean the plastic surface of the stencil, starting at the outer edges.
- If you notice that you have not completely cut out one of the segments, immediately put the stencil back, reattach it to the surface and re-cut the desired area.
-
Smooth sharp corners. Carefully walk over the cut of the stencil with soft emery paper to smooth out any tapers. If the edges of the stencil are not smooth, when you apply the paint the image will not be accurate and sharp.
- After sanding, remove plastic dust with a piece of gauze or a soft cotton rag.
Creating a paper stencil