How to make an application on clothing. Knitwear appliqués and embroidery
There are different ways to decorate the product with appliqués or embroidery.
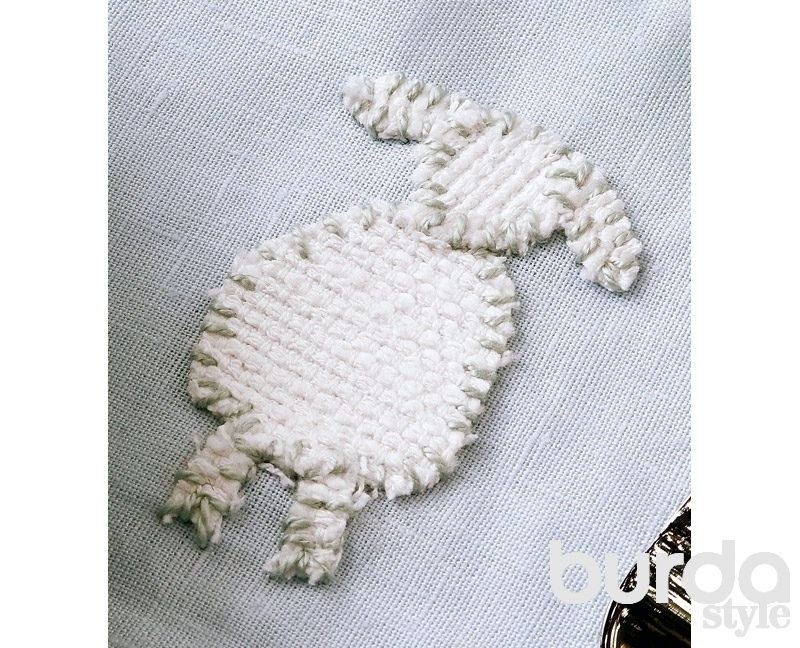
How to sew a volumetric flower-appliqué from knitwear:

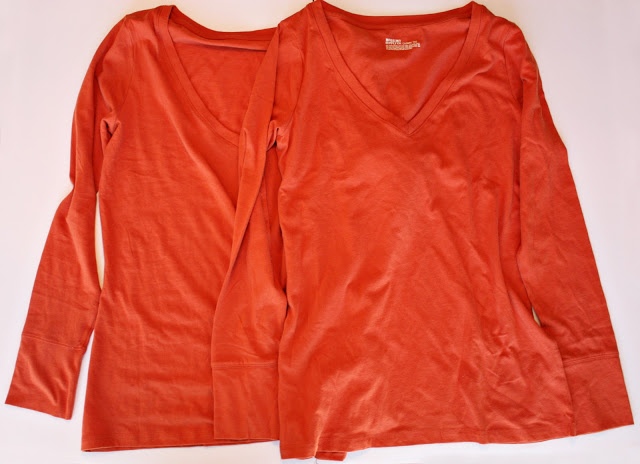
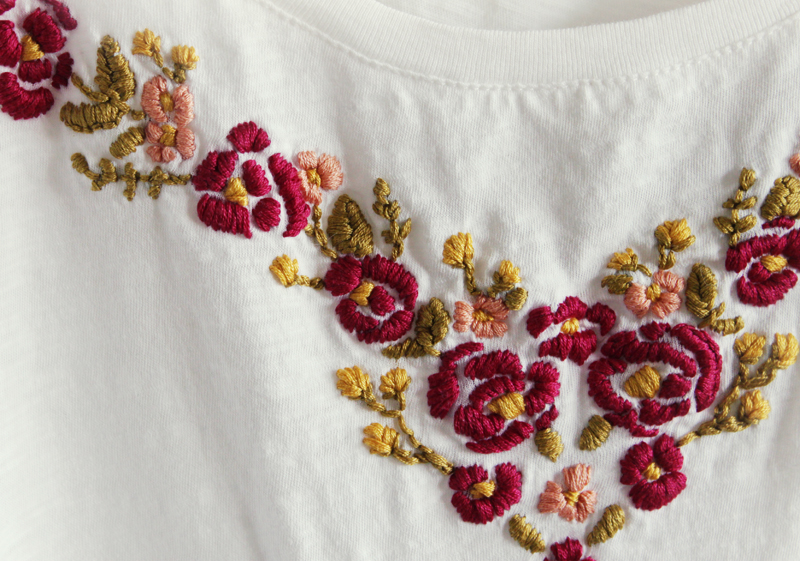
Even if you have never before embroidered, this is just the case to start. Absolutely simple technique will allow even the stupid to shine their talents. A simple white (or other color, according to your desire) T-shirt will turn into a fashionable thing.
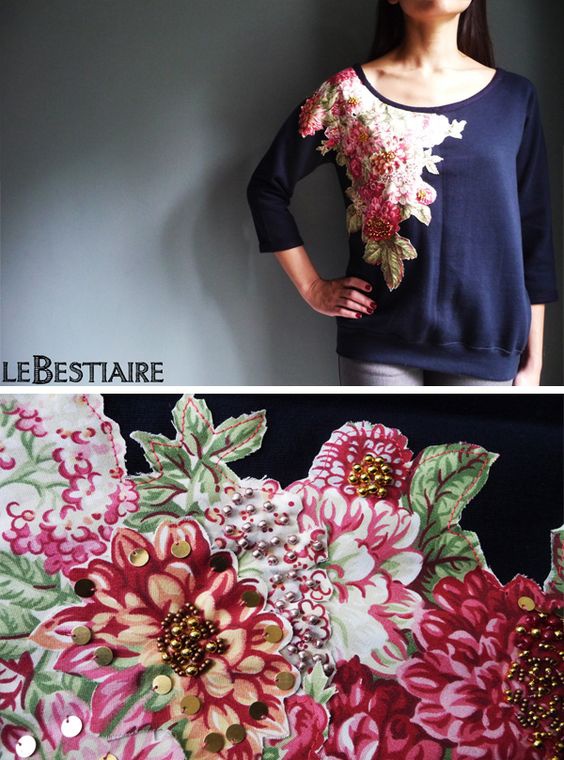
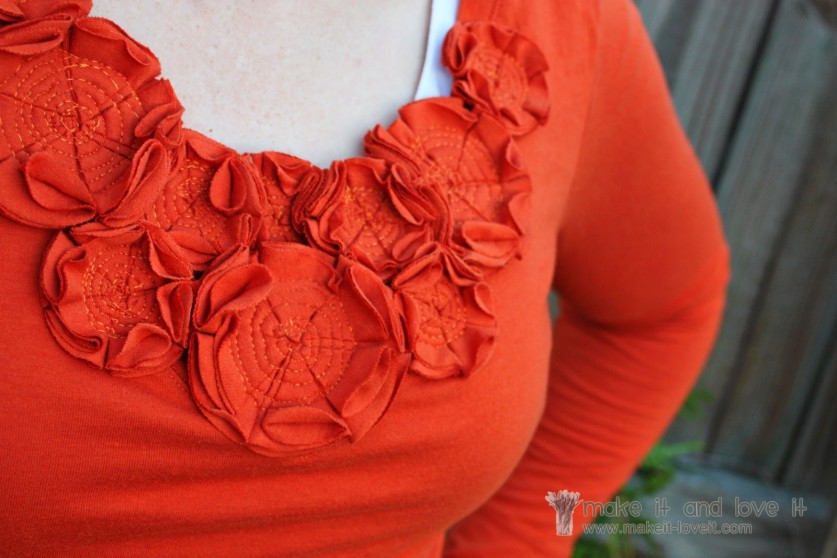
Sweater with appliqué - stitched fragments of floral fabric
MASTER CLASS FROM ASHLEY HOW TO DECORATE KNITTED JUMPER BY APPLICATION FROM KNITTING:
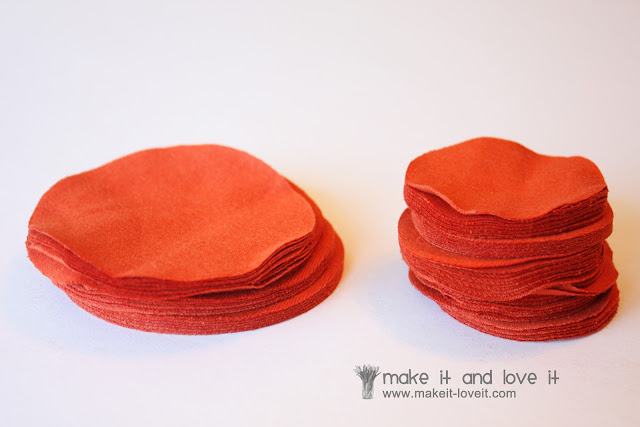
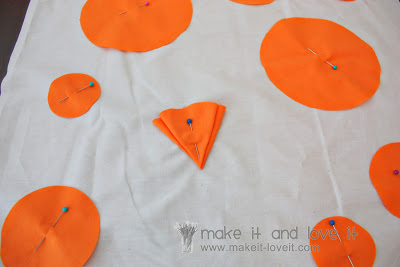
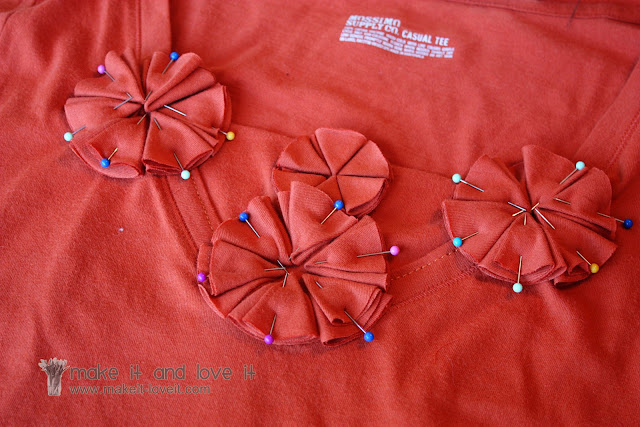
Applications will be in the form of multi-layered colors. cut 18 large circles and 42 small ones:
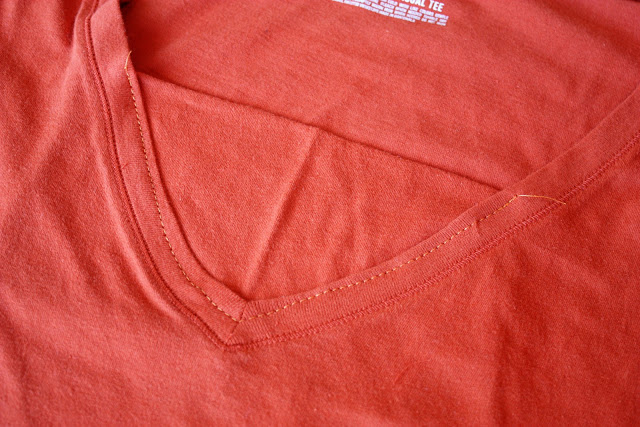
The task of the craftswoman was to change the shape of the neck, and then decorating it with an appliqué, to determine the position of the applications:
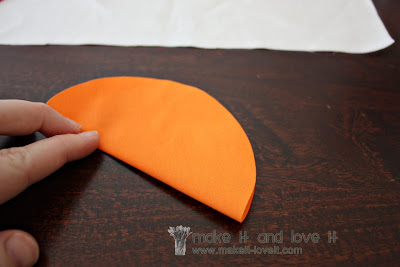
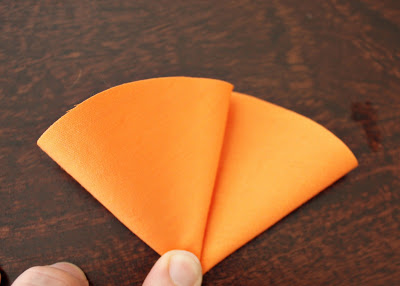
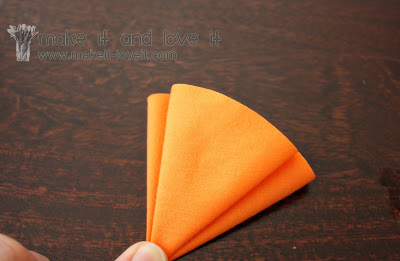
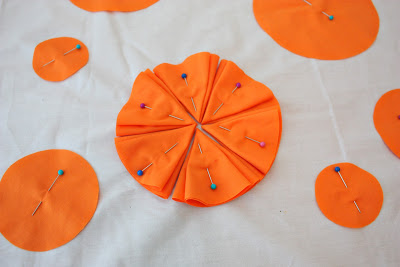
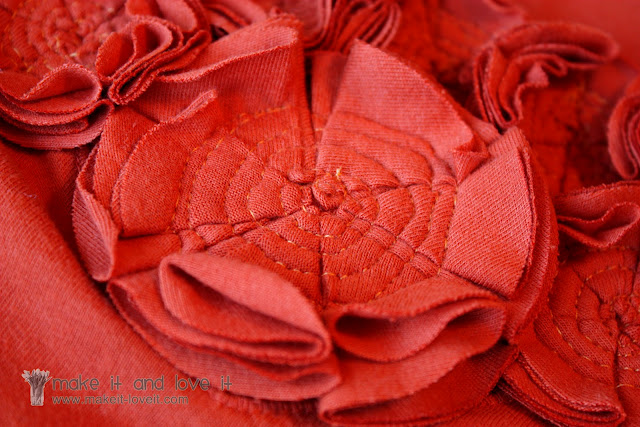
Each flower consists of 6 circles rolled into corners:
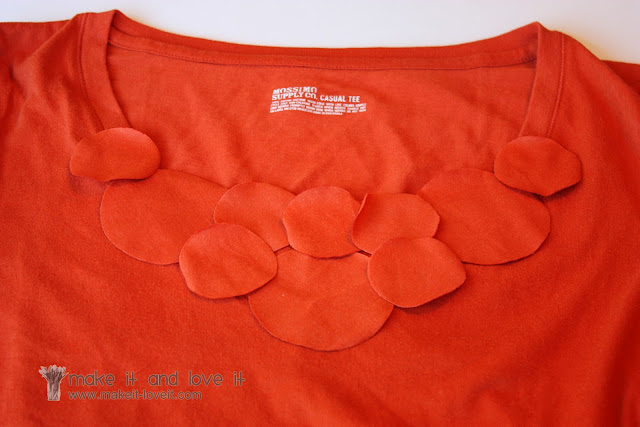
Then roll the circles in the shape of petals and make flowers from the petals. fasten and then sew them up.
Master class6 HOW TO MAKE AN APPLICATION ON KNITTED CLOTH
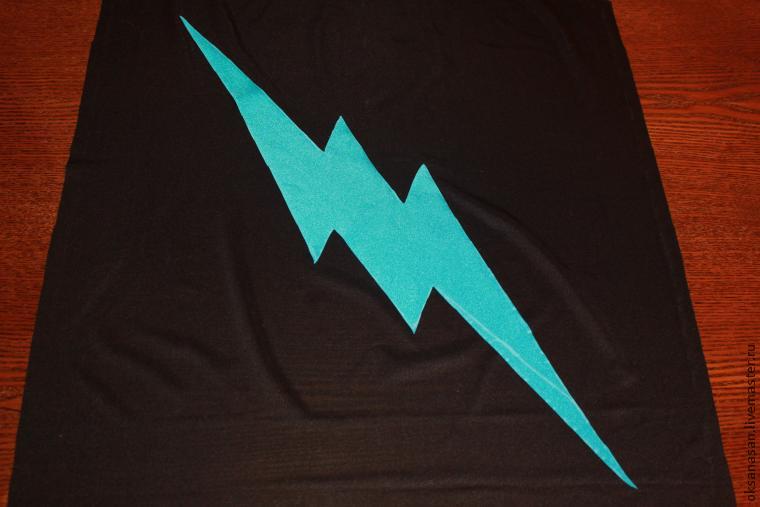
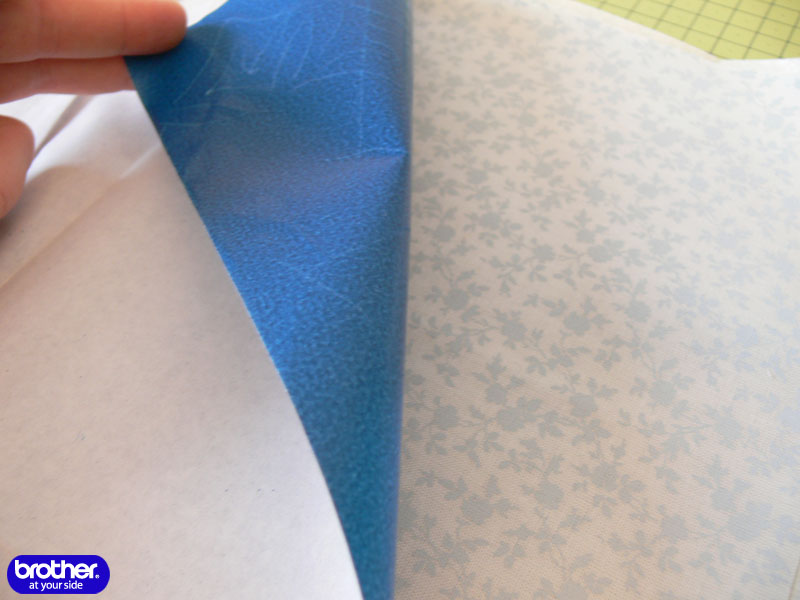
The main fabric is thin knitwear, stretches along the transverse and a little along the thread. The application of supplex, which stretches well in all directions, and it is denser than the main fabric.
It will take: Threads in appliqué color, non-woven glue-based material, glue spiderweb, iron, scissors, sewing machine, chalk, carbon paper and a wheel to translate the contour of the pattern.
What to do:
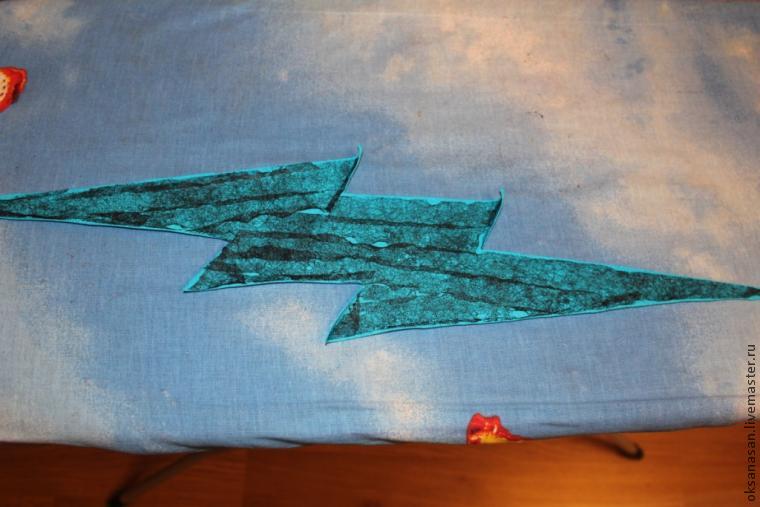
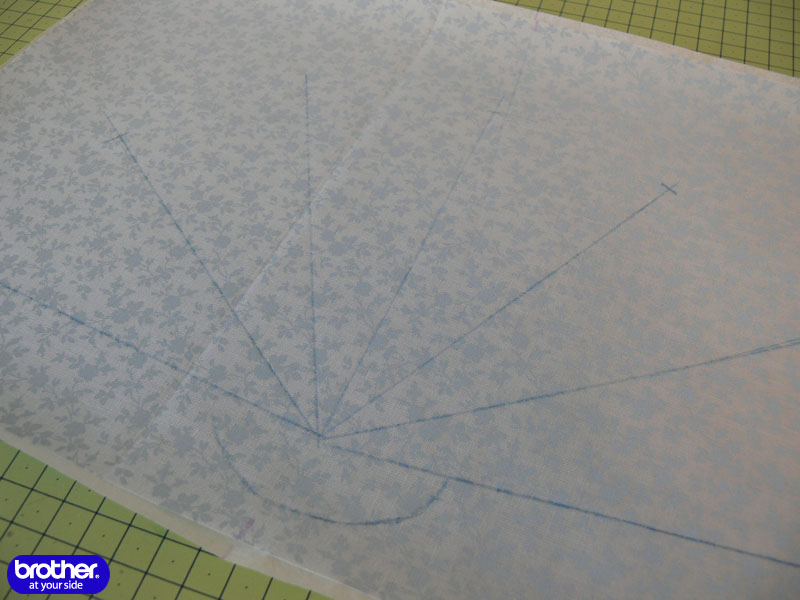
We come up with a drawing, I have a zipper, and draw a pattern on paper. We pin it to the biflex, we outline it with chalk and we cut it out.
The detail of the front is already prepared. Lay it out and attach the application, determine the location.
Outlined with chalk.
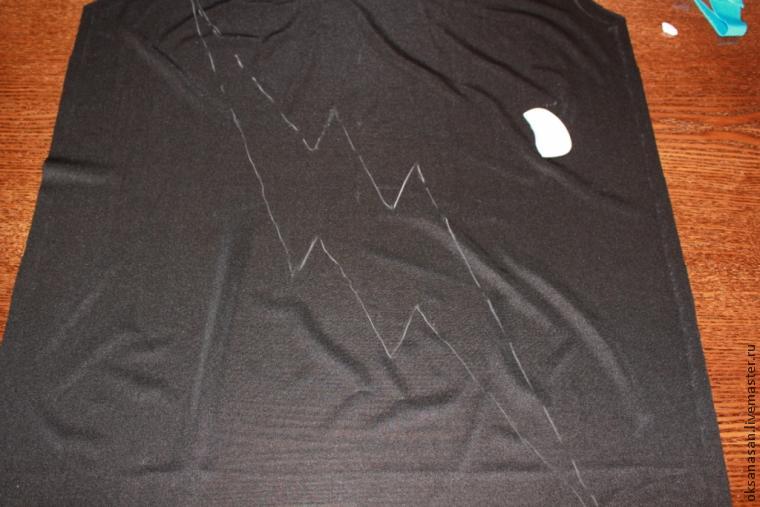
With the help of a carbon paper and castor we transfer the contours of the application to the wrong side.
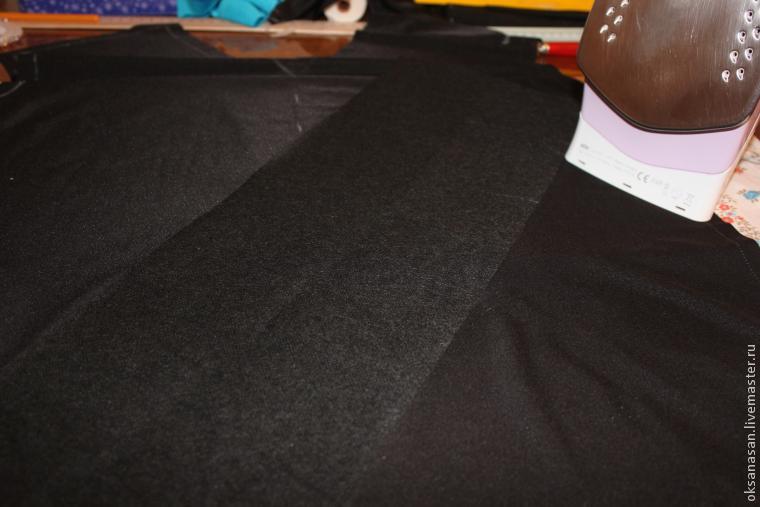
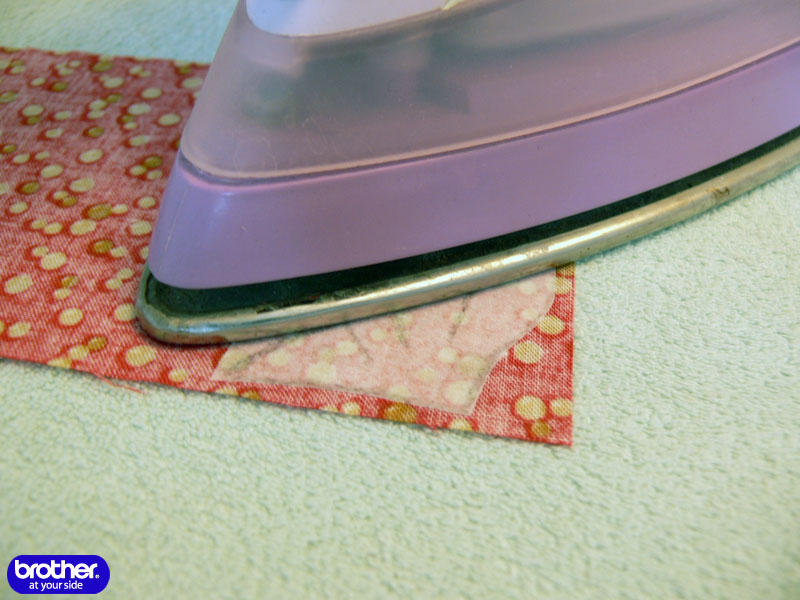
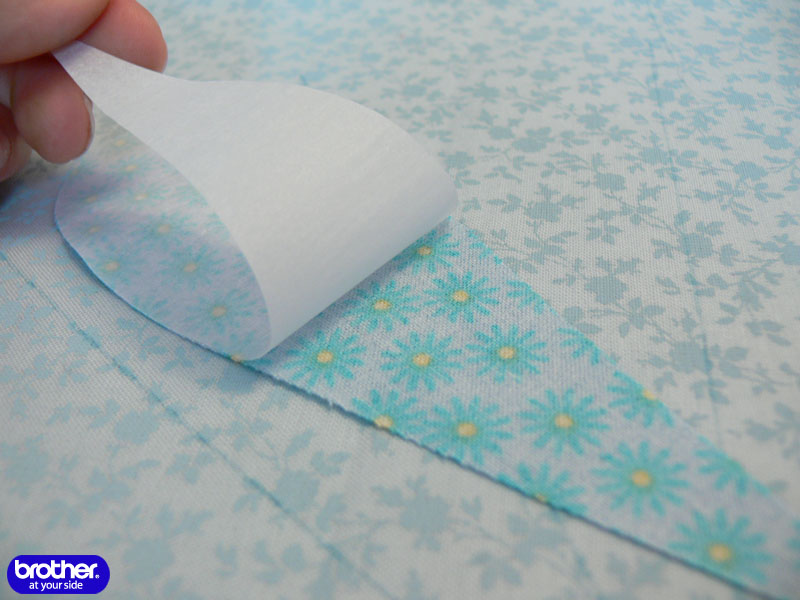
Cut a rectangle out of adhesive material, which corresponds to the size of the application and overlaps its contours when applied. We transform the detail in front with the seamy side up, glue the glue material with the help of an iron.
Now the most interesting thing: we turn the application upside down and begin to fill the whole space with a gossamer. BUT! The web should not be glued with an iron, otherwise it will remain on its sole, and it will not be easy to clean it. Therefore, glue the cobweb ... steam! Cut off a piece of spider web, put it on a cloth, hold the iron and press the steam button. A few seconds is enough, otherwise the cobweb will shrink under the steam.
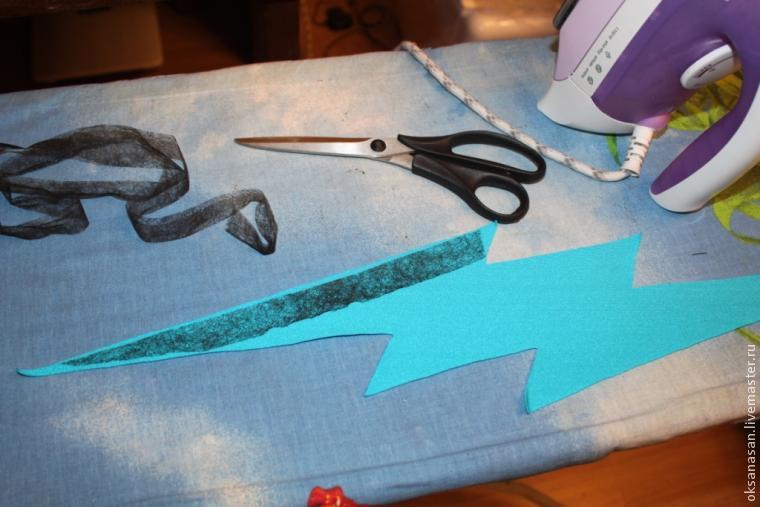
Caution! Do not touch the iron web!
All space should be filled with a cobweb. An extra spiderweb that extends beyond the contours of the application must be trimmed with scissors, it is better if it almost reaches the edge.
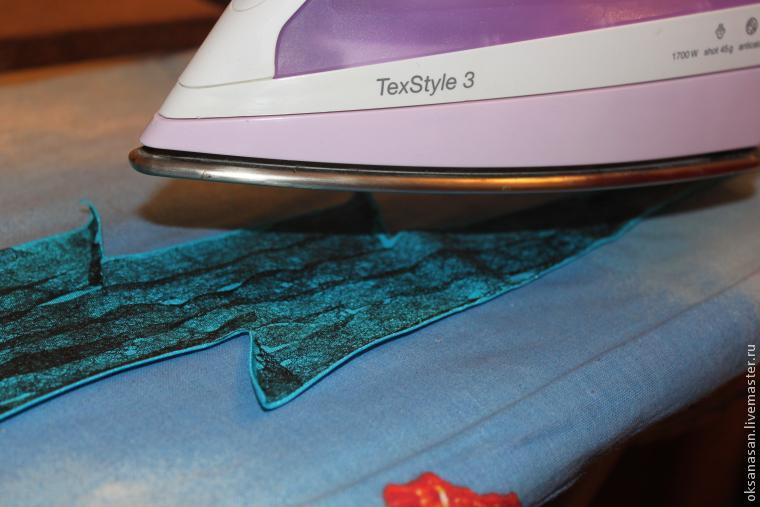
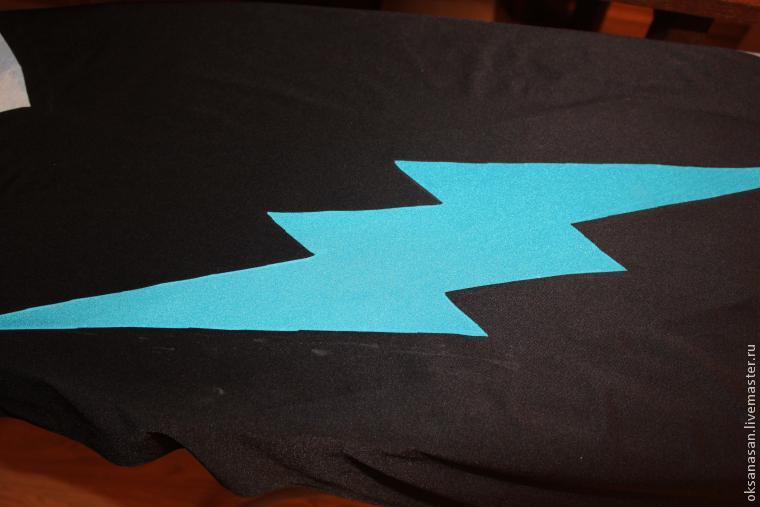
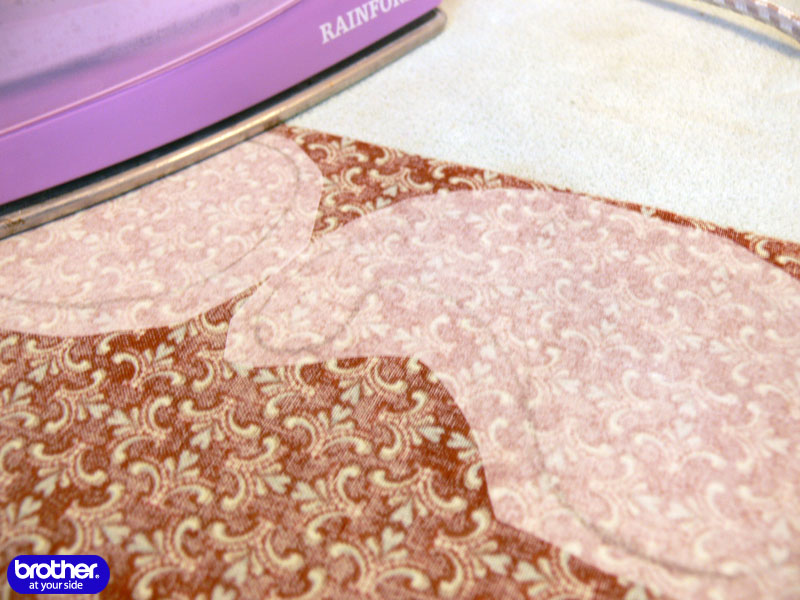
We turn over the blank from the main fabric on the front side, we put the application of gossamer down and glue it with an iron. If the cobweb is not cut or if it accidentally hit the iron, ugly stains may form on the underlying fabric.
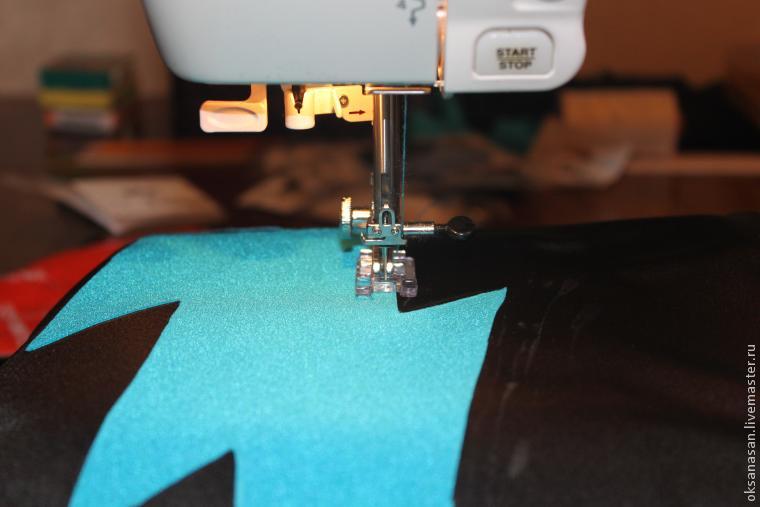
On the sewing machine, set the mode corresponding to the application. If not, choose a zigzag. Sew the appliqué around the edge. It is securely fixed, neither the base fabric nor the application fabric will move, as a result, the work will be neat.
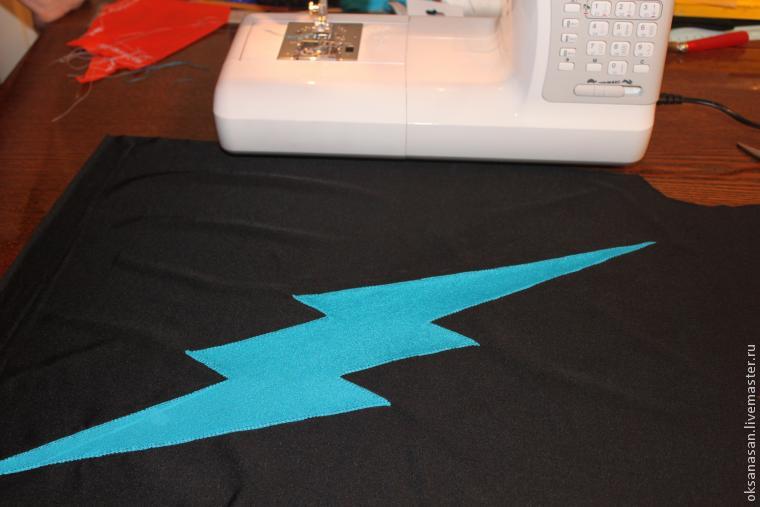
On the reverse side, you can tear off the edges of the adhesive fabric and trim the excess close to the edge of the appliqué.
![]()
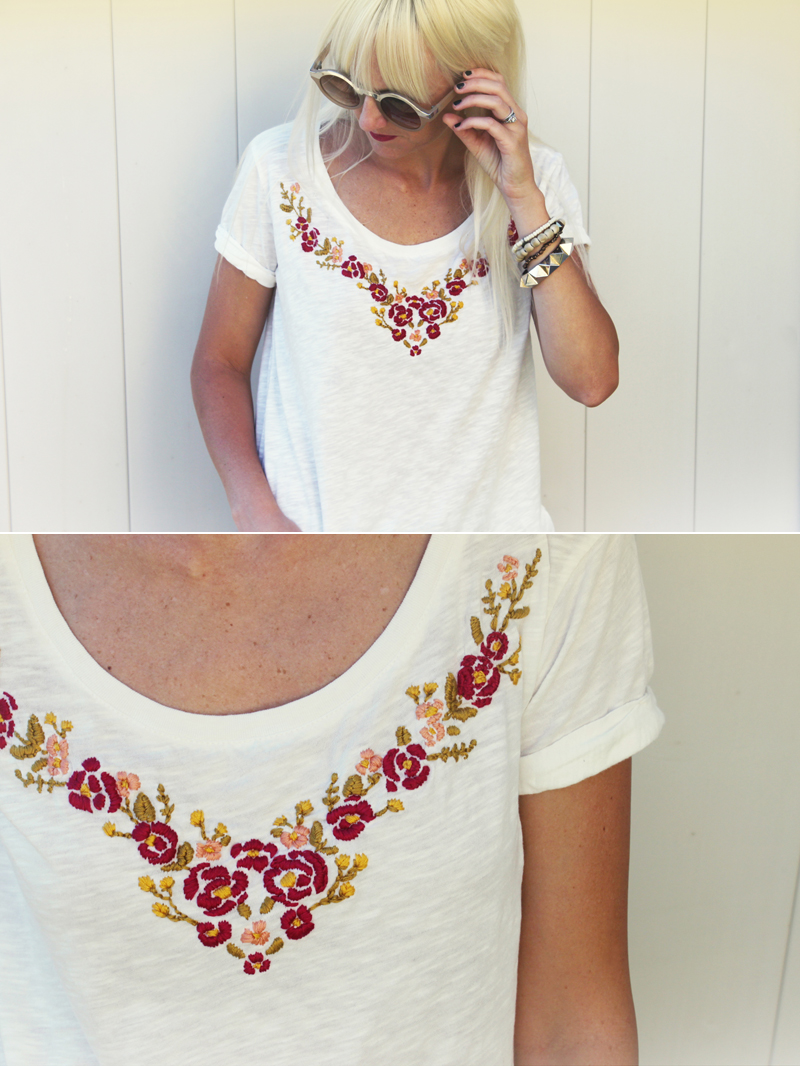
Knitwear embroidery
Photo workshop from Kelly (Kelli)
Prepare the necessary materials.

You will need:
floss color corresponding to the idea;
disappearing marker;
sketch of the pattern on paper
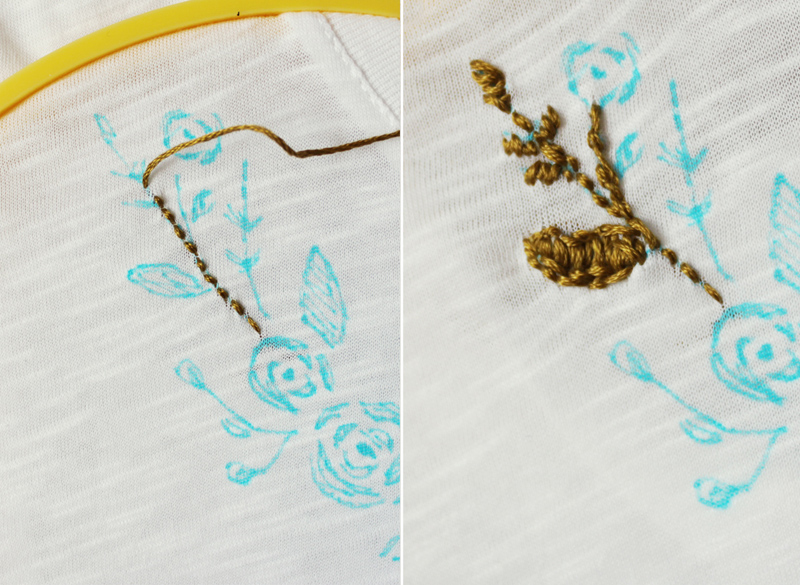
Step 1. We transfer the design to the front side of the T-shirt; this can be done using carbon copy or glass:
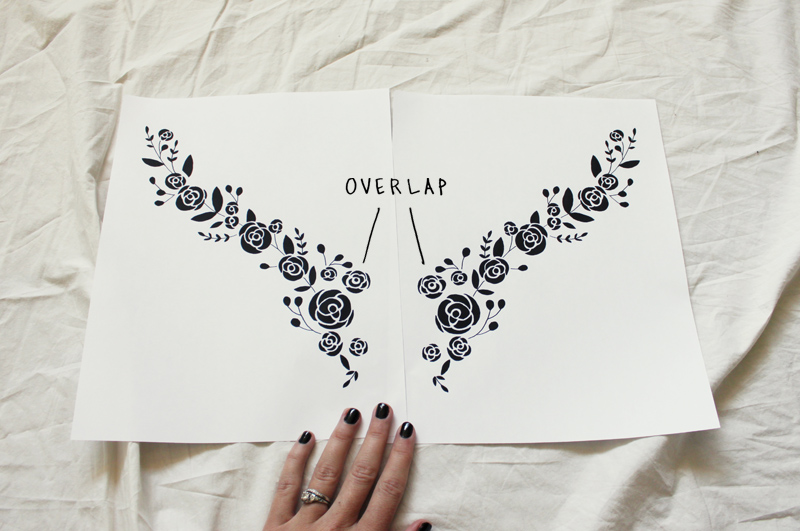
We put a sketch on the glass, on top of a t-shirt. Outline all contours with a fading marker. If you don’t have one on hand, draw with a simple pencil and then wash.
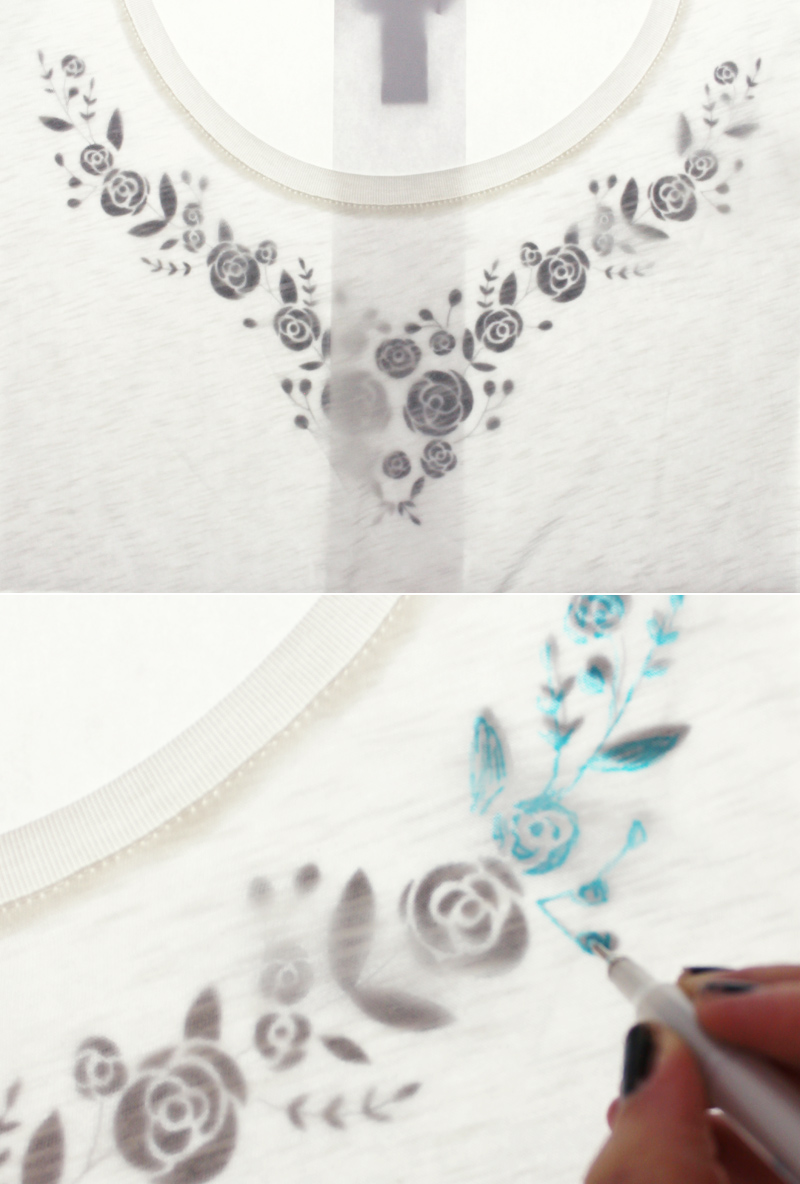
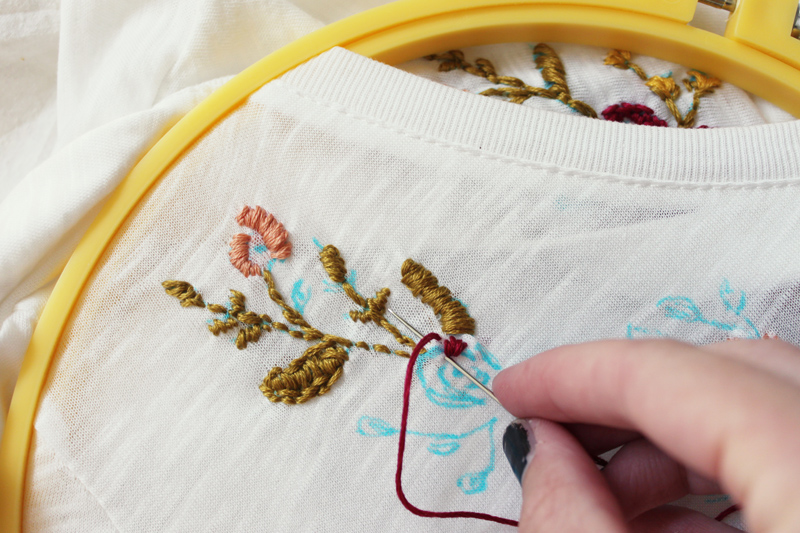
Step 2. We stretch the T-shirt on the hoop. We start from the extreme side and gradually move to the end of the motive. We do not recommend strongly stretching the fabric, as knitwear can easily be deformed.
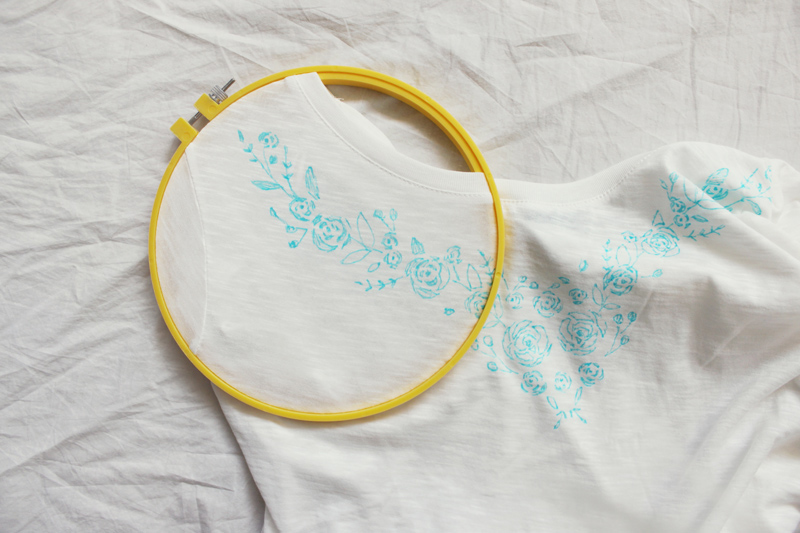
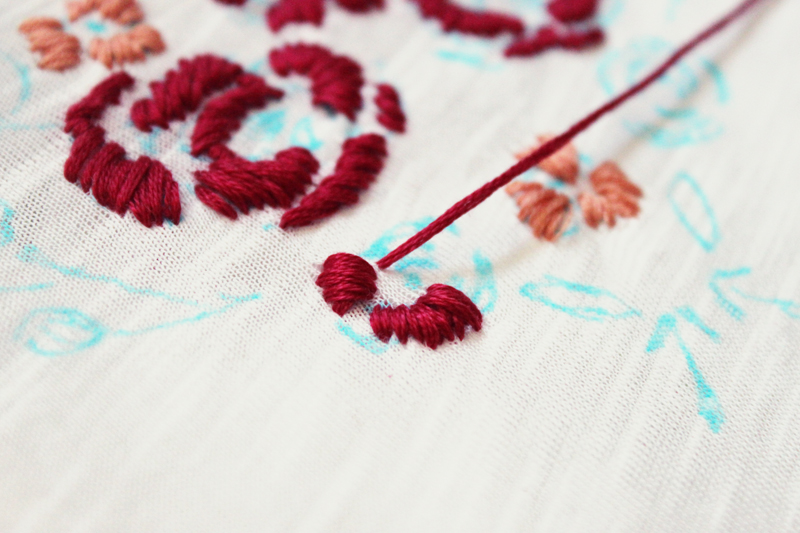
Step 3. Completely simple stitches sew all the contours, try to lay stitches thickly. Thread is better to take a triple. Gently fasten the nodules on the seamy side. We try to make the nodules smaller
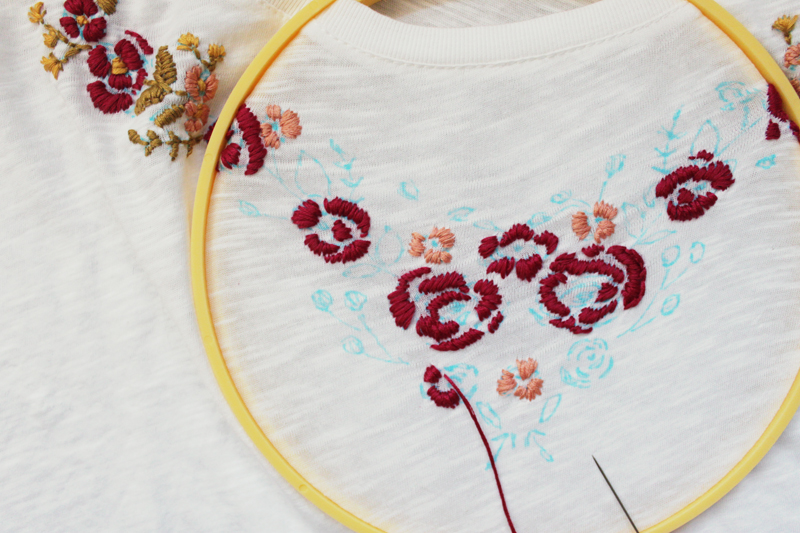
Step 4. Smooth through several layers of gauze.
It turned out a unique thing!
Ator of the next master class Anna Tykhonova
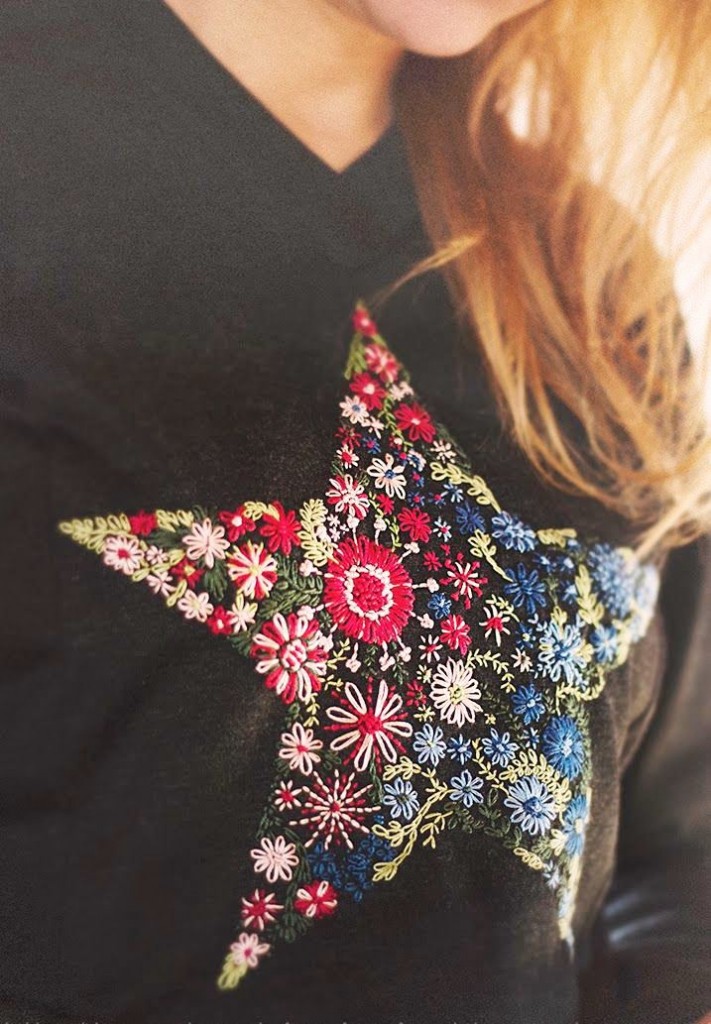
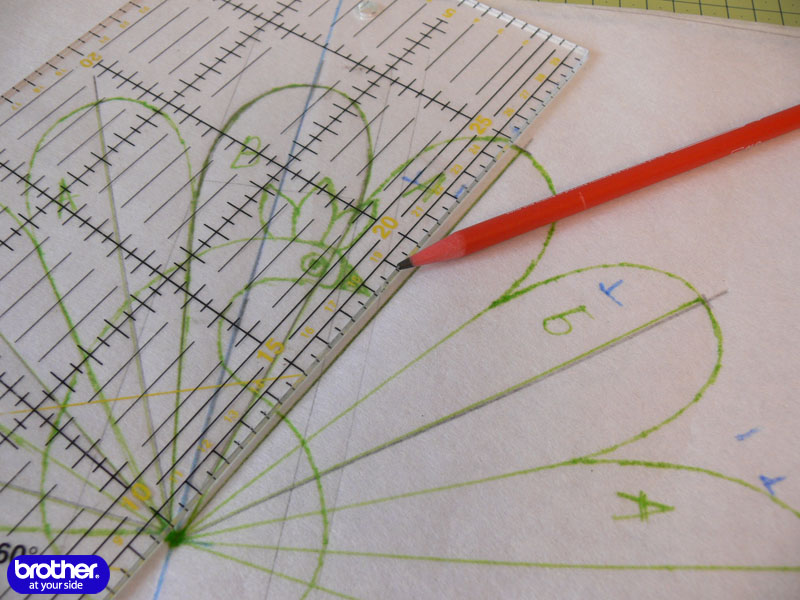
Beautiful floral embroidery in the shape of a star First, mark the position of the embroidery on the product. To do this, make a dense form of dense paper
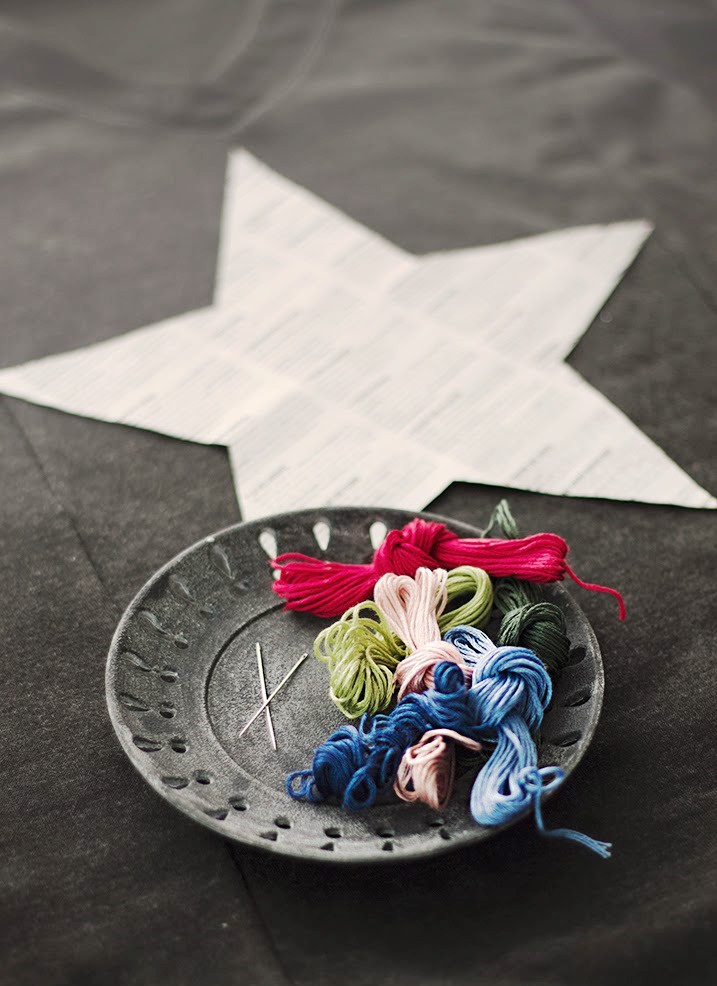
fasten on the product with pins and sew around the contour with a basting fine stitch. Further, in accordance with the selected pattern make embroidery.
The application is a motif sewn to the product from another fabric. With the help of applications you can not only effectively decorate various things, but also skillfully hide material defects.
The motifs for applications can be bought in the store, come up with your own, or cut out part of the pattern of fabric.
How to make a motive
Draw the motif immediately on the wrong side of the fabric in mirror image using the fabric marker (). On the contour of the motif pave the line.Or draw a motif on paper and translate its contour and internal details directly to the front side using a marker with fading paint.
Tip: To teach a child to sew, start with an appliqué. Let him draw it with his own hands, and then practice in the implementation of stitches, you can take as a basis.
How to attach an appliqué
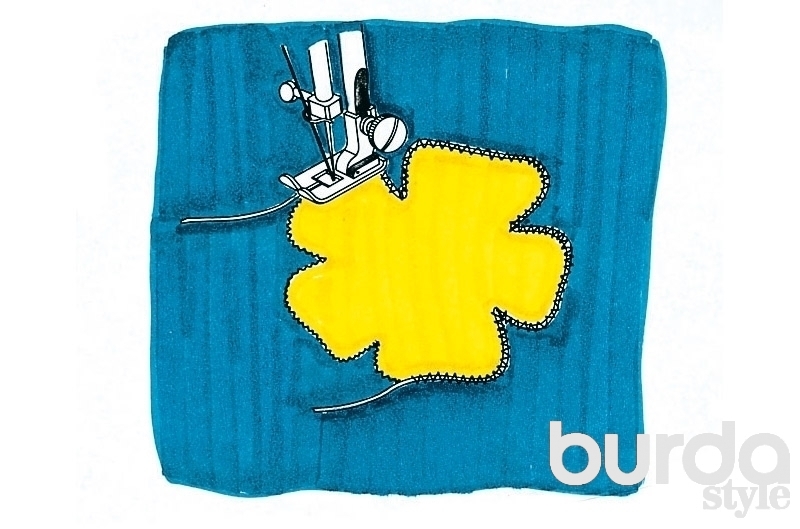
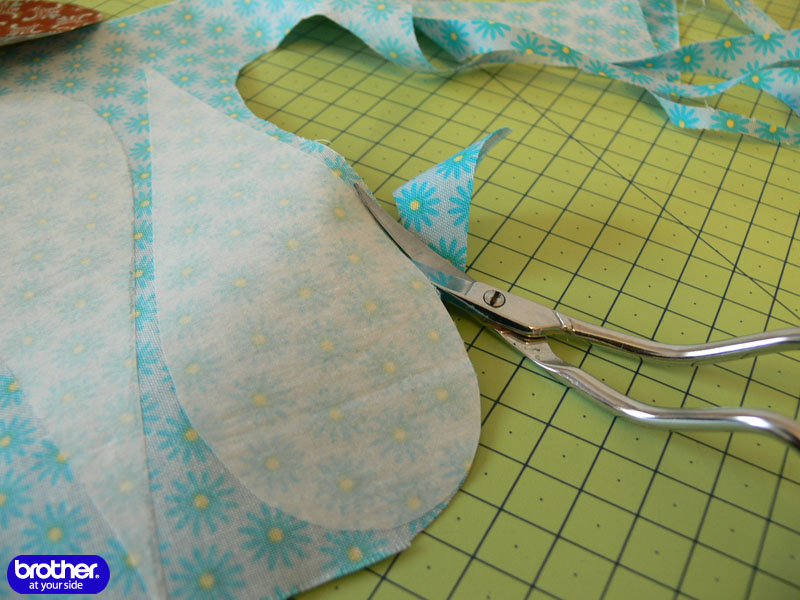
To prevent the appliqué fabric from peeling off, on the seamy side, press a gasket to it, for example, flizelin H 180. Tie the appliqué fabric from the front side to the pre-marked place. Lay a small zigzag stitch along the contour of the motive. On the front side, cut the fabric with sharp scissors () of the appliqué against the zigzag stitch.![]()
Then otstrochite the edge of the motif once again with a dense zigzag stitch. If you want the edge of the motive to look more voluminous, skip the thread through the finishing line.
If you do not want to drain the edge of the motive, you can circle it with a special contour paint for screen printing. This will not only give relief to the edge of the motive, but also protect it from shedding.
Important: if several motives are stitched on top of one another, then one should start from the bottom, as, for example, in.

Online motives
Pictures for motives for applications are easy to find on the Internet, as well as download on our website. And these are not only hearts and stars, but also lovely butterflies in a variety of wardrobe details - a skirt, a short jumpsuit, a scarf. Moreover, such applications are not necessarily sewn on the outer contour, you can attach only the body, and the wings to grab in several places with hidden stitches by hand. The combination of flat and bulk large colors looks avant-garde and non-standard - you can make them by following the description in. Picturesque and colorful applications of maple leaves and other plant motifs in the Art Nouveau style can be found in the master class on organza applications. They will decorate not only clothes, but also many accessories for the home.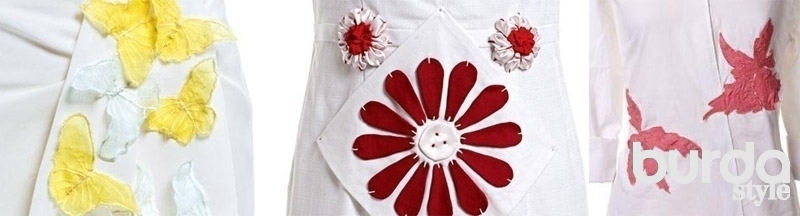
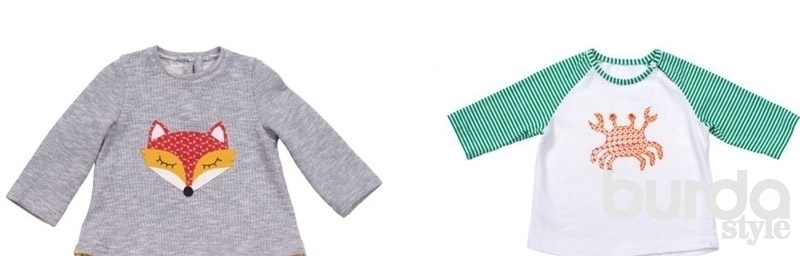
For children's clothes on our website there is an application of sly chanterelles in and a funny crab in.
Applique as part of a fabric pattern.
If you want to use a part of a pattern of some fabric as a motive for an appliqué, cut out a motif with large margins and press a flizelin to it from the wrong side. Sweep aside a motif to a selected place on your product or scribble with a zigzag stitch. The fabric protruding beyond the edge of the motive, cut close to the zigzag line. Then, once again, trim the edge of the motif with a zigzag stitch, optionally passing a thread through the seam.Tip: if the fabric is not showered, then you can do without stitching for cuts, as in.
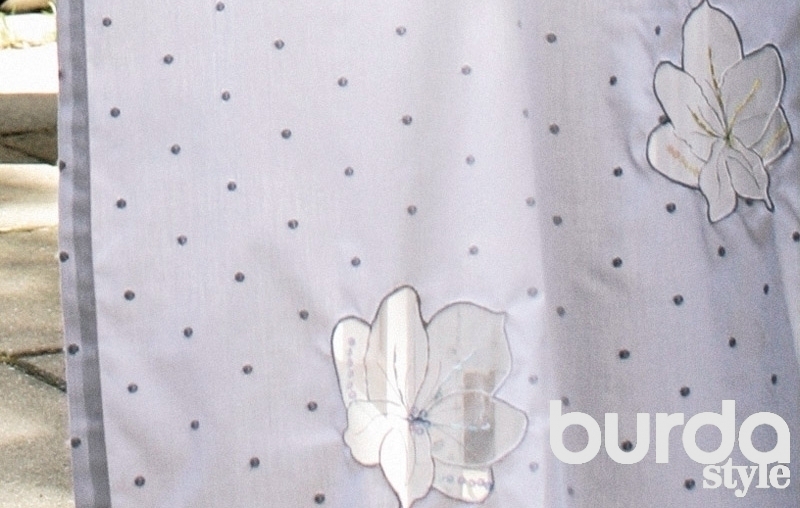
Tulle appliqués
Elegant translucent applications are obtained by using tulle. For appliqués from tulle, draw a motif on the front of the product, and sweep the tulle from the wrong side. Trim the contours of the motif from the front of a dense zigzag stitch, while laying a thread along the edge of the motif, so that it acquires volume. Cut the fabric inside the motif close to the zigzag stitch. Do not cut the tulle.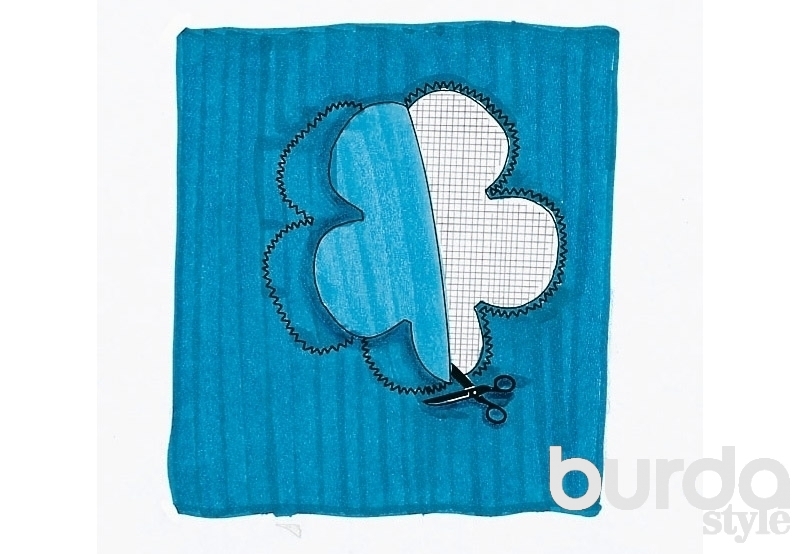
Similarly, applications are made of other transparent fabrics, for example, as in.
Lace appliqué
It is done quite simply. Motif, cut from the lace fabric, scribble on the fabric from the front of a dense zigzag stitching. Cut the fabric lying under the motif close to the stitch.
Lace appliqués can also be sewn by hand with invisible stitches, for example, as it did, which used woolen lace-braid to trim the coat: on the sleeves, the back, the lower part of the skirt. Zlata cut out 2 different motifs from lace and put them on the finished coat.

Appliques with unusual effects.
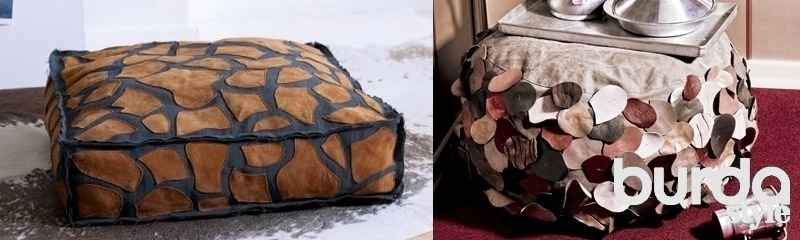
If you like an interesting, unique design, then use non-trivial materials for appliqués: fur, fabrics with a mirror coating, metallic fabrics, with embroidery on a mesh, crocheted, as well as leather and suede.In a master class on sewing a rectangular floor cushion, applications made of soft brown suede are sewn in the shape of a zebra skin pattern. This floor cushion immediately gives the interior a noble exotic touch. And in the ovals cut from the skin remains, the ovals are sewn onto the fabric not along the contour, as described, but in the middle, imitating the leaf vein. From the side of such an ottoman seems strewn with fallen autumn leaves.
Applications can be single-layer and multi-layered, flat and voluminous. With their help, you can decorate any product. If you have a baby, turn sewing into a fascinating game using his drawings. From the master class, you will learn about the basic techniques of adjusting the details of applications.
Appliqué is a type of artistic embroidery associated with cutting and setting up figures, patterns from pieces of fabric or leather on a base material (background).
Preparation of parts of the application begins with the cutting of parts from the fabric. There are various ways to fasten an appliqué on a fabric; details can be tacked on, glued to the fabric using glue webs, glued with a glue stick for textiles or glue-spray of temporary fixation. Try different ways and choose yours.
Glue the details of the appliqué to the main fabric and start sewing. If your machine has an auto-foot presser setting, when you stop the machine, activate this feature.
For overlaying the details of the appliqué, overcast, quilting, or appliqué stitches are suitable. The most commonly used zigzag stitch with increased stitch density (shorter stitch length).
Operating procedure:
When performing applications, the shape of the piece to be sewn should be considered.
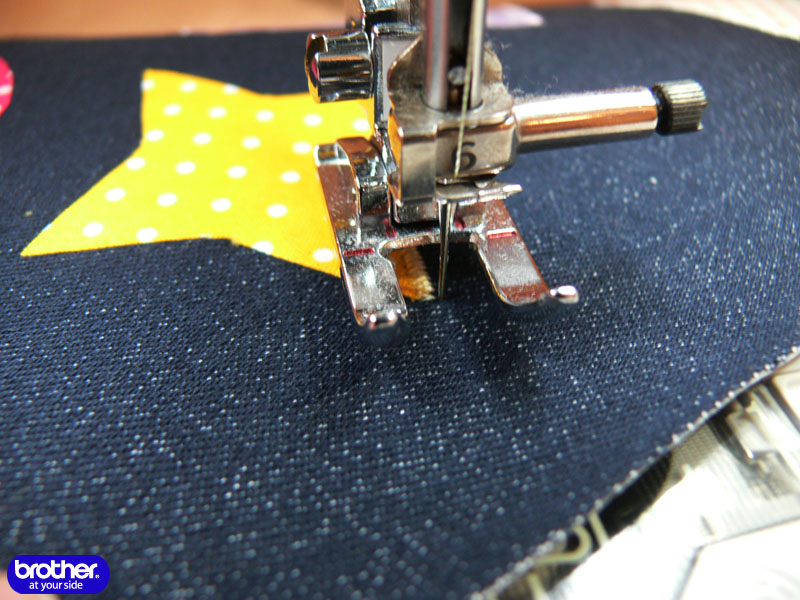
Start the line better in the bottom of the picture. For drawings with corners (stars, rhombuses, triangles, etc.) it is desirable to start the line in the middle of the straight section.
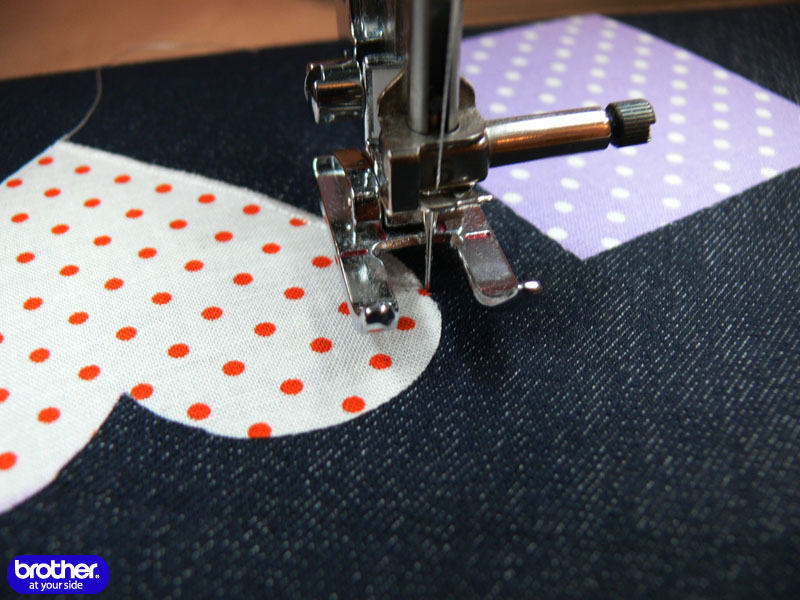
Sewing the rounded parts of the pattern, turn the fabric under the presser foot gently. If the fabric cannot be smoothly turned, lower the needle into the fabric, so that the point is located beyond the edge of the appliqué piece and raise the foot, turn the fabric, lower the foot and continue sewing. 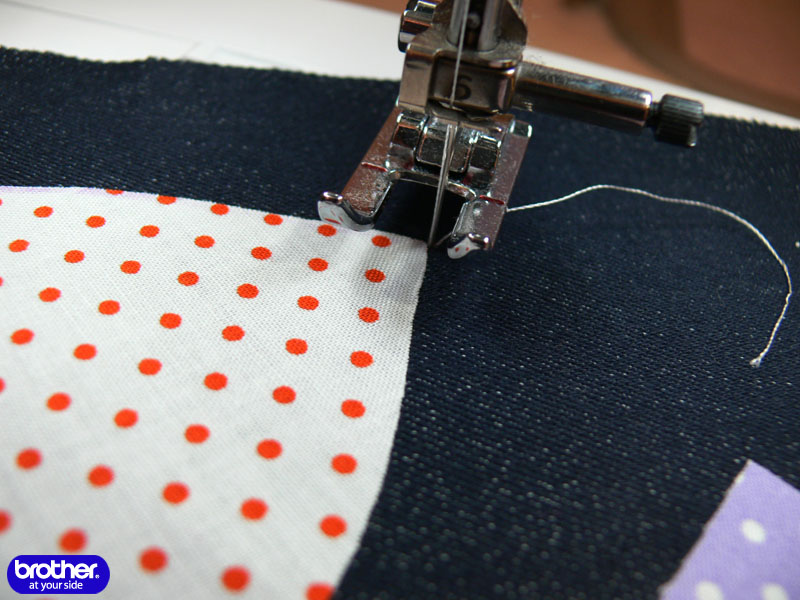

Perform external corners.
The needle when making the outer corners should be located on the outer side of the edge of the application.


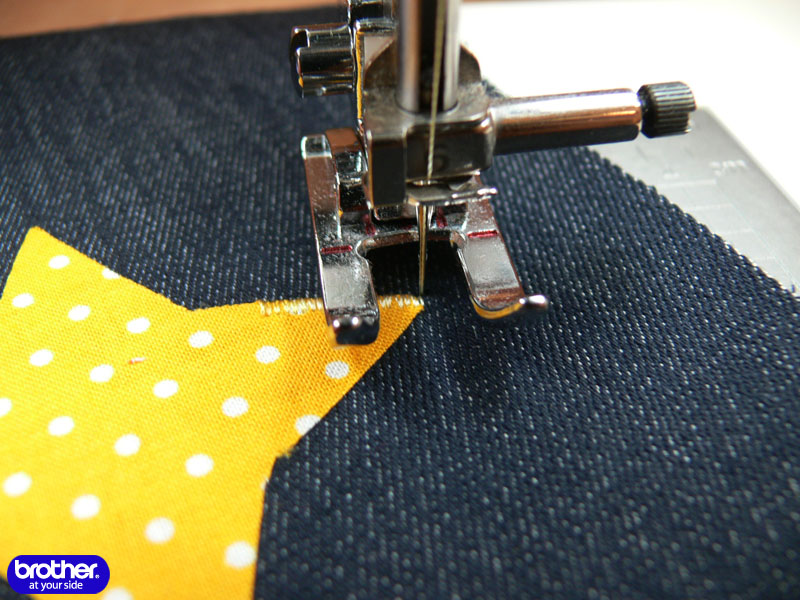
The execution of the inner corners is the opposite.
Sew the stitch to the corner, stop the machine, lower the needle into the fabric, raise the presser foot. Using the needle as an axis, turn the fabric, lower the presser foot, and continue sewing.
When performing the inner corners, the needle must be installed inside the detail of the application.
Performance of multi-layer application
Materials:
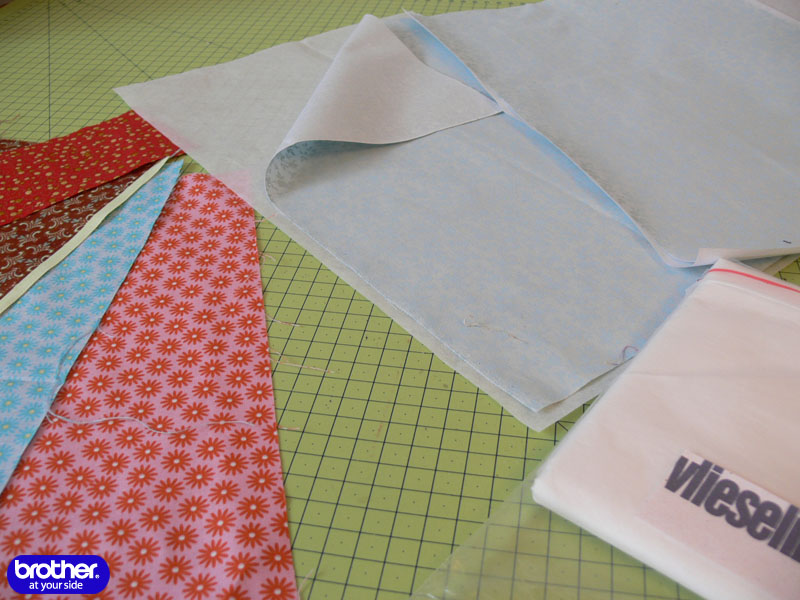
- Quilting fabrics
- Glue spider web paper (Vliselin)
- Pattern-pattern to create applications
- Open appliqué foot
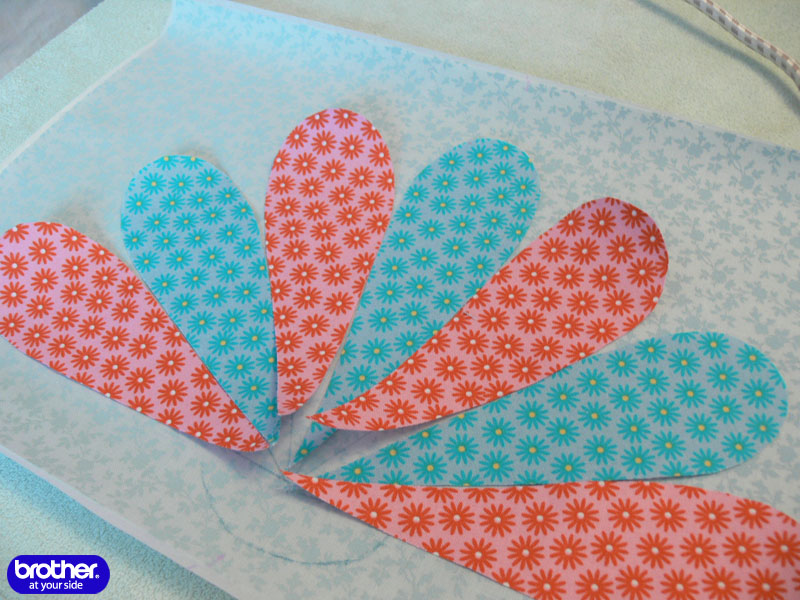
To create a pattern, you can use a finished drawing, use a child's drawing, or draw your own drawing for application. Some fabrics in the process of work can shrink and change their size, to avoid this, roll them, ironed with steam.
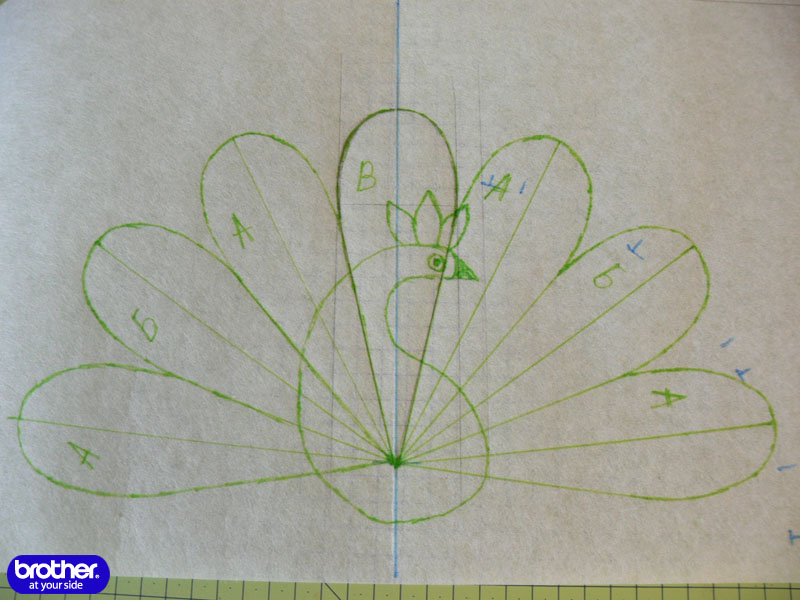
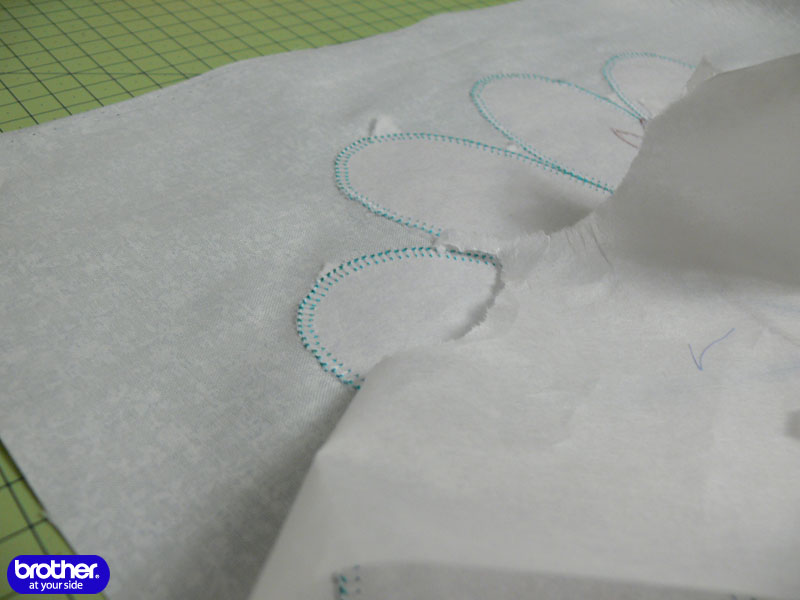
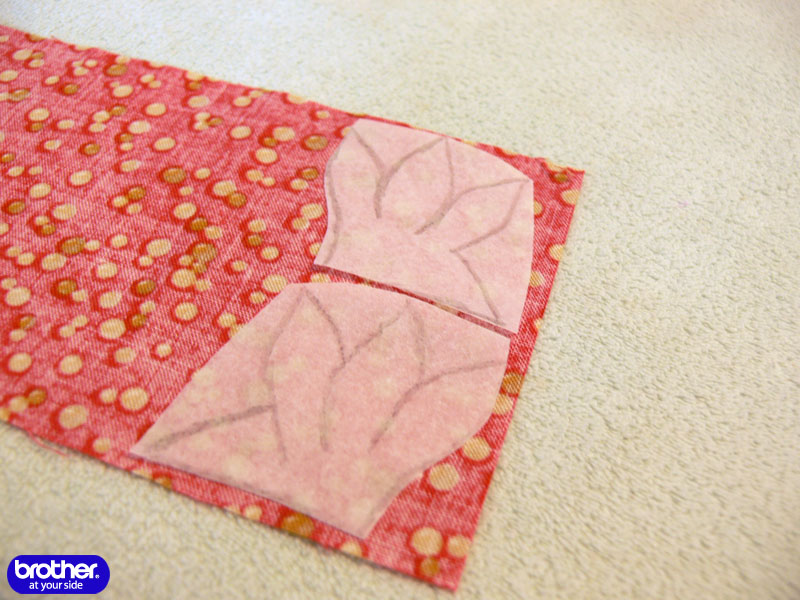
Cut out the details of the future application. They can be made of thick cardboard, printer paper or non-woven fabric for patterns. Transfer the outlines of the appliqué to the base fabric with copy paper.
For reliable fixation of parts of the application, use a glue spider on a paper basis (Vliselin). Overlay the pattern of the parts of the application on the paper part of Vliselin and cut out the necessary number of parts from it. Cut the details of the future application from Vliselin with an adhesive layer on the wrong side of the fabric.
When cutting parts from Vliselin, keep in mind that all parts must be mirrored.

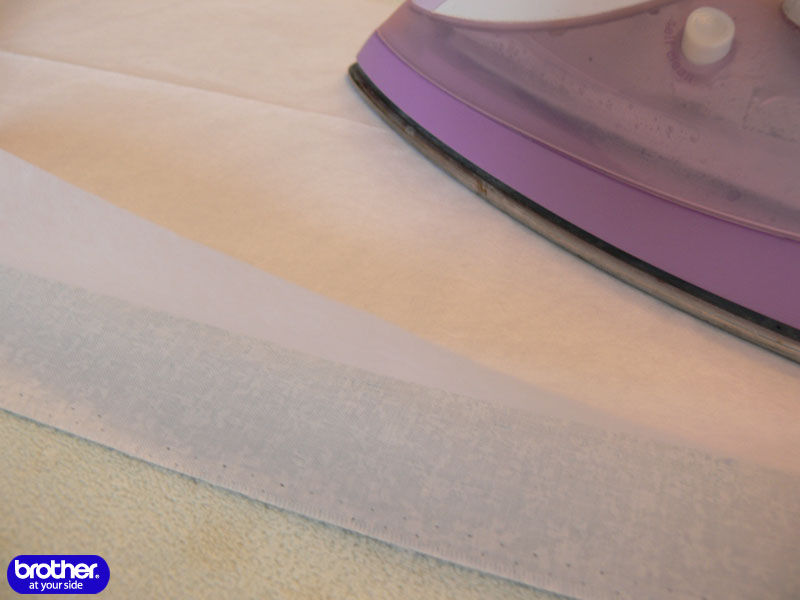
Iron the parts to the fabric by setting the heating mode of the iron to the cotton tag, ironing without steam. Iron all the details of the appliqué to the selected fabrics.
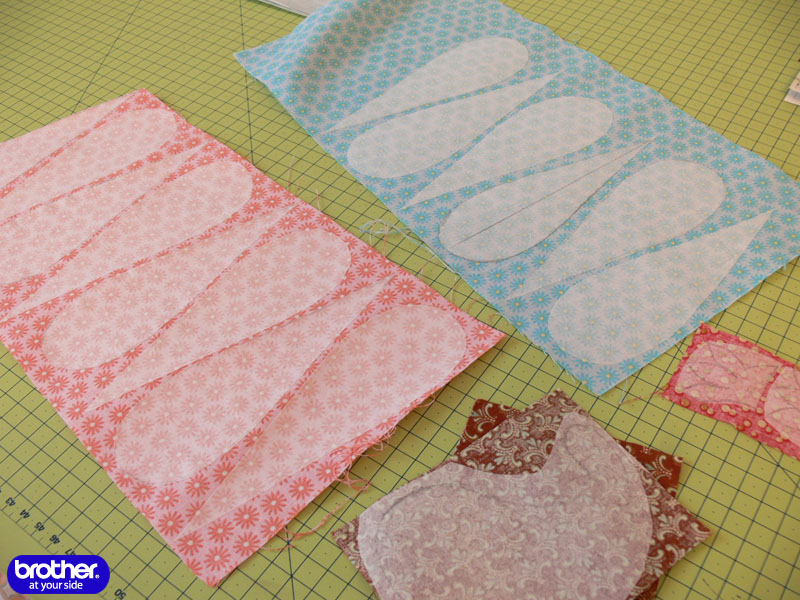
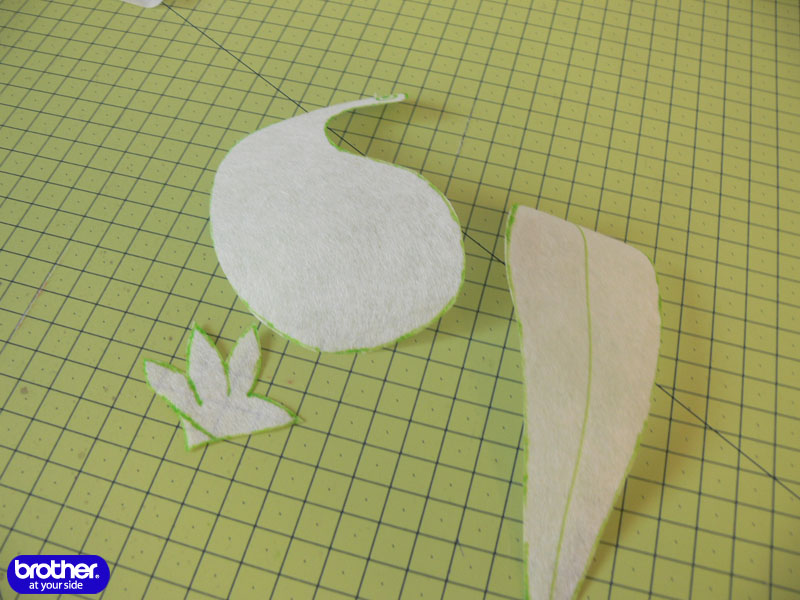
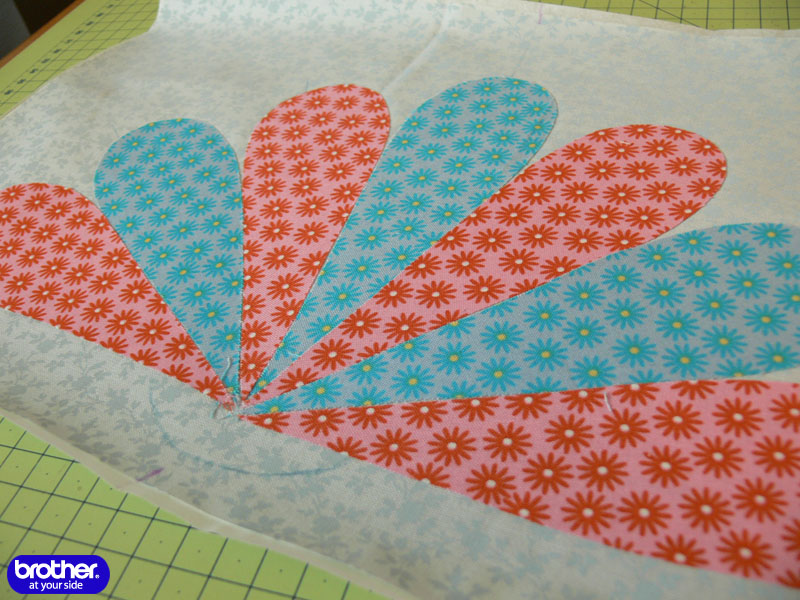
Cut out the details of the future application exactly along the lines of the pattern. Remove the protective layer of paper and place them on the base part, glued with tear-off adhesive stabilizer, adhesive layer down.
When performing a multi-layer application, the lower parts are first glued, then the middle, upper, and so on, depending on the number of layers.
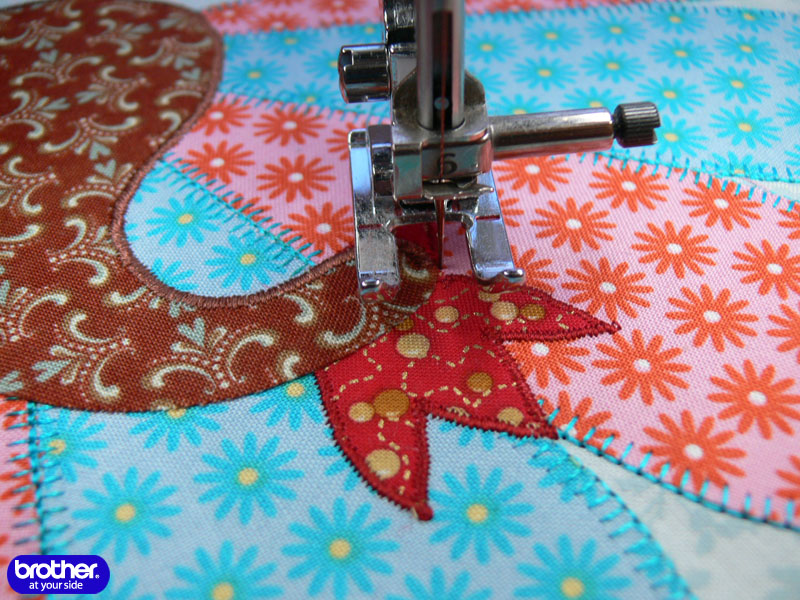
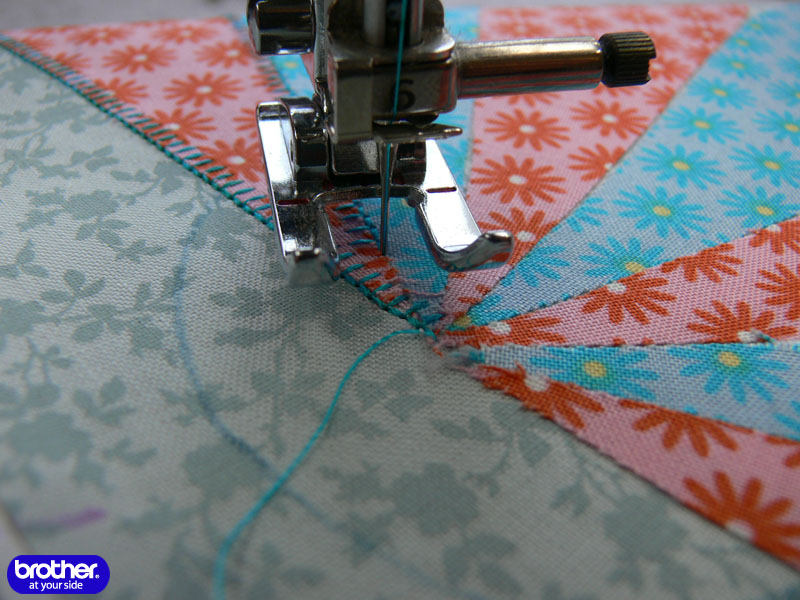
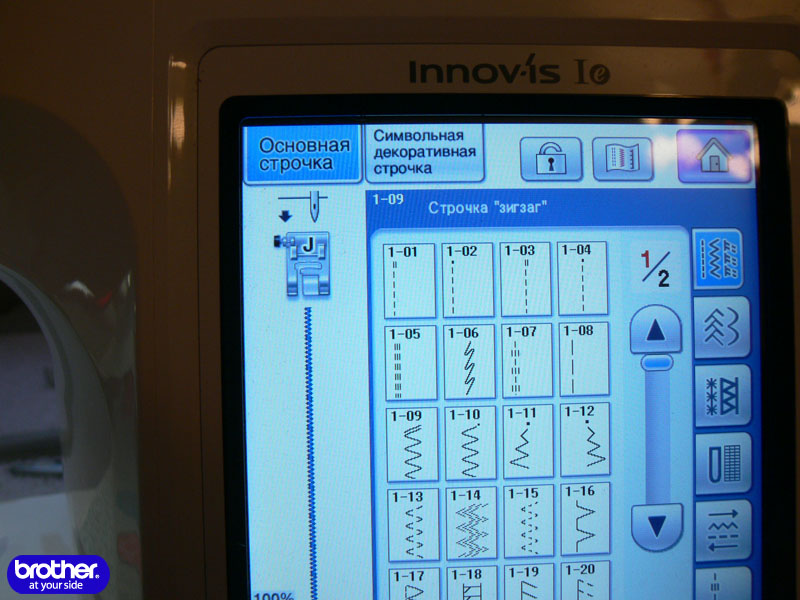
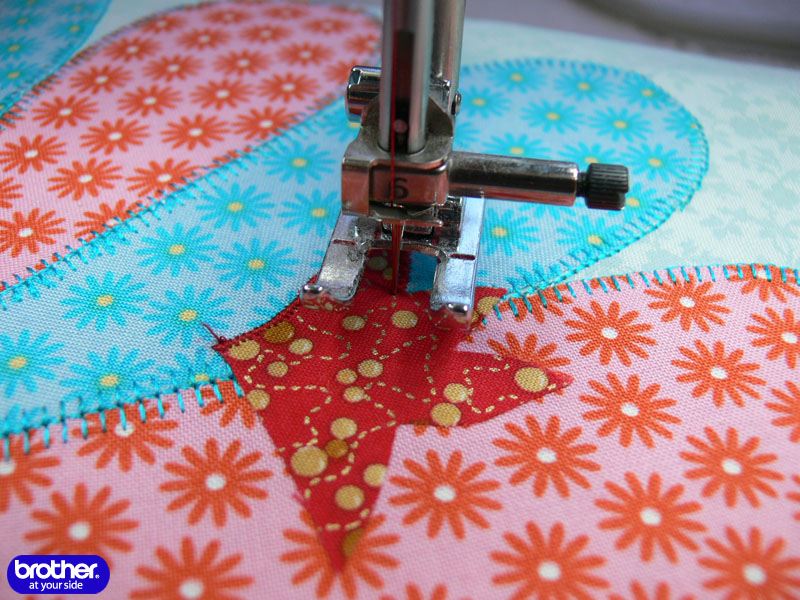
Iron the details of the lower layer of the application (here it is the details of the tail of the bird). Place an open appliqué foot on the sewing machine, select one of the appliqué or overlay stitches. On the sample fabric, select the optimal combination of stitch length and stitch width.


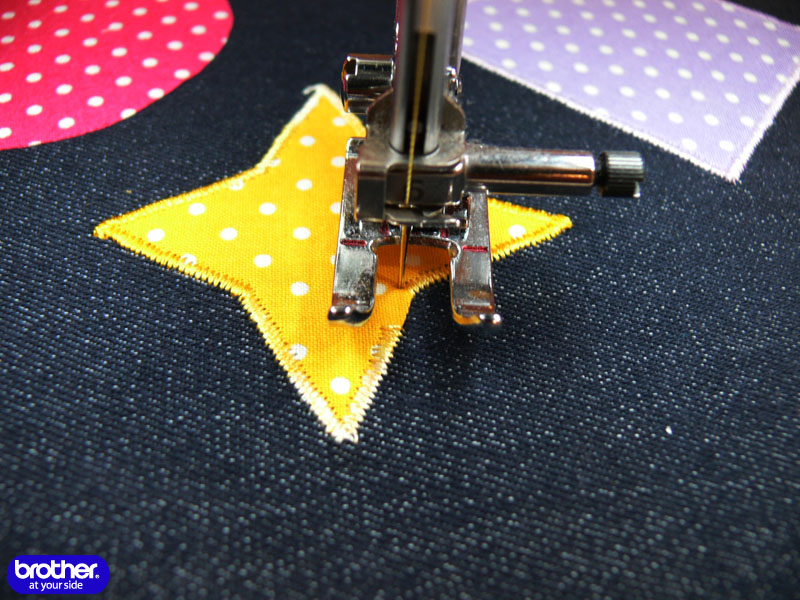
Start the line from the center or bottom edge of the appliqué piece. Sew the appliqué parts by gently turning the fabric with the appliqué detail on the curves.
![]()

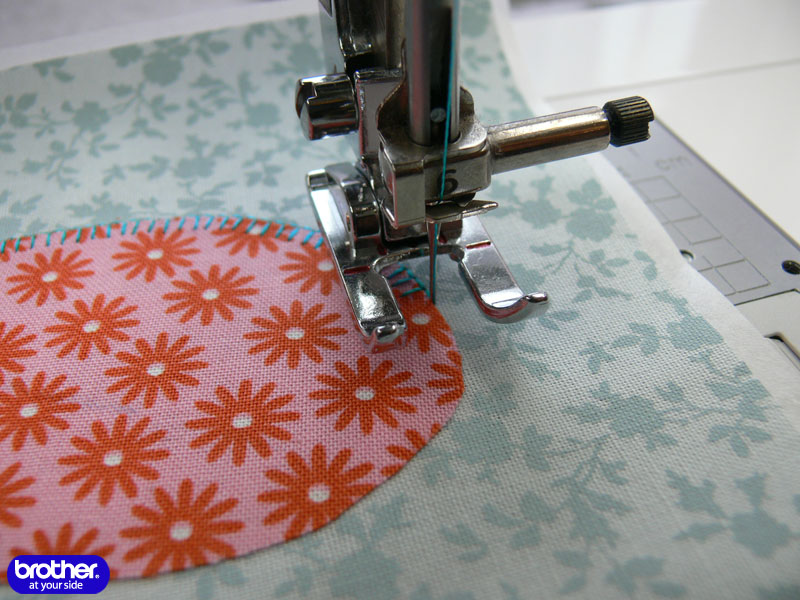
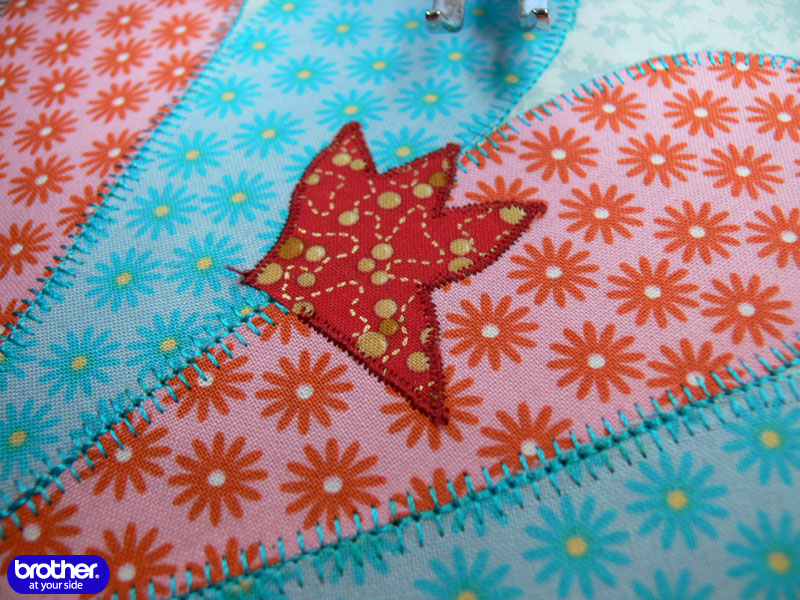
Finish the line at the start point. Repeat the process for the remaining parts of the application.
Application and overcast stitches are best suited for sewing large parts of the appliqué.
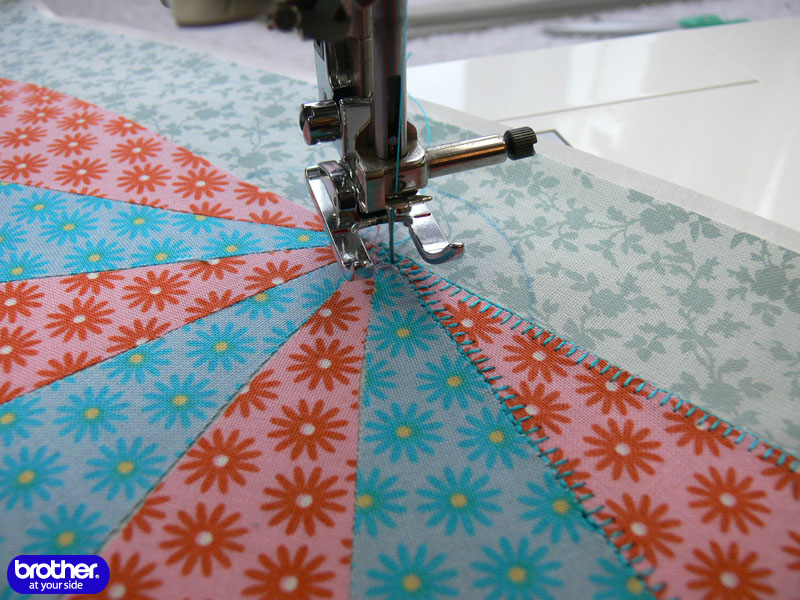
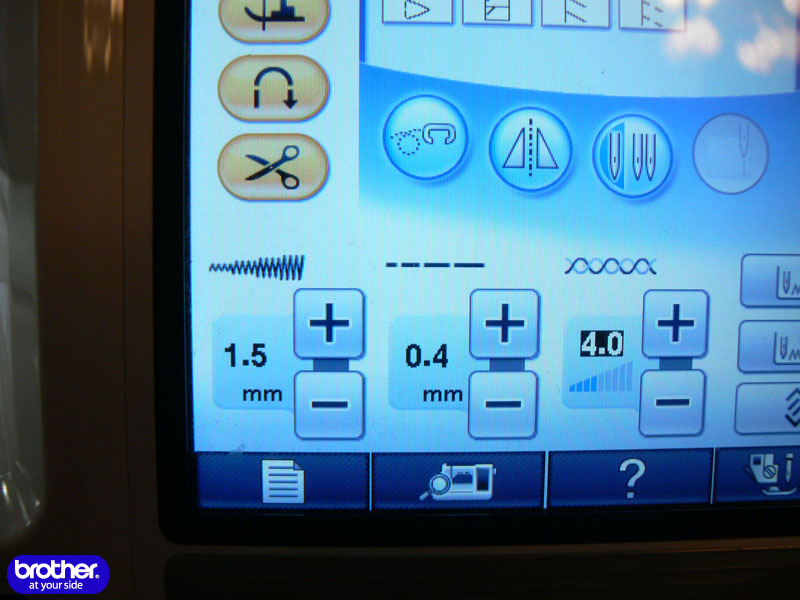
It is more convenient to sew small parts of the application, as well as parts with a large number of corners with satin lines. Select a zigzag stitch and set the stitch width settings to 1.5 to 3.5 mm, stitch lengths from 0.2 to 0.4 mm.
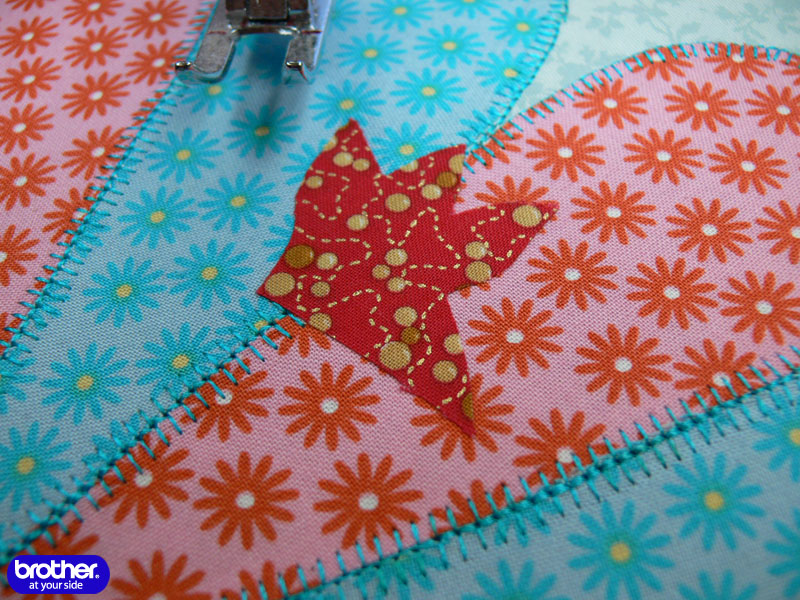
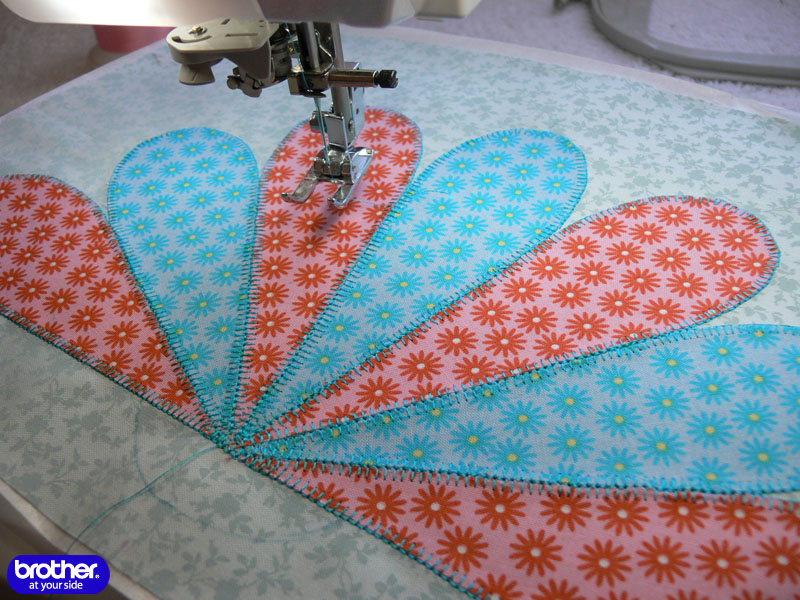
Glue the detail for the application (bird's crest) and attach it with satin stitching. Glue the next element of the application (bird's body).
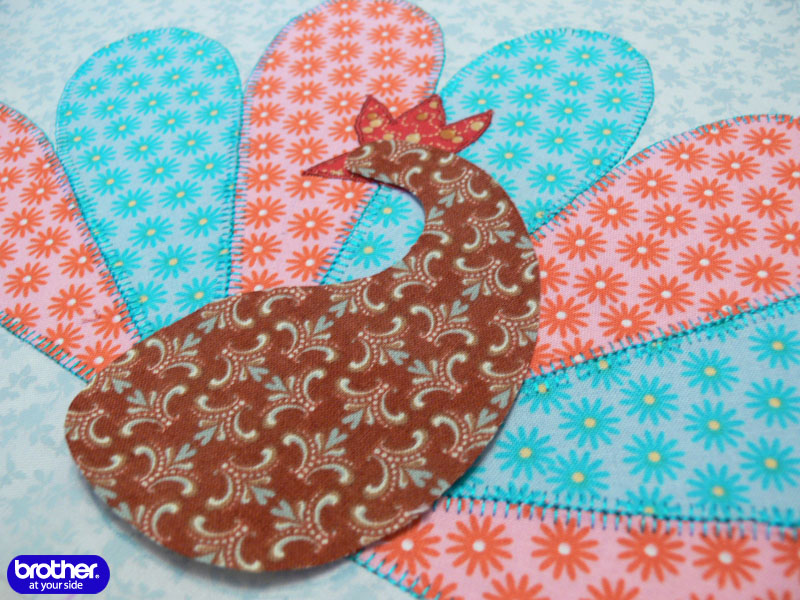
To add larger details to the appliqué, adjust the stitch width setting to a value between 2.5 and 5 mm. When you are finished sewing all the parts, tear off the tear-off glue stabilizer from the inside. That's all, the application is ready, you can proceed to tailoring the product.